ANYCUBIC Photon Mono 4, Resin 3D Printer with 7'' 10K Mono LCD Screen, Stable LighTurbo Light Source and 70mm/h Fast Printing, Print Volume 6.04'' x 3.42'' x 6.49''
$159.99 (as of June 18, 2025 23:32 GMT +00:00 - More infoProduct prices and availability are accurate as of the date/time indicated and are subject to change. Any price and availability information displayed on [relevant Amazon Site(s), as applicable] at the time of purchase will apply to the purchase of this product.)In this article, you will find five 3D printing tips that are not commonly known but can greatly enhance your 3D printing experience. Tip #1 focuses on supporting holes without the need for support material by utilizing the Prusa Research bridging trick. Tip #2 recommends using G10 or Garolite as a print surface for better bed adhesion and durability. Moving on, Tip #3 reveals how to achieve excellent bed adhesion with just a little bit of glue stick and isopropyl alcohol. Tip #4 suggests using a cheap food dehydrator to restore the printing quality of filaments by effectively drying them. Lastly, Tip #5 introduces the concept of slicing directly from STEP files in Prusa Slicer to obtain more accurate curves in 3D prints. Additionally, a bonus tip is included, highlighting how 3MF files can contain hidden content when opened as an archive. By following these pro tips, you can save time and money while achieving high-quality 3D prints.
In this comprehensive guide, you will find expert advice and tips on various aspects of 3D printing. Learn how to optimize your printing process with tips such as using supporting holes, employing G10 or Garolite as a print surface, and achieving superior bed adhesion with glue stick and isopropyl alcohol. Discover the benefits of drying filaments in a cheap food dehydrator to restore their printing quality. Additionally, explore the potential of slicing directly from STEP files in Prusa Slicer to obtain more accurate curves in your 3D prints. Lastly, uncover the hidden potential of 3MF files as archives, enabling you to include additional content. By implementing these tips, you can enhance your 3D printing results and avoid unnecessary expenses.

Tip #1: Supporting Holes Using the Prusa Research Bridging Trick
Explanation of the Prusa Research bridging trick
The Prusa Research bridging trick is a clever technique used to create supporting holes in 3D prints without the need for additional support material. Typically, when printing objects with holes in orientations that would normally require support material, the resulting print may have visible imperfections or require tedious post-processing to remove the support material. However, by employing the Prusa Research bridging trick, these issues can be avoided.
How to use the bridging trick to create supporting holes
To utilize the Prusa Research bridging trick, simply design your model with holes that require support in a non-optimal orientation. As the print progresses, the Prusa slicer software will create a partial bridge that forms layer by layer over the support hole. By doing this gradually, the hole remains clean and well-defined, resulting in a clean print even without the use of support material.
Benefits of using this trick to avoid the need for support material
The Prusa Research bridging trick offers several advantages when it comes to avoiding the need for support material. Firstly, it eliminates the time-consuming and often challenging process of removing support material after printing. This can provide significant time savings, especially when printing complex models with multiple supporting holes.
Additionally, by avoiding the use of support material, the Prusa Research bridging trick helps to improve the overall aesthetics of the print. The resulting holes are clean and well-defined, without any visible remnants of support material. This can be particularly crucial for functional objects where the integrity of the holes is essential.
Overall, the Prusa Research bridging trick is a valuable technique that can enhance the quality and efficiency of your 3D prints, particularly when it comes to creating supporting holes in non-optimal orientations.
Tip #2: Using G10 or Garolite as a Print Surface
What is G10 and Garolite?
G10 and Garolite are two types of materials primarily used for circuit boards but have also gained recognition in the 3D printing community as effective print surfaces. G10 is a flame-resistant, high-pressure, fiberglass laminate material, while Garolite is similar but with added phenolic resin. Both materials offer exceptional durability and heat resistance, making them ideal for 3D printing applications.
The advantages of using G10 or Garolite as a print surface
One of the main advantages of using G10 or Garolite as a print surface is their excellent bed adhesion properties. These materials provide a strong and reliable grip on the printed object, reducing the chances of warping or detachment during printing. This is especially important for materials that tend to have poor bed adhesion, such as ABS or nylon.
Furthermore, G10 and Garolite are highly durable, withstanding the wear and tear often associated with repeated printing. Unlike traditional build surfaces that may require regular replacement, G10 and Garolite sheets can offer long-lasting performance, saving both time and money in the long run.
Proper techniques for using G10 or Garolite for better bed adhesion and durability
To maximize the benefits of using G10 or Garolite as a print surface, it is essential to follow proper techniques. Firstly, ensure that the surface is clean and free from any debris or residual filament. A quick wipe-down with isopropyl alcohol should be sufficient to remove any contaminants.
Next, if using G10 or Garolite for the first time, it is recommended to apply a thin layer of adhesive, such as glue stick, to further enhance bed adhesion. This will create a slight tackiness that helps the printed object adhere securely to the surface.
Finally, periodically check and maintain the G10 or Garolite surface by cleaning it with isopropyl alcohol or a similar cleaning agent. This will remove any accumulated dirt or residue and ensure consistent performance.
By utilizing G10 or Garolite as a print surface and implementing the appropriate techniques, you can greatly improve bed adhesion and durability in your 3D prints, resulting in higher quality and more reliable prints.
Find 3D Printing Accessories Here
Tip #3: Achieving Bed Adhesion with Glue Stick and Isopropyl Alcohol
The importance of good bed adhesion in 3D printing
Bed adhesion is a critical factor in successful 3D printing. Adequate adhesion ensures that the printed object remains securely attached to the print bed throughout the entire printing process. Without proper bed adhesion, objects may warp, detach, or become misshapen, leading to failed prints and wasted time and material.
How to use glue stick and isopropyl alcohol for better bed adhesion
A simple yet effective method for achieving optimal bed adhesion is by using a combination of glue stick and isopropyl alcohol. Start by cleaning the print bed with isopropyl alcohol, removing any dust or debris that may hinder adhesion. This step ensures a clean and smooth surface for the next step.
Next, apply a thin, even layer of glue stick to the print bed. The glue stick should be spread in a way that covers the entire area where the print will adhere. For larger prints, consider applying multiple layers of glue stick for added adhesion.
After applying the glue stick, mix a small amount of isopropyl alcohol with the glue. This helps to create a thin film that acts as a bonding agent between the print bed and the printed object. The alcohol also helps to dissolve the glue stick, ensuring a smooth and even surface.
Tips and tricks for achieving optimal bed adhesion
Here are some additional tips and tricks to maximize bed adhesion:
- Adjust the print bed temperature: Different filament materials require different bed temperatures for optimal adhesion. Experiment with adjusting the temperature to find the right balance for your specific filament.
- Use a brim or raft: For prints with a larger surface area or complex geometries, adding a brim or raft can provide additional stability and improve bed adhesion. These structures extend the contact area between the print and the bed, aiding in adhesion.
- Level the print bed: Properly leveling the print bed is crucial for ensuring uniform adhesion across the entire print surface. Regularly check and adjust the bed level to avoid any issues with bed adhesion.
By following these guidelines and utilizing the powerful combination of glue stick and isopropyl alcohol, you can significantly enhance bed adhesion in your 3D prints, resulting in more successful and high-quality prints.
Tip #4: Drying Filaments in a Food Dehydrator
Why filament drying is important for printing quality
Moisture absorption is a common issue with many filament materials, especially those that are hygroscopic, such as nylon or certain types of ABS. When filament absorbs moisture from the air, it can lead to poor print quality, including clogged nozzles, bubbling in the printed object, and inconsistent extrusion. Therefore, it is essential to ensure that filaments are adequately dried before use to maintain optimal printing conditions.
The benefits of using a food dehydrator for drying filaments
A food dehydrator can be a cost-effective and efficient solution for drying filaments. Compared to specialized filament drying setups, which can be expensive, a food dehydrator offers comparable performance at a fraction of the cost. These devices are specifically designed to remove moisture from food, making them ideal for drying filament materials as well.
Using a food dehydrator offers several advantages. Firstly, it provides a controlled and consistent drying environment, ensuring that filaments are thoroughly dried without the risk of overheating. Additionally, food dehydrators are typically equipped with adjustable temperature settings, allowing you to select the appropriate drying temperature based on the specific filament material.
Step-by-step guide on how to properly dry and store filaments using a food dehydrator
To effectively dry and store filaments using a food dehydrator, follow these steps:
- Preheat the food dehydrator to the recommended temperature for the filament material you are drying. Refer to the manufacturer’s guidelines or consult reliable sources for temperature recommendations.
- Place the filament spool or loose filament in the food dehydrator. Ensure that the filament is spread out or placed on a mesh or rack for even airflow.
- Allow the filament to dry for the recommended amount of time. This can vary depending on the material and its moisture content, but a few hours is generally sufficient.
- After drying, remove the filament from the food dehydrator and transfer it to airtight storage containers or bags. This will help to prevent moisture absorption before and during printing.
- If you plan to print with the filament immediately after drying, allow it to cool down to room temperature before loading it into the printer.
By utilizing a food dehydrator for filament drying and following these steps, you can ensure that your filaments are free from moisture and ready for high-quality 3D printing.

Tip #5: Slicing Directly from STEP Files in Prusa Slicer
Explanation of STEP files and their relevance in 3D printing
A STEP (Standard for the Exchange of Product Model Data) file is a common file format used for CAD (Computer-Aided Design) models. Unlike STL files, which represent 3D objects as a series of triangles, STEP files retain the original geometric information of the design, allowing for more accurate representation of curves and smooth surfaces.
In 3D printing, slicing software is used to convert the CAD model into a series of layers and generate the necessary toolpaths for the printer. Slicing software typically relies on STL files as the input format. However, by slicing directly from STEP files, the slicing process can leverage the original design information to create more precise and accurate prints.
The advantages of slicing directly from STEP files in Prusa Slicer
Slicing directly from STEP files in Prusa Slicer provides several advantages:
- Improved accuracy of curves: By utilizing the original curves and surface information stored in the STEP file, Prusa Slicer can generate toolpaths that closely match the intended design. This can result in more accurate and aesthetically pleasing curved surfaces in the printed object.
- Reduced STL conversion artifacts: When converting CAD models to STL files, certain imperfections and inaccuracies can arise due to the tessellation process. Slicing from STEP files bypasses this conversion step, minimizing the chances of introducing artifacts or losing important design details.
- Simplified design modifications: When designing your own models, slicing directly from STEP files allows for easier modifications and adjustments. Instead of going back to the CAD software and updating the STL file, you can make changes to the STEP file and directly slice the updated design in Prusa Slicer.
Step-by-step guide on how to slice directly from STEP files for more accurate curves in 3D prints
To slice directly from STEP files in Prusa Slicer, follow these steps:
- Open Prusa Slicer and navigate to the “Open” or “Import” option.
- Select the desired STEP file from your computer and import it into Prusa Slicer.
- Configure the necessary slicing settings, such as layer height, infill density, and print speed, according to your preferences.
- Generate the toolpaths by clicking on the “Slice Now” or similar option in Prusa Slicer.
- Save the resulting G-code file, which contains the instructions for your printer, onto an SD card or transfer it directly to the printer.
- Load the SD card into your 3D printer or initiate the print from your printer’s interface, following the manufacturer’s instructions.
By following these steps and utilizing Prusa Slicer’s ability to slice directly from STEP files, you can achieve more accurate and visually appealing curved surfaces in your 3D prints.
Bonus Tip: Altered 3MF Files and Hidden Content
What are 3MF files and their potential for hidden content
3MF (3D Manufacturing Format) files are a type of file format used for storing and exchanging 3D printing information. These files can contain various data, such as the model geometry, colors, textures, material properties, and even slicing settings. However, what many people may not realize is that 3MF files are essentially zip files, which means they can be expanded to reveal hidden content.
The ability to explore the hidden content within 3MF files opens up possibilities for customization, modification, and even uncovering potential security vulnerabilities in certain scenarios. While this feature can be useful for advanced users and developers, it is essential to exercise caution and adhere to ethical practices when working with altered 3MF files.
How to alter 3MF files and explore their hidden content
To alter and explore the hidden content within 3MF files, follow these steps:
- Obtain a 3MF file that you wish to alter or investigate.
- Use a file compression tool, such as 7-Zip, to open and extract the contents of the 3MF file. This can typically be done by right-clicking on the file and selecting the appropriate option.
- Once the 3MF file has been expanded, you can explore its contents, which may include various folders and files related to the 3D model, textures, and additional information.
- If desired, you can add or modify files within the expanded 3MF file. However, it is crucial to be aware of any potential implications or legalities associated with altering intellectual property or integrity of the original file.
- Once you have made any desired changes, compress the expanded files back into a 3MF file format. Ensure that the resulting file maintains compatibility with 3D printing software and remains functional if shared or used by others.
Precautions and considerations when dealing with altered 3MF files
Working with altered 3MF files carries certain responsibilities and considerations. It is essential to respect intellectual property rights, including copyrights or licenses associated with the original design or its components. Additionally, altering 3MF files can potentially introduce security vulnerabilities or compatibility issues. Therefore, it is advisable to exercise caution, adhere to ethical practices, and seek permission or guidance from the appropriate individuals or organizations before making any alterations.
While the ability to explore hidden content within 3MF files can be fascinating and offer opportunities for customization and experimentation, it is crucial to approach this feature with responsibility and respect for the original creators and the safety of the 3D printing community.
Maintain Your 3D Printer with these Tools
BIQU CryoGrip Pro Frostbite Panda Build Plate for Bambu-Lab P1S P1P X1C X1E A1 3D Printers, Cold Plate, Room Temperature Printing, Double-Sided Textured Sheet, 257x257mm, 1 Piece
$32.99 (as of June 18, 2025 23:32 GMT +00:00 - More infoProduct prices and availability are accurate as of the date/time indicated and are subject to change. Any price and availability information displayed on [relevant Amazon Site(s), as applicable] at the time of purchase will apply to the purchase of this product.)
FLASHFORGE PLA Filament 1.75mm +/- 0.02mm Burnt Titanium, Color Changeable 3D Printer Filament 1kg (2.2lbs), Chameleon Changing Colors with Light, Perfectly Hide The Layer Line
$25.99 (as of June 18, 2025 23:32 GMT +00:00 - More infoProduct prices and availability are accurate as of the date/time indicated and are subject to change. Any price and availability information displayed on [relevant Amazon Site(s), as applicable] at the time of purchase will apply to the purchase of this product.)
YOOPAI 6.0 mm 3D Scanning Markers for 3D Scanners, 3D Scanning Marker Dot Stickers, Diffuse Markers for 3D Scanners (10 Sheets of 500 dots)
$11.99 (as of June 18, 2025 23:32 GMT +00:00 - More infoProduct prices and availability are accurate as of the date/time indicated and are subject to change. Any price and availability information displayed on [relevant Amazon Site(s), as applicable] at the time of purchase will apply to the purchase of this product.)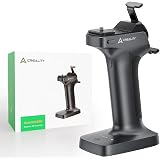
Creality Scan Bridge for CR-Scan Raptor and Raptor Pro 3D Scanner, Wireless Scanning Kit for iPhone, Android and Mirror Screen for Windows, Mac
$459.00 (as of June 18, 2025 23:32 GMT +00:00 - More infoProduct prices and availability are accurate as of the date/time indicated and are subject to change. Any price and availability information displayed on [relevant Amazon Site(s), as applicable] at the time of purchase will apply to the purchase of this product.)