
Creality K2 Plus Combo 3D Printer, Multi Color Printing with New CFS, Max 600mm/s Printing Speed, Full-auto Leveling, Next-Gen Direct Drive Extruder, Dual Al Camera, Build Volume 350 * 350 * 350mm
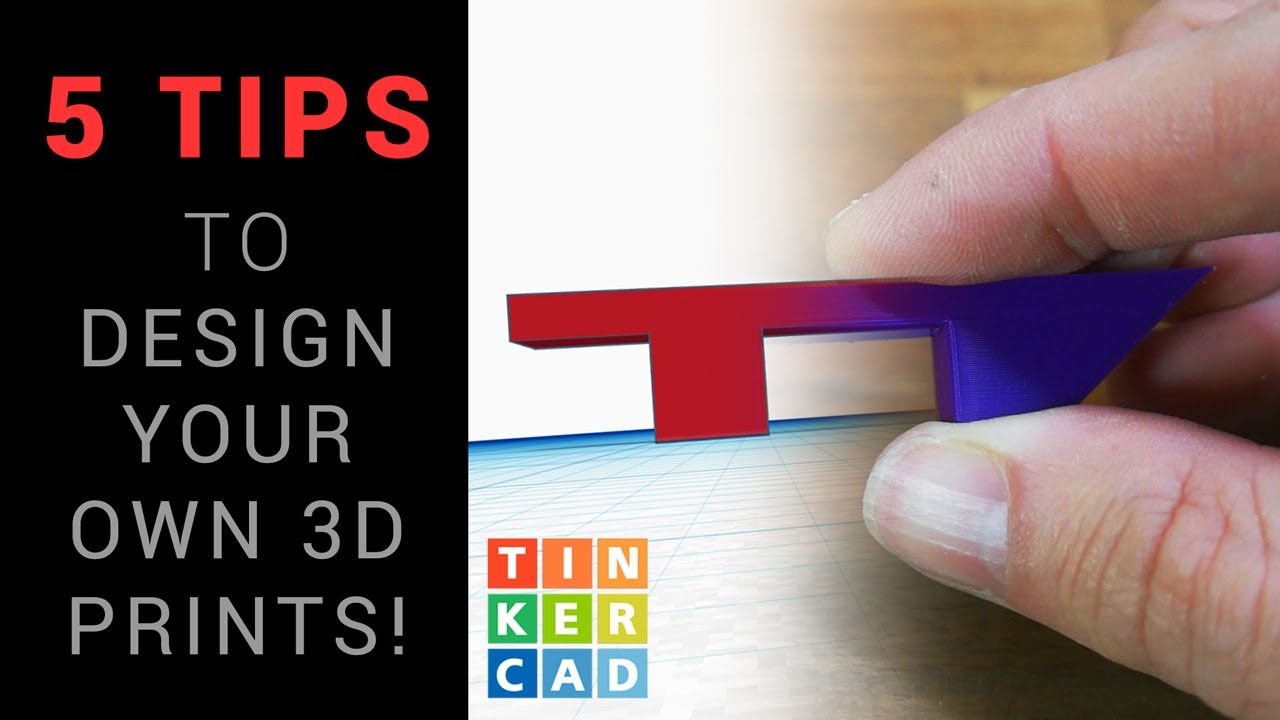
$1,349.00 (as of June 19, 2025 23:45 GMT +00:00 - More infoProduct prices and availability are accurate as of the date/time indicated and are subject to change. Any price and availability information displayed on [relevant Amazon Site(s), as applicable] at the time of purchase will apply to the purchase of this product.)So you’ve got your own 3D printer, but you’ve never tried designing and printing your own parts. Well, this video on Tinkercad will give you five essential tips to get started. By designing your own parts, you increase the chances of success and achieve a satisfying result. Tinkercad is beginner-friendly, but if you’re looking for something more advanced, Fusion 360 and Onshape are popular options. The video provides tips on designing parts with a flat base, avoiding steep overhangs, considering layer lines for strength, paying attention to dimensions, and being patient and iterative in the design process. It also touches on the importance of first layer adhesion and support materials. Examples and demonstrations are provided, and viewers are encouraged to share additional tips in the comments section. This content aims to teach and support 3D printing activities, so give it a watch and start designing your own 3D printed parts!
Tip 1: Design with a flat base


Why a flat base is important
When designing and printing 3D parts, it is crucial to start with a flat base. A flat base provides stability and ensures that the part adheres properly to the printer bed. If the base is not flat, the part may become unstable during printing, leading to failed prints or poor quality results.
How to create a flat base in Tinkercad
In Tinkercad, creating a flat base is simple. Start by dragging the desired shape onto the workspace. Use the black arrow to move the object around and the white dots in the corner to resize it. Make sure to position the shape in a way that creates a flat and stable base.
Tips for optimizing the base design
To optimize the base design, consider the shape and size of the part. If the part has a wide and stable base, it is more likely to print successfully. Avoid designs with narrow or unstable bases, as they may result in failed prints. Additionally, flipping the part upside down or adding a raft in the slicing software can help improve first layer adhesion and increase the chances of success.
Tip 2: Avoid steep overhangs
The challenges of printing steep overhangs
Printing steep overhangs can be challenging because the printer cannot support the material as it is being printed. This can lead to drooping or collapsing of the overhang and result in poor print quality or failed prints.
Techniques for designing with gentle angles
To avoid steep overhangs, it is important to design with gentle angles. Try to keep the overhang angle below 45 degrees, as anything steeper may be difficult to print successfully. By gradually transitioning from a horizontal surface to an angled surface, you can create a design that is more printable.
Support structures for overhangs
If your design requires steep overhangs that cannot be avoided, consider using support structures. Support structures are temporary structures that are printed along with the part and provide support for overhangs. They can be easily removed after printing. Most slicing software, including Tinkercad, allows you to add support structures to your design.
Tip 3: Consider the direction of layer lines for strength

Understanding the impact of layer lines on part strength
Layer lines are the lines formed by each layer of the 3D printed part. The direction of these layer lines can affect the strength of the final part. Parts with layer lines aligned in the direction of the applied force are generally stronger than those with layer lines perpendicular to the force.
Designing parts to align with layer lines
To maximize part strength, consider the direction in which the part will experience the most stress or force. Orient the part so that the layer lines align with this direction. By designing the part with this in mind, you can ensure that the printed part is stronger and more durable.
Using infill patterns to reinforce strength
In addition to aligning the layer lines with the applied force, you can also reinforce the strength of the part by adjusting the infill pattern. Infill is the internal structure of the 3D printed part. By selecting a pattern that provides optimal strength, you can further enhance the durability of the printed part.
Tip 4: Pay attention to dimensions
Ensuring accurate dimensions in your design
Accurate dimensions are essential for ensuring that your 3D printed part fits and functions as intended. In Tinkercad, you can easily check and adjust the dimensions of your design using the measurement tools.
Using Tinkercad’s measurement tools
To access the measurement tools in Tinkercad, click on the shape or group of shapes you want to measure. Then, click on one of the white corner boxes to view the dimensions in terms of X and Y. Additionally, the fifth box located in the center provides the overall dimensions of the shape or group.
Checking dimensions before printing
Before printing your design, double-check the dimensions to ensure accuracy. Use the measurement tools to confirm that the dimensions match your requirements. Making adjustments to the design early on will save time and prevent issues during the printing process.
Tip 5: Be patient and iterative in the design process

The importance of iterations in improving designs
Designing 3D printed parts is an iterative process. It often takes multiple iterations to refine a design and achieve the desired outcome. Embrace the process of testing, tweaking, and refining your design until you achieve the best possible result.
Taking the time to test and refine your design
To improve your designs, take the time to test and evaluate them. Print prototypes or small sections of your design to identify areas that may need adjustment. Evaluate the print quality, functionality, and overall performance of the part. Use this feedback to make informed design decisions and iterate until you achieve the desired result.
Utilizing Tinkercad’s revision history feature
Tinkercad offers a useful revision history feature that allows you to revisit previous versions of your design. This feature enables you to compare different iterations, revert to earlier versions if needed, and track your progress throughout the design process. Take advantage of this feature to enhance your design workflow and make iterative improvements.
The importance of first layer adhesion and support materials
Ensuring a good first layer adhesion for successful prints
First layer adhesion is crucial for successful 3D prints. It determines how well the part sticks to the build plate during printing. To achieve good first layer adhesion, make sure your build plate is clean and level. Adjust the nozzle height to ensure proper squishing of the filament onto the build plate. Consider using a brim or a raft to improve adhesion for complex parts.
Choosing the right support materials for complex designs
For complex designs with overhangs or intricate structures, support materials can help maintain the integrity of the print. Support materials are designed to be easily removed after printing and provide temporary support for overhangs or bridges. Depending on the printer and material used, different types of support materials may be available, such as water-soluble or breakaway supports.
Tips for optimizing support settings in Tinkercad
In Tinkercad, you can adjust the support settings to optimize the use of support materials. Experiment with different support structures, densities, and patterns to find the best settings for your specific design. Keep in mind that using support materials may increase print time and material usage, so it’s important to strike a balance between support and print quality.
Examples and demonstrations

Showcasing successful 3D printed parts
Throughout the video, various examples of successful 3D printed parts can be showcased. These examples can range from functional parts to intricate designs, highlighting the potential of designing and printing your own parts.
Step-by-step demonstrations of the design process
To provide a comprehensive understanding of the design process, step-by-step demonstrations can be included in the video. These demonstrations should cover each tip in detail, showing viewers how to apply the tips in Tinkercad and overcome common challenges.
Highlighting common mistakes and how to avoid them
To help viewers avoid common pitfalls, it can be beneficial to highlight common mistakes that beginners may make when designing and printing 3D parts. By showing these mistakes and providing tips on how to avoid them, viewers can learn from the experiences of others and improve their own designs.
Encouraging viewer interaction and sharing additional tips
Inviting viewers to share their own tips in the comments
At the end of the video, viewers can be encouraged to share their own tips and experiences in the comments section. This promotes engagement and allows the community to learn from each other.
Responding to viewer questions and feedback
As viewers engage with the video and leave comments or questions, it is important to respond and provide valuable feedback. This interaction builds a sense of community and fosters a collaborative learning environment.
Building a collaborative community of 3D printing enthusiasts
By encouraging viewer interaction and fostering a collaborative community, the video can help create a space where 3D printing enthusiasts can connect, learn, and share their knowledge and experiences. This community can serve as a valuable resource for beginners and experienced designers alike.
Overview of Tinkercad’s user-friendly interface
Introduction to Tinkercad’s basic features
In the video, viewers can be introduced to the basic features of Tinkercad. This includes an overview of the user interface, the shape library, and the various tools available for creating and manipulating 3D designs.
Navigating the Tinkercad workspace
To help viewers navigate the Tinkercad workspace more effectively, a tutorial can be provided on how to move, rotate, and resize objects. This will enable viewers to create more complex designs with ease.
Using shapes and tools to create 3D designs
In Tinkercad, viewers can learn how to use the available shapes and tools to create their own 3D designs. This includes dragging and dropping shapes, grouping and ungrouping objects, and using the alignment tools to create precise designs.
Conclusion
Recap of the five essential tips for designing and printing 3D parts
To wrap up the video, a recap can be provided summarizing the five essential tips for designing and printing 3D parts. This will serve as a quick reference for viewers and reinforce the key takeaways from the video.
Encouragement to apply the tips in future designs
It is important to encourage viewers to apply the tips and techniques learned in the video to their future designs. By implementing these tips, viewers can improve the quality and success rate of their 3D prints.
Reminder to subscribe and stay updated with new content
Lastly, a reminder can be given to viewers to subscribe to the channel and stay updated with new content. This will ensure that viewers continue to learn and grow in their 3D printing journey.
If you own a 3D printer but have never designed your own parts, this video aims to encourage you to give it a try. In this video, you will find 5 helpful tips to help you get started with TinkerCAD. By following these tips, you will increase the chances of your designs being successful and achieving their intended purpose, leading to a satisfying outcome.
Although this video is beginner-friendly, there may come a time when you outgrow Tinkercad and begin looking for a more powerful design tool. Many parametric 3D modeling apps are quite similar, with Fusion 360 being the most popular. Personally, I use Onshape, which, like Tinkercad, is cloud-based and allows you to start designing in just minutes. If you’re interested, I have created a series of tutorials specifically tailored for beginners. You can check them out in this playlist.
To start designing with TinkerCAD, visit their website here: Tinkercad
If you need quality and affordable filament for your 3D printer, I recommend X3D. They currently have an offer where you can buy 3 filaments and get 1 free, along with a free sample pack included in every order. You can find them at www.x3d.com.au
Feel free to explore my channel and if you enjoy the content, please consider subscribing.
If you would like to support me, you can do so on Patreon: Support me on Patreon
Creality 3D Printer Filament, PLA Plus Filament 1.75mm Rainbow, PLA Pro Toughness Upgraded Dimensional Accuracy +/- 0.03mm, 1KG Spool(2.2lbs) Ender PLA+ Filament for Most 3D Printer
$21.99 (as of June 19, 2025 23:45 GMT +00:00 - More infoProduct prices and availability are accurate as of the date/time indicated and are subject to change. Any price and availability information displayed on [relevant Amazon Site(s), as applicable] at the time of purchase will apply to the purchase of this product.)
ELEGOO PLA Plus Filament 1.75mm White 2KG, PLA+ Tougher and Stronger 3D Printer Filament Pro Dimensional Accuracy +/- 0.02mm, 2 Pcs 1kg Spool(2.2lbs) Fits for Most FDM 3D Printers
$28.98 (as of June 19, 2025 23:45 GMT +00:00 - More infoProduct prices and availability are accurate as of the date/time indicated and are subject to change. Any price and availability information displayed on [relevant Amazon Site(s), as applicable] at the time of purchase will apply to the purchase of this product.)
FLASHFORGE Adventurer 5M 3D Printer,600mm/s Max High-Speed FDM 3D Printers with Fully Auto Leveling, 280°C Direct Extruder with Quick Detachable Nozzle, Effective Cooling, Core XY Structure
$259.00 (as of June 19, 2025 23:45 GMT +00:00 - More infoProduct prices and availability are accurate as of the date/time indicated and are subject to change. Any price and availability information displayed on [relevant Amazon Site(s), as applicable] at the time of purchase will apply to the purchase of this product.)
ELEGOO Mars 5 Ultra 9K MSLA Resin 3D Printer, Smart Mechanical Sensor, Fast Printing Up to 150mm/h, AI Camera, WiFi Cluster Printing, Automatic Leveling, Large Printing Size 6.04 * 3.06 * 6.49 inch
$284.89 (as of June 19, 2025 23:45 GMT +00:00 - More infoProduct prices and availability are accurate as of the date/time indicated and are subject to change. Any price and availability information displayed on [relevant Amazon Site(s), as applicable] at the time of purchase will apply to the purchase of this product.)