FLASHFORGE Adventurer 5M 3D Printer with Fully Auto Leveling System, Max 600mm/s High-Speed, 280℃ Quick-Detach Nozzle, CoreXY Structure for Superior Print Quality, Rookies & Experts Smart Choice
$259.00 (as of June 18, 2025 23:32 GMT +00:00 - More infoProduct prices and availability are accurate as of the date/time indicated and are subject to change. Any price and availability information displayed on [relevant Amazon Site(s), as applicable] at the time of purchase will apply to the purchase of this product.)In the world of 3D printing, there are common mistakes that many people make that can hinder the quality and success of their prints. As highlighted by the 3D Printer Academy, these mistakes can easily be avoided with a bit of knowledge and understanding. One common mistake is touching the 3D printer’s build plate with oily or grimy hands, which can negatively impact bed adhesion. Properly leveling the printer’s bed is also important for beginners, as it can greatly affect the printing process. Additionally, printing too fast can result in poor print quality, so it’s best to start with the default speed settings. It’s also crucial to use the correct material settings for each filament to ensure optimal extrusion. Moreover, considering the print orientation can lead to stronger prints, faster print times, and better surface finishes. Properly storing filament can prevent tangling, and increasing the wall count rather than adjusting the infill percentage can improve print strength. Lastly, cleaning the build plate with warm soapy water is recommended over isopropyl alcohol for more effective removal of grease. And finally, using PLA for outdoor applications is discouraged due to its low melting point, with alternative materials like ASA being better suited for this purpose.
As you delve into the world of 3D printing, it’s important to be aware of these common mistakes. By avoiding these pitfalls, you can ensure better print quality and success. Whether you’re a beginner or an experienced user, understanding proper techniques, such as avoiding touching the build plate, leveling the bed, adjusting print speeds, utilizing correct material settings, considering print orientation, storing filament properly, adjusting wall count, and cleaning the build plate with warm soapy water, will help you achieve the desired results. Remember to choose suitable materials for outdoor use and to avoid excessive adjustments to slicer settings, as default settings are often sufficient for high-quality prints. By following these guidelines, you can enhance your 3D printing experience and create outstanding prints.

Mistake 1: Touching the 3D printer’s build plate with oily or grimy hands
Explanation of the mistake
One of the most common mistakes made when 3D printing is touching the build plate with oily or grimy hands. When you touch the build plate with dirty hands, you transfer oils and grime onto the surface, which can significantly impact bed adhesion. These contaminants on the build plate can prevent the printed object from sticking properly to the surface, leading to failed prints and wasted filament.
Impact on bed adhesion
When the build plate is contaminated with oils and grime, the print will have poor bed adhesion. This means that the printed object may not stick to the build plate as it should, resulting in warping, shifting, or even detaching from the plate entirely. This can lead to distorted or failed prints, causing frustration and wasted time and resources.
Preventive measures
To avoid this mistake, it is crucial to always handle the build plate with clean hands. Before touching the build plate, make sure to wash your hands thoroughly with soap and water to remove any oils or dirt. If necessary, use gloves when handling the build plate to prevent contamination. Additionally, it is beneficial to clean the build plate regularly with warm soapy water to remove any accumulated oils or grime. This will ensure optimal bed adhesion and successful prints.
Mistake 2: Improper leveling of the printer’s bed
Importance of proper bed leveling
Properly leveling the bed of a 3D printer is essential for successful and accurate prints. Improper bed leveling can lead to uneven print surfaces, adhesion issues, and even misalignment of layers. Leveling the bed ensures that the print head maintains a consistent distance from the build plate throughout the printing process, resulting in uniform and precise prints.
Common issues faced by beginners
Bed leveling can be a challenging task, especially for beginners. Common issues that arise from improper bed leveling include filament not adhering to the build plate, print layers not sticking together correctly, and warped or misaligned prints. These issues can be frustrating and may require reprinting the object, wasting both time and filament.
Step-by-step guide to leveling the bed
- Begin by homing the printer, ensuring that the print head is at the home position.
- Use a sheet of paper or a feeler gauge to check the distance between the print head and the build plate. The ideal distance should allow the paper or gauge to move with slight resistance.
- Adjust the bed leveling screws or knobs to raise or lower the build plate until the desired distance is achieved. Make small adjustments and re-check the distance until it is consistent across the entire build plate.
- Repeat the process for each corner and the center of the build plate, ensuring that the bed is level throughout.
- Test the bed leveling by printing a small test object. Check the first layer adhesion and inspect the overall print quality. Make further adjustments if necessary.
Properly leveling the bed may require some trial and error, but with practice, it will become easier to achieve accurate and successful prints.
Find 3D Printing Accessories Here
Mistake 3: Printing too fast
Impact on print quality
Printing too fast can have a significant impact on print quality. When the print head moves too quickly, it may not have enough time to properly extrude the filament, resulting in under-extrusion or gaps in the print. This can lead to a weak and structurally compromised object. Additionally, increased speed can cause excessive vibrations, leading to a loss of print accuracy and a rough surface finish.
Suggested starting speed
As a general rule, it is recommended to start printing at the default speed settings provided by the printer manufacturer. These default settings are typically optimized for a balance between print speed and quality. Starting with these settings allows you to gauge the printer’s capabilities and make adjustments as needed.
Factors to consider when adjusting print speed
When adjusting the print speed, it is important to consider several factors. These include the complexity and size of the object being printed, the material being used, and the printer’s capabilities. Complex and intricate designs may require slower speeds to ensure accuracy and quality. Similarly, certain materials, such as flexible filaments or high-temperature materials, may require slower speeds to prevent issues like filament buckling or overheating. Experimentation and fine-tuning may be necessary to find the optimal print speed for each specific scenario.
Mistake 4: Using wrong material settings
Importance of correct material settings
using the correct material settings is crucial for achieving high-quality prints. Each filament type requires specific temperature, speed, and extrusion settings to ensure proper flow and adhesion. Using incorrect settings can lead to poor extrusion, filament clogging, warping, or even damage to the printer.
Effects of incorrect settings on extrusion
If the material settings are too high or too low for a specific filament, extrusion issues may occur. When the temperature is too low, the filament may not melt properly, resulting in inconsistent flow and weak adhesion between layers. On the other hand, if the temperature is too high, the filament may become over-liquidized, causing stringing or blobs in the print. Additionally, incorrect speed settings can lead to under or over-extrusion, negatively impacting the overall print quality.
Checking recommended settings for each filament
To avoid this mistake, it is important to always consult the recommended settings for each filament type. Manufacturers typically provide guidelines for temperature, speed, and other pertinent parameters. These recommendations should serve as a starting point for adjusting the settings based on your specific printer and object requirements. Regularly checking and calibrating the material settings will ensure consistent and high-quality prints.

Mistake 5: Ignoring print orientation
Benefits of considering print orientation
Print orientation plays a vital role in the strength, speed, and surface finish of a printed object. By considering the optimal print orientation, you can significantly improve the overall quality of the finished product. Choosing the right orientation can reduce supports, improve layer adhesion, and enhance the aesthetic appearance of the print.
Impact on print strength, speed, and surface finish
The orientation of a print determines how the layer lines are positioned, which directly affects its strength. Printing objects with layers perpendicular to the applied force or stress will result in stronger parts. In addition, the print speed may vary depending on the orientation. Printing objects in a way that minimizes the number of overhangs or unsupported areas can significantly increase print speed. Finally, print orientation affects the overall surface finish. By printing surfaces in the right direction, you can achieve smooth and visually appealing results.
Tips for optimizing print orientation
Consider the following tips when determining print orientation:
- Identify the primary stresses or forces that the printed object will experience and orient it to minimize these forces on the weakest points.
- Minimize overhangs by tilting the object or incorporating supports only where necessary.
- Utilize the slicer software’s tools to analyze and optimize the orientation based on support requirements, strength, and surface finish.
- Experiment with different orientations to find the best balance between strength, print speed, and surface quality.
By carefully considering the print orientation, you can achieve prints that not only meet your functional requirements but also exhibit improved strength and aesthetic appeal.
Mistake 6: Improper storage of 3D printer filament
Importance of proper filament storage
Proper storage of 3D printer filament is critical to maintaining its quality and preventing printing issues. Filament exposed to moisture or extreme temperature variations can absorb moisture, which negatively affects its performance. Additionally, improper storage can lead to tangling and filament breakage, causing print failures and wasted material.
Preventing tangling and moisture absorption
To prevent tangling, it is essential to store filament spools in a clean and dry environment. Keep the spools in sealed containers or resealable bags with desiccant packets to absorb moisture. If possible, consider using filament dry boxes or specialized filament storage solutions that provide a controlled environment with low humidity. Handling filament with clean hands and using filament guides can also help prevent tangling during the printing process.
Recommended filament storage solutions
Here are some recommended filament storage solutions:
- Filament dry boxes: These airtight containers are designed to maintain a low humidity environment, preventing moisture absorption. Some dry boxes include built-in desiccant holders for added protection.
- Vacuum-sealed bags: Place filament spools in vacuum-sealed bags along with desiccant packets. Vacuum sealing removes the air and helps prevent moisture from reaching the filament.
- Dehumidifier cabinets: These cabinets are equipped with built-in dehumidifiers, ensuring a controlled humidity level for filament storage.
- Desiccant containers: Use desiccant containers to absorb moisture. These containers typically feature airtight compartments where you can place the filament spools.
By storing filament properly, you can ensure consistent print quality and reduce the risk of print failures caused by moisture absorption or tangling.
Mistake 7: Adjusting infill percentage instead of increasing wall count
Understanding the relationship between infill and wall count
Infill and wall count are two critical parameters that determine the strength and density of a 3D printed object. Infill refers to the internal structure of the print, while the wall count refers to the number of solid layers that make up the walls or outer surface of the object. These two parameters work together to determine the overall strength and structural integrity of the print.
Effects of adjusting infill percentage
Adjusting the infill percentage affects the density and strength of the print. Higher infill percentages increase the internal structure’s density, resulting in a stronger object. However, simply increasing the infill percentage without considering the wall count can lead to inefficient and time-consuming prints. Increased infill also adds more material and printing time, which may not always be necessary.
Recommendation to increase wall count for better print strength
To achieve better print strength, it is recommended to increase the wall count rather than relying solely on a higher infill percentage. Increasing the number of solid layers making up the outer surface of the object fortifies its structure and improves strength. By increasing the wall count, you can achieve stronger prints without the need for excessive infill, optimizing print time and material usage.
When determining the optimal wall count, consider the specific requirements of your print. Thinner walls may require a higher count, while thicker walls may only need a few solid layers. Experimentation and testing with different wall counts will help you find the right balance between strength and print efficiency.
Mistake 8: Cleaning the build plate with isopropyl alcohol
Comparison between isopropyl alcohol and warm soapy water
When it comes to cleaning the build plate, there is often a debate between using isopropyl alcohol and warm soapy water. While both options can effectively clean the build plate, there are differences in their effectiveness and potential side effects.
Isopropyl alcohol, commonly referred to as IPA, is a popular choice for cleaning the build plate due to its ability to remove grease and contaminants effectively. IPA evaporates quickly, leaving the build plate clean and dry. However, IPA may not completely remove grease contaminants, potentially causing issues with print adhesion if residual grease remains.
Warm soapy water, on the other hand, offers a more thorough cleaning process. The soap helps to break down greasy residues, allowing them to be easily washed away. Warm water also assists in loosening any stuck-on filament or adhesive remnants. This method is especially beneficial for build plates with removable surfaces, as they can be fully submerged in the water for a more thorough clean.
Advantages of using warm soapy water for cleaning
Using warm soapy water for cleaning the build plate offers several advantages:
- Thoroughly removes greasy residues and contaminants.
- Loosens stuck-on filament or adhesive remnants.
- Safe to use on all types of build plate surfaces.
- Can be combined with gentle scrubbing for stubborn residues.
- Cost-effective and readily available.
Steps to clean the build plate effectively
To clean the build plate effectively using warm soapy water, follow these steps:
- Remove the build plate from the printer if it is removable.
- Prepare a basin or sink with warm water and add a small amount of dish soap.
- Immerse the build plate in the soapy water and let it soak for a few minutes.
- Gently rub the build plate with a soft sponge or cloth to remove any residues.
- Rinse the build plate thoroughly with clean water to remove any soapy residue.
- Allow the build plate to air dry completely before reattaching it to the printer.
By using warm soapy water, you can ensure a thorough and effective cleaning of the build plate, maintaining optimal print adhesion and preventing the buildup of contaminants.
Mistake 9: Using PLA for outdoor use
Understanding the limitations of PLA
PLA (Polylactic Acid) is a popular filament choice for 3D printing due to its ease of use, low odor, and biodegradability. However, PLA does have limitations, one of which is its low melting point. PLA begins to soften and deform at temperatures as low as 60-70 degrees Celsius, making it unsuitable for outdoor use, especially in hot climates or direct sunlight.
Recommended materials for outdoor use
For outdoor applications, it is advisable to use filaments that offer greater temperature resistance and durability. Some recommended materials include:
- PETG (Polyethylene Terephthalate Glycol) is a popular choice for outdoor use due to its higher melting point compared to PLA. It offers good strength and resilience, making it suitable for functional parts exposed to varying weather conditions.
- ABS (Acrylonitrile Butadiene Styrene) is another option for outdoor use. It has higher temperature resistance than PLA, making it more suitable for parts exposed to direct sunlight and high temperatures.
- ASA (Acrylonitrile Styrene Acrylate) is a UV resistant filament with improved weatherability compared to ABS. It is a viable option for outdoor applications that demand superior UV stability and resistance to weathering.
Factors to consider when selecting outdoor-friendly filaments
When choosing filaments for outdoor use, consider the following factors:
- Temperature resistance: Ensure the filament can withstand the temperature extremes of the intended environment.
- UV stability: Opt for filaments with UV stabilizers to prevent degradation and discoloration when exposed to sunlight.
- Weather resistance: Consider the filament’s ability to withstand moisture, humidity, and other weather elements.
- Mechanical properties: Evaluate the filament’s strength, flexibility, and impact resistance to ensure it can withstand outdoor conditions without compromising functionality.
By selecting filaments specifically designed for outdoor use, you can ensure that your printed objects will withstand the environmental challenges they may encounter.
Conclusion
In the world of 3D printing, avoiding common mistakes is crucial for achieving successful prints and maximizing the quality of your creations. By understanding the impact of factors such as bed adhesion, leveling, print speed, material settings, print orientation, filament storage, infill percentage, cleaning methods, and filament selection, you can navigate the challenges and pitfalls often encountered in 3D printing.
Remember to always handle the build plate with clean hands, properly level the printer’s bed, adhere to suggested print speeds, use correct material settings, consider print orientation for stronger and smoother prints, store filament properly, adjust wall count instead of just the infill percentage, clean the build plate with warm soapy water, and choose the right filament for outdoor applications.
By avoiding these 3D printing “sins,” you can save time, resources, and frustration while achieving consistent, high-quality prints. With proper knowledge and attention to detail, you can become a successful and proficient 3D printer enthusiast. Happy printing!
Maintain Your 3D Printer with these Tools
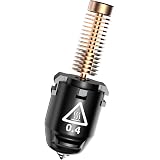
FLASHFORGE Adventurer 5M Nozzle, 0.4mm 280℃ High Flow 32mm³/s Nozzle for Stable High-Speed Printing, Adventurer 5M Pro Hotend, 3S Quick-Detachable Nozzle
$35.00 (as of June 18, 2025 23:32 GMT +00:00 - More infoProduct prices and availability are accurate as of the date/time indicated and are subject to change. Any price and availability information displayed on [relevant Amazon Site(s), as applicable] at the time of purchase will apply to the purchase of this product.)
FLASHFORGE PLA Filament 1.75mm +/- 0.02mm Burnt Titanium, Color Changeable 3D Printer Filament 1kg (2.2lbs), Chameleon Changing Colors with Light, Perfectly Hide The Layer Line
$25.99 (as of June 18, 2025 23:32 GMT +00:00 - More infoProduct prices and availability are accurate as of the date/time indicated and are subject to change. Any price and availability information displayed on [relevant Amazon Site(s), as applicable] at the time of purchase will apply to the purchase of this product.)
ELEGOO Mars 5 Ultra 9K Resin 3D Printer, 150mm/h High Speed Printing, Smart Automatic Leveling, Intelligent Detection, WiFi-Transfer, Printing Size of 6.04 x 3.06 x 6.49 inch
$284.99 (as of June 18, 2025 23:32 GMT +00:00 - More infoProduct prices and availability are accurate as of the date/time indicated and are subject to change. Any price and availability information displayed on [relevant Amazon Site(s), as applicable] at the time of purchase will apply to the purchase of this product.)
Fully Assembled Mini 3D Printer for Kids and Beginners - Complete Starter Kit with Auto Leveling 3D Printing Machine, 10M PLA Filament, and SD Card - WiFi 3D Home Printer for MAC, Windows, and Linux
$229.99 (as of June 18, 2025 23:32 GMT +00:00 - More infoProduct prices and availability are accurate as of the date/time indicated and are subject to change. Any price and availability information displayed on [relevant Amazon Site(s), as applicable] at the time of purchase will apply to the purchase of this product.)