ANYCUBIC 10K Resin 3D Printer, Photon Mono 4 LCD 3D Printer with 7-inch Mono Screen, Upgraded LighTurbo Matrix and Printing Platform, Printing Size of 6.04''x3.42''x6.49''
$169.99 (as of March 8, 2025 20:51 GMT +00:00 - More infoProduct prices and availability are accurate as of the date/time indicated and are subject to change. Any price and availability information displayed on [relevant Amazon Site(s), as applicable] at the time of purchase will apply to the purchase of this product.)The subject of 3D printing has become increasingly popular, offering a range of possibilities for manufacturing. However, one challenge that often arises in the process is achieving smooth curved surfaces in 3D printed parts. This article will delve into the details of this challenge, exploring why layer lines appear more distinct on the top of curved surfaces and discussing various solutions to improve the appearance of these parts. From increasing print resolution to printing the part on its side, using flat edges or multiple facets, pixelating the part, to adding digital noise or textures, this article will provide you with a comprehensive guide on how to overcome the challenges of achieving smooth curved surfaces in 3D printing.
The article aims to provide valuable insights and design tips that will benefit individuals looking to enhance the surface finish and aesthetics of their 3D printed parts. By exploring innovative approaches and alternative design considerations, readers will gain a deeper understanding of how to optimize their designs for mass production 3D printing. Whether you are seeking a smoother finish or looking to create unique surface textures, this article will equip you with the knowledge and techniques to elevate your 3D printed parts to the next level.

Challenges of achieving smooth curved surfaces
Layer lines on curved surfaces
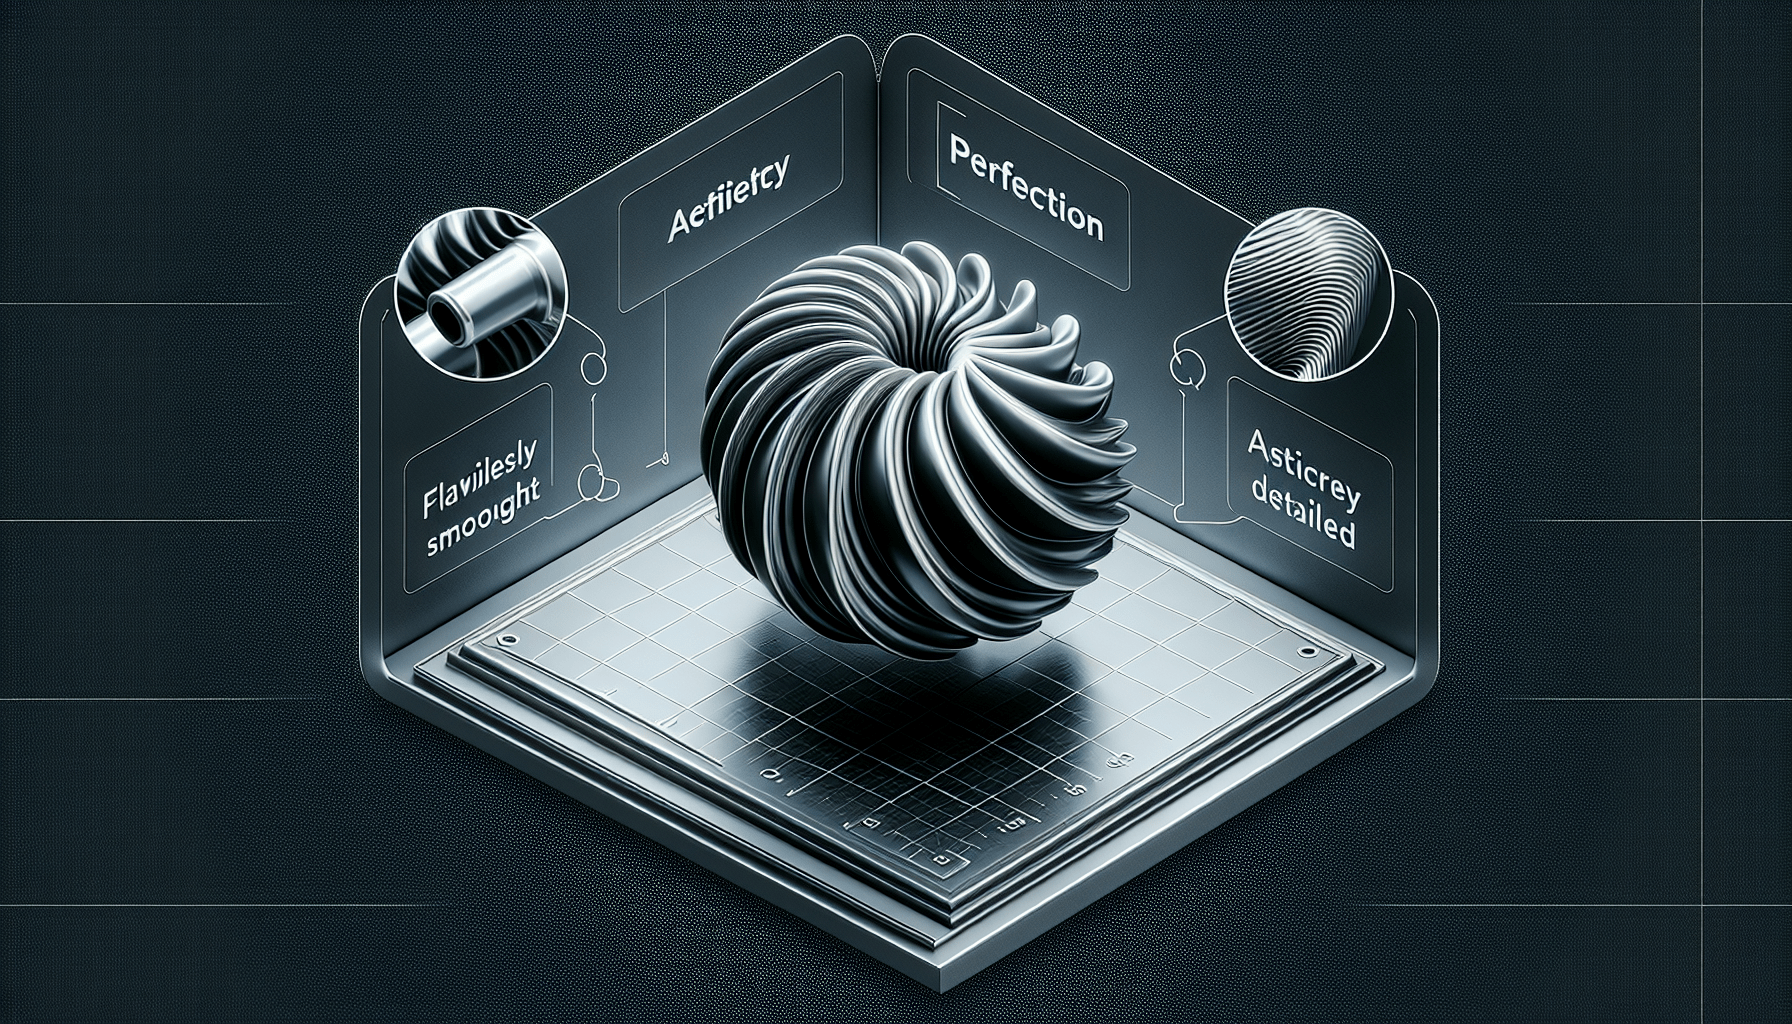
One of the main challenges in achieving smooth curved surfaces in 3D printed parts is the visibility of layer lines. As the part curves, the layer lines become more distinct, leading to an undesirable appearance. The transition from one layer to another becomes more noticeable on the top of curved surfaces, where the angle is shallow and the edges of the layers move inward to follow the curve of the upper surface. This change in the curve causes the layer lines to appear much more pronounced at the top, affecting the overall surface finish of the part.
Undesirable appearance
The visibility of layer lines on curved surfaces creates an undesirable appearance in 3D printed parts. These layer lines disrupt the smoothness of the surface, making the part look rough and unfinished. In applications where aesthetics are important, such as consumer products or prototypes, achieving a smooth surface finish is crucial. The presence of layer lines can diminish the overall quality of the part and may not meet the desired standards for the final product.
Increasing print resolution
One way to improve the surface finish of curved parts is by increasing the print resolution. By reducing the layer height, the change in the curve between each layer becomes less substantial and less noticeable. Smaller layer heights result in smoother transitions between layers, leading to a more consistent and refined surface finish. However, increasing print resolution comes with its own challenges. It requires more time and resources, as printing at higher resolutions is slower and more costly. In mass production contexts, where time and cost efficiency are crucial, increasing print resolution may not be the most viable solution.
Improving surface finish by printing on its side
Design considerations
Printing the part on its side can help improve the surface finish of curved parts. By orienting the part horizontally, each layer is printed consistently throughout the length of the part, resulting in a more uniform surface finish. However, printing on its side requires careful design considerations. Overhangs and steep angles need to be minimized or eliminated to ensure successful printing without support structures. Designing the part in a way that allows it to be printed on its side requires thoughtful planning and consideration of the overall geometry and functionality of the part.
Consistent surface finish
Printing on its side provides a more consistent surface finish because each layer is printed with the same orientation and angle. The layer lines become less pronounced, and the surface appears smoother and more refined. Consistency in surface finish is crucial for achieving high-quality parts, especially in applications where aesthetics play a significant role. By optimizing the part’s orientation during printing, manufacturers can improve the overall surface finish and enhance the visual appeal of their 3D printed parts.
Orientation optimization
Optimizing the orientation of the part during printing is essential for achieving the best possible surface finish. Certain features, such as overhangs or intricate details, may require specific orientations to ensure successful printing without sacrificing surface quality. Conducting orientation optimization tests and simulations can help determine the most suitable printing orientation for achieving the desired surface finish. By carefully considering the part’s geometry and specific requirements, manufacturers can maximize the benefits of printing on its side and achieve optimal surface finish results.
Find 3D Printing Accessories Here
Using flat edges or multiple facets
Maintaining surface finish
Another approach to achieving smooth curved surfaces is by using flat edges or multiple facets instead of smooth curves. Flat edges provide a consistent slope throughout the part’s height, resulting in a more uniform surface finish. Unlike smooth curves, which pose challenges in maintaining consistent layer lines, flat edges simplify the printing process and minimize any potential disruptions in surface quality. By designing parts with flat edges or multiple facets, manufacturers can ensure a consistently smooth surface finish without compromising on overall aesthetic appeal.
Design alternatives to smooth curves
Using flat edges or multiple facets offers design alternatives to traditional smooth curves. While smooth curves may be visually appealing, they can pose printing challenges and result in more distinct layer lines on curved surfaces. Flat edges provide a simpler geometry that is easier to print and maintain a consistent surface finish. Additionally, multiple facets offer an alternative approach to achieving a smooth surface by dividing it into smaller, distinct planes. These design alternatives allow for greater control over the printing process and can result in improved surface finish on curved parts.
Considerations for flat edges
When using flat edges or multiple facets, it is important to consider certain factors to ensure a high-quality surface finish. The angle and orientation of the flat edges should be carefully evaluated to avoid issues like overhangs or steep angles that may require support structures. The size and number of facets should also be considered to achieve the desired surface finish and overall aesthetic appeal. Additionally, post-processing techniques, such as sanding and polishing, may be necessary to further refine the flat edges for a smoother surface finish. By carefully addressing these considerations, manufacturers can successfully incorporate flat edges into their designs and achieve improved curved surfaces.
Pixelating the part with stair steps
Controlling layer lines
Pixelating the part by creating stair steps is an alternative method for controlling the appearance of layer lines on curved surfaces. By introducing these vertical steps in the design, each layer becomes vertically on top of the other, minimizing the visibility of layer lines that typically occur when layers transition in a smooth curve. This technique, known as pixelation, provides a consistent visual effect throughout the part and offers greater control over the surface finish.
Creating consistent visual effect
Creating stair steps in the design allows for a consistent visual effect across the curved surface. Unlike smooth curves, where layer lines become more pronounced at the top, pixelated parts maintain a uniform surface appearance. The vertical steps blend together, resulting in a smoother and more controlled surface finish. Manufacturers can adjust the size of the steps based on their specific requirements and desired aesthetic. While the pixelation technique may result in a different surface aesthetic compared to smooth curves, it offers a unique and consistent visual effect that can be advantageous in certain applications.
Potential limitations
While pixelating parts can help control layer line aesthetics and create a unique surface finish, there are some potential limitations to consider. The pixelation technique may not be suitable for all types of products or design requirements. Some applications may require the smoothness and continuity of a traditional curved surface, which cannot be achieved through pixelation. Additionally, the size and resolution of the stair steps may impact certain functional aspects of the part. Manufacturers should carefully evaluate the trade-offs and consider the specific needs of their design before implementing the pixelation technique.
Adding digital noise or textures
Hiding layer line aesthetics
Adding digital noise or textures to the surface of 3D printed parts can help hide layer line aesthetics. By introducing slight variations or imperfections in the surface texture, the layer lines become less noticeable to the naked eye. This technique works by visually blending the layer lines with the surrounding texture, resulting in a smoother appearance. Digital noise and textures can be applied directly in the CAD software or by adjusting the printing parameters to achieve the desired effect.
Creating unique surface finish
In addition to hiding layer line aesthetics, adding digital noise or textures can create a unique surface finish for 3D printed parts. By intentionally modifying the surface texture, manufacturers can achieve a distinct and customized appearance. This technique allows for greater design flexibility and creativity, enabling the production of parts with specific aesthetic qualities. Digital noise and textures offer a way to enhance the overall visual appeal of curved surfaces and differentiate products in the market.
Application of textures
The application of digital noise or textures can be done through various methods, depending on the design requirements and printing technology. Manufacturers can experiment with different textures, such as rough surfaces, organic patterns, or specific motifs, to achieve the desired effect. These textures can be incorporated into the CAD design or post-processed onto the surface of the printed part using techniques like sanding, etching, or surface coatings. When applying textures, it is important to consider the intended purpose and functionality of the part to ensure a harmonious blend between aesthetics and performance.
Selection of suitable 3D printing technology
Comparison of printing technologies
The selection of a suitable 3D printing technology is crucial for achieving high-quality curved surfaces. Different printing technologies offer varying capabilities and limitations when it comes to surface finish. Technologies like Fused Deposition Modeling (FDM) may struggle with achieving smooth curved surfaces due to the visible layer lines. On the other hand, Stereolithography (SLA) or Selective Laser Sintering (SLS) can provide finer resolution and better surface quality. It is essential to compare and evaluate the capabilities of different printing technologies to determine which one is most suited for achieving the desired surface finish.
Impact on curved surface quality
The choice of 3D printing technology directly impacts the quality of curved surfaces. Technologies that offer higher print resolutions tend to produce smoother and more refined results. Technologies that utilize support structures may introduce additional imperfections or require more extensive post-processing to achieve a smooth surface. Factors such as material properties, layer height, and printing speed all contribute to the final surface quality. Manufacturers should consider these factors when selecting a 3D printing technology to ensure it aligns with their surface finish requirements for curved parts.
Trade-offs and considerations
When selecting a 3D printing technology for curved surface applications, trade-offs need to be considered. Technologies that provide better surface quality may come with higher costs or longer print times. Conversely, technologies that offer faster production or lower costs may compromise surface finish. Manufacturers need to evaluate their priorities, such as cost, time, and desired surface finish, and strike a balance based on their specific needs. Conducting test prints and prototypes can help evaluate the surface quality of different technologies before committing to mass production.
Optimizing support structures
Preventing support-induced imperfections
Support structures are often necessary in 3D printing to ensure the stability and integrity of certain geometries. However, support structures can lead to surface imperfections, especially on curved surfaces. The removal of support structures can cause damage or leave marks that require additional post-processing. Optimizing support structures by minimizing their contact points with the curved surface or incorporating well-designed breakaway supports can help prevent support-induced imperfections. Careful consideration of support placement and orientation can significantly improve the surface finish of curved parts.
Minimizing post-processing requirements
Minimizing post-processing requirements is essential for achieving efficient production of curved parts. The presence of support structures often necessitates additional sanding, polishing, or chemical smoothing to achieve the desired surface finish. By optimizing the support structures during the printing phase, manufacturers can minimize the need for extensive post-processing, saving time, and reducing costs. Designing the part with support removal in mind and utilizing support structures only where necessary can streamline the manufacturing process and improve the overall surface quality.
Support removal strategies
Effective support removal strategies are crucial for achieving smooth curved surfaces. Manufacturers can employ various techniques to remove supports without causing damage or leaving visible marks on the part. This can include manual removal using tools like pliers or tweezers, utilizing breakaway supports that cleanly detach from the part, or employing soluble support materials that dissolve in specific solvents. The chosen support removal strategy should be based on the material compatibility, part geometry, and desired surface finish. Implementing efficient support removal processes is key to optimizing the production workflow and achieving high-quality curved surfaces.
Post-processing techniques for curved surfaces
Sanding and polishing
Post-processing techniques such as sanding and polishing can significantly improve the surface finish of curved parts. Sanding with increasingly finer grits helps to smooth out imperfections and visible layer lines, resulting in a more refined surface. Polishing further enhances the smoothness and shine of the part, giving it a professional and finished appearance. By carefully sanding and polishing curved surfaces, manufacturers can achieve the desired level of smoothness and eliminate any visual imperfections.
Chemical smoothing
Chemical smoothing is another post-processing technique that can be used to improve the surface finish of curved parts. This technique involves applying a chemical agent to the printed part, which melts and fuses the surface layers together, creating a smoother and homogeneous appearance. Chemical smoothing can effectively minimize or even eliminate the visibility of layer lines on curved surfaces. However, the compatibility between the material and the smoothing agent needs to be considered, as certain materials may not be suitable for chemical smoothing or may require specialized solutions.
Surface coatings and painting
Applying surface coatings or painting is a common post-processing technique used to enhance the surface finish of 3D printed parts. Coatings such as clear coats or lacquers can be used to provide a smooth and glossy finish to curved surfaces. Painting allows for customization and the incorporation of specific colors or designs. Both surface coatings and painting can effectively hide any imperfections, including layer lines, and provide a finished and aesthetically pleasing appearance. It is important to select appropriate coatings or paints that are compatible with the printed material and have the desired characteristics for the final product.
Design guidelines for improved curved surfaces
Aligning print parameters with curved geometry
Designing curved surfaces requires careful consideration of print parameters to ensure optimal surface finish. Parameters such as layer height, print speed, and infill density can impact the visibility of layer lines and the overall quality of the surface. Aligning these print parameters with the curved geometry can help minimize the appearance of layer lines and achieve a smoother surface. Conducting test prints and adjusting the print parameters based on the specific curvature and design requirements can lead to improved results and better surface finish.
Using fillets and chamfers
Utilizing fillets and chamfers in the design of curved surfaces can contribute to a smoother and more refined finish. Fillets are rounded edges that replace sharp corners, while chamfers are beveled edges that remove material along an edge. These design elements eliminate abrupt transitions between surfaces, allowing for better continuity and minimizing the visibility of layer lines. By incorporating fillets and chamfers strategically in the design, manufacturers can achieve a more aesthetically pleasing and harmonious curved surface.
Avoiding acute angles
When designing curved surfaces for 3D printing, it is important to avoid acute angles whenever possible. Acute angles can lead to overhangs and require support structures that may disrupt the surface finish. By designing with gentle and gradual transitions, the need for supports can be minimized or eliminated, resulting in a smoother and more consistent surface. Incorporating smooth curves and avoiding sharp angles not only improves the printability of the part but also enhances the overall surface finish.
Conclusion
Achieving smooth curved surfaces in 3D printed parts presents various challenges, including the visibility of layer lines, undesired appearance, and the trade-offs associated with increasing print resolution. However, by employing alternative design approaches, such as printing on its side, using flat edges or multiple facets, pixelating the part, or adding digital noise or textures, manufacturers can overcome these challenges and improve the surface finish. The selection of a suitable 3D printing technology, optimization of support structures, and implementation of effective post-processing techniques also play vital roles in achieving high-quality curved surfaces. By following design guidelines and considering the specific requirements of the application, manufacturers can create 3D printed parts with enhanced surface finish and meet the demands of mass production.
Maintain Your 3D Printer with these Tools

Polymaker PLA PRO Filament 1.75mm, Tough & High Rigidity Black PLA Filament 1.75mm 1kg Cardboard Spool - PolyLite PLA PRO 3D Printer Filament 1.75mm, Print with Most 3D Printers Using 3D Filament
$24.99 (as of March 6, 2025 16:28 GMT +00:00 - More infoProduct prices and availability are accurate as of the date/time indicated and are subject to change. Any price and availability information displayed on [relevant Amazon Site(s), as applicable] at the time of purchase will apply to the purchase of this product.)
BIQU CryoGrip Pro Glacier 257x257mm Panda Build Plate for Bambu-Lab P1S/P1P/X1C/X1E/A1 3D Printer Double Sided Upgrade Build Plate Removable Surface Platform
$29.99 (as of March 8, 2025 20:51 GMT +00:00 - More infoProduct prices and availability are accurate as of the date/time indicated and are subject to change. Any price and availability information displayed on [relevant Amazon Site(s), as applicable] at the time of purchase will apply to the purchase of this product.)
Revopoint 6 Pieces 3D Magnetic Dome Marker Kit for 3D Scanning, 3D Scanning Markers for 3D Scanners, 3D Tracking Dots for Preventing Tracking Loss and Enhance Accuracy, 3D Reference Point Marker
$39.00 (as of March 8, 2025 20:51 GMT +00:00 - More infoProduct prices and availability are accurate as of the date/time indicated and are subject to change. Any price and availability information displayed on [relevant Amazon Site(s), as applicable] at the time of purchase will apply to the purchase of this product.)
6.0mm 3D Scanning Markers for 3D Scanner, Accurate Tracking Dots, Reference Point Markers, and Diffuse Reflection for Precise Optical Tracking and 3D Scanning(200 Per Pack)
$6.99 (as of March 8, 2025 20:51 GMT +00:00 - More infoProduct prices and availability are accurate as of the date/time indicated and are subject to change. Any price and availability information displayed on [relevant Amazon Site(s), as applicable] at the time of purchase will apply to the purchase of this product.)