FLASHFORGE Adventurer 5M 3D Printer with Fully Auto Leveling, Max 600mm/s High Speed Printing, 280°C Direct Extruder with 3S Detachable Nozzle, Core XY All Metal Structure, Print Size 220x220x220mm
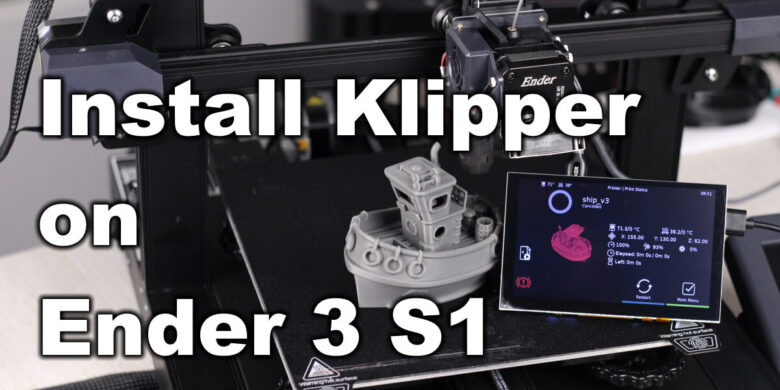
$279.00 (as of March 8, 2025 20:51 GMT +00:00 - More infoProduct prices and availability are accurate as of the date/time indicated and are subject to change. Any price and availability information displayed on [relevant Amazon Site(s), as applicable] at the time of purchase will apply to the purchase of this product.)Do you want to take your 3D printing game to the next level with your Creality Ender 3 S1? If so, installing Klipper can significantly enhance your printing experience, offering improved speeds and precision. In this guide, you’ll learn how to efficiently install Klipper firmware on your Ender 3 S1, using a step-by-step approach to make the entire process manageable and less daunting. But first, let’s start with a little background on Klipper and why you should consider making the switch.
Anycubic 3D Materials Sale: Resin & PLA from $9.49/kg
Introduction
Klipper, an open-source 3D printer firmware, can be a game-changer for your Creality Ender 3 S1. Recognized by enthusiasts and experts alike, this firmware enables superior print speeds and enhanced precision. Originally discussed by the 3D Print Beginner, this guide aims to help you navigate the installation process seamlessly.
What is Klipper?
Klipper is open-source firmware that works in conjunction with a Raspberry Pi and your printer’s mainboard. Unlike traditional firmware that runs exclusively on the printer’s hardware, Klipper uses the processing power of a Raspberry Pi to handle computational tasks. This setup allows for higher speeds and improved control of the printing process, combining the strengths of both pieces of hardware.
Why Install Klipper?
Installing Klipper on your printer offers several advantages. First and foremost, you’ll experience faster printing speeds compared to the stock firmware. Additionally, Klipper allows remote control of your 3D printer via Wi-Fi and a web interface. With advanced features like Pressure Advance and Input Shaper, you can achieve better print quality and reduced ghosting.
Prerequisites
Before we proceed, ensure you have the following items:
- Raspberry Pi: Any version will work, but newer models are more efficient.
- MainsailOS or FluiddPi: These are user-friendly software options for managing your printer through a web interface.
- Creality Ender 3 S1: Ensure it’s the stock version so the steps align perfectly.
- Quality Power Supply: The Raspberry Pi requires a stable power source.
- Type C Cable: Required to connect the Ender 3 S1 to the Raspberry Pi.
Anycubic 3D Materials Sale: Resin & PLA from $9.49/kg
Before You Begin
Installing Klipper isn’t a casual weekend project; it requires some experience with 3D printers and general hardware. This guide will walk you through every step, but please read through the entire guide before starting to familiarize yourself with the risks and tasks involved. Also, keep in mind that the stock touchscreen on the Ender 3 S1 will be disabled after this procedure. For better ease-of-use, it’s recommended to get a BIQU PI TFT50 touchscreen and KlipperScreen.
Software Installation
To start, you’ll need to install either MainsailOS or FluiddPi, which are popular choices for a web interface to control your Klipper setup. Both options are straightforward to install on your Raspberry Pi.
-
Download MainsailOS or FluiddPi:
- Visit the official websites to download the image file for MainsailOS or FluiddPi.
-
Flash the Image:
- Use a tool like Balena Etcher to write the image to your microSD card.
-
Initial Setup:
- Insert the microSD card into your Raspberry Pi.
- Connect your Raspberry Pi to your network via Ethernet or Wi-Fi.
-
Access Web Interface:
- Once connected, you can access the control interface via your web browser by entering the local IP address of your Raspberry Pi.
-
Install Klipper Using KIAUH:
- KIAUH (Klipper Installation And Update Helper) simplifies the installation and management of Klipper. Follow the instructions provided on the KIAUH GitHub page to install it.
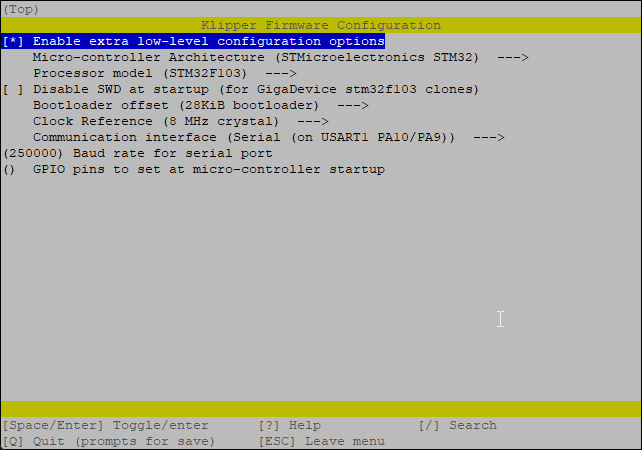
Firmware Preparation and Installation
Building and flashing the Klipper firmware onto your printer involves a series of specific steps.
-
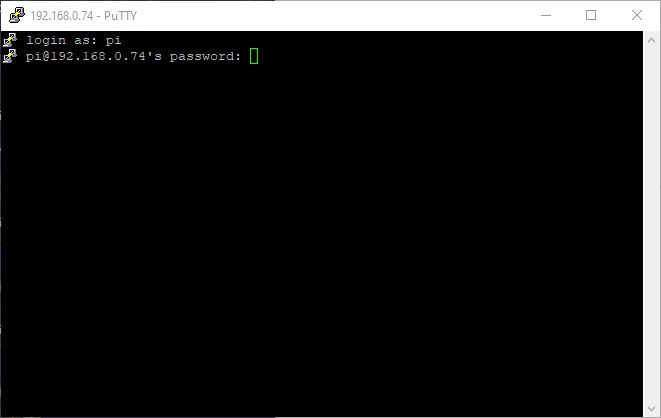
Access Raspberry Pi via SSH:
- Software like Putty can be used for this. Ensure you have the IP address of your Raspberry Pi.
-
Building Klipper:
- Once connected, follow the command-line prompts to build the Klipper firmware. You’ll need to specify configurations like your CPU type—typically STM32F401 or STM32F103 for the Ender 3 S1.
- The resulting firmware file will be saved on your Raspberry Pi.
-
Flash Firmware:
- Copy the compiled firmware file to an SD card.
- Insert the SD card into the Ender 3 S1 and reboot the printer to flash the new Klipper firmware.
Connecting Klipper
After successfully flashing the firmware, you’ll need to configure Klipper to communicate effectively with your 3D printer.
-
Copy Configuration File:
- Move or copy the Klipper configuration file to the appropriate directory on Mainsail.
-
Web Interface Setup:
- Access the Mainsail or Fluidd web interface to complete setting up the connection between Klipper and your printer.
- Follow the on-screen prompts to enter your printer’s specific settings and calibrations.
-
Calibration:
- Perform initial calibrations to ensure your printer is correctly tuned. This includes setting steps/mm for your motor, home offsets, and extruder steps/mm.
| Calibration Step | Description |
|---|---|
| X, Y, Z Steps/mm | Ensure each axis moves accurately. |
| Extruder Steps/mm | Calibrate filament extrusion amounts. |
| Home Offsets | Set accurate home positions. |

Reverting to Stock Firmware
If for any reason you want to switch back to the original firmware, the steps are straightforward.
-
Download Stock Firmware:
- Get the latest stock firmware from the Creality website.
-
Flash Stock Firmware:
- As with the Klipper firmware, copy the stock firmware file to an SD card and insert it into the Ender 3 S1.
- Reboot the printer to reset to stock firmware.
Extras
With your Klipper setup, you can now access additional resources to optimize your 3D printing experience.
-
Tuned IdeaMaker Profile:
- A specially tuned IdeaMaker profile for Klipper on the Ender 3 S1 is available. This profile enhances print quality and efficiency.
-
Community Support:
- Engage with the 3DPrintBeginner community if you run into any issues or have questions. Sharing experiences and solutions can be incredibly beneficial.
Conclusion
Installing Klipper on your Creality Ender 3 S1 can significantly elevate your 3D printing experience, giving you faster prints and more control. Should you have any questions or run into challenges, don’t hesitate to seek assistance through comments or the 3DPrintBeginner Forum. Supporting 3DPrintBeginner via Patreon can also provide you with exclusive benefits, ensuring you stay at the forefront of 3D printing advancements.
Anycubic 3D Materials Sale: Resin & PLA from $9.49/kg

3D Printer Tools Kit, 3D Printing Accessory with 55Pcs Includes Deburring Tool, Caliper, Art Knife Set, Tube Cutter, Storage Bag Suitable for 3D Print Removing, Cleaning
$39.99 (as of March 8, 2025 20:51 GMT +00:00 - More infoProduct prices and availability are accurate as of the date/time indicated and are subject to change. Any price and availability information displayed on [relevant Amazon Site(s), as applicable] at the time of purchase will apply to the purchase of this product.)
SUNLU Silk PLA Filament 1.75mm, Neatly Wound Shiny PLA 3D Printer Filament, Dimensional Accuracy +/- 0.02mm, Fit Most 3D Printers, Good Vacuum Packaging, 1kg Spool(2.2lbs), 330 Meters, Silky Gold
$19.99 (as of March 6, 2025 16:28 GMT +00:00 - More infoProduct prices and availability are accurate as of the date/time indicated and are subject to change. Any price and availability information displayed on [relevant Amazon Site(s), as applicable] at the time of purchase will apply to the purchase of this product.)
FLASHFORGE Adventurer 5M 3D Printer, 600mm/s High-Speed, 1 Click Fully Auto Leveling, Upgraded Direct extruder Quick Detachable 280°C Nozzle, Dual-Sided PEI Coating Plate, Print Size 220x220x220mm
$379.00 (as of March 8, 2025 20:51 GMT +00:00 - More infoProduct prices and availability are accurate as of the date/time indicated and are subject to change. Any price and availability information displayed on [relevant Amazon Site(s), as applicable] at the time of purchase will apply to the purchase of this product.)
12 Piece Multi-Angle Marker Set: 3D Scanner 6mm Dots, 3D Scanning Spray & 3D Scanner Turntable Compatible, Accurate Tracking Markers, 3D Tracking Dot Reference Point Markers for 3D Scanning
$34.99 (as of March 8, 2025 20:51 GMT +00:00 - More infoProduct prices and availability are accurate as of the date/time indicated and are subject to change. Any price and availability information displayed on [relevant Amazon Site(s), as applicable] at the time of purchase will apply to the purchase of this product.)