
Upgraded Tina2S 3D Printer, HEPHI3D 3D Printers WiFi Cloud Printing Auto Bed Leveling, Fully Assembled Mini 3D Printers for Beginners, Silent Print, Fully Open Source DIY 3D Printers for Home, School
$207.49 (as of June 4, 2025 21:32 GMT +00:00 - More infoProduct prices and availability are accurate as of the date/time indicated and are subject to change. Any price and availability information displayed on [relevant Amazon Site(s), as applicable] at the time of purchase will apply to the purchase of this product.)Hey there! If you’re looking to dip your toes into the world of 3D Printing, then this Ultimate Beginner’s Guide to 3D Printing with the Creality Ender 3 V2 is perfect for you. In this comprehensive video tutorial by Troy McMillan, you’ll learn everything you need to know about 3D printing using the Ender 3 V2 printer. From assembling the printer and adjusting belts to exploring different types of filaments and understanding the difference between STL and GCODE files, Troy covers it all. He’ll even guide you through installing Cura software, downloading STL files from Thingiverse, and achieving excellent bed adhesion and first layer. With step-by-step instructions and helpful tips, this guide is designed to make your 3D printing journey a breeze. So grab your popcorn, sit back, and get ready to discover the exciting world of 3D printing!
Ever wondered how to kickstart your 3D printing adventure? Look no further! In this fantastic video tutorial by Troy McMillan, the best entry-level 3D printing experience comes to life with the Creality Ender 3 V2 printer. Troy takes you on a journey from the very beginning, explaining how to assemble the printer and adjust its belts. He then dives into the fascinating world of filaments, covering everything from PLA to TPU. But that’s not all! Troy also delves into the intricacies of STL and GCODE files, shows you how to install Cura software, and teaches you how to download STL files from Thingiverse. From bed leveling techniques to achieving optimal bed adhesion and first layer, this beginner’s guide has got you covered. So sit tight and let Troy be your 3D printing guide – your creative possibilities await you!
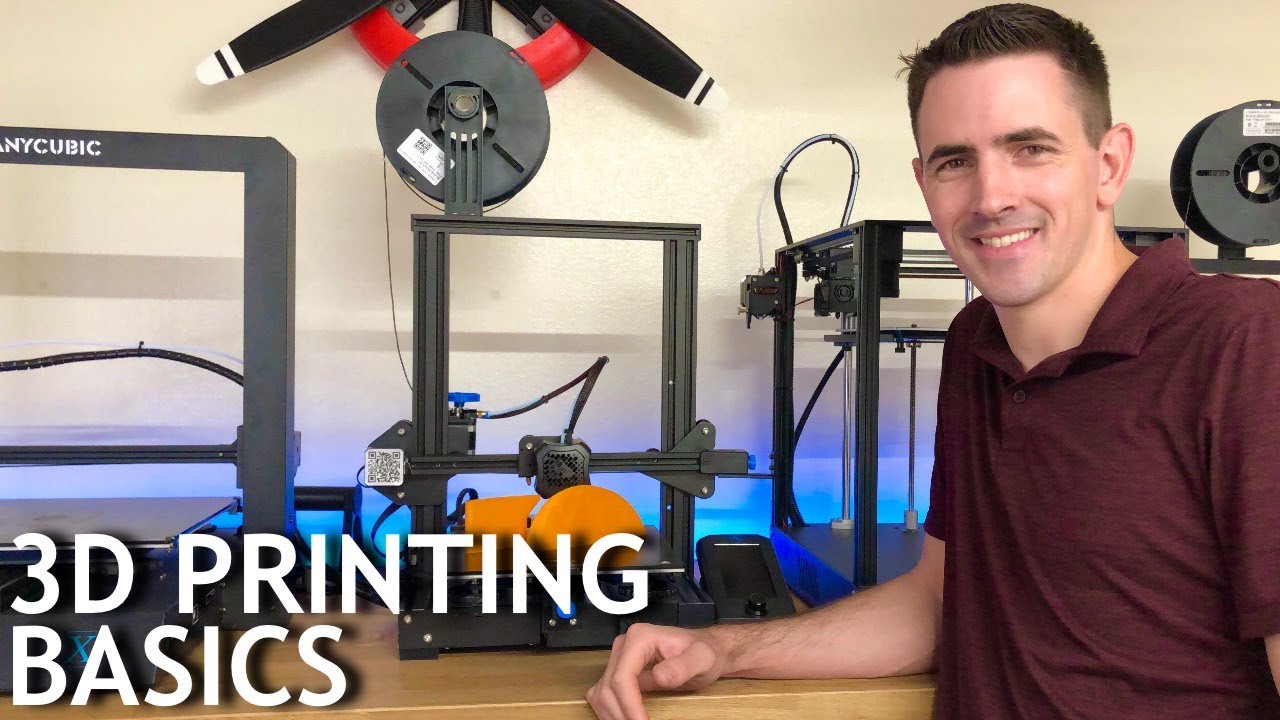
Assembling the Creality Ender 3 V2 Printer

Adjusting Belts
To ensure smooth and accurate movement of the printer components, it is important to adjust the belts properly. Locate the belts on the X-axis and Y-axis of the printer. Use the provided tools to loosen or tighten the belts until they are at the correct tension. This will prevent any skipping or slipping during the printing process.
Adding Screws and Nuts
The Creality Ender 3 V2 printer comes partially assembled, so you will need to add some screws and nuts to secure the different components. Follow the instructions in the user manual to identify the correct screws and nuts and their respective positions. Use a screwdriver or wrench to tighten them securely without over-tightening.
Attaching Extruder and Hotend
The extruder and hotend are crucial parts of the printer as they control the filament feed and melting process. Attach the extruder assembly to the designated mount on the printer frame. Ensure that it is securely fastened with screws. Next, connect the hotend to the extruder assembly. Make sure all connections are tight to avoid any filament leaks or clogs during printing.

This image is property of i.ytimg.com.

Connecting Wires
Proper wire connections are essential for the printer to function correctly. Identify the different wires coming from the printer components, such as the motors and sensors. Connect these wires to their corresponding connectors on the printer control board. Follow the color-coding or labeling on the wires to ensure accurate connections.
Mounting the Filament Holder
The filament holder is where the spool of filament is placed for feeding into the printer. Mount the filament holder on one side of the printer, ensuring that it is stable and secure. Make sure the filament can unwind smoothly from the spool without any obstructions. This will ensure a consistent filament feed during printing.
Understanding Different Types of Filaments
PLA Filament
PLA (Polylactic Acid) is one of the most popular filaments used in 3D printing. It is a biodegradable and environmentally-friendly material made from renewable resources such as corn starch or sugarcane. PLA filament is easy to print with, has a low melting temperature, and produces minimal odor during printing. It is a great choice for beginners and general-purpose prints.
This image is property of i.ytimg.com.
TPU Filament
TPU (Thermoplastic Polyurethane) filament is a flexible and elastic material commonly used for printing objects that require stretchability or impact resistance. TPU filament is more challenging to print with compared to PLA, as it requires specific printer settings and a direct drive extruder. It is commonly used for printing phone cases, shoe soles, and other flexible objects.
Lightweight PLA Filament
Lightweight PLA filament is a variant of regular PLA filament. It is formulated to have a lower density, resulting in lighter prints. Lightweight PLA is suitable for objects that need to be lightweight, such as models and drones. It retains the ease of printing and environmentally friendly properties of regular PLA.
Pros and Cons of Each Filament Type
- PLA: Pros – Easy to print with, biodegradable, minimal odor. Cons – Less heat resistance compared to other filaments, can be brittle.
- TPU: Pros – Highly flexible, impact-resistant, suitable for specialized applications. Cons – More challenging to print with, requires specific printer settings.
- Lightweight PLA: Pros – Lightweight, retains ease of printing with PLA. Cons – Limited heat resistance, may not be suitable for certain applications.
Difference Between STL and GCODE Files

This image is property of i.ytimg.com.
Definition of STL File
STL (Standard Tessellation Language) is the most common file format used for 3D printing. It represents the 3D model as a series of triangles, defining the shape and surface geometry of the object. STL files are typically created using 3D modeling software or downloaded from online repositories. However, STL files cannot be directly printed on a 3D printer.
Definition of GCODE File
GCODE is the language understood by 3D Printers. It consists of a series of commands that instruct the printer on how to move, extrude filament, and build the object layer by layer. GCODE files are generated from the original STL files using a slicer software, which converts the 3D model into a set of instructions specific to the printer.
Converting STL to GCODE Files
To convert an STL file to a GCODE file, you need to use a slicing software such as Cura. Import the STL file into the software, adjust the print settings according to your preferences, and generate the GCODE file. The slicing software will analyze the 3D model, divide it into layers, and generate the necessary instructions for the printer to build the object.
Installing Cura Software

This image is property of www.creality3dofficial.com.
Downloading Cura from Ultimaker’s Website
To install Cura, visit the official Ultimaker website and navigate to the Cura download page. Choose the appropriate version for your operating system and click on the download link. Once the download is complete, run the installer and follow the on-screen instructions to install Cura on your computer.
Setting Up Cura Software
After installing Cura, launch the software. You will be prompted to select your printer model. Choose “Creality Ender 3 V2” from the list of available printers. Then, you can customize the printer settings, such as print bed dimensions and nozzle size, if needed. Once the setup is complete, Cura is ready to use.
Adding Creality Ender 3 V2 Printer to Cura
To add the Creality Ender 3 V2 printer to Cura, connect the printer to your computer using a USB cable or through a network connection if supported. Open Cura and navigate to the printer settings. Click on “Add Printer” and select “Creality Ender 3 V2” from the list. Follow any additional prompts to establish the connection between Cura and the printer.
Downloading STL Files from Thingiverse

This image is property of i.ytimg.com.
Introduction to Thingiverse
Thingiverse is a popular online platform for sharing and downloading 3D printable models. It hosts a vast collection of STL files created by the 3D printing community. To access Thingiverse, visit their website and create an account, if necessary. You can search for specific models, explore different categories, and even contribute your own designs.
Searching, Selecting, and Downloading STL Files
To find and download STL files from Thingiverse, use the search bar to enter keywords related to the model you are looking for. Browse through the search results and click on a model that interests you. On the model’s page, you can view details, comments, and images related to the design. If you decide to download the model, click on the “Download All Files” button.
Organizing Downloaded STL Files
It is essential to keep your downloaded STL files organized for easy access. Create a dedicated folder on your computer or external storage device where you can store all your downloaded STL files. You can further organize them into sub-folders based on categories or projects. This will help you quickly locate the model you want to print when needed.
Leveling the Printer Bed
Preparing the Printer Bed
Before leveling the bed, make sure the printer is turned on and preheated to the desired temperature for the filament you will be using. Clean the printer bed surface using isopropyl alcohol or a similar cleaning agent to remove any dust, debris, or fingerprints. This will ensure proper adhesion of the printed object to the bed.
Using Manual or Automatic Bed Leveling
The Creality Ender 3 V2 printer offers both manual and automatic bed leveling options. Manual bed leveling involves adjusting the wheels or knobs underneath the bed to achieve a level surface. Automatic bed leveling uses a built-in sensor that probes different points on the bed and adjusts the nozzle height accordingly. Follow the user manual instructions for the specific bed leveling method you prefer.
Performing Bed Leveling Process
To level the bed manually, navigate to the printer settings on the control interface and select the bed leveling option. Follow the on-screen instructions to adjust the wheels or knobs until the nozzle is at the correct height above the bed. Alternatively, for automatic bed leveling, choose the corresponding option from the control interface and let the printer perform the leveling process automatically.
Loading a New Filament
Preparing the Filament
Before loading a new filament, ensure that the printer is turned on and preheated to the temperature recommended for the specific filament type. Cut the end of the filament at a clean angle to facilitate smooth feeding into the printer’s extruder. Remove any remnants of the previous filament from the extruder, if necessary.
Inserting and Feeding the Filament
Locate the filament feed port on the printer’s extruder assembly. Gently insert the filament into the port until you feel resistance or until it reaches the hotend. Use the printer’s control interface or software to engage the filament feed mechanism. The printer will begin pulling the filament into the extruder and hotend. Observe the filament movement to ensure it is feeding properly.
Ensuring Proper Feed and Tightening
While the filament is feeding into the extruder, make sure it does not encounter any obstacles or get stuck. Monitor the filament path to ensure it is entering the extruder smoothly and through the proper channels. Check that the extruder gear is gripping the filament and pulling it without slipping. If necessary, adjust the tension on the extruder gear to ensure a secure grip.
Cutting Excess Filament
Once the filament is fed and flowing smoothly through the extruder, you can cut off any excess filament protruding from the extruder assembly. Use a pair of wire cutters or similar tools to make a clean cut as close to the extruder entrance as possible. This will prevent any interference or tangling of the filament during the printing process.
Achieving Good Bed Adhesion and First Layer
Options for Bed Adhesion
Proper bed adhesion is crucial for successful 3D printing. There are several methods you can use to improve bed adhesion:
-
Clean the Bed with Alcohol: Before each print, clean the bed surface with isopropyl alcohol or a similar cleaning agent. This will remove any oils, dust, or debris that could hinder adhesion.
-
Applying Hairspray or Glue Sticks: Another option is to apply a thin layer of hairspray or glue stick to the bed surface before printing. This provides additional adhesion for the first layer.
Monitoring First Layer Adhesion
During the printing process, pay close attention to the adhesion of the first layer. Observe the initial lines being printed and ensure they are sticking firmly to the bed without any lifting or warping. If you notice any issues, such as poor adhesion or uneven lines, it may be necessary to adjust the bed leveling or try a different bed adhesion method.
Specific Print Settings for PLA Filament
Adjusting Quality, Infill, and Speed Settings
When preparing to print with PLA filament, it is essential to adjust various print settings to achieve the desired print quality. In your slicing software, you can customize settings such as layer height, wall thickness, infill density, and print speed. Experiment with different settings to find the balance between print quality and speed that works best for your specific model.
Setting Temperature for PLA Filament
PLA filament typically requires a nozzle temperature of around 200-220 degrees Celsius and a heated bed temperature of around 50-60 degrees Celsius. However, these temperatures may vary depending on the specific PLA brand or filament characteristics. Consult the manufacturer’s recommendations or conduct some test prints to determine the ideal temperature settings for your PLA filament.
Conclusion
Congratulations! You have successfully assembled your Creality Ender 3 V2 printer and learned about various aspects of 3D printing, including adjusting belts, understanding different filaments, working with STL and GCODE files, installing Cura software, downloading STL files from Thingiverse, leveling the printer bed, loading filament, achieving good bed adhesion, and specific print settings for PLA filament. With this newfound knowledge, you are ready to unleash your creativity and bring your digital designs to life through 3D printing. Enjoy your printing journey and explore the endless possibilities that this exciting technology has to offer!
Using the best entry level 3D Printer, the Creality Ender3, I will show you step by step how to start your first print, level the bed, and provide information about different filaments available for your printer.
Propeller Wall Art: link
Spool Holder STL: link
Links to purchase printer:
- Creality 3D Ender 3 V2: link
Thank you so much for watching!
If you like videos like this, consider buying me a coffee, as it really supports me: link
See what else I am working on: link
Airplane STL files:
Basic supplies:
- Spektrum DX6 Controller: link
- Spektrum NX10 Controller: link
- Receiver: link
- Battery Charger: link
- CA Glue: link
- Onboard Camera: link
- Soldering Iron: link
——–Print Settings———–
*These are the settings I used for my Creality Ender 3 V2 3D Printer with PLA. These settings may not work with every printer or every PLA since printers have different length bodin tubes and PLA’s have different melting points. However, they should give you a good base to start with if you have a similar size printer. Good luck!
———Pliers
STL: link
Cura Settings:
Quality:
- Layer Height – 0.16
- Line Width – 0.4
Walls:
- Wall Line Count – 3
Top/Bottom:
- Top Layers: 4
- Bottom Layers: 4
Infill:
- Infill Density – 20
- Infill Pattern – Grid
Material:
- Printing Temperature – 215
- Build Plate Temperature – 60
- Flow – 100
Speed:
- Print Speed – 100
- Outer Wall Speed – 50
- Inner Wall Speed – 50
- Travel Speed – 100
Travel:
- Enable Retraction – Checked
- Retraction Distance – 7.5
- Retraction Speed – 35
- Retraction Extra Prime Amount – 0
- Combing Mode – all
- Avoid Printed Parts When Traveling – NOT Checked
Cooling:
- Enable Print Cooling – Checked
- Fan Speed – 100
Mesh Fixes:
- Union Overlapping Volumes – Checked
Special Modes:
- Surface Mode – Normal
Experimental:
- Slicing Tolerance – Middle
———Planeprint Profile 3
Test Wing STL: link
Cura Settings:
Quality:
- Layer Height – 0.25
- Line Width – 0.4
Walls:
- Wall Line Count – 1
Top/Bottom:
- Top Layers: 0
- Bottom Layers: 0
Infill:
- Infill Density – 0
Material:
- Printing Temperature – 215
- Build Plate Temperature – 60
- Flow – 100
Speed:
- Print Speed – 100
- Outer Wall Speed – 50
- Inner Wall Speed – 50
- Travel Speed – 100
Travel:
- Enable Retraction – Checked
- Retraction Distance – 7.5
- Retraction Speed – 35
- Retraction Extra Prime Amount – 0
- Combing Mode – all
- Avoid Printed Parts When Traveling – NOT Checked
Cooling:
- Enable Print Cooling – Checked
- Fan Speed – 30
Mesh Fixes:
- Union Overlapping Volumes – NOT Checked
Special Modes:
- Surface Mode – Surface
Experimental:
- Slicing Tolerance – Middle
——-TPU Settings
Cura Settings:
Quality:
- Layer Height – 0.25
- Line Width – 0.4
Walls:
- Wall Line Count – 2
Top/Bottom:
- Top Layers: 4
- Bottom Layers: 4
Infill:
- Infill Density – 10
- Infill Pattern – Grid
Material:
- Printing Temperature – 210
- Build Plate Temperature – 60
- Flow – 100
Speed:
- Print Speed – 100
- Outer Wall Speed – 20
- Inner Wall Speed – 20
- Travel Speed – 100
Travel:
- Enable Retraction – Checked
- Retraction Distance – 7.5
- Retraction Speed – 35
- Retraction Extra Prime Amount – 0
- Combing Mode – all
- Avoid Printed Parts When Traveling – NOT Checked
Cooling:
- Enable Print Cooling – Checked
- Fan Speed – 100
Mesh Fixes:
- Union Overlapping Volumes – Checked
Special Modes:
- Surface Mode – Normal
Experimental:
- Slicing Tolerance – Middle
Disclaimer: I am sponsored by some of the products I mention. However, all of my opinions are my own. Some of the above links are affiliate links, which do not affect the price you pay for a product, but I may receive a small commission if you make a purchase. This helps support my channel and allows me to continue making videos like this. Thank you for your support!


ELEGOO PLA+ Filament 1.75mm White 1KG, High Toughness PLA Plus 3D Printer Filament Dimensional Accuracy +/- 0.02mm, 1kg Spool(2.2lbs) for Most FDM 3D Printers
$14.99 (as of June 5, 2025 21:38 GMT +00:00 - More infoProduct prices and availability are accurate as of the date/time indicated and are subject to change. Any price and availability information displayed on [relevant Amazon Site(s), as applicable] at the time of purchase will apply to the purchase of this product.)
SuperFilter 100 pcs, Disposable Filter, 3D Printer Resin and Paint Strainer, Made in Korea by 3DMaterials
$11.98 (as of June 5, 2025 21:38 GMT +00:00 - More infoProduct prices and availability are accurate as of the date/time indicated and are subject to change. Any price and availability information displayed on [relevant Amazon Site(s), as applicable] at the time of purchase will apply to the purchase of this product.)
Bambu Lab A1 Mini 3D Printer, Support Multi-Color 3D Printing, Set Up in 20 Mins, High Speed & Precision, Full-Auto Calibration & Active Flow Rate Compensation, ≤48 dB Quiet FDM 3D Printers
$399.00 (as of June 4, 2025 21:32 GMT +00:00 - More infoProduct prices and availability are accurate as of the date/time indicated and are subject to change. Any price and availability information displayed on [relevant Amazon Site(s), as applicable] at the time of purchase will apply to the purchase of this product.)
ANYCUBIC Photon Mono 4, Resin 3D Printer with 7'' 10K Mono LCD Screen, Stable LighTurbo Light Source and 70mm/h Fast Printing, Print Volume 6.04'' x 3.42'' x 6.49''
$159.99 (as of June 4, 2025 21:32 GMT +00:00 - More infoProduct prices and availability are accurate as of the date/time indicated and are subject to change. Any price and availability information displayed on [relevant Amazon Site(s), as applicable] at the time of purchase will apply to the purchase of this product.)