What’s the best way to create a grip that’s both functional and aesthetically pleasing for your 3D printed creations?
Anycubic Coupon – $5 off $50+ sitewide with code DIY5OFF
Understanding the Problem
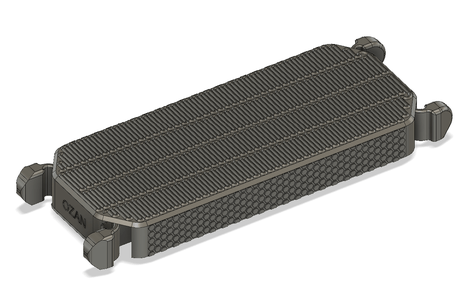
When designing a guitar footstep, you want to create a top surface with strong friction and a clean look. Initially, you might try using a standard honeycomb extrusion pattern, but this approach can lead to poor surface aesthetics and printing issues. The nozzle struggles to follow the pattern cleanly, resulting in a rough top surface. You can see the result in the picture above, which shows the old pattern.
The issue lies in how 3D printers handle different types of patterns. When printing the sides, the toolhead can move slightly outside or inside the pattern on each layer, which allows for a more consistent print. However, at the top, especially with intricate patterns like honeycomb, this movement can cause issues like poor adhesion and warping because the nozzle overlaps with already printed areas more frequently.
Why Standard Patterns Don’t Work
Standard patterns like hexagons don’t provide the optimal surface friction for a 3D printed part and often result in poor aesthetics or even failed prints. This is because the toolhead doesn’t simply start and finish the pattern in one go. Instead, it prints the pattern piece by piece, often traveling along previously printed sides, which creates inconsistencies as the toolhead goes over already printed areas, causing warping at the edges. Additionally, there’s an over-extrusion issue due to the filament used.
Anycubic Coupon – $5 off $50+ sitewide with code DIY5OFF
Solutions
After identifying the issues with the honeycomb pattern, you need a solution that will provide a clean, friction-enhancing surface without causing printing problems. One approach is to use infill for the top surfaces while clearing the top solid layers in the slicer. You can use infill patterns like Aligned Rectilinear, 3D Honeycomb, Gyroid, or Hilbert Curve (available in PrusaSlicer) since they offer continuous extrusion.
| Infill Pattern | Description |
|---|---|
| Aligned Rectilinear | A pattern of aligned rectangles that provides a clean and simple texture. |
| 3D Honeycomb | A 3D version of the honeycomb pattern that provides a more complex texture. |
| Gyroid | A pattern that resembles a gyroid, a three-dimensional structure that provides a unique texture. |
| Hilbert Curve | A pattern that follows a Hilbert curve, a continuous curve that fills a two-dimensional space. |
However, this method has its downsides. Although it reduces print time and material usage, the result often lacks the cohesive texture you’re looking for. If you’re looking for a pattern for aesthetic purposes or to add friction to a flat surface, infill patterns on slicers work fine. However, a pattern made from single layers wouldn’t have the necessary strength to support a footstep.
Creating a Custom Friction Pattern
Since you want an extruded pattern, your solution is to create a continuous circular pattern. This allows you to maintain the friction properties you need while avoiding the printing issues associated with the honeycomb pattern. A continuous circular pattern ensures that the toolhead follows a smooth path without unnecessary travel along printed areas, minimizing the risk of warping and over-extrusion.
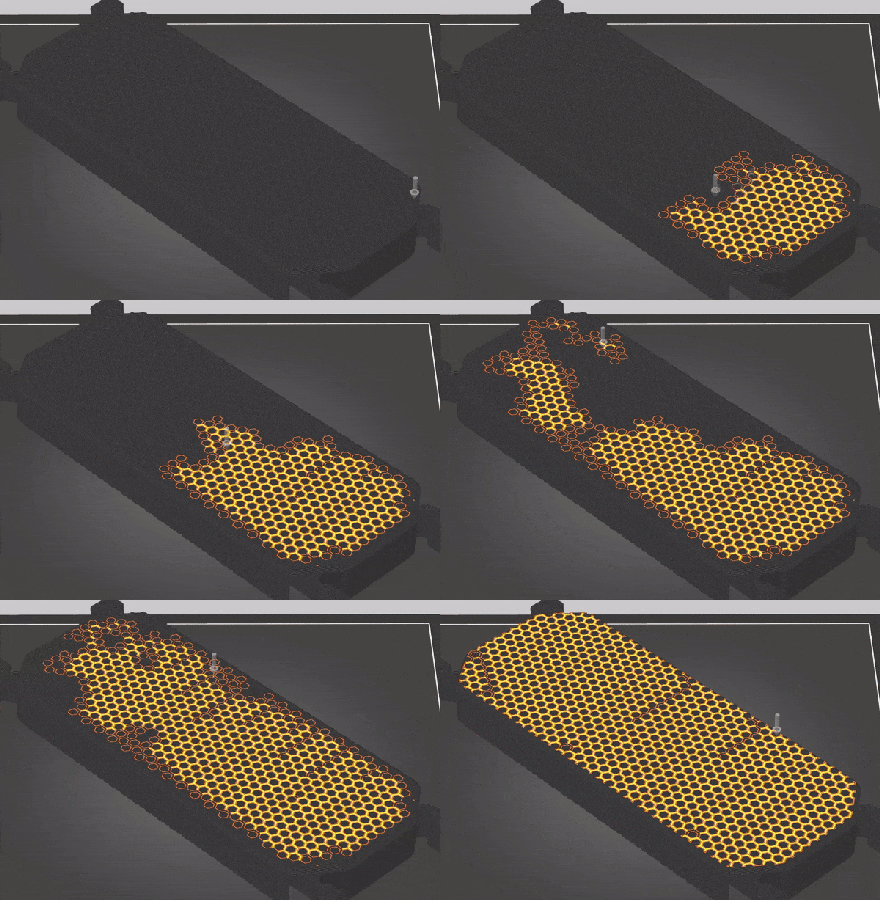
Sketch to Solid Model
After a bit of brainstorming, it’s time to model the pattern! You’ll be using Fusion 360 for the CAD work, but feel free to use any CAD software you’re comfortable with that has a good sketching feature. First, clear any previous design on the top surface to start fresh.
One of the general concerns is ensuring enough friction for both side-to-side and front-back movements, so a pattern needs to be designed that blocks both actions. After adding enough layers for friction and thickness, connect all the layers, leaving only the start and end separate. It’s also important to respect the frame of the part while sketching the pattern, as you don’t want it to overflow.
| Design Considerations | Description |
|---|---|
| Friction | Ensure enough friction for both side-to-side and front-back movements. |
| Thickness | Add enough layers for friction and thickness. |
| Frame | Respect the frame of the part while sketching the pattern. |
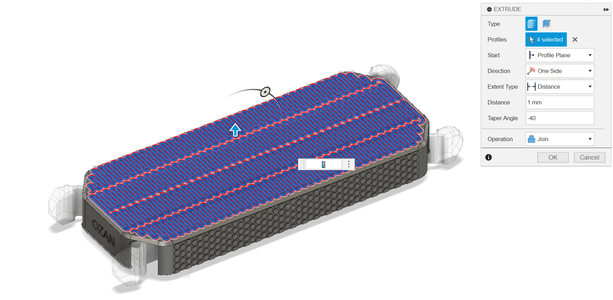
You can get an idea from the crowded sketch if you want to design for your own applications. Once the basic sketch is ready, extrude it with a -40-degree taper angle. This taper ensures the pattern sharpens nicely, giving it better grip and a more defined texture. The angled extrusion also helps the toolhead print each layer cleanly, resulting in a solid, consistent pattern.
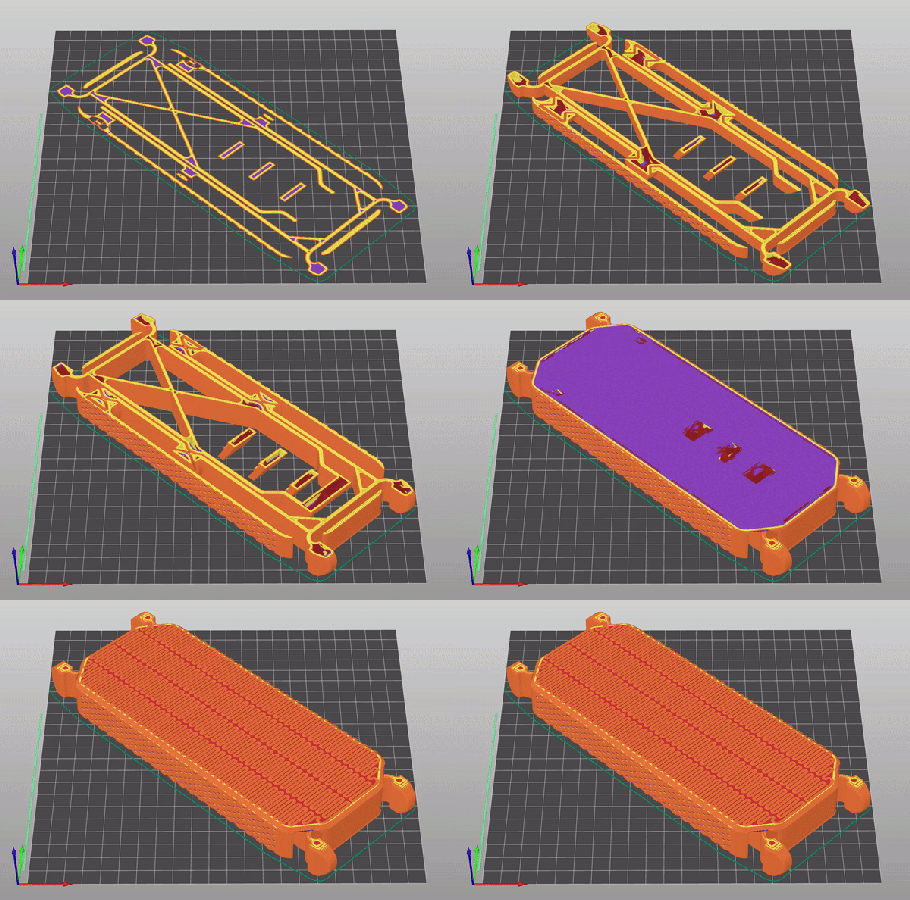
Slicing Control
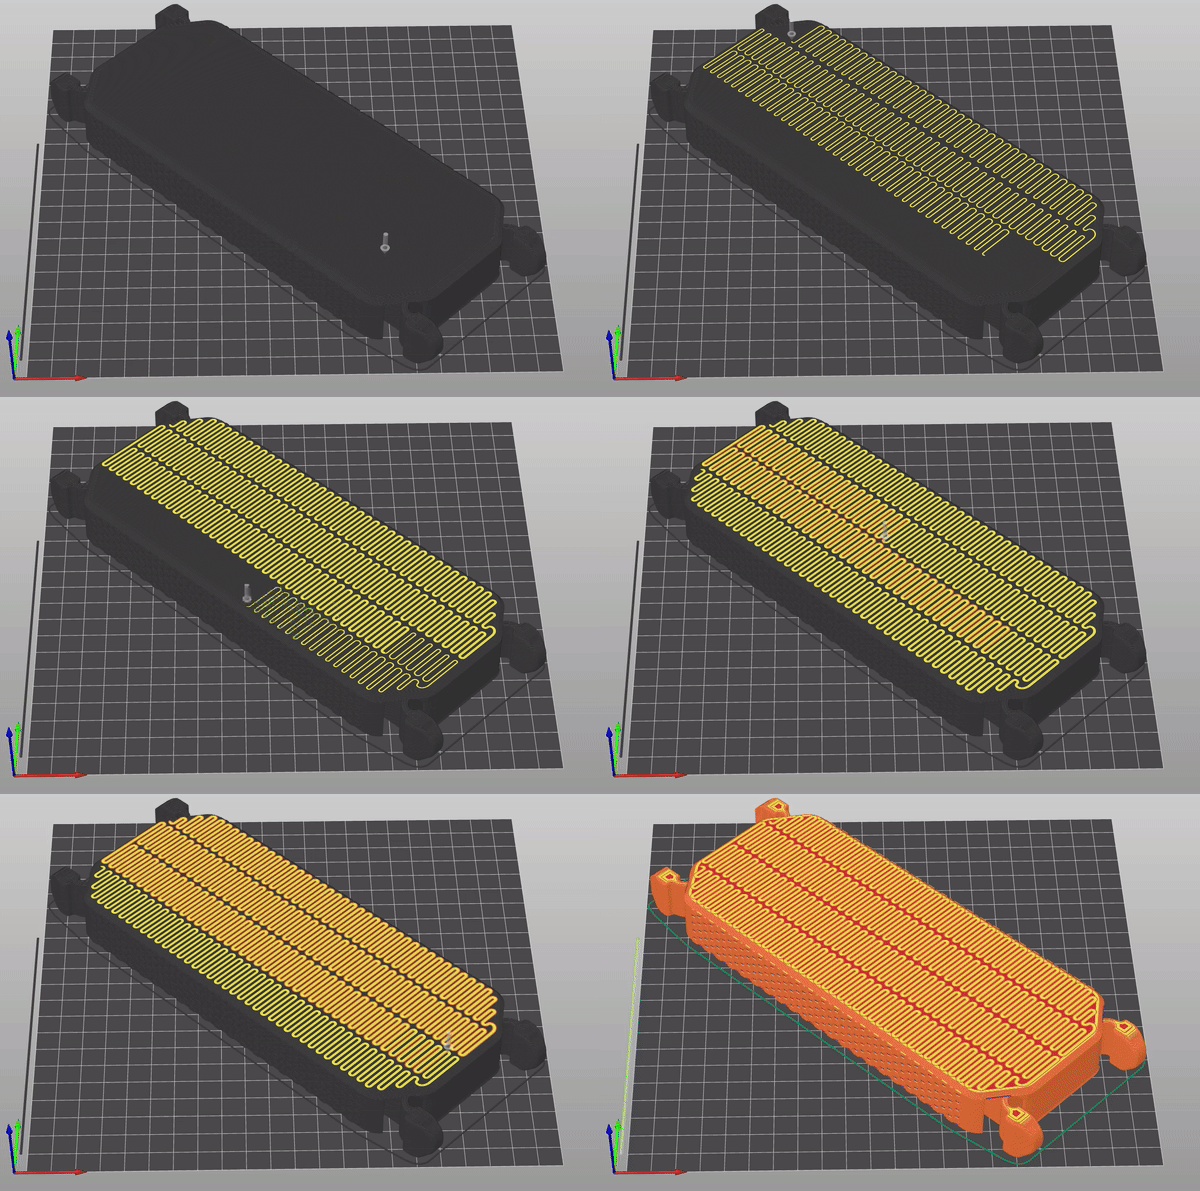
Don’t forget to check your prints in the slicer before printing to prevent any failures. You can also see how beautifully the continuous pattern prints without skipping.
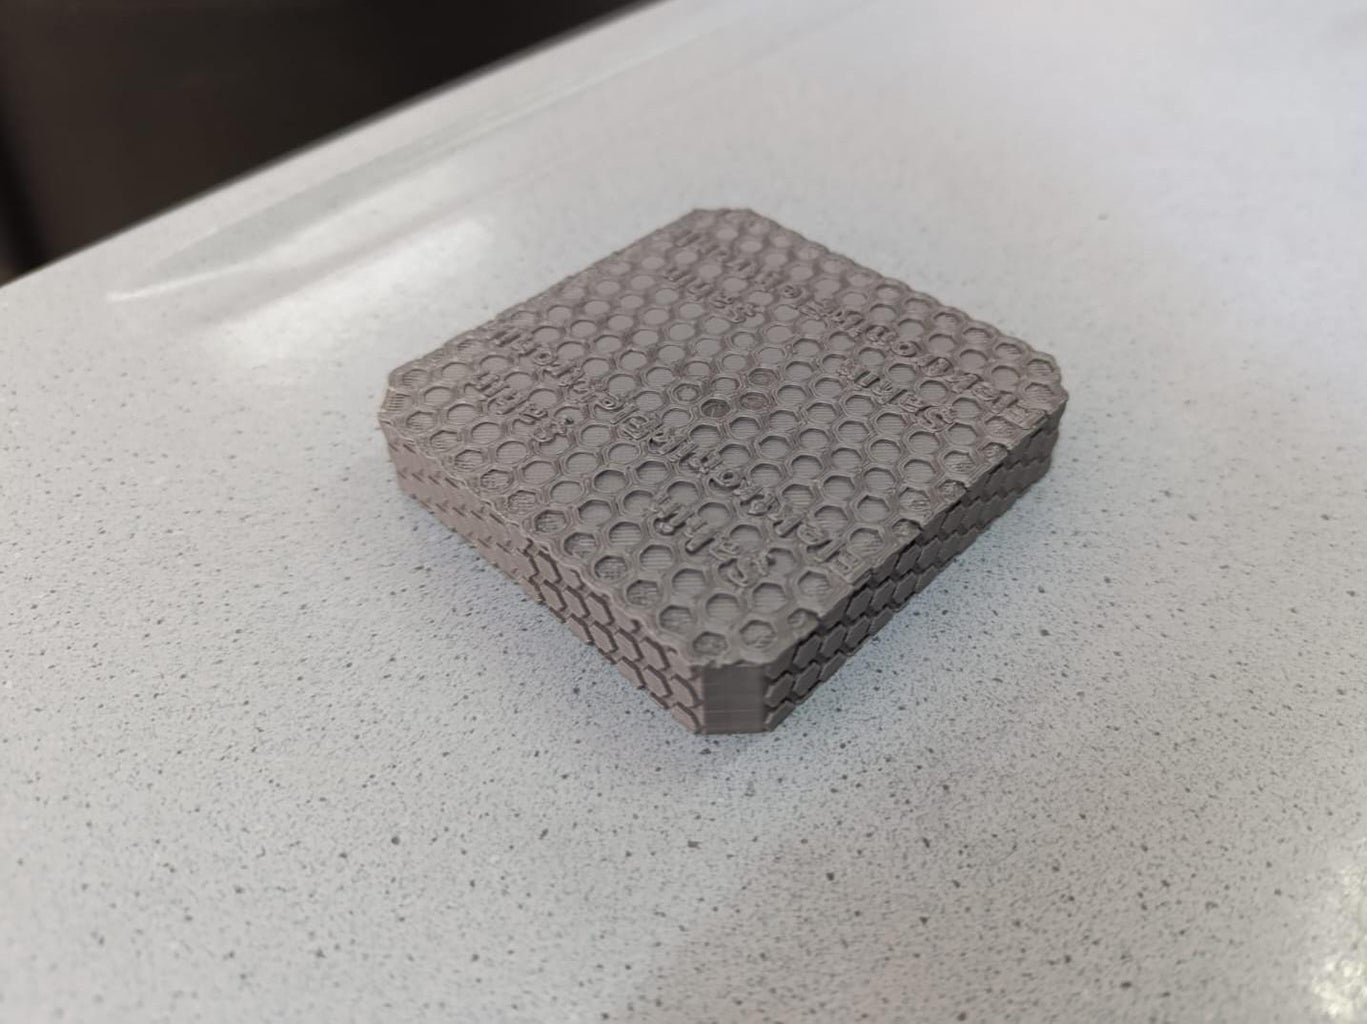
Print & Use!
After slicer control, you are free to print the part! If you’re interested in printing guitar accessories for yourself, you can find the “OZAN Guitar Footstep” design on MakerWorld, along with other functional models for 3D printing.
| Resources | Description |
|---|---|
| MakerWorld profile | Find the “OZAN Guitar Footstep” design and other functional models for 3D printing. |
| Free Files of Guitar Footstep | Download the free files for the guitar footstep design. |
By following these steps, you can create a custom friction pattern that provides a clean, friction-enhancing surface without causing printing problems. Remember to design your pattern with enough friction for both side-to-side and front-back movements, and respect the frame of the part while sketching the pattern. Happy printing!
Anycubic Coupon – $5 off $50+ sitewide with code DIY5OFF
