FLASHFORGE Adventurer 5M 3D Printer,600mm/s Max High-Speed FDM 3D Printers with Fully Auto Leveling, 280°C Direct Extruder with Quick Detachable Nozzle, Effective Cooling, Core XY Structure
$259.00 (as of June 18, 2025 23:32 GMT +00:00 - More infoProduct prices and availability are accurate as of the date/time indicated and are subject to change. Any price and availability information displayed on [relevant Amazon Site(s), as applicable] at the time of purchase will apply to the purchase of this product.)Are you ready to take your laser engraving skills to the next level by mastering the art of inlays? Inlays are a sophisticated technique used to add depth, contrast, and elegance to your laser projects. With the right tools and a bit of practice, you can achieve professional-looking results that will make your projects stand out.
What are Inlays in Laser Engraving?
Inlays involve embedding one material into another to create intricate designs with a seamless finish. The process typically begins with a laser precisely engraving or cutting a cavity into the base material, such as wood or metal. A contrasting material, like another type of wood, resin, metal, or acrylic, is then cut to perfectly fit the cavity. The inlay is secured with adhesive and finished to create a smooth, polished surface.
Materials and Tools Needed for Inlays
To get started with inlays, you’ll need a few essential materials and tools. These include:
- A laser engraver (such as the Creality Falcon 2 Pro)
- Wood veneer sheets
- Various wood pieces
- Calipers (to measure veneer thickness)
- Aluminum tape (any width)
- Wood glue
- Stain
- Clearcoat
- Sandpaper (various grits)
- Clamps
All of these materials can be easily found on Amazon or at major home improvement stores.
Performing an Engraving Test
Before starting your inlay, it’s essential to test the engraving depth. This ensures the depth accommodates the veneer and leaves enough space for glue. To perform an engraving test, follow these steps:
- Create a material test grid using the built-in material test feature in LightBurn.
- Adjust the settings to specify the starting and ending speeds and power levels.
- Run the test and examine the engraved squares to find the ideal depth.
Engraving the Base Material
Once you’ve established the settings, engrave the base material where the inlay will sit. Use an image that can be inverted for the veneer, such as a mandala pattern or a simple design. Ensure the image has a background so the inverted design leaves the correct pieces for the inlay.

$30 off $400+ Anycubic Products with code AC30OFF
Preparing and Engraving the Veneer
Preparing and engraving the veneer is a crucial step in the inlay process.
- Cut the veneer to the required size.
- Apply aluminum tape to the back of the veneer, using a roller to smooth the tape and ensure it’s firmly attached.
- Secure the edges of the veneer to prevent curling during engraving.
- Engrave the veneer using the settings recommended for the specific veneer material.
Assembling the Inlay
Assembling the inlay requires patience and attention to detail.
- Apply wood glue evenly over the engraved area of the base material or the back of the inlay.
- Position the inlay pieces with the engraved areas, pressing firmly to ensure all pieces are flush and smooth.
- Clamp and dry the inlay for at least 24 hours.
Tips for Achieving the Perfect Inlay
- Use high-quality materials to ensure a smooth, polished finish.
- Measure and test the veneer thickness to ensure a proper fit.
- Apply even pressure when clamping the inlay to prevent air bubbles or gaps.
- Allow the glue to dry fully before handling the inlay.
Finishing Touches and Result
Once the inlay is dry, apply a finish to protect the wood and enhance the color. A clearcoat or stain can be used to bring out the natural beauty of the wood.
Conclusion
Creating inlays is a rewarding and challenging process that requires patience, attention to detail, and practice. With the right tools and materials, you can achieve professional-looking results that will take your laser engraving skills to the next level.

Buy Photon Mono M5 Get Free 1KG Resin
Recommended Products for Inlays
| Product | Description |
|---|---|
| Creality Falcon 2 Pro | A powerful and precise laser engraver ideal for inlays. |
| Wood Veneer Sheets | High-quality wood veneer sheets in various thicknesses and materials. |
| LightBurn Software | A user-friendly software for preparing and sending designs to your laser engraver. |
| Calipers | Accurate calipers for measuring veneer thickness. |
| Aluminum Tape | Durable aluminum tape for securing veneer edges. |
| Wood Glue | High-quality wood glue for a strong and lasting bond. |

Additional Resources
- Laser Engraving Safety Guidelines: A comprehensive guide to laser engraving safety and best practices.
- Wood Veneer Thickness Guide: A helpful guide to understanding wood veneer thickness and its importance in inlays.
- Inlay Design Inspiration: A collection of inspiring inlay designs and ideas for your next project.
$30 off $400+ Anycubic Products with code AC30OFF

PETG Filament 1.75mm 2025 Upgrade Spool Compatible with Bambulab Refill Filament, 2kg(4.4lbs) SUNLU PETG 3D Printer Filament, 1.75mm Dimensional Accuracy +/- 0.02mm, Black+Black Bundle
$22.99 (as of June 18, 2025 23:32 GMT +00:00 - More infoProduct prices and availability are accurate as of the date/time indicated and are subject to change. Any price and availability information displayed on [relevant Amazon Site(s), as applicable] at the time of purchase will apply to the purchase of this product.)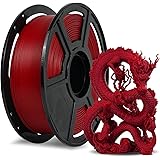
FLASHFORGE Rapid PLA Filament 1.75mm Ruby Red, 500mm/s High Speed Printing, 3D Printer Filament 1kg Spool, Dimensional Accuracy +/- 0.02mm, Enjoy Exceptional Print Quality
$23.99 (as of June 18, 2025 23:32 GMT +00:00 - More infoProduct prices and availability are accurate as of the date/time indicated and are subject to change. Any price and availability information displayed on [relevant Amazon Site(s), as applicable] at the time of purchase will apply to the purchase of this product.)
Revopoint 28 Pieces 3D Marker Block Kit for 3D Scanning, 3D Scanning Markers for 3D Scanners, 3D Tracking Dots for Preventing Tracking Loss and Enhance Accuracy, Magnetic 3D Reference Point Marker
$220.00 (as of June 18, 2025 23:32 GMT +00:00 - More infoProduct prices and availability are accurate as of the date/time indicated and are subject to change. Any price and availability information displayed on [relevant Amazon Site(s), as applicable] at the time of purchase will apply to the purchase of this product.)
Anycubic Kobra S1 Combo 3D Printer, Multi-Color 3D Printer High Speed Max 600mm/s High Precision, Core XY Stable Structure Ultra-Quiet Printing Anycubic App One-Click Printing 250 * 250 * 250mm
$599.99 (as of June 18, 2025 23:32 GMT +00:00 - More infoProduct prices and availability are accurate as of the date/time indicated and are subject to change. Any price and availability information displayed on [relevant Amazon Site(s), as applicable] at the time of purchase will apply to the purchase of this product.)