
ELEGOO Saturn 4 Ultra 12K Resin 3D Printer, with Smart Automatic Leveling, 10-Inch 12K Monochrome LCD, 150mm/h Faster Printing Speed,8.62x4.84x8.66 Inch Printing Size
$593.99 (as of March 8, 2025 20:51 GMT +00:00 - More infoProduct prices and availability are accurate as of the date/time indicated and are subject to change. Any price and availability information displayed on [relevant Amazon Site(s), as applicable] at the time of purchase will apply to the purchase of this product.)Are you ready to embark on a creative journey, one that will take you to the intersection of art and technology? Do you want to learn how to create a stunning masquerade mask, with intricate filigree details and a splash of vibrant colors?
Anycubic Coupon – $5 off $50+ sitewide with code DIY5OFF
The Inspiration Behind the Project
As the author of this project, Penolopy Bulnick, recalls, the idea for this masquerade mask came from her previous experience with elastic masquerade masks. She wanted to experiment with Hueforge, a tool that allows you to create complex designs with multiple colors. After generating an image using Craiyon, a tool that uses AI to create artwork, Penolopy edited the design in Photoshop to make it symmetrical and thicker. She then ran the design through Hueforge, selecting three colors and adjusting the minimum thickness to make the mask more sturdy.
Designing the Mask
To create your own filigree masquerade mask, you’ll need to start with a design. If you’re not artistic, don’t worry! You can use Craiyon to generate an image, just like Penolopy did. Once you have your image, you can edit it in Photoshop to make any necessary adjustments. You’ll want to make sure the design is symmetrical and the lines are thick enough to be visible when printed.
Editing the Design
When editing your design, keep in mind that you’ll want to make the lines thicker in some areas to create a more defined shape. You can also use the “copy” feature to duplicate one side of the design and create a symmetrical mask. Don’t forget to erase any unnecessary details and adjust the size of the design to fit your needs.
Anycubic Coupon – $5 off $50+ sitewide with code DIY5OFF
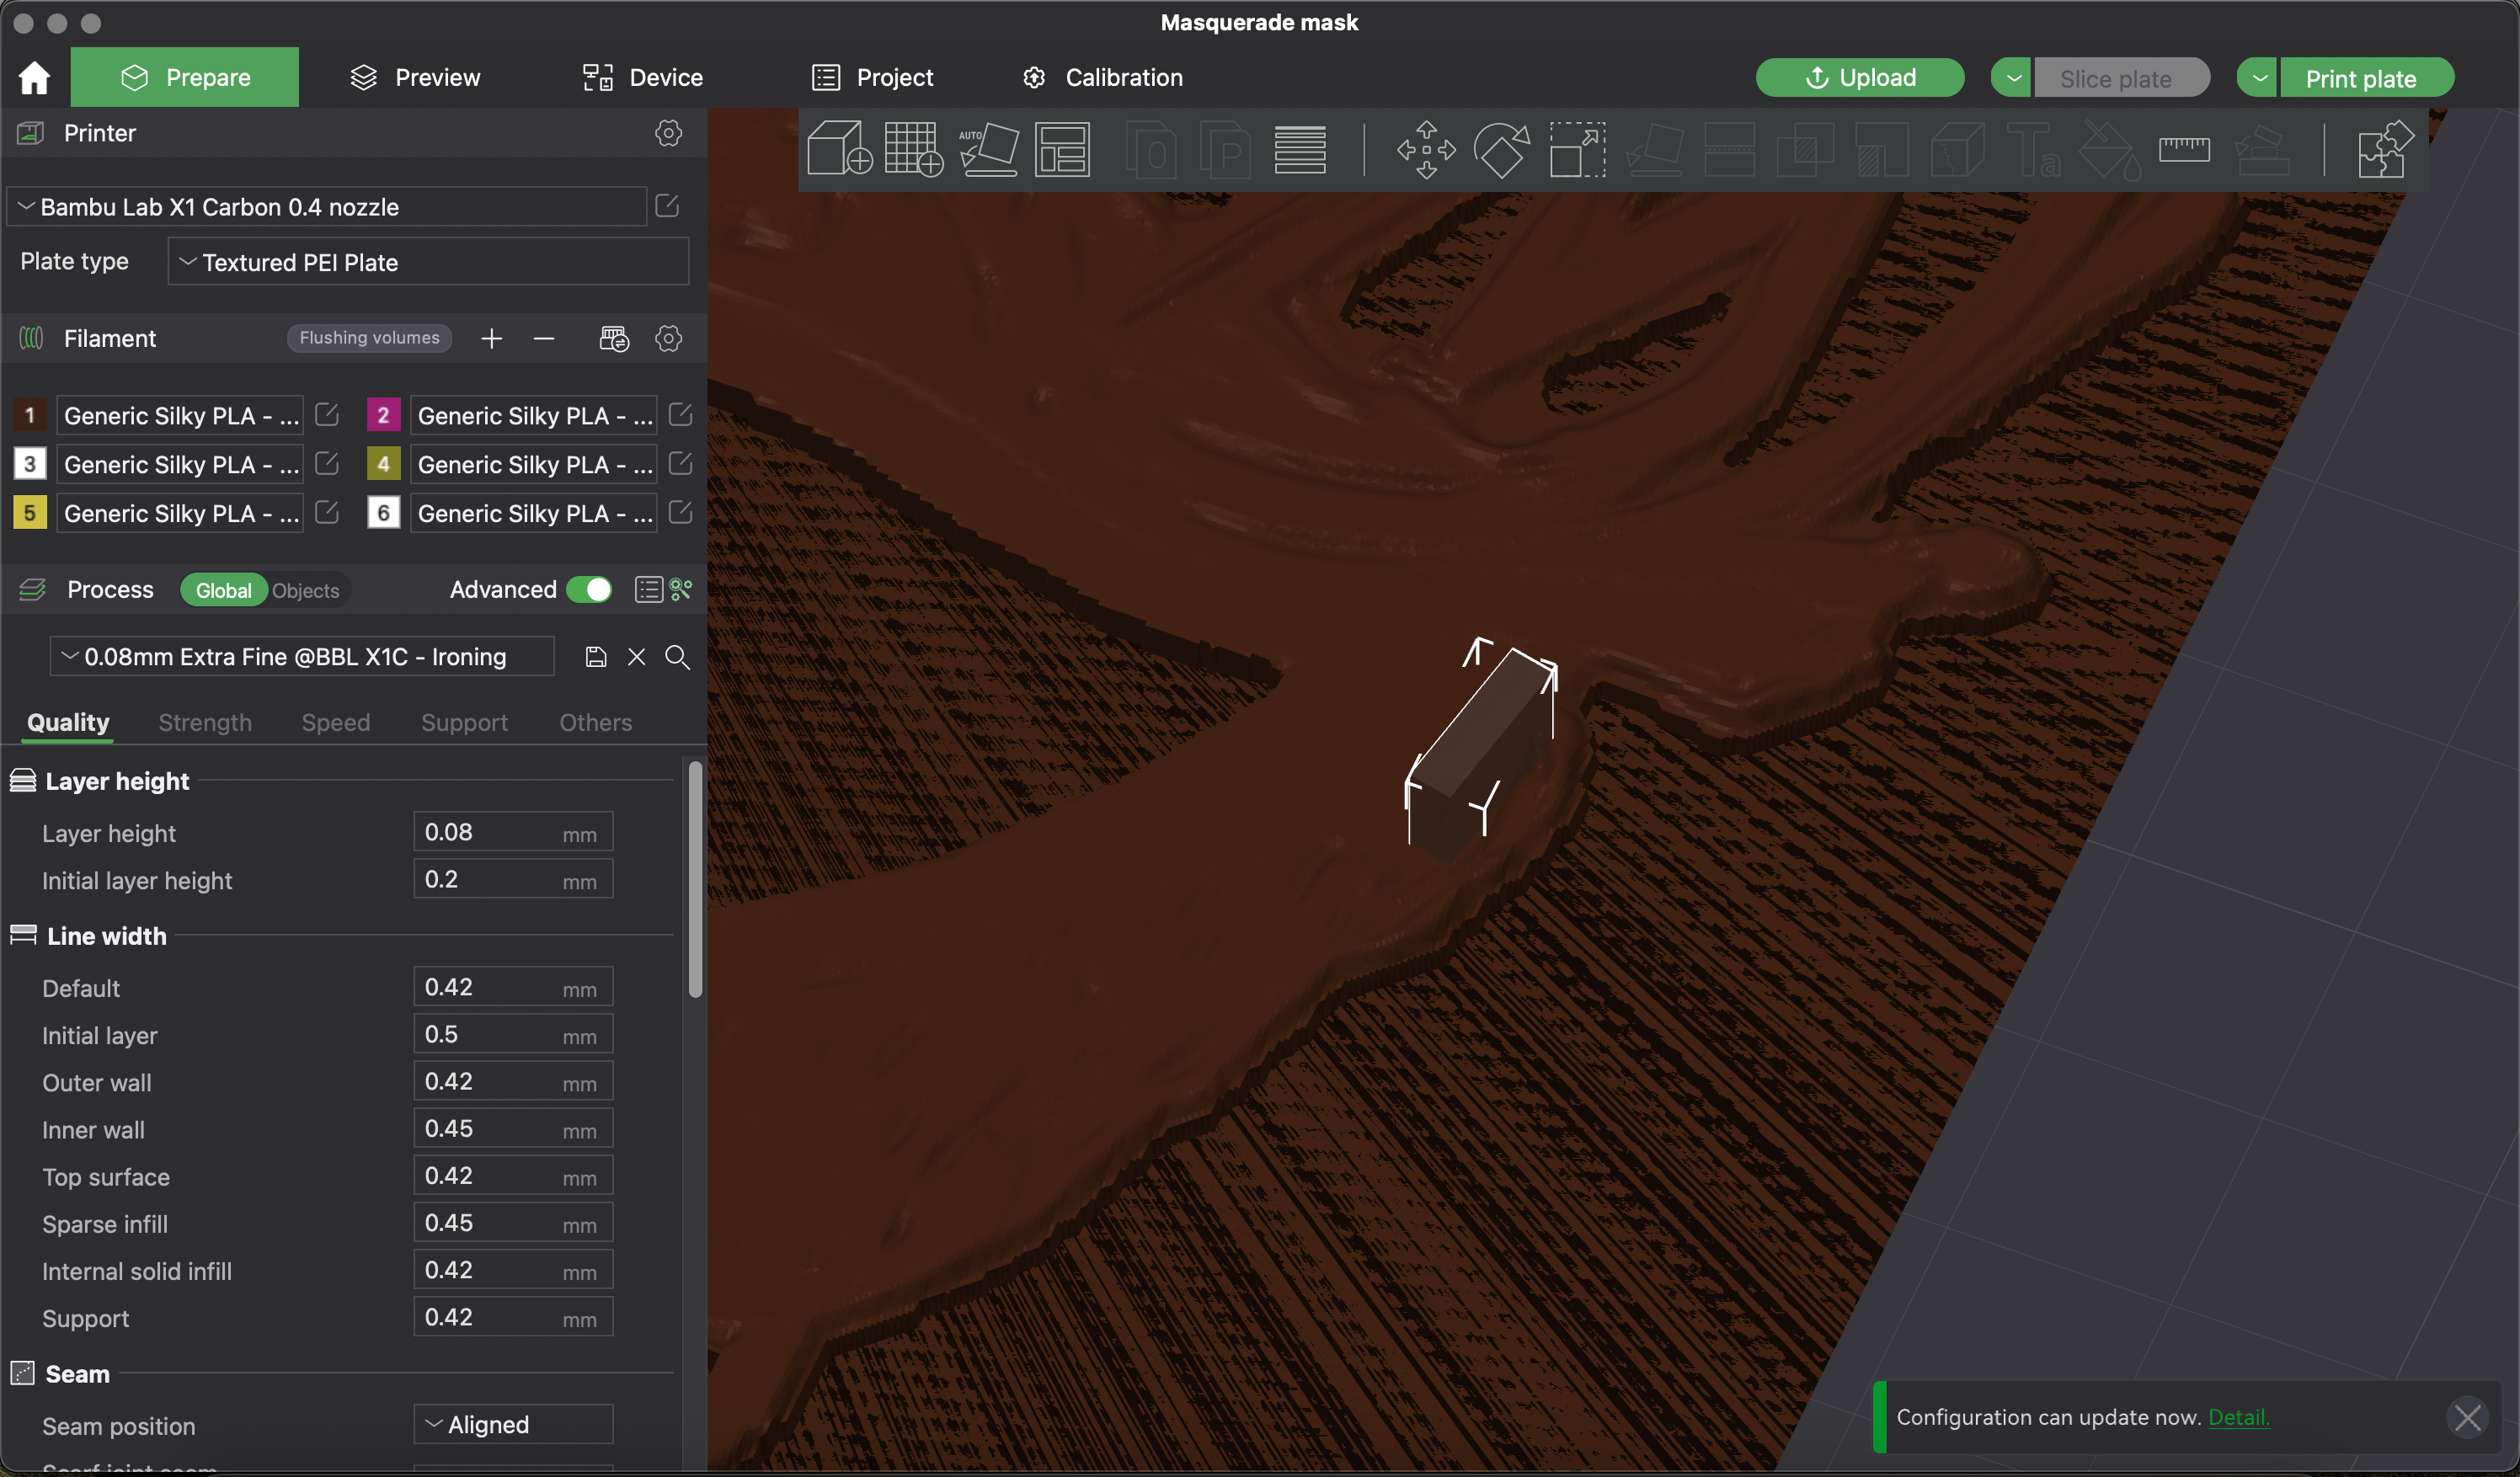
Slicing and Printing the Mask
Once you have your design, it’s time to slice and print the mask. Penolopy used the basic settings for.08mm Extra Fine using a.4mm nozzle, with ironing on all top layers. She also added slots for the elastic using the “Add Negative Part > Cube” feature. You can adjust the size and angle of the slots to fit your needs.
Printer Settings
Here are the printer settings used for this project:
| Setting | Value |
|---|---|
| Layer height | .08mm |
| Nozzle size | .4mm |
| Ironing | On (all top layers) |
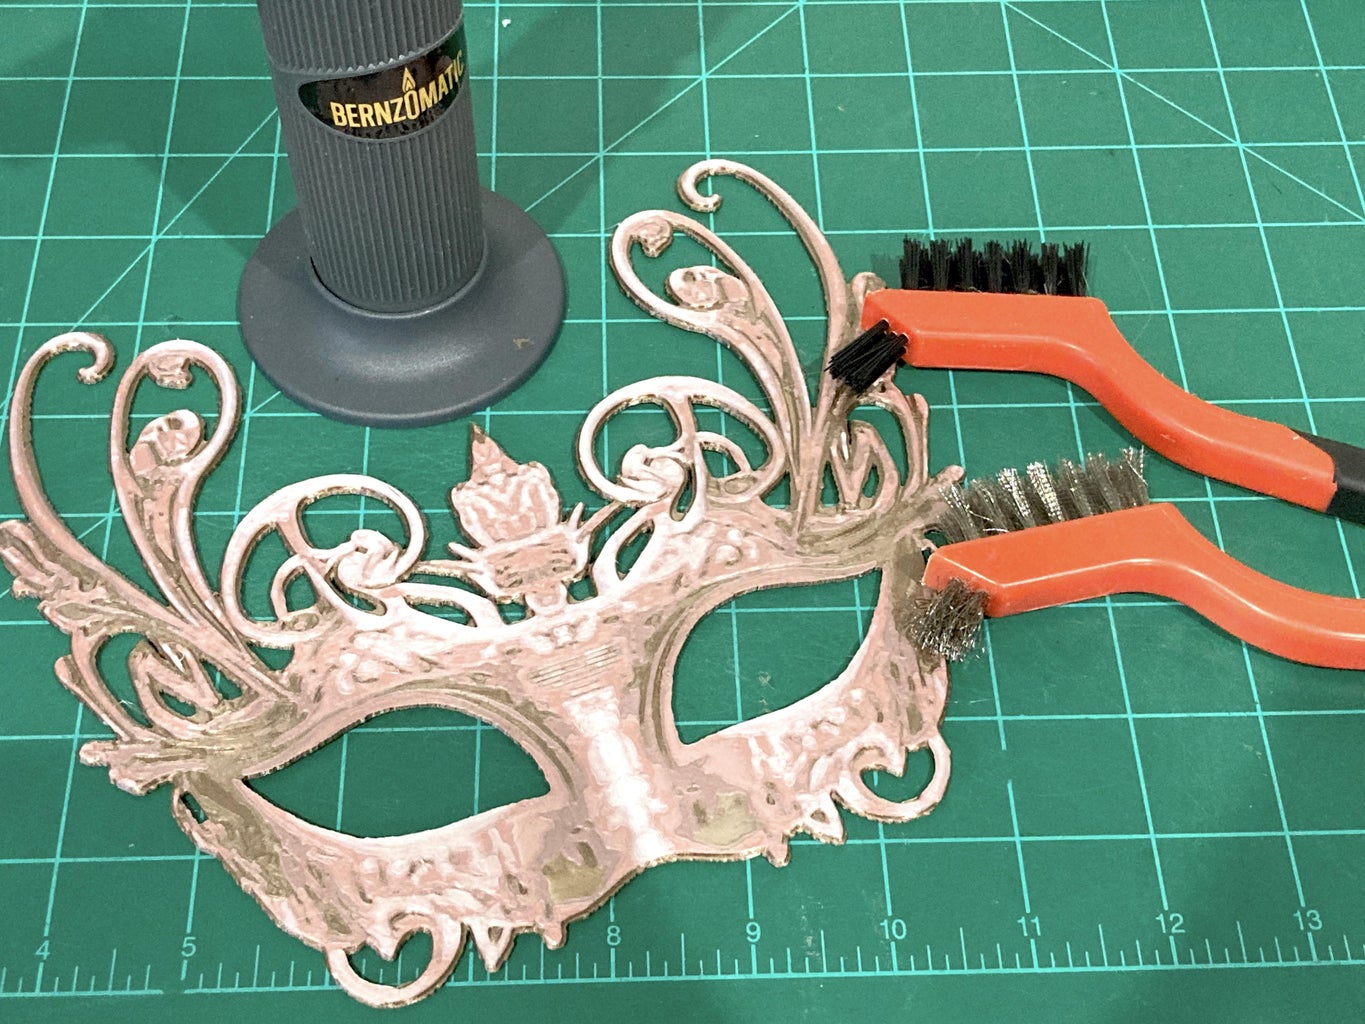
Shaping the Mask
After printing the mask, it’s time to shape it. You can use a heat gun or hot water to warm up the mask and make it pliable. Penolopy recommends using a styrofoam head to shape the mask, but you can also use your own face. Be careful not to burn yourself!
Shaping Techniques
Here are a few techniques you can use to shape the mask:
- Heat gun: Use a heat gun to warm up the mask and shape it. Be careful not to melt the plastic.
- Hot water: Soak the mask in hot water to make it pliable.
- Styrofoam head: Use a styrofoam head to shape the mask. This will help you get a more defined shape.

Adding the Elastic Strap
Once the mask is shaped, it’s time to add the elastic strap. Measure the length of elastic you need and cut it to size. You can use hot glue or sewing to attach the elastic to the mask. Make sure to attach it securely, as you don’t want it to come loose while wearing the mask.
Attaching the Elastic
Here are a few methods you can use to attach the elastic:
- Hot glue: Apply hot glue to the ends of the elastic and attach it to the mask.
- Sewing: Sew the elastic to the mask using a needle and thread.
- Super glue: Apply super glue to the ends of the elastic and attach it to the mask. However, this method is not recommended, as it can be iffy and may not hold securely.
Finishing Touches
Once the elastic is attached, your mask is complete! You can consider adding felt behind the nose to help cushion it against your face. You can also add any additional details, such as glitter or rhinestones, to make the mask more elaborate.
Tips and Variations
Here are a few tips and variations to keep in mind:
- Use different colors: Experiment with different colors and color combinations to create a unique mask.
- Add embellishments: Add glitter, rhinestones, or other embellishments to make the mask more elaborate.
- Use different materials: Experiment with different materials, such as metal or fabric, to create a unique mask.
By following these steps, you can create your own stunning filigree masquerade mask, complete with intricate details and a splash of vibrant colors. Happy creating!
Anycubic Coupon – $5 off $50+ sitewide with code DIY5OFF

SUNLU Silk PLA Filament 1.75mm, Neatly Wound Shiny PLA 3D Printer Filament, Dimensional Accuracy +/- 0.02mm, Fit Most 3D Printers, Good Vacuum Packaging, 1kg Spool(2.2lbs), 330 Meters, Silky Gold
$19.99 (as of March 6, 2025 16:28 GMT +00:00 - More infoProduct prices and availability are accurate as of the date/time indicated and are subject to change. Any price and availability information displayed on [relevant Amazon Site(s), as applicable] at the time of purchase will apply to the purchase of this product.)
3D Printer Tools Kit, 3D Printing Accessory with 55Pcs Includes Deburring Tool, Caliper, Art Knife Set, Tube Cutter, Storage Bag Suitable for 3D Print Removing, Cleaning
$39.99 (as of March 8, 2025 20:51 GMT +00:00 - More infoProduct prices and availability are accurate as of the date/time indicated and are subject to change. Any price and availability information displayed on [relevant Amazon Site(s), as applicable] at the time of purchase will apply to the purchase of this product.)
CREALITY CR Scan Ferret-Pro 3D Scanner, 0.1mm Accuracy, Handheld Wireless Scanning Anti-Shake Tracking, Equipped with Wifi6 Wireless Bridge, Power Bank, Support Windows, Mac, Android, iOS
$498.99 (as of March 8, 2025 20:51 GMT +00:00 - More infoProduct prices and availability are accurate as of the date/time indicated and are subject to change. Any price and availability information displayed on [relevant Amazon Site(s), as applicable] at the time of purchase will apply to the purchase of this product.)
Revopoint Dual Axis Turntable for Accurate 3D Scanning, Easy Capturing Detail-rich 3D Data of Small-Medium Objects
$99.00 (as of March 8, 2025 20:51 GMT +00:00 - More infoProduct prices and availability are accurate as of the date/time indicated and are subject to change. Any price and availability information displayed on [relevant Amazon Site(s), as applicable] at the time of purchase will apply to the purchase of this product.)