ELEGOO Mars 5 Ultra 9K Resin 3D Printer, 150mm/h High Speed Printing, Smart Automatic Leveling, Intelligent Detection, WiFi-Transfer, Printing Size of 6.04 x 3.06 x 6.49 inch
$284.95 (as of May 7, 2025 20:40 GMT +00:00 - More infoProduct prices and availability are accurate as of the date/time indicated and are subject to change. Any price and availability information displayed on [relevant Amazon Site(s), as applicable] at the time of purchase will apply to the purchase of this product.)Have you ever dreamed of designing your own custom LEGO rockets, but didn’t know where to start? With the power of 3D modeling software, like SelfCAD, the possibilities are endless.
Anycubic Coupon – $5 off $50+ sitewide with code DIY5OFF
Creating Your Custom LEGO Rocket with SelfCAD
SelfCAD is an intuitive 3D modeling software that allows users to construct complex models with precision and creativity. In this article, we will walk through the process of designing a LEGO rocket using SelfCAD. Whether you’re a LEGO fan or a digital design enthusiast, this guide will help you bring your ideas to life in 3D.
Opening the Editor and Importing Objects
Before we begin designing our LEGO rocket, let’s start by opening the SelfCAD editor. To access the interactive tutorial for this article, check out https://www.selfcad.com/tutorials/5lc2s323h01r5u1f1y2s2i643d536u6614m5. Once you’ve launched the editor, follow these steps:
| Step | Action |
|---|---|
| 1 | From the file menu on the top toolbar, click Import |
| 2 | Click Load Object from Tutorial button to add the object |
| 3 | From the edit menu on the top toolbar, choose Ungroup |
By following these steps, we will start with a pre-made object that we can modify to create our custom LEGO rocket.
Modifying the Object
Now that we have our object, we can start modifying it to create our LEGO rocket. Follow these steps:
| Step | Action |
|---|---|
| 1 | Click on mesh 234, 234(1), union 1 to deselect |
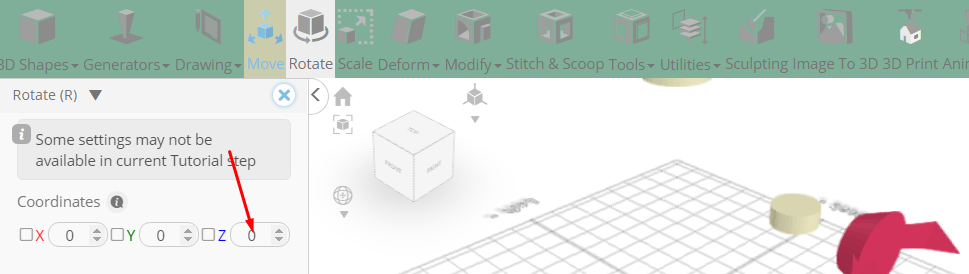
| 2 | Click Rotate on the toolbar and set z to -90 |
| 3 | Click Move on the toolbar and set z to -1, x to 0 |
As you modify the object, you can see how each change affects the overall design.
Creating the Rocket Body
Let’s start creating the body of our LEGO rocket. Follow these steps:
| Step | Action |
|---|---|
| 1 | Click on mesh 234(3) to select |
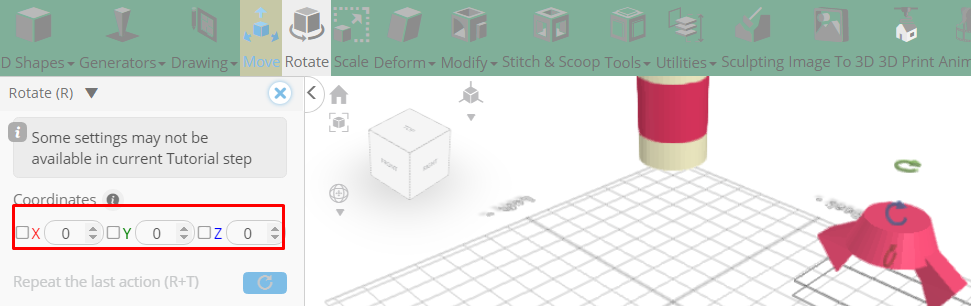
| 2 | Click Rotate on the toolbar and set z to -270 |
| 3 | Click Move on the toolbar and click Center Object button to center object, set x to 0, y to 387, z to 0 |
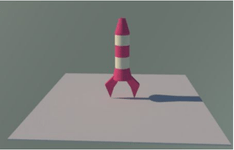
By creating the body of our rocket, we can start to see our design come to life.
Adding Finishing Touches
Now that we have the basic shape of our rocket, let’s add some finishing touches. Follow these steps:
| Step | Action |
|---|---|
| 1 | Click on mesh 234(3) to select, click on mesh 234(3) to deselect |
| 2 | Click Rotate on the toolbar and set z to 270 |
| 3 | Click Move on the toolbar and click Center Object button to center object, set x to 0, y to 305, z to 0 |
With these final touches, we can complete our custom LEGO rocket design.
Anycubic Coupon – $5 off $50+ sitewide with code DIY5OFF
Taking Your Design to the Next Level
As you continue to design and modify your LEGO rocket, remember to take advantage of SelfCAD’s wealth of resources to support your learning journey. Check out the interactive tutorials available on the SelfCAD website at https://www.selfcad.com/tutorials. These tutorials provide a treasure trove of guides, tips, and tricks that cater to designers of all levels.
For a more structured learning experience, consider accessing the SelfCAD Academy at https://www.selfcad.com/academy/curriculum/. The SelfCAD Academy offers in-depth courses taught by industry experts, allowing you to master the intricacies of SelfCAD at your own pace.
By combining your creativity with the power of SelfCAD, you can take your LEGO rocket design to new heights and create something truly unique and imaginative.
Conclusion
With SelfCAD, the possibilities for creating custom LEGO rockets are endless. By following the steps outlined in this guide, you can bring your ideas to life and create something truly amazing. So why wait? Start designing your own custom LEGO rocket today and see where your imagination takes you.
Anycubic Coupon – $5 off $50+ sitewide with code DIY5OFF
Creality Original Ultra Removable Magnetic 3D Printer Build Surface Heated Bed Cover for Ender 3/Ender 3 Pro/Ender 3 V2/Ender 3 V2 Neo/Ender 3 Neo/Ender 3 S1/3 S1 Pro/Ender 5 Pro 235X235mm
$9.99 (as of May 7, 2025 20:40 GMT +00:00 - More infoProduct prices and availability are accurate as of the date/time indicated and are subject to change. Any price and availability information displayed on [relevant Amazon Site(s), as applicable] at the time of purchase will apply to the purchase of this product.)
3D Printer Enclosure with LED Lighting, Fireproof Dustproof Tent Constant Temperature Protective Cover for Creality Ender 3 V3 SE/KE/Ender 3/Ender 3 Pro/Ender 3V2/Ender 3S1/Neo/Anycubic Elegoo, Medium
$41.99 (as of May 7, 2025 20:40 GMT +00:00 - More infoProduct prices and availability are accurate as of the date/time indicated and are subject to change. Any price and availability information displayed on [relevant Amazon Site(s), as applicable] at the time of purchase will apply to the purchase of this product.)
Entina Mini 3D Printers Tina 2, Fully Assembled and Auto Leveling 3D Printer for Beginners, Removable Magnetic Platform, High Precision Printing with PLA/PLA Pro/TPU, Size 3.9x4.7x3.9 inch
$179.99 (as of May 7, 2025 20:40 GMT +00:00 - More infoProduct prices and availability are accurate as of the date/time indicated and are subject to change. Any price and availability information displayed on [relevant Amazon Site(s), as applicable] at the time of purchase will apply to the purchase of this product.)
Creality Ender 3 V3 SE 3D Printer, 250mm/s Faster FDM 3D Printers with CR Touch Auto Leveling, Sprite Direct Extruder Auto-Load Filament Dual Z-axis & Y-axis, Printing Size 8.66 * 8.66 * 9.84 inch
$229.00 (as of May 7, 2025 20:40 GMT +00:00 - More infoProduct prices and availability are accurate as of the date/time indicated and are subject to change. Any price and availability information displayed on [relevant Amazon Site(s), as applicable] at the time of purchase will apply to the purchase of this product.)