Fully Assembled Mini 3D Printer for Kids and Beginners - Complete Starter Kit with Auto Leveling 3D Printing Machine, 10M PLA Filament, and SD Card - WiFi 3D Home Printer for MAC, Windows, and Linux
$224.99 (as of June 8, 2025 21:50 GMT +00:00 - More infoProduct prices and availability are accurate as of the date/time indicated and are subject to change. Any price and availability information displayed on [relevant Amazon Site(s), as applicable] at the time of purchase will apply to the purchase of this product.)In the “AutoCAD Advanced 3D Modeling Tutorial,” you will gain proficiency in creating complex three-dimensional parts using AutoCAD’s advanced functionalities. The tutorial begins with guiding you through the setup process, including selecting the appropriate template and configuring the 3D modeling mode. You will then proceed to learn various techniques such as creating vertical arcs, drawing lines, and leveraging tools like revolve and helix for sophisticated modeling tasks.
Further, the tutorial covers essential steps for enhancing visualization through shading and adjusting spiral curves to refine the overall model. You will discover how to utilize the sweep tool for generating 3D rods, simplify complex curves, and arrange elements using polar arrays. This comprehensive instruction is part of a broader series that aims to equip you with advanced AutoCAD skills, emphasizing practical techniques for constructing intricate 3D objects.

Setting Up the Environment
Opening AutoCAD and Selecting Template
When you launch AutoCAD, a prompt will request you to select a template. For this tutorial, we will use the acadiso.dwt template. This standard template includes the necessary settings for an international system of units. To open the template, select it from the list and double-click it or click “Open.”
Switching to 3D Modeling Mode
Once AutoCAD is up and running and the template is selected, you need to switch to 3D modeling mode. This mode offers all the necessary tools for 3D design which are not available in the default 2D Drafting & Annotation workspace. Click on the workspace switching arrow, typically located at the top left or bottom right of the interface, and select ‘3D Modeling’ from the dropdown menu.
Setting the View to SE Isometric
To get an appropriate perspective for 3D modeling, switch the viewport to “SE Isometric”. Click on the view cube located in the top right corner of the drawing area. From there, select the SE Isometric view option, which provides a clear three-dimensional view of your drawing.
Adjusting the UCS Icon
The User Coordinate System (UCS) icon indicates the orientation of the drawing axes. To adjust the UCS icon for better alignment, type UCSICON into the command line and press Enter. Then select Noorigin so the icon remains fixed at the corner of the drawing area. This adjustment will help ensure your model’s alignment throughout the design process.
Creating the Initial Structure
Creating Vertical Arcs by Adjusting the XY Plane
In AutoCAD, arcs are created on the XY plane by default, which is horizontal. For this tutorial, you need to create a vertical arc. Change the XY plane by typing UCS into the command line, then select ‘Right’ to make the XY plane vertical. Now draw the arc: click on the Arc tool, select the “Start, Center, End” method, and specify the start point, the center point (with a radius of 500 units), and the end point.
Drawing Lines for Basic Framework
To complement the arc, draw a vertical line. Select the Line tool, click at the end point of the arc for the start of the line, and extend the line vertically (along the Y-axis). This line will serve as the axis for creating a surface of revolution.
Creating Surfaces using Revolve Tool
Next, use the Revolve tool to create a surface. Select Revolve, choose the arc you created, press Enter, and then click on the vertical line to specify the axis of revolution. Enter the angle of 360 degrees to create a full circular surface.
Shading the Model for Better Visualization
To improve the visibility of the newly created 3D surface, switch to a shaded view. Select the “Shaded with Edges” option from the visual styles toolbar, which provides a better visual representation of the model compared to wireframe mode.
Find 3D Printing Accessories Here
Advanced Curves and Surfaces
Creating Spiral Curves with Helix Tool
Spiral curves add complexity and detail to a model. Use the Helix tool to create one. Click on Draw and select Helix. Specify the center point of the base, which should be the same as the center of the previously created circular surface.
Specifying Base and Top Radius
For the base radius, input 10 units, and for the top radius, input 500 units, matching the radius of the initial arc. This will ensure that the spiral aligns properly with the structure.
Adjusting Turns in the Spiral Curve via Properties
To control the number of turns in the spiral, click on the created helix. A properties window appears, where you can adjust the number of turns. Enter 10 turns to make the spiral detailed yet manageable.
Extruding the Spiral for Depth
Convert the 2D spiral into a 3D shape by extruding it. Select the spiral and use the Extrude tool. Enter a height of 510 units, which will provide sufficient depth and account for minor offsets from the radius.
Combining Curves and Surfaces
Extracting Intersection Curves
To integrate the spiral with the revolved surface, you must extract the intersection curves. Go to the Surface tab, click on Edit, and select Extract Intersections. Choose the spiral and the revolved surface to generate the intersection curves.
Joining Multiple Curves into a Single Curve
Once intersection curves are created, unify them into a single continuous curve. Use the Join command, select all individual segments, and press Enter. Ensure you do not select tiny segments that could complicate the modeling process.
Simplifying Curves by Removing Vertices
For smoother operation, simplify the continuous curve by removing unnecessary vertices. Select the curve, right-click on vertices, and choose “Remove Vertex” to eliminate redundant points, thereby refining the curve.

Creating 3D Elements
Creating 3D Rods using Sweep Tool
With the simplified curve ready, create 3D rods. Draw a circle with a radius of 10 units at the starting point of the curve. Use the Sweep tool, select the circle as the profile, and then select the curve as the path.
Adding Rings using Circles
Add rings to the structure by creating another circle with a radius of 500 units, centered at the top of the initial vertical line. Sweep this circle along the same path to form a ring that wraps around the rods.
Adding Vertical Rods
To add vertical rods, start by drawing a circle with the same 10 units radius. Sweep this circle along the vertical lines that you originally used for creating the axis of revolution. Replicate these rods by creating a polar array around the structure.
Structuring and Adjusting
Adjusting Number of Rods for Complexity
The complexity of the model can be controlled by adjusting the number of rods. Use the Polar Array tool to increase or decrease the number of rods around the central axis. For a dense structure, set a higher number of items in the array.
Positioning Rods for Desired Design
Fine-tune the position of the rods using the Move tool. Adjust the placement so the rods are symmetrically distributed and visually appealing. Use the SE Isometric view to check alignment from multiple angles.
Finishing Touches on the Structure
Add final touches to your model to ensure it looks polished. Use the Fillet tool to round off sharp edges and the Chamfer tool to create beveled edges. These details contribute to a more finished appearance.
Visualization Techniques
Applying Different Shading Techniques
Experiment with different shading techniques to better visualize your 3D model. Use options like “Shaded,” “Shaded with Edges,” and “Realistic” from the visual styles toolbar. These techniques will help in examining the model’s surfaces and edges.
Using Visual Styles for Better Visualization
AutoCAD offers various visual styles that enhance model visualization. Access them through the Visual Styles Manager. Popular options include “Conceptual,” “Shades of Grey,” and “Wireframe,” each offering distinct viewing enhancements.
Setting Up Lighting for 3D Model
Proper lighting enhances 3D visualization. Setup lighting by going to the Render tab and selecting appropriate lighting options. Use point lights, spotlights, or distant lights to illuminate different parts of the model, improving the visualization clarity.
Exporting and Sharing
Saving the Model in Different Formats
Save your model in different formats depending on your needs. Common formats include .dwg for AutoCAD, .stl for 3D printing, and .pdf for sharing with clients or stakeholders. Use the ‘Save As’ option in the File menu to choose the desired format.
Sharing the Model through Cloud Services
For collaboration and sharing, use cloud services like AutoCAD Web or Autodesk Drive. Upload your models directly from AutoCAD to these platforms, making it easier to share with team members or clients, and enabling real-time collaboration.
Preparing the Model for 3D Printing
To prepare for 3D printing, ensure the model has no errors and is properly scaled. Use the STL Export tool to convert the file into an .stl format, suitable for most 3D printers. Check for wall thickness and ensure all components are unioned into a single, solid object.
Troubleshooting Common Issues
Fixing Errors in Sweeping
Errors during sweeping are common when paths are complex. Simplify the path by removing extra vertices and ensuring it’s a continuous curve. Check the path’s smoothness and revise it if necessary.
Dealing with Intersecting Surfaces
Intersecting surfaces can cause rendering and modeling issues. Use the Intersect tool to identify and adjust these areas. You can manually fix intersections by moving or modifying affected parts and checking their alignment frequently.
Adjusting Model for Better Performance
Large and complex models can slow down AutoCAD performance. Improve performance by reducing polygon count, removing unnecessary objects, and simplifying curves. Alternatively, use layers to manage different parts of the model and toggle their visibility as needed.
Conclusion
Summary of Key Points
This tutorial covered advanced 3D modeling techniques in AutoCAD, including setting up the environment, creating initial structures, utilizing advanced curves and surfaces, and combining various elements to build a complex 3D model. You also learned visualization techniques, exporting methods, and troubleshooting tips to refine your models.
Encouragement to Apply Knowledge
Successfully mastering these techniques significantly boosts your ability to create sophisticated 3D models. Apply the methods learned in this tutorial to your own projects, experimenting and expanding on them to develop your unique designs.
Call to Action for Further Tutorials
To continue improving your AutoCAD proficiency, explore further tutorials in this series. Subscribe to our channel for updates on new tutorials released every Monday, Wednesday, and Saturday. Engage with our community by liking, sharing, and commenting on the videos for continuous learning and feedback.
Maintain Your 3D Printer with these Tools

Official Creality Hyper PLA Filament 1.75mm, High Speed PLA 30-600mm/s 3D Printer Filament, Dimensional Accuracy +/-0.02mm, Fit Most FDM 3D Printers, 1KG(2.2lbs) Spool Black
$22.99 (as of June 8, 2025 21:49 GMT +00:00 - More infoProduct prices and availability are accurate as of the date/time indicated and are subject to change. Any price and availability information displayed on [relevant Amazon Site(s), as applicable] at the time of purchase will apply to the purchase of this product.)
MYNT3D 3D Pen Mat Kit, DesignPad + FreePad,Black
$19.00 (as of June 8, 2025 21:49 GMT +00:00 - More infoProduct prices and availability are accurate as of the date/time indicated and are subject to change. Any price and availability information displayed on [relevant Amazon Site(s), as applicable] at the time of purchase will apply to the purchase of this product.)
Creality K1 SE 3D Printer, 2024 New Version 600mm/s High-Speed Hands-Free Auto Leveling Flagship-Level Direct Extruder Quick-swap Tri-Metal Nozzle K1 Upgrade 3D Printer
$283.99 (as of June 8, 2025 21:50 GMT +00:00 - More infoProduct prices and availability are accurate as of the date/time indicated and are subject to change. Any price and availability information displayed on [relevant Amazon Site(s), as applicable] at the time of purchase will apply to the purchase of this product.)
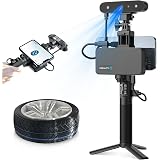
Creality 3D Scanner Raptor Pro for Automotive & Engineering Projects with Metrology-Grade 0.02mm Accuracy,22+7 Blue Laser,Anti-Shake Tracking,Up to 60FPS Scanning Speed Support 5-2000mm Objects
$1,899.05 (as of June 8, 2025 21:49 GMT +00:00 - More infoProduct prices and availability are accurate as of the date/time indicated and are subject to change. Any price and availability information displayed on [relevant Amazon Site(s), as applicable] at the time of purchase will apply to the purchase of this product.)