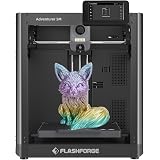
FLASHFORGE Adventurer 5M 3D Printer,600mm/s Max High-Speed FDM 3D Printers with Fully Auto Leveling, 280°C Direct Extruder with Quick Detachable Nozzle, Effective Cooling, Core XY Structure
$259.00 (as of June 6, 2025 21:45 GMT +00:00 - More infoProduct prices and availability are accurate as of the date/time indicated and are subject to change. Any price and availability information displayed on [relevant Amazon Site(s), as applicable] at the time of purchase will apply to the purchase of this product.)Are you new to 3D printing and looking to get started with your own prints? The video “Beginners guide to 3D printer slicers” by Teaching Tech is here to help! In this video, you’ll learn all about the basics of 3D printer slicers, including file formats like STL and Gcode, what a slicer is, and popular slicers such as Cura, Prusa Slicer, and Simplify3D. The video covers important settings in slicers like layer height, extrusion width, and infill, as well as temperature, speed, retraction, support material, and vase mode. It also emphasizes the importance of experimentation to find the right settings for your printer. So, if you’re ready to dive into the software side of 3D printing and start creating your own prints, this video is a must-watch!
If you’re new to 3D printing and wondering what a slicer is and how to use it, then Teaching Tech’s video “Beginners guide to 3D printer slicers” is perfect for you. This video focuses on the software side of 3D printing and covers the basics of slicers, file formats, and popular slicing programs like Cura, Prusa Slicer, and Simplify3D. It delves into important settings such as layer height, extrusion width, temperature, speed, retraction, support material, and vase mode. The video encourages beginners to start simple, experiment, and find the right settings for their printer. So, if you’re ready to take your 3D printing journey to the next level, this video is a great resource to help you get started!


Overview of 3D Printer Slicers
Explanation of what a slicer is
If you’re new to 3D printing, you may be wondering what exactly a slicer is and why it’s an essential part of the 3D printing process. A slicer is a software program that takes a 3D model and slices it into a series of 2D layers. These layers are then used by the 3D printer to create the object layer by layer. The slicer converts the 3D model into Gcode, a language that the printer understands. In simple terms, a slicer prepares the digital model for physical printing.
Importance of slicers in 3D printing
Slicers play a crucial role in 3D printing as they determine the quality, accuracy, and speed of the final printed object. They allow users to adjust various settings such as layer height, extrusion width, infill, temperature, speed, and acceleration. These settings directly impact the final result and enable makers to optimize their prints according to their specific needs and preferences. Without a slicer, the process of generating Gcode and preparing a model for printing would be much more complex and time-consuming.
File Formats for 3D Printing
Introduction to STL file format
When it comes to 3D printing, the two most commonly used file formats are STL and Gcode. Let’s start with STL. STL stands for Stereolithography or Standard Tessellation Language and is the standard file format used for 3D printing. It represents a 3D model as a collection of triangles or surfaces. STL files can be easily exported from popular 3D modeling software and are compatible with most slicers and printers.
Explanation of Gcode file format
Gcode, on the other hand, is the language that 3D printers understand. It consists of a series of commands and parameters that control the movements and actions of the printer. A slicer takes the 3D model and generates Gcode by interpreting the model’s geometry and specifying how the printer should move, extrude filament, and perform other tasks. Gcode files can be modified manually if desired, but slicers handle this conversion automatically, making it more accessible for users.

Popular Slicing Programs
Overview of Cura slicer
Cura is one of the most popular slicing programs in the 3D printing community. It is free, open-source software developed by Ultimaker. Cura works with a wide range of 3D printers and offers extensive customization options. The user-friendly interface allows users to easily adjust print settings and optimize their prints. It also provides features such as print time estimation, support structures, and infill patterns.
Introduction to Prusa Slicer
Prusa Slicer is another widely used slicing program, particularly among owners of Prusa 3D printers. It is based on the open-source project Slic3r and remains open source as well. While it is designed with Prusa printers in mind, it supports other printers too. Prusa Slicer offers various profiles for different materials and allows users to customize settings for their specific needs. It has a user-friendly interface and provides advanced features for fine-tuning prints.
Overview of Simplify3D slicer
Simplify3D is a powerful but commercial slicing program known for its advanced capabilities. Although it comes with a price tag, many users consider it worth the investment. Simplify3D provides a comprehensive set of features that allow users to achieve high-quality prints. It offers advanced support structures, customizable print settings, and detailed previews. Simplify3D is compatible with various 3D printers and supports a wide range of filament materials.
Understanding Slicer Settings
Explanation of layer height setting
Layer height refers to the vertical thickness of each layer in a 3D printed object. It impacts the overall quality and resolution of the print. A smaller layer height produces smoother and more detailed prints, but it also increases print time. On the other hand, a larger layer height results in faster prints with more visible layer lines. Choosing the right layer height depends on the desired level of detail and the printing speed you’re aiming for.
Importance of extrusion width setting
Extrusion width determines the width of the lines or paths of filament that the printer extrudes to create each layer. The extrusion width should be set to a value that is compatible with the nozzle size. It is generally recommended to use a value between 100% and 120% of the nozzle diameter. Adjusting the extrusion width can affect the strength, surface finish, and accuracy of the print.
Discussion on infill setting
Infill refers to the internal structure of a 3D printed object. It provides support and strength to the print while reducing material usage and print time compared to solid prints. The infill setting allows users to control the density and pattern of the infill. Higher infill percentages result in stronger but slower prints, while lower infill percentages save time and material but may sacrifice strength.

Temperature and Cooling Settings
Optimal temperature settings for different materials
Temperature settings are essential for achieving successful 3D prints with different filament materials. The optimal temperature varies depending on the specific filament type, such as PLA, ABS, PETG, or TPU. Each material has a recommended temperature range for the hot end and the heated bed. These temperatures affect the filament’s flow, adhesion, and overall print quality.
Importance of part cooling in 3D printing
Part cooling is crucial during the 3D printing process, especially for filaments like PLA that require cooling to solidify quickly. Cooling prevents overheating, stringing, and warping of the printed object. Slicers allow users to control the speed and intensity of the part cooling fan. Optimizing part cooling settings can greatly improve the print quality, especially when dealing with complex geometries or overhangs.
Speed and Acceleration
Understanding the relationship between speed and acceleration
Speed and acceleration settings impact the overall print time, quality, and accuracy of a 3D print. Speed determines how fast the printer moves during various printing operations, such as non-print moves, perimeters, and infills. Acceleration, on the other hand, affects how quickly the printer changes speed. Both speed and acceleration settings need to be balanced to avoid print issues like ringing, vibrations, or missed steps.
Considerations for adjusting speed and acceleration in slicers
When adjusting speed and acceleration settings in slicers, it is important to consider the capabilities of your printer and the specific requirements of your print. Increasing speed too much can negatively affect print quality, especially with detailed or intricate designs. It is recommended to start with default settings and gradually experiment to find the optimal balance between speed, accuracy, and print quality.

Retraction and Support Material
Explanation of retraction and its role in reducing stringing
Retraction is a process where the printer pulls back the filament slightly to prevent oozing or stringing when moving between different print areas. Stringing occurs when the melted filament continues to extrude during non-print movements, leaving unwanted trails of filament. Retraction settings can be adjusted in slicers to minimize or eliminate stringing, resulting in cleaner and more precise prints.
Importance of support material for complex prints
Support material is used to provide temporary support for overhangs, complex geometries, or parts that cannot be printed without additional support. Slicers allow users to generate support structures automatically based on specific criteria, such as overhang angle or unsupported surface area. Support structures are essential for achieving successful prints of complex designs and can be easily removed after printing.
Vase Mode and Spiral Mode
Explanation of vase mode for creating hollow prints
Vase mode, also known as spiral mode or single walled mode, is a feature in many slicers that allows users to create hollow or vase-like prints. Instead of printing with multiple outer walls and infill, vase mode produces a single continuous wall. This results in faster and more efficient prints, making it ideal for decorative items or prints that don’t require structural strength.
Introduction to spiral mode for continuous printing
Spiral mode, similar to vase mode, enables a continuous printing process without stopping at each layer. It produces smooth, seamless prints with no visible layer lines. Spiral mode is beneficial for objects with curved or organic shapes, as it eliminates the need for layer transitions. However, it is important to note that not all slicers support spiral mode, so users need to check their slicer’s capabilities.
Additional Resources
Links to Teaching Tech’s video on slicers
Teaching Tech, a popular YouTube channel, has a comprehensive video guide that explains slicers and covers various aspects related to 3D printing software. They provide step-by-step instructions and tips for using slicers effectively. Watching this video will help beginners understand the concepts discussed in this article and gain a more in-depth understanding of slicers and their role in 3D printing.
Recommended articles and tutorials for further learning
For those interested in diving deeper into the world of slicers and 3D printing software, there are numerous online resources available. Websites like All3DP, PrusaPrinters, and MatterHackers offer articles, tutorials, and guides that cover different aspects of slicers, including advanced settings, troubleshooting, and optimization techniques. Exploring these resources will provide a wealth of information and help users expand their knowledge and skills in 3D printing.
Conclusion
As a beginner in 3D printing, it is important to understand what a slicer is and how to use it effectively. Slicers play a crucial role in the 3D printing process, allowing users to prepare, customize, and optimize their models for printing. By adjusting settings such as layer height, extrusion width, infill, temperature, speed, and acceleration, users can achieve the desired print quality, accuracy, and efficiency. Experimentation and learning from resources like Teaching Tech’s video and recommended articles will enable beginners to master the art of 3D printing and unleash their creativity. Remember to subscribe to Teaching Tech’s channel and stay informed about the latest developments in the world of 3D printing. Happy printing!
If you’re new to 3D printing, have you tried printing the demo file from the SD card and are now ready to start your own 3D prints? In this video, I’ll explain what a slicer is and cover all the basics you need to know to get started. Remember to start simple, try different things, and don’t be afraid to branch out. Before you know it, you’ll be printing like a pro!
Here are some helpful resources that I mentioned in the video:
- Tweezers thing: link
- Prusa 3MF article: link
- Marlin Gcode reference: link
- 3Dbenchy: link
- Comparison of big three slicers: link
Here are the links to the slicers mentioned:
- Cura: link
- Blackbelt Cura: link
- PrusaSlicer: link
- Simplify3D: link
- Slic3r: link
- Idea Maker: link
- Kiri Moto: link
- Mattercontrol: link
- KISSlicer: link
- SuperSlicer: link
If you’re interested in acceleration tuning, check out this video: link
For retraction calibration, you can use my free website: link
For quality filament, I recommend X3D. They have a special offer of buy 3, get 1 free, and you’ll also receive a free sample pack with every order. Visit their website: link
If you need quality resins, check out 3D Printers Online. They offer a 5% discount storewide for Teaching Tech subscribers. Use the code “tech5”: link
Feel free to explore my channel and if you like what you see, please subscribe. And if you’d like to support me, you can do so on Patreon: link
ELEGOO PLA Plus Filament 1.75mm White 2KG, PLA+ Tougher and Stronger 3D Printer Filament Pro Dimensional Accuracy +/- 0.02mm, 2 Pcs 1kg Spool(2.2lbs) Fits for Most FDM 3D Printers
$28.98 (as of June 6, 2025 21:45 GMT +00:00 - More infoProduct prices and availability are accurate as of the date/time indicated and are subject to change. Any price and availability information displayed on [relevant Amazon Site(s), as applicable] at the time of purchase will apply to the purchase of this product.)
Creality ABS Filament 1.75mm, 3D Printer Filament, Excellent Resistance, Odorless Non-Toxic, Stability, Tough, 1kg(2.2lbs) Printing Filament for 3D Printer (Black)
$22.99 (as of June 6, 2025 21:45 GMT +00:00 - More infoProduct prices and availability are accurate as of the date/time indicated and are subject to change. Any price and availability information displayed on [relevant Amazon Site(s), as applicable] at the time of purchase will apply to the purchase of this product.)
Anycubic 3D Printer Kobra S1 Combo, Multi-Color 3D Printer Max 600mm/s High Speed Printing High Precision, Works Right Out of Box Sealed Storage Intelligent Mult-Filament Drying 9.8"x9.8"x9.8"
$599.99 (as of June 6, 2025 21:45 GMT +00:00 - More infoProduct prices and availability are accurate as of the date/time indicated and are subject to change. Any price and availability information displayed on [relevant Amazon Site(s), as applicable] at the time of purchase will apply to the purchase of this product.)
Creality Official 8 Inches Rotating Turntable Display Stand, 360˚ Rotation Portable Turntable for Creality Otter/Raptor/Ferret Pro 3D Scanner, Easy Scanning of Featureless and Small and Medium Objects
$14.99 (as of June 5, 2025 21:38 GMT +00:00 - More infoProduct prices and availability are accurate as of the date/time indicated and are subject to change. Any price and availability information displayed on [relevant Amazon Site(s), as applicable] at the time of purchase will apply to the purchase of this product.)