
Are you interested in diving into the world of 3D printing? Look no further than Austen Hartley’s Beginners Guide to 3D Printing in 2022. In this comprehensive video, Austen covers everything from unboxing your printer to achieving high-quality prints. He recommends certain products, offers an in-depth 3D printing course, and even provides a course on designing using Fusion 360. Topics covered include checking the printer, exploring different materials such as PLA, PETG, and ABS, understanding the idea-to-object process, important slicing settings, support structures, bed leveling, and the printing process. Austen, an engineering school graduate and former professional football player, now owns and operates an engineering design and 3D printing company. Contact information for Austen is provided, along with affiliate links in the video that earn him a small commission. If you’re looking for a comprehensive guide to 3D printing, Austen Hartley’s video is a must-watch!
In Austen Hartley’s video, “Beginners Guide to 3D Printing in 2022 – Watch Before You Start,” he covers everything you need to know about 3D printing. As a mechanical engineer with years of experience in the field, Austen guides you through the process from unboxing your printer to selecting the right software, ensuring safety, understanding settings, and achieving perfect prints every time. PLA, PETG, and ABS are the most commonly used materials in 3D printing, and Austen provides insight into their properties and best use cases. He also emphasizes the importance of proper belt tension, wire safety, and nozzle tightness. Whether you’re a beginner or looking to expand your 3D printing knowledge, Austen’s guide has you covered. Don’t forget to subscribe to his channel for more 3D printing content and consider enrolling in the in-depth course he offers.

This image is property of i.ytimg.com.

Unboxing the Printer
When unboxing your 3D printer, there are a few important steps to follow to ensure the best print quality and longevity of your machine. The first step is to check the belt tension. You want to make sure that the X, Y, and Z belts are tight, but not too tight. A good way to test this is by trying to pinch the belts together. There should be some resistance, but they should still be able to touch. If you strum the belt like a guitar string, it should vibrate for a second.
Next, it’s crucial to check the wires. Move the X, Y, and Z axes to make sure that none of the cables have the potential to get caught on anything. This step is extremely important and should be done before every single print. However, it’s essential to note that this should only be done when the machine is powered on. Moving the axes when the machine is powered off can send power back through the machine and its electronics, which is not good for it.
Lastly, make sure that the nozzle is tight. If the nozzle is not tightened properly, melted plastic can ooze out from the top of the nozzle, fall onto your print, and cause it to fail. Make sure to tighten the nozzle to avoid any print failures due to loose nozzles.
By following these steps when unboxing your printer, you will ensure that your machine is ready for printing with high-quality results.
Checking the Printer
After unboxing your printer, it’s important to check a few key components to ensure everything is in working order. One of the first things to check is the belt tension, as mentioned earlier. Additionally, make sure to check the wires to prevent any potential hazards or damage during printing. Lastly, confirm that the nozzle is properly tightened to avoid any issues during the printing process.
Taking the time to check these components will save you from potential print failures and ensure that your printer is ready to produce high-quality prints.

Introduction to Different Materials
When it comes to 3D printing, there are several materials available, each with its own unique properties and use cases. In this guide, we will focus on three of the most commonly used materials: PLA, PETG, and ABS.
PLA (Polylactic Acid)
PLA, or Polylactic Acid, is one of the most popular materials used in 3D printing. It is known for its low shrinkage and widespread availability. PLA has a nozzle temperature range of 200 to 230 degrees Celsius and a print bed temperature of around 50 degrees Celsius. This material is easy to print with and offers good strength under standard conditions. It is commonly used for both prototyping and functional parts.
However, it’s important to note that PLA has some limitations. It is not suitable for high-temperature applications, as it can become weak and warp at temperatures around 55 degrees Celsius or 130 degrees Fahrenheit. PLA is also not recommended for outdoor use in hot climates, as it can melt and degrade over time.
PETG (Polyethylene Terephthalate Glycol)
PETG, or Polyethylene Terephthalate Glycol, is another popular material in the 3D printing community. It offers better heat resistance and strength compared to PLA. PETG has a higher nozzle temperature range of around 220 to 250 degrees Celsius and a print bed temperature similar to PLA, of around 50 degrees Celsius.
The heat resistance of PETG makes it suitable for applications that require higher temperatures. It also has good durability and impact resistance, making it a popular choice for functional parts. PETG is less prone to warping than PLA and offers excellent layer adhesion.
ABS (Acrylonitrile Butadiene Styrene)
ABS, or Acrylonitrile Butadiene Styrene, is known for its heat resistance and favorable finishing properties. Unlike PLA and PETG, ABS requires a higher nozzle temperature range of around 230 to 260 degrees Celsius and a print bed temperature of around 90 degrees Celsius. It is important to note that ABS emits toxic fumes when heated, so proper ventilation is necessary when printing with this material.
ABS is commonly used in applications that require heat resistance, such as automotive parts and enclosures. It is also a suitable material for post-processing, as it can be sanded, painted, and glued. However, ABS is more prone to warping and requires proper bed adhesion techniques, such as using a heated bed and adhesive.
By understanding the properties and use cases of PLA, PETG, and ABS, you can choose the material that best suits your specific 3D printing needs.
The Idea-to-Object Process
The idea-to-object process in 3D printing involves several steps to go from a concept or design to a physical object. Here is an overview of the process:
-
Designing: The first step is to create or obtain a 3D design file. This can be done using CAD (Computer-Aided Design) software or by downloading pre-designed files from online repositories.
-
Slicing: Once you have your 3D design file, you need to use slicing software to convert it into printable layers. Slicing software allows you to adjust various settings, such as layer height, infill, and perimeters, which we will discuss in more detail later.
-
Setting up the Printer: Before starting the print, ensure that your printer is properly calibrated, leveled, and equipped with the appropriate material and nozzle. Bed leveling is especially crucial for achieving successful prints, as it ensures that the first layer adheres properly to the print bed.
-
Printing: Once everything is set up, you can start the printing process. The printer will follow the instructions from the sliced file, extruding layers of material to gradually build the object.
-
Post-processing: After the print is complete, there may be some post-processing steps required, depending on the desired outcome. This can include removing support structures, sanding, painting, and assembling the printed parts.
By following these steps, you can turn your ideas into tangible objects using a 3D printer.

This image is property of images.pexels.com.
Important Slicing Settings
Slicing software plays a crucial role in translating your 3D design file into printable layers. It allows you to adjust various settings that directly impact the quality and characteristics of your prints. Here are some important slicing settings to consider:
Layer Height
Layer height refers to the thickness of each printed layer. The layer height you choose significantly affects the overall print time and surface finish. A smaller layer height will result in smoother surfaces but will increase print time. On the other hand, a larger layer height will reduce print time but may result in more noticeable layer lines.
The optimal layer height depends on the desired balance between print speed and surface quality. Common layer heights range from 0.1mm to 0.3mm, with 0.2mm being a popular choice for standard-quality prints.
Infill
Infill refers to the internal density of the printed object. It determines the amount of material used to fill the empty spaces within the object. Higher infill percentages result in stronger and more robust prints, but they also increase print time and material usage.
The appropriate infill percentage depends on the desired structural integrity of the object. For objects that don’t require significant strength, such as decorative models, a lower infill percentage (around 10% to 20%) may be sufficient. However, functional parts or objects that need to withstand stress should have a higher infill percentage (around 30% to 50%).
Perimeters
Perimeters, also known as shells or outlines, refer to the number of solid layers that form the walls of the printed object. Increasing the number of perimeters improves the overall strength and durability of the part but also increases print time.
The optimal number of perimeters depends on the specific requirements of the print. For general-purpose prints, two or three perimeters are usually sufficient. However, for parts that require added strength, such as mechanical components, increasing the number of perimeters can enhance stability and rigidity.
By adjusting these slicing settings according to your specific needs, you can optimize the print quality and performance of your 3D prints.
Support Structures
Support structures are essential for successfully printing designs with overhangs or complex geometries. They provide temporary support during the printing process and can be removed afterward. There are two main methods of generating support structures: manual placement and automatic generation.
Manual Support Placement
Manual support placement involves manually adding support structures to areas of the design that require them. This method gives you more control over the placement of supports, allowing you to optimize their location for easy removal and minimal impact on the surface finish.
To manually add support structures, you need to identify areas in your design that have overhangs or bridges. These areas typically require support to prevent sagging or collapsing during printing. Using the slicing software, you can add individual support structures to these areas with a few clicks.
While manual placement offers more control, it requires time and expertise to identify the optimal locations for supports. You may need to experiment with different support settings to achieve the desired result.
Automatic Supports
Automatic supports are generated by the slicing software based on predefined parameters. The software analyzes the model and determines where supports are needed. This method is faster and more convenient than manual placement, especially for complex designs.
However, automatic supports may not always be perfectly placed, resulting in unnecessary supports or supports in difficult-to-remove areas. It’s important to review the automatic supports generated by the software and make adjustments if necessary. Some slicing software allows you to fine-tune support settings to enhance their effectiveness and ease of removal.
Whichever method you choose, support structures are crucial for printing complex designs. They ensure the successful completion of your prints, prevent deformations, and ensure structural integrity.

This image is property of images.pexels.com.
Bed Leveling
Proper bed leveling is crucial for achieving successful prints. Bed leveling refers to the process of adjusting the distance between the print bed and the nozzle to ensure that the first layer adheres evenly and firmly.
To level your print bed, you will need to make slight adjustments to the four corners or three points of your print bed. Most 3D printers have built-in bed leveling features that guide you through the process. It typically involves moving the nozzle to specific positions on the print bed and adjusting the bed height until the proper distance is achieved.
During bed leveling, it’s important to use a leveling tool or paper gauge to measure the distance between the nozzle and the bed accurately. The ideal distance is typically around 0.1mm to 0.3mm, depending on your printer and filament.
Regularly checking and adjusting bed leveling is essential, as the print bed can shift or become unlevel over time. Proper bed leveling ensures optimal adhesion and prevents issues such as uneven first layers, warping, and failed prints.
The Printing Process
Once your printer is set up, calibrated, and the bed is leveled, you are ready to start the printing process. Here is a general overview of the steps involved:
-
Prepare the Print: Load the 3D design file into your slicing software. Adjust the slicing settings, such as layer height, infill, and perimeters, according to your requirements. Slice the model to generate the G-code file, which contains the instructions for the printer.
-
Load the Filament: Insert the filament into the printer’s extruder. Make sure it is properly inserted and secured. Depending on your printer, you may need to manually feed the filament until it reaches the nozzle.
-
Start the Print: Transfer the G-code file to the printer, either via a USB connection or an SD card. Select the file on the printer’s interface and start the print. The printer will begin heating the nozzle and print bed to the required temperatures.
-
Monitor the Print: While the print is in progress, it’s important to monitor the process for any potential issues. Make sure the filament is smoothly extruding, the layers are adhering properly, and there are no signs of warping or other print defects.
-
Post-Processing: Once the print is complete, carefully remove it from the print bed. If there are support structures, carefully remove them using appropriate tools. Depending on your desired finish, you may need to sand, paint, or assemble the printed parts.
Remember to always prioritize safety during the printing process. Avoid leaving the printer unattended for long periods and follow any safety guidelines provided by the manufacturer.

This image is property of images.pexels.com.
Key Points Summary
In summary, this guide has covered various aspects of 3D printing, from unboxing the printer to achieving high-quality prints. Here are the key points to remember:
- When unboxing your printer, check the belt tension, ensure wire safety, and tighten the nozzle.
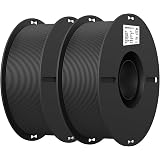
- The most common materials used in 3D printing are PLA, PETG, and ABS, each with its own strengths and limitations.
- Important settings in slicing software include layer height, infill, and perimeters, which impact print quality and performance.
- Support structures are essential for successful prints, and manual support placement is preferred for optimal results.
- Proper bed leveling is crucial for ensuring the first layer adheres properly to the print bed.
- The printing process involves preparing the print, loading the filament, starting the print, monitoring the process, and post-processing the print.
By following these guidelines, you can enhance your 3D printing experience and achieve excellent results.
Further 3D Printing Content
For those looking to delve deeper into the world of 3D printing, there are additional resources available. Here are two options worth exploring:
Subscribing to the Channel
Consider subscribing to the creator’s YouTube channel for more 3D printing content. Subscribing ensures that you receive notifications for new videos and updates on topics related to 3D printing. This will allow you to stay up to date with the latest techniques, tips, and product recommendations.
In-Depth Course
For a more comprehensive understanding of 3D printing, consider enrolling in an in-depth course. This course will provide detailed instruction on various aspects of 3D printing, from beginner to advanced topics. It will cover everything from printer setup and troubleshooting to advanced printing techniques and design considerations. By taking a course, you can gain valuable knowledge and practical skills to excel in the world of 3D printing.
Both of these options provide opportunities to further enhance your 3D printing knowledge and skills beyond what this guide covers.
In conclusion, this guide has provided a comprehensive overview of 3D printing, covering everything from unboxing a printer to achieving high-quality prints. By following the outlined steps and considering the recommendations, you can embark on your 3D printing journey with confidence and create amazing objects from your own ideas.
This video is a Beginners Guide to 3D Printing where I will cover everything you need to know, from unboxing your first 3D printer to achieving high-quality prints. You can find all the products we recommend and use in the description below:
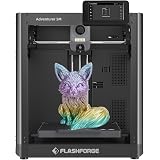
- Best Printer Under $300: link
- Best Overall Printer: link
- Best Large Bed Printer: link
- 3D Printer Adhesive: link
- Best Filament on Amazon: link
- Best Glue for Attaching Models: link
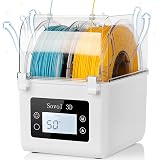
- Best Dehydrator for Filament: link
- Ventilation System Fan: link
- Ventilation System Duct: link
- Timelapse Raspberry Pie: link
- Timelapse Raspberry Pie Camera: link
If you want to dive deeper into 3D printing, we also offer an in-depth course: link. Additionally, learn how to make money with 3D printing: link.
For those interested in designing using Fusion 360, we have a complete and free course: link. You can also check out my company, Crate3d.com.
Consider subscribing to our channel for more informative content: link.
Now, a little about me – after graduating from Engineering school, I spent a short time pursuing a professional football career in the Canadian Football League. However, I decided to retire after two years and focus on business development and investing. I currently own and operate an engineering design and 3D printing company, along with other ventures discussed on this channel.
If you have any questions or want to get in touch, feel free to email me at austen@crate3d.com or follow me on Instagram @ _austenhartley.
Lastly, I’d like to disclose that some of the links provided are affiliate links, meaning I earn a small commission at no extra cost to you.