
Fully Assembled Mini 3D Printer for Kids and Beginners - Complete Starter Kit with Auto Leveling 3D Printing Machine, 10M PLA Filament, and SD Card - WiFi 3D Home Printer for MAC, Windows, and Linux
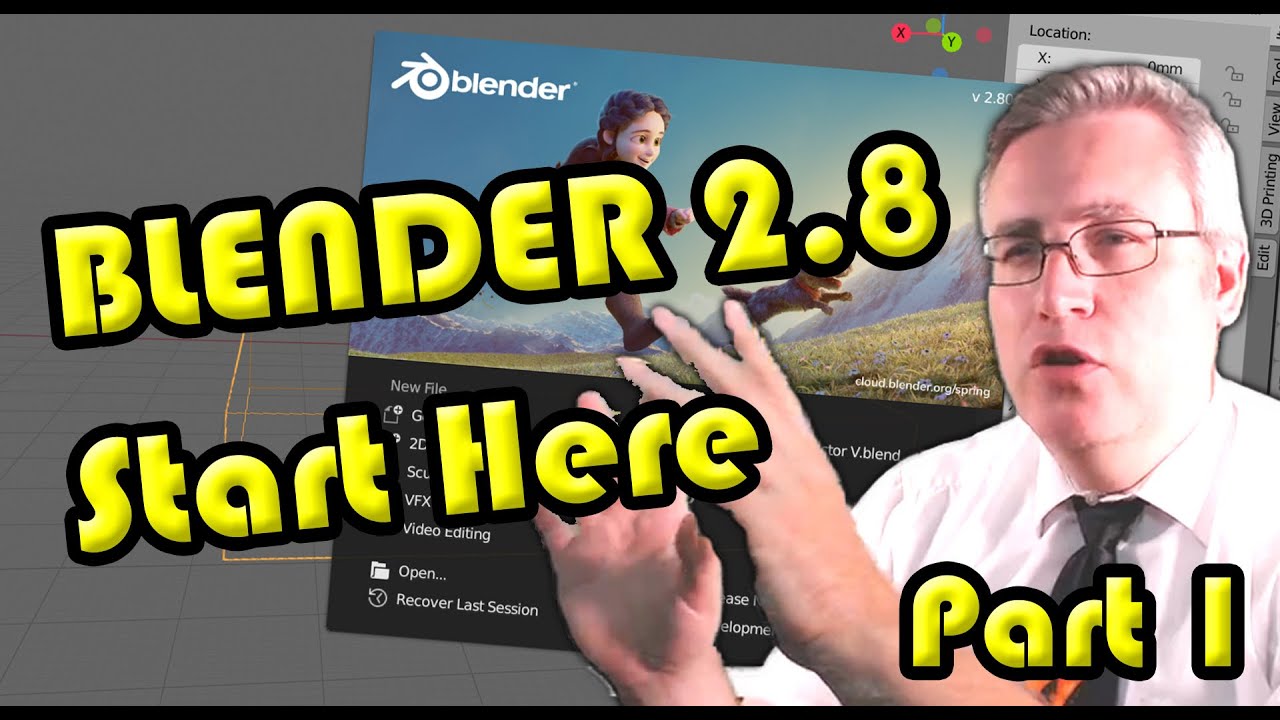
$229.99 (as of June 18, 2025 23:32 GMT +00:00 - More infoProduct prices and availability are accurate as of the date/time indicated and are subject to change. Any price and availability information displayed on [relevant Amazon Site(s), as applicable] at the time of purchase will apply to the purchase of this product.)Blender 2.8 is a powerful software used for 3D printing. In this video by 3D Printing Professor, you will be guided on how to set up Blender for 3D modeling specifically for 3D printing. The video covers various aspects such as setting up the scale to match STL export to millimeters, configuring the environment, and enabling recommended plugins for optimal use. The 3D Printing Professor also recommends a helpful Google doc for organizing thoughts. This video is part of the Blender 2.8 series, with more videos to follow. Be sure to like, subscribe, share, and enjoy the content as the 3D Printing Professor is active on social media platforms.
Blender 2.8 is a free 3D modeling program that offers powerful tools for creating stunning 3D models. However, to make the most of it for 3D printing, certain configurations are needed. In this video by 3D Printing Professor, you will learn how to set up Blender for 3D modeling tailored to 3D printing requirements, including adjusting scale settings, optimizing the environment, and enabling helpful plugins. Additionally, the tutorial series called “Absolute Beginners Guide to 3D Printing” is recommended for those new to Blender. Customizing preferences and exploring additional plugins can enhance Blender’s capabilities according to personal needs. So, if you want to embark on your 3D printing journey using Blender, this video is the perfect starting point.
Blender 2.8 for 3D Printing


Introduction to Blender 2.8 as a 3D printing software
Blender 2.8 is a powerful 3D modeling program that can be used for 3D printing. While it is primarily known as a 3D animation software, it also offers a wide range of features and tools that make it ideal for creating 3D models for 3D printing. In this article, we will explore how to set up Blender 2.8 for 3D printing and make the most out of its capabilities.
Benefits of using Blender for 3D printing
Blender offers several advantages for 3D printing enthusiasts. First and foremost, it is a free software, which makes it accessible to anyone interested in 3D modeling and printing. Additionally, Blender has a user-friendly interface that simplifies the modeling process, making it suitable for both beginners and experienced users.
Moreover, Blender provides a wide range of powerful tools and features that allow for the creation of complex and detailed 3D models. These tools include sculpting, texturing, and rigging, among others. Blender also supports various file formats, making it easy to export models for 3D printing.
Furthermore, Blender has an active and helpful community of users who frequently share their knowledge and expertise. This community provides support and resources that can be invaluable for individuals looking to improve their 3D printing skills.
Part 1: Setup

Overview of the setup process
Before diving into 3D modeling in Blender 2.8, it is important to set up the software properly for 3D printing. This involves configuring the scale, environment, and enabling recommended plugins for optimal use.
Importance of configuring Blender for 3D printing
Configuring Blender for 3D printing is crucial because it ensures that the models created in the software accurately represent the intended dimensions when printed. By properly setting up the scale, environment, and plugins, users can avoid potential errors and discrepancies between the digital and physical models.

Configuring Scale to Match STL Export
Explanation of the scale setup in Blender
The scale setup in Blender determines how the software interprets the sizes and dimensions of the 3D models. By default, Blender uses meters as the unit of measurement. However, for 3D printing, it is essential to set the scale to match the exported STL file, typically in millimeters.
Importance of matching the exported STL file to millimeters
When 3D models are exported to STL files for 3D printing, the printer interprets the dimensions based on the unit of measurement specified in the file. Therefore, it is crucial to ensure that the exported STL file is set to millimeters, so the 3D printer understands the intended size of the model accurately.
Step-by-step guide to setting up the scale in Blender
- Open Blender 2.8 and go to the scene properties panel.
- In the unit settings, choose the metric system.
- Change the length unit to millimeters.
- Adjust the unit scale to 0.001 to represent millimeters accurately.
- Update the grid scale to match the unit scale.
By following these steps, Blender will now work with millimeter measurements, ensuring that the dimensions of the 3D models align correctly with the physical output.
Setting Up the Environment
Importance of environment setup for optimal 3D printing
The environment setup plays a crucial role in creating realistic and aesthetically pleasing 3D models. By configuring the environment settings in Blender, users can enhance the visual appeal of their models while ensuring optimal 3D printing outcomes.
Recommended environment settings in Blender
Blender offers various settings for customizing the environment. Some of the recommended settings for 3D printing purposes include:
- Adjusting the lighting to highlight the model’s details and eliminate any harsh shadows.
- Choosing a suitable background color or image that complements the 3D model.
- Adjusting the camera focal length and clipping distance to control the perspective and visibility of the model.
By carefully configuring these settings, users can create a visually appealing environment for their 3D modeling projects.

Enabling Recommended Plugins
Overview of plugins that enhance Blender’s capabilities for 3D printing
Blender supports a wide range of plugins that can enhance its capabilities for 3D printing. These plugins provide additional features and tools that simplify and streamline the 3D modeling process.
Some recommended plugins for 3D printing include:
- 3D Printing Toolbox: This plugin offers various tools for preparing models for 3D printing, such as checking and fixing mesh issues, setting print orientation, and adding support structures.
- Meshlint: Meshlint is a plugin that helps identify potential issues with the 3D model, such as non-manifold geometry, overlapping faces, or holes.
Importance of enabling recommended plugins
Enabling recommended plugins can significantly improve the efficiency and accuracy of 3D printing projects. These plugins offer functionalities that simplify the preparation and optimization of 3D models for printing. By incorporating these plugins into the workflow, users can save time and minimize the risk of encountering errors during the printing process.
Step-by-step guide to enabling and installing plugins in Blender
- Open Blender 2.8 and go to the Edit menu.
- Select Preferences and navigate to the Add-ons tab.
- Click on the “Install” button and locate the downloaded plugin file.
- Enable the installed plugin by checking the box next to it.
- Adjust the settings of the plugin according to the specific requirements of the project.
By following these steps, users can easily enable and install the recommended plugins to enhance Blender’s capabilities for 3D printing.
Organizing Thoughts with Google Doc
Introduction to the Google doc recommended by the 3D Printing Professor
The 3D Printing Professor recommends using a Google doc for organizing thoughts and ideas related to 3D printing projects. This document acts as a centralized hub for brainstorming, planning, and tracking progress throughout the project.
How to use the Google doc for organizing 3D printing ideas and projects
To use the Google doc effectively for organizing 3D printing ideas and projects, users can create sections or categories such as:
- Project ideas: This section can include brainstormed ideas for future 3D printing projects.
- Materials and resources: A list of materials and resources required for each project.
- Progress tracking: A section dedicated to tracking the progress of each project, including design iterations and print testing.
- Inspiration and references: A place to collect references and sources of inspiration for future projects.
Users can also share the Google doc with collaborators or mentors to receive feedback and guidance throughout the project.
Benefits of using a structured approach for organizing thoughts
Using a structured approach like the Google doc recommended by the 3D Printing Professor offers several benefits:
- Improved organization: By having a centralized location for all project-related information, users can easily access and locate the information they need.
- Enhanced collaboration: Collaborators can view and provide feedback in real-time, making it easier to work together on complex projects.
- Clear progress tracking: By documenting progress and design iterations, users can keep track of the progress made and identify areas for improvement.
- Increased productivity: With a structured approach to organizing thoughts, users can stay focused and prioritize tasks, ultimately leading to increased productivity.
By utilizing the Google doc or a similar organizational tool, 3D printing enthusiasts can streamline their projects and ensure effective communication with collaborators.
Blender 2.8 Video Series
Explanation of the Blender 2.8 video series by the 3D Printing Professor
The 3D Printing Professor has created a video series dedicated to Blender 2.8, focusing on teaching beginners how to use the software for 3D printing. The video series provides step-by-step instructions and practical examples to guide viewers through the various features and functionalities of Blender.
Overview of the topics covered in the video series
The Blender 2.8 video series covers a wide range of topics, including:
- Introduction to Blender 2.8 and its interface.
- Basic modeling techniques and tools.
- Sculpting and detailing 3D models.
- Materials and texturing.
- Lighting and rendering.
- Exporting models for 3D printing.
The video series aims to provide a comprehensive understanding of Blender 2.8 and equip viewers with the skills necessary to create high-quality 3D prints.
Encouragement to like, subscribe, share, and enjoy the content
The 3D Printing Professor encourages viewers to engage with the video series by liking, subscribing, and sharing the content. By doing so, viewers can support the creator and help reach a wider audience, allowing more individuals to benefit from the valuable tutorials and resources provided.
Connecting with the 3D Printing Professor
Information about the 3D Printing Professor’s social media presence
The 3D Printing Professor is an active member of the 3D printing community and maintains a strong social media presence. Through various platforms, the 3D Printing Professor shares updates, tutorials, and engages with the community.
Details on how to connect and engage with the 3D Printing Professor
Viewers who wish to connect and engage with the 3D Printing Professor can do so through the following channels:
- Discord: Join the 3D Printing Professor Discord server to interact with like-minded individuals and receive guidance from experts.
- Social media platforms: Follow the 3D Printing Professor on platforms such as Discord, Twitter, and YouTube to stay updated on new tutorials, tips, and tricks.
By connecting with the 3D Printing Professor, users can benefit from a knowledgeable and supportive community, fostering their growth and development in the field of 3D printing.
Benefits of connecting with a knowledgeable community for 3D printing
Connecting with a knowledgeable community for 3D printing, such as the one facilitated by the 3D Printing Professor, offers several benefits, including:
- Access to valuable resources and tutorials.
- Opportunities to ask questions and receive advice from experienced individuals.
- Collaboration and networking with like-minded individuals.
- Stay up-to-date with the latest trends and developments in the field.
By actively engaging with the community, users can expand their knowledge, enhance their skills, and find inspiration for their own 3D printing projects.
Exploring Blender 2.8’s Powerful Tools
Overview of Blender 2.8’s powerful tools for 3D modeling
Blender 2.8 offers a wide range of powerful tools specifically designed for 3D modeling. These tools allow users to create complex and detailed 3D models that are suitable for 3D printing.
Some of the powerful tools available in Blender 2.8 include:
- Sculpting tools: These tools make it possible to add intricate details and textures to 3D models, enhancing their visual appeal.
- Texturing tools: Blender offers advanced texturing capabilities, allowing users to create realistic materials and apply them to their models.
- Animation tools: While primarily known as a 3D modeling software, Blender also offers a complete set of animation tools, making it possible to create dynamic and animated 3D models.
Explanation of the benefits and capabilities of these tools
The powerful tools provided by Blender 2.8 enable users to take their 3D modeling projects to the next level. These tools allow for greater creativity, precision, and flexibility when designing 3D models for 3D printing. Whether it’s sculpting intricate details, applying realistic textures, or adding animations, Blender’s tools offer endless possibilities for creating stunning 3D prints.
Examples of how these tools can be used for 3D printing projects
Blender’s powerful tools can be utilized in various ways to enhance 3D printing projects. For example:
- Sculpting tools can be used to create custom designs, such as organic shapes or intricate patterns.
- Texturing tools can be applied to add lifelike materials to the models, giving them a more realistic appearance.
- Animation tools can be used to create movable or dynamic parts in a 3D model, allowing for interactive and engaging prints.
By leveraging Blender’s powerful tools, users can elevate their 3D printing projects and create unique and visually appealing designs.
Conclusion
Blender 2.8 is a versatile and powerful software that can be used for 3D printing. By properly setting up Blender and utilizing its features and tools, users can create high-quality and intricately detailed 3D models for printing. The video series by the 3D Printing Professor, along with the recommended plugins and organizational tools, provide valuable resources and guidance for beginners and experienced users alike. By exploring Blender’s capabilities and connecting with the 3D Printing Professor and the community, users can dive into the world of 3D printing and unlock a world of creative possibilities. So, grab your mouse, start Blender 2.8, and let your imagination come to life in the form of stunning 3D prints.
In this video, you’ll learn how to set up Blender for 3D printing. If you’re new to Blender and want to start creating 3D models for printing, this is the perfect place to begin. We’ll cover everything from optimizing Blender for modeling to adjusting the scale for STL export. By following these steps, you’ll be able to make the most out of Blender’s capabilities. Additionally, we’ll enable some highly recommended plugins that will enhance your experience. To achieve the same look as mine and follow along with future videos, this is exactly how I set up my Blender.
To help you further, check out this excellent Google doc by imonsei, a user on the 3DPProfessor Discord: [Deleted, Sorry]
Make sure to watch the entire Blender 2.8 series here: • Blender 2.8 / 2.9 for the Absolute Be…
Don’t forget to like, subscribe, share, and enjoy!
3D Printing Professor is made possible by your support! If you’d like to contribute, visit: https://www.3dpprofessor.com/support/
Let’s stay connected!
/ discord
/ 3dpprofessor
/ 3dprofessor
If you need a comprehensive guide to navigating the 3D printing world, consider purchasing the Beginner’s Guide to the 3D Printing Galaxy on Amazon: https://amzn.to/2ws7OiT
Support the channel by shopping at GearBest for your 3D printing needs: https://www.gearbest.com/3d-printers-…
Follow along with my other 3D printing adventures on: https://www.3dpprofessor.com
Join our mailing list to stay updated on all the important information: https://bit.ly/3DPPnews
All the music in this video is composed by Kevin MacLeod (incompetech.com) and is licensed under the Creative Commons Attribution 3.0 License: https://creativecommons.org/licenses/…
Creality 3D Printer Glue Sticks for Hot Bed Warping Reducing 3D Printer Bed Adhesive PVP Solid 3D Print Glue Stick 3D Gloop for PLA/ABS/PETG/PC/PA/TPU(Pack of 4)
$13.59 (as of June 18, 2025 23:32 GMT +00:00 - More infoProduct prices and availability are accurate as of the date/time indicated and are subject to change. Any price and availability information displayed on [relevant Amazon Site(s), as applicable] at the time of purchase will apply to the purchase of this product.)
BIQU CryoGrip Pro Glacier 257x257mm Panda Build Plate for Bambu-Lab P1S/P1P/X1C/X1E/A1 3D Printer Double Sided Upgrade Build Plate Removable Surface Platform
$29.99 (as of June 18, 2025 23:32 GMT +00:00 - More infoProduct prices and availability are accurate as of the date/time indicated and are subject to change. Any price and availability information displayed on [relevant Amazon Site(s), as applicable] at the time of purchase will apply to the purchase of this product.)
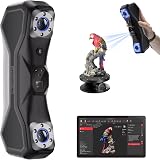
3D Scanning Marker & Turntable Kit – 6.0mm Inner Diameter Adhesive Dots with Auto Rotating Turntable, 600 Reference Markers for Handheld 3D Scanners, Reverse Engineering & Metrology
(as of June 18, 2025 23:32 GMT +00:00 - More infoProduct prices and availability are accurate as of the date/time indicated and are subject to change. Any price and availability information displayed on [relevant Amazon Site(s), as applicable] at the time of purchase will apply to the purchase of this product.)
Kingdder 200 Pcs 3D Magnetic Tracking Dot for Scanner Scanning Reference Point Marker Diffuse Reflection Positioning Targets for 3D Scanning (Inner 3.0 mm Outer 6 mm)
$25.99 (as of June 18, 2025 23:32 GMT +00:00 - More infoProduct prices and availability are accurate as of the date/time indicated and are subject to change. Any price and availability information displayed on [relevant Amazon Site(s), as applicable] at the time of purchase will apply to the purchase of this product.)