Embark on an exciting journey into the world of 3D printing with your very own guide, “Complete Beginner’s Guide to 3D Printing.” Whether you’re just pulling your brand-new 3D printer out of the box or contemplating the purchase of your first unit, this thorough tutorial offers a haven of knowledge. Your new tech adventure will take you from the very basics of setting up your machine to the final reveal of your first printed marvel, ensuring you understand every step of the process along the way. You’ll also get a glimpse into the ins and outs of the Flashforge Creator Max 2, a state-of-the-art 3D printer that might just be your next favorite gadget.
Think of yourself as an artist, and the 3D printer as your chisel and marble — it’s time to unleash your inner Michelangelo of the modern world. Your guide, Nils, will escort you through the intricacies of your new 3D printer, from ensuring you have all the necessary tools at hand — yes, a sip of your favorite drink might just be as essential as any screwdriver — to the final touches of perfecting your 3D printed models. From bed leveling that could rival the poise of a ballet dancer to slicing software that makes you feel like a computer wiz, this guide doesn’t miss a beat. So, prepare to turn those digital dreams into tangible realities with a side of pro tips and tricks to keep your 3D printing journey as smooth as your freshly printed creations.
Understanding 3D Printing
Introduction to 3D printing basics
You may have heard about the wonders of 3D printing, but what is it exactly? At its core, 3D printing, also known as additive manufacturing, is the process whereby a digital design is turned into a physical object by adding material layer by layer. Picture this: you’re a sculptor, and instead of chipping away at a block of marble, you meticulously add bits of material to create your masterpiece. That’s the heart of 3D printing.
Significance of 3D Printing
The significance of 3D printing can’t be overstated. Imagine the freedom to create complex and customized items with just the click of a button. You’re not just buying what’s available; you’re making what you need. Industries from healthcare to aerospace have taken note, as 3D printing allows for rapid prototyping, customized solutions, and intricate designs that traditional manufacturing methods would struggle to realize.
Examples of 3D Printed Objects
What’s truly exciting is what’s already been accomplished with 3D printing. You could print everything from simple household items like a vase or a doorstop to more complex items like prosthetic limbs or intricate jewelry. And yes, you can even print parts for another 3D printer. This technology encourages creativity and practicality in equal measures.
Possible Future Applications of 3D printing
Envision a future where buildings are constructed with 3D printed materials, where your medications are printed to suit your specific needs, or where space exploration vehicles are printed and assembled off-world. The potential uses are expanding every day as the technology evolves, and you’ll likely witness incredible advancements in your lifetime.
Getting Started with 3D Printing
Necessary items for setting up a 3D Printer
So, you’re ready to dive in! To start your 3D printing journey, ensure you have a computer (a Mac or PC will do), the assembly tools often included with your printer, and a dose of patience. The adventure is just beginning.
Unboxing and setting up a 3D printer
The moment you unbox your 3D printer is quite thrilling. However, the setup can vary significantly based on the model you have. Some printers come fully assembled, while others arrive as kits that allow you to build from scratch – a great learning experience but more time-consuming.
Understanding the assembly level (full, partial, kit)
When you chose your printer, you decided how involved you wanted to be in the setup process. Fully assembled models are almost plug-and-play, partial assemblies might require some fitting and tweaking, and kits offer the full DIY experience—choose based on your comfort level with tools and instructions.
Importance of leveling the printing bed
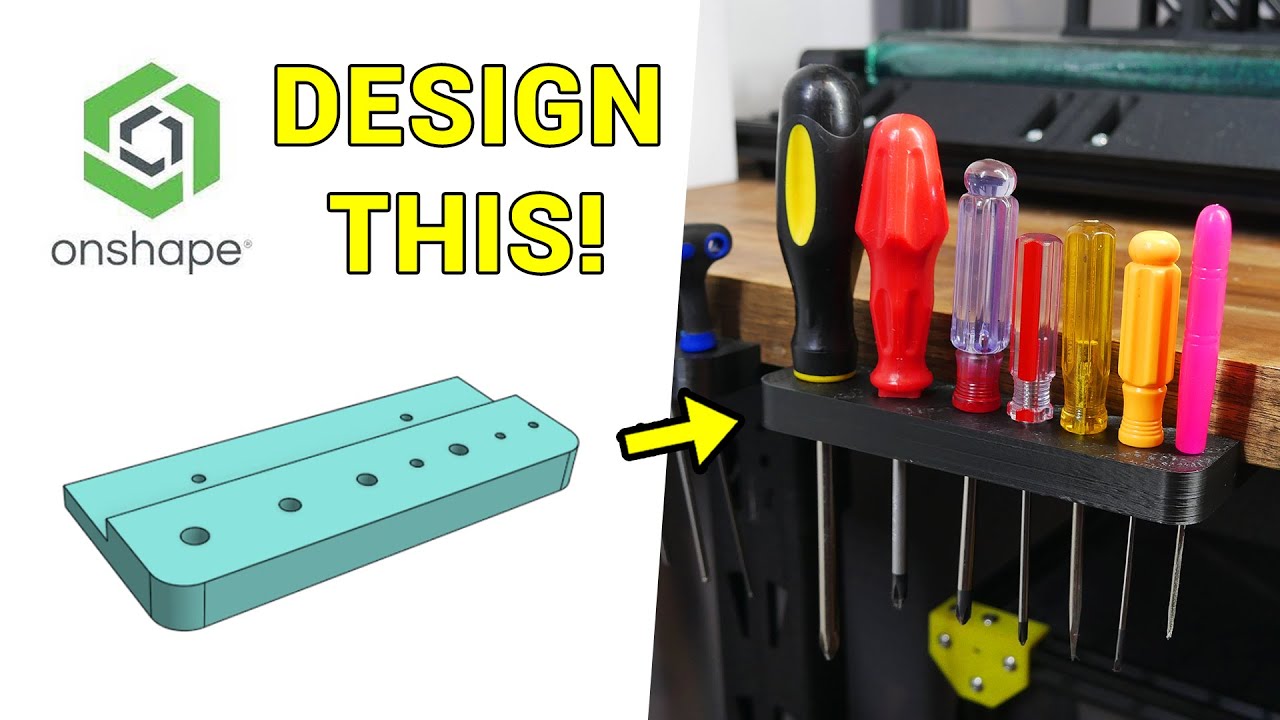
Leveling the bed is a step you can’t skip over. If the foundation isn’t level, your prints will fail. Think of it as prepping your canvas before painting; you need a flat surface to create a masterpiece. Your printer might have auto-leveling features, or you might need to do it manually, but it’s key to ensure successful prints.

This image is property of i.ytimg.com.
Initial Test Prints and the Slicer Software
Introduction to test prints
Before creating your designs, you’ll run a few test prints. These are important to verify that everything is set up correctly. It’s like a chef tasting their dish before serving: you need to ensure everything tastes—or in this case, looks—just right.
Demonstration of initial test prints
These initial prints will be provided on the SD card that comes with your printer or can be downloaded from the manufacturer’s site. Straightforward shapes like cubes or spheres test the printer’s accuracy and reveal any issues with bed adhesion or leveling.
Overview of slicer software
The slicer software is your print’s best friend and your ally. It slices your 3D model into layers and generates the G-code the printer needs to produce your object. Think of it as a translator, converting your digital design into a language your 3D printer understands.
Examining FlashPrint and Cura slicer software
FlashPrint and Cura are popular slicer programs that often come recommended for beginners. Both have intuitive interfaces, and while they have specific features and formats, they share the same goal: to prep your model for printing. It’s worth trying both and seeing which you prefer.
Preparing the 3D Model for Printing
How to download 3D models
If you aren’t designing your objects, you’ll download models created by others. Places like Thingiverse are treasure troves for 3D printing enthusiasts. You can find anything from decorative pieces to replacement parts, all available at your fingertips.
Prepping 3D models for printing
Once you download your model—typically an STL or OBJ file—you’ll need to prepare it. This might mean scaling the model to the desired size or adjusting its orientation for the best print quality. The slicer software can help you make these tweaks seamlessly.
Understanding STL files and where to download them
STL files are the standard format for 3D printing, representing the surface geometry of a 3D object. There are many online repositories where you can find STL files; just ensure that the designs you choose are compatible with your printer’s capabilities.
Perfecting settings in slicer software
Now comes the meticulous part: adjusting settings like layer height, infill percentage, and supports. It’s not just about what you’re printing, but how you’re printing it. Low layer heights increase detail but take longer, higher infill strengthens your object, and supports are crucial for overhangs. Balancing these settings is where the magic happens.

This image is property of images.unsplash.com.
Demonstrating the Printing Process
From the beginning: How to start a print from an SD card
When you’re ready to print, you’ll load the G-code file onto an SD card and slide it into your printer. Then select the file from the printer’s menu—it’s the digital equivalent of setting your dough into the oven.
Layer-by-layer print process
Watching your printer work is captivating. It adds material, layer by ultra-thin layer, gradually bringing your design to life. If you pay close attention, you can see each layer fuse to the last, building your design as each minute passes.
Printing additional structures: The Raft
In some cases, you’ll print a raft—a foundation layer that helps with adhesion and ensures a smooth surface for your model to build upon. Once complete, you can simply remove the raft, like peeling away the backing of a sticker.
Printing complex objects and necessary adjustments
Complex objects might need adjustments like reduced speed for greater detail or modified temperatures for different materials. The slicer software will guide you through these choices, ensuring the paths set for the nozzle will result in a successful print.
Print cleanup and post-processing
Once the printing is complete, you might have some cleanup work. Supports must be removed, and sometimes, a bit of sanding is necessary for a smooth finish. It’s all worth it when you hold your finished product, ready for use or display.
Using Support Structures in 3D Printing
What are support structures?
Imagine building a bridge out of clay without anything to hold it up—impossible, right? That’s where support structures come in. They’re the temporary scaffolds that allow you to print elements like overhangs or undercuts, supporting the design where gravity defies it.
When to use support structures
You’ll use supports when your model has parts that float in mid-air, unsupported by any other part of the design. It’s like having training wheels on a bike—they’re there until you don’t need them anymore, after which they can be removed to reveal the final form.
Tree-like vs Linear support options
There are different styles of supports, like tree-like that branch out as they reach your model, or linear that are straight pillars. Each has its benefits: tree-like supports use less material and are easier to remove, whereas linear supports are sturdier.
Removing support from the printed model
Taking away the supports can be a delicate process. You want to avoid damaging your model, so work carefully, using tools like tweezers or clippers when necessary. After removal, a little sanding might be needed to smooth the surface. It’s the finishing touch in achieving the polished look of your print.

This image is property of images.unsplash.com.
Examining the Flashforge Creator Max 2 3D Printer
Features of Flashforge Creator Max 2
The Flashforge Creator Max 2 deserves attention. It stands out with its independent dual extruders (IDEX), which means you can print with two colors or materials independently—a dream for producing intricate or colorful designs.
Experience in setting up and using Flashforge Creator Max 2
Your experience with setting up the Creator Max 2 will likely be smooth, as it requires minimal assembly. The dual extruders allow you to experiment with a range of materials and colors, making your prints stand out.
Understanding the independent dual extruders (IDEX) function
The IDEX function lets you print two different models simultaneously or use a soluble support material together with your main filament. It’s like having two printers in one, doubling your productivity and creativity.
Other unique features of Flashforge Creator Max 2
The magnetic release plate makes removing prints a breeze, and a fully enclosed design means reduced noise and improved temperature stability—especially important for materials like ABS. The touchscreen interface adds convenience to this well-rounded machine.
Troubleshooting and Adjustments
Tips for successful prints
The key to successful prints includes ensuring your bed is level, your nozzle is clean, and your filament is of good quality. Keep an eye on the first layer—often a tell-tale sign of a good print to come.
Common troubleshooting concerns
Running into issues? Don’t fret. Common concerns include prints not sticking to the bed, warping, or filament not feeding correctly. Each has a solution, from adjusting bed temperature to tweaking retraction settings.
Recommended tweaks for common print issues
Sometimes, a small tweak can go a long way: changing print speed for better detail, adjusting bed leveling knobs for that first perfect layer, or drying out filament that’s absorbed moisture to prevent bubbles in your print.
Understanding Bed Adhesion, Layer Shifting and other common printing problems
Learning about bed adhesion techniques and solving layer shifting will elevate your 3D printing game. Whether it’s applying a glue stick for better grip or calibrating your printer for consistent movement, mastering these will lead to consistently better prints.

This image is property of images.unsplash.com.
Additional 3D Printing Resources
Online 3D Printing Communities
Join online communities like forums, Facebook groups, or even Reddit to absorb the collective wisdom of thousands of 3D printing aficionados. These groups are invaluable for advice, tips, and sharing your triumphs and failures.
3D Printing Tutorial Videos
A plethora of tutorial videos awaits on platforms like YouTube. From assembling your printer to perfecting print settings, there’s a guide for almost any topic you can think up. Soak in the knowledge these creators are eager to share.
3d Printing Zone’s Channel Membership and Patreon
Supporting creators like The 3D Printing Zone through channel memberships or Patreon can unlock a trove of content tailored for enthusiasts. Plus, your support helps create more amazing content for the community.
Free audiobooks and educational materials offered to viewers
And don’t forget about the free audiobooks and resources that might be available to you. These can serve as a great starting point for understanding the intricacies of 3D printing, often covering topics from the very basics to advanced techniques.
Conclusion
General thoughts on the future of 3d printing
The future of 3D printing looks bright and limitless. As we develop new materials and refine our technology, the horizon expands with opportunities—opportunities for you to be part of a revolution in making and creating.
Discussion and comments on 3D printing
Engage in discussions and leave comments to share your experiences within the world of 3D printing. Every insight, question, or piece of advice can pave the way for learning and innovation.
More on the 3D Printing Zone’s contributions
Platforms like The 3D Printing Zone continue to contribute to the community, providing valuable guidance and resources. Their efforts make your journey from a beginner to an advanced user smoother.
Conclusion of the Guide
As you venture forth, remember that every print, whether a success or a learning experience, takes you further into the realm of 3D printing. Let your creativity loose, and happy printing!
Are you new to the world of 3D printing or perhaps considering getting your very first 3D printer? You’re heading in the right direction. This video will guide you, a newcomer to 3D printing, through the steps from unpacking to slicing to actual printing, whether it’s your own designs or ones you’ve sourced online. Plus, we’ll take a look at the latest from Flashforge: the Creator Max 2.
► SPONSOR ◀︎
A massive shout-out to Flashforge for supplying their latest model – the Creator Max 2 that you can spot in the video. You have the option to get one for yourself on Amazon for $969 USD right here: https://geni.us/HEGphi.

-
Flashforge Creator Max 2 ($969): https://geni.us/HEGphi
-
5 pk of 3D Printing Snips ($14): https://geni.us/10fTo
-
PLA Filament ($18-35): https://geni.us/9oWTb
-
PETG Filament ($18-35): https://geni.us/79mP5Ez
-
ABS Filament ($18-35): https://geni.us/ML7kw
-
TPU Flexible Filament ($18-35): https://geni.us/AibL3
Remember, most of these links are affiliate links, so while you pay the standard rate, your purchase helps me make a little commission. It’s a great way to support my channel, so thank you!

-
3D Printing Troubleshooting Guide: https://www.simplify3d.com/support/pr…
-
Download Flashprint (for Flashforge Printers): https://www.flashforge.com/download-c…
-
Download Cura (for other printers): https://ultimaker.com/software/ultima…
-
Purchase Simplify 3D (an advanced slicer – a bit costly at $149 but it’s robust): https://www.simplify3d.com/buy-now/
-
Thingiverse: https://www.thingiverse.com/
-
MyMiniFactory: https://www.myminifactory.com/

Feel free to show your support by joining the Channel Membership: /the3dprintingzone
or through Patreon: /the3dprintingzone

• What I Wish I Had Known Before 3D Printing: • Revised: 3D Printing – 13 Things I Wi…
• Bulletproof Stormtrooper from 3D Printer: • 3D Printed Wearable Stormtrooper Armo…
• Tips for a Flawless First Layer in 3D Printing: • 2 Tricks For Getting the Perfect Firs…

Navigate to our site at https:/www.the3dprinting.zone

Facebook: /the3dprintingzone
Instagram: /the3dprintingzone
TikTok: /the3dprintingzone

If you’re interested in getting two free audiobooks from Audible, use this link: https://goo.gl/QGFC4Q


