Creality Ender 3 V3 SE 3D Printer, 250mm/s Faster Print Speed CR Touch Auto Leveling Sprite Direct Extruder Dual Z-Axis Auto Filament Loading Ender 3 Upgrade 3D Printer Print Size 8.66x8.66x9.84 inch
$229.00 (as of June 6, 2025 21:45 GMT +00:00 - More infoProduct prices and availability are accurate as of the date/time indicated and are subject to change. Any price and availability information displayed on [relevant Amazon Site(s), as applicable] at the time of purchase will apply to the purchase of this product.)Are you ready to unleash your creativity and create a personalized keychain that’s uniquely yours?
Anycubic Coupon – $5 off $50+ sitewide with code DIY5OFF
Getting Started with Tinkercad
Tinkercad is an amazing online tool that allows you to design and create 3D models, and it’s perfect for making a customized keychain. If you haven’t already, sign up for a Tinkercad account by pressing “Use personal account” and selecting “Sign in with Google.” The process is straightforward, and you’ll be logged into your brand new Tinkercad account in no time.
Creating Your Workspace
Once you’re logged in, you’ll see your Tinkercad workspace, where you can access all your projects. Click on “Create 3D design” at the top right of the home screen, and you’ll be taken to your workplane. This is where the magic happens, and you’ll start designing your keychain.
Anycubic Coupon – $5 off $50+ sitewide with code DIY5OFF
Starting Your Keychain
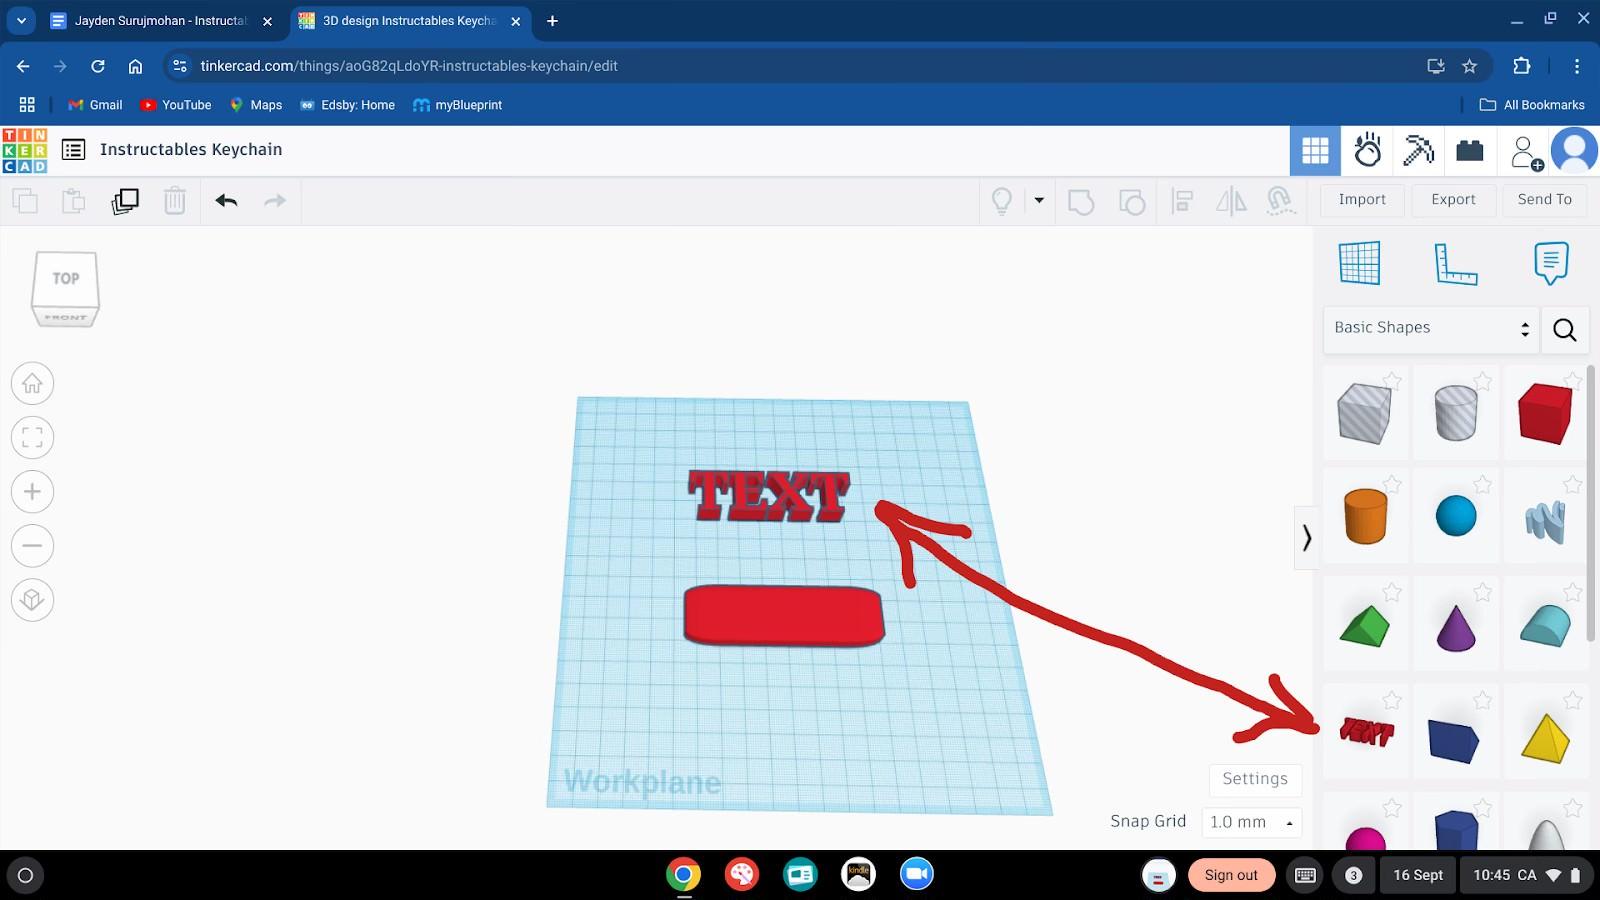
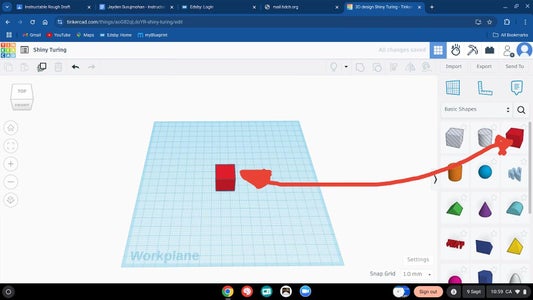
In your workplane, you’ll see a red cube on the right side of the screen. Drag this cube to the workplane to start creating your keychain. Don’t worry if you’re not sure what you’re doing yet; Tinkercad saves your progress automatically, so you can experiment without losing your work.
Sizing and Radius
To make your keychain round and smaller than the block on the screen, you need to edit the dimensions of the cube. Click on the screen, and on the right side, you’ll see the dimensions of the cube. Change the radius to 3.4mm and set the height to 8.00mm. You can adjust the size using the white box on top of the square or type in your preferred dimensions.
Adjusting the Length and Width
Next, click and hold the black square on the right side of the cube and adjust its length to 85.00mm. You can do this by dragging the square or typing in the dimension. Then, click on the white box above the black dot and adjust the width to 25.00mm. You now have the perfect length, width, and height for your keychain.
Adding Customized Text
This is the fun part! You can add your own customized text to your keychain using the TEXT shape. Drag and drop the TEXT shape onto the workplane and position it inside the cube, leaving some space on one side for the loophole.
Making Sure It Fits
Click on the TEXT block and type in what you want your keychain to say. Depending on the length of your text, the block may expand past the keychain block. Use the sizing blocks on the TEXT block to size it down to your preferred size.
Using Hole and Sphere
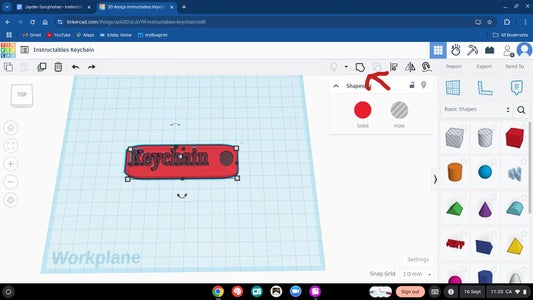
Now it’s time to engrave your keychain and add a loophole. Click on the TEXT block and select HOLE from the window that pops up. This may take a few seconds to load, but it will give you a nice, engraved look. Then, drag and drop the blue sphere into the space and size it down to fit your keychain. Use HOLE again to create a loophole.
Merging Shapes
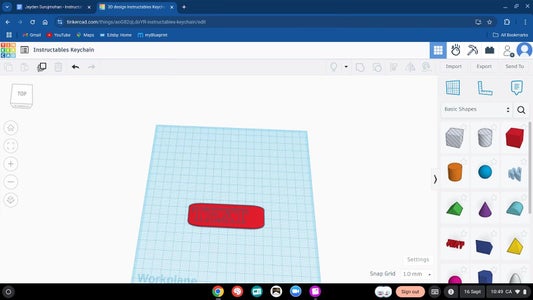
Drag your cursor to cover the entire block, and when the block menu shows up, select the circle inside a square to merge the three shapes together. This will create a single, cohesive design for your keychain.
Checking Your Progress
Take a step back and look at your design. If it looks like the example, you’re on the right track! If not, don’t worry; just go back to the previous steps to see where you went wrong.
Exporting Your Keychain
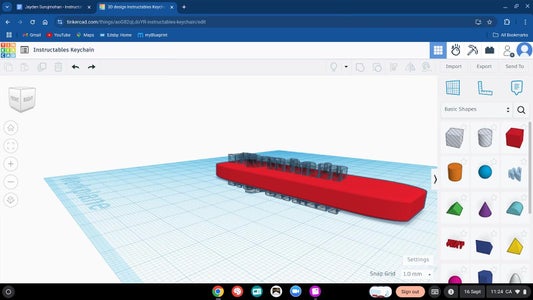
Once you’re happy with your design, click on “Export” at the top of the document. This will set up the process to send it to your 3D printer.
Choosing the Right File Type
You’ll be prompted to select a file type. Choose “.STL” as this is the specific printing file for 3D prints.
Using MakerBot Print
Open up your 3D printing software, and if you don’t have one, download MakerBot Print. Drag and drop your STL file onto the workplane, and it should look like the example.
Breakaway Supports
On the right side of the screen, you’ll see a gear icon. This will open up your print settings. Under support type, select Breakaway Support. This ensures that your print will look exactly like it does on your computer.
Starting the Printing Process
On your 3D printer, select “Begin printing,” and your print should start. Make sure your printing plate is clear, and let the magic happen!
Finishing Touches
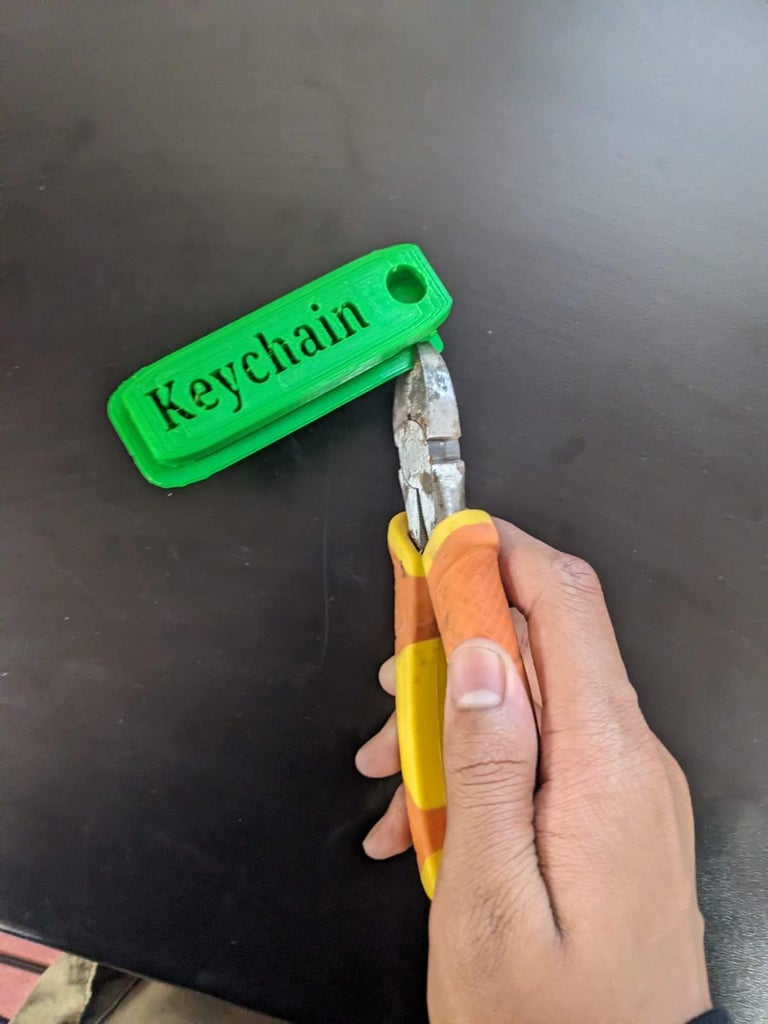
When your print is finished, it should look like the example. The color will vary depending on the filament you used. Take some pliers and break off the breakaway supports, and you’ll have a beautiful, customized keychain.
Congratulations! You’ve successfully created a personalized keychain using Tinkercad. Pat yourself on the back, and enjoy your new accessory.
Anycubic Coupon – $5 off $50+ sitewide with code DIY5OFF
