FLASHFORGE Adventurer 5M 3D Printer, 600mm/s High-Speed, 1 Click Fully Auto Leveling, Upgraded Direct extruder Quick Detachable 280°C Nozzle, Dual-Sided PEI Coating Plate, Print Size 220x220x220mm
$259.00 (as of June 18, 2025 23:32 GMT +00:00 - More infoProduct prices and availability are accurate as of the date/time indicated and are subject to change. Any price and availability information displayed on [relevant Amazon Site(s), as applicable] at the time of purchase will apply to the purchase of this product.)The article titled “Creality Ender 3 V2 – Simple Tips for Super Clean 3D Prints” provides valuable insights and techniques for improving the print quality of 3D prints. The content covers various tips, such as printing one part at a time to reduce surface irregularities, using the combing feature to keep travel movements within the part, and adjusting the position of parts to hide irregularities. The article also highlights an experimental setting called “print sequence” that allows for printing multiple parts while maintaining high print quality. The video showcases test prints with different settings and materials to demonstrate the impact on print quality. Overall, the article emphasizes the importance of these simple tips to achieve super clean 3D prints.
If you have been struggling to achieve high-quality 3D prints and are looking for effective techniques and settings, the article “Creality Ender 3 V2 – Simple Tips for Super Clean 3D Prints” can provide the guidance you need. It offers step-by-step instructions on methods like printing one part at a time, turning on combing, and adjusting seam locations to improve print quality. The article also warns about the potential damage that carbon fiber filament can cause and provides recommendations for maintaining a close-to-stock printer setup. By following these tips and techniques, you can elevate the professionalism and visual appeal of your 3D prints.

Print One Part at a Time
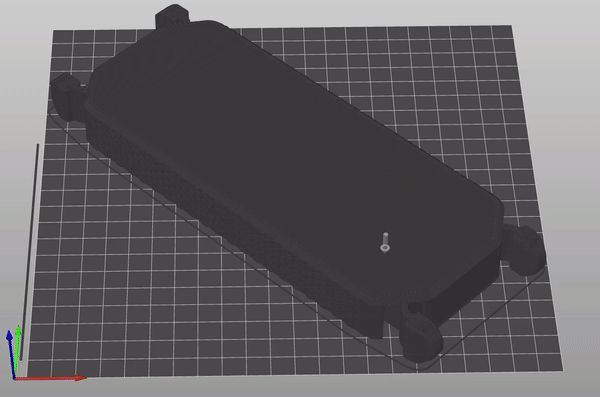
When it comes to improving the print quality of your 3D prints, one simple method is to print one part at a time. This means printing each part individually instead of printing multiple parts at once. By doing this, you can reduce surface irregularities that are caused by travels between parts. These travels can result in issues such as blobs and stringing, which can compromise the overall quality of your prints. Printing one part at a time eliminates these surface imperfections and ensures that each print is clean and high-quality.
Reduce Surface Irregularities
Printing one part at a time helps to reduce surface irregularities that can occur when printing multiple parts simultaneously. When you print multiple parts at once, the printer has to travel between each part, which can cause imperfections in the surface of the print. By printing one part at a time, you eliminate these travels and minimize the chances of surface irregularities.
Minimize Travel Movements
Printing one part at a time not only reduces surface irregularities but also minimizes travel movements. When the printer has to move between multiple parts, there is a higher chance of stringing and oozing. These issues can result in unwanted material being deposited between parts, leading to a decrease in print quality. By printing one part at a time, you can keep travel movements within the part itself, reducing the risk of stringing and oozing.
Improve Overall Print Quality
By reducing surface irregularities and minimizing travel movements, printing one part at a time significantly improves the overall print quality. Each print will be cleaner and more professional-looking, with fewer imperfections and defects. This method ensures that each part receives the attention and detail it deserves, resulting in high-quality prints that meet your standards.
Turn on Combing
Alongside printing one part at a time, another useful tip for improving print quality is to turn on combing. Combing is a feature in slicing software that allows the printer to keep travel movements within the part, reducing the need for unnecessary retractions. By enabling combing, you can further optimize your prints and enhance the overall print quality.
Keep Travel Movements Within the Part
By turning on combing, you ensure that travel movements are confined within the part itself. This means that the printer will avoid unnecessary movements outside the part’s boundaries, reducing the potential for stringing and oozing. Keeping travel movements within the part helps to maintain a clean and smooth print, resulting in improved print quality.
Reduce Stringing and Oozing
Stringing and oozing can be common issues when 3D printing, but they can greatly affect the quality of your prints. Stringing occurs when the printer leaves thin strands of material between different parts of the print. Oozing, on the other hand, happens when excess material oozes out of the nozzle during non-printing movements. By turning on combing, you can minimize both stringing and oozing, resulting in cleaner and more precise prints.
Enhance Print Quality
By minimizing stringing and oozing through the use of combing, you can enhance the overall print quality of your 3D prints. Prints will have smoother surfaces, with fewer visible defects caused by stringing or oozing. This enhancement in print quality ensures that your prints meet the highest standards and are visually appealing.
Adjust Part Position
Another technique to improve print quality is to adjust the position of your parts on the build plate. By strategically placing parts with unseen sides opposed to each other, you can hide irregularities and minimize surface defects. This means that any travels between parts will be concealed and not visible in the final print, enhancing the overall aesthetics of the model.
Hide Irregularities on Unseen Sides
When adjusting the position of your parts, the goal is to have the unseen sides of each part facing each other. This way, any travels between parts will occur on the sides that are not visible in the final print. By doing this, you can effectively hide any irregularities or imperfections caused by these travels, ensuring a cleaner and more visually appealing print.
Minimize Surface Defects
By adjusting the position of your parts to hide irregularities on unseen sides, you can minimize surface defects in your prints. Travel movements between parts can often leave marks or imperfections on the surface, affecting the overall quality of the print. By strategically placing the travels on unseen sides, you can greatly reduce the visibility of these defects and achieve a smoother and more polished final result.
Find 3D Printing Accessories Here
Improve Aesthetics of the Print
By effectively adjusting the position of your parts, you can greatly improve the aesthetics of your 3D prints. Prints will appear cleaner and more professional-looking, with fewer visible imperfections. This attention to detail in placement enhances the overall visual appeal of the print and ensures that it meets your desired standards of quality.
Utilize Print Sequence Setting
To further optimize your 3D printing process and maintain high print quality, consider utilizing the print sequence setting available in slicing software. This feature allows you to print multiple parts while still ensuring each part receives the necessary attention and detail. By using this setting, you can save time and material while still producing prints with exceptional quality.
Print Multiple Parts
The print sequence setting enables you to print multiple parts at once, increasing the efficiency of your printing process. Instead of printing each part individually, you can print them simultaneously, saving time and reducing the overall printing duration. This feature is especially useful when dealing with smaller parts that can fit on the build plate without compromising print quality.
Maintain High Print Quality
Despite printing multiple parts at once, the print sequence setting ensures that each part maintains a high level of print quality. By properly configuring the settings and ensuring that the parts are spaced and aligned correctly, you can achieve consistent and professional-looking prints. This feature allows you to streamline your printing process without sacrificing the quality of your final products.
Save Time and Material
In addition to maintaining high print quality, the print sequence setting also helps in saving time and material. By printing multiple parts simultaneously, you can reduce the number of print runs required, resulting in a shorter overall print time. This time-saving benefit is particularly valuable when working on larger projects or when you have a high volume of prints to complete. Moreover, by optimizing the print sequence, you can minimize material waste and maximize efficiency.
Test Prints with Different Settings and Materials
To truly understand the impact of different settings and materials on print quality, it is important to conduct test prints. By experimenting with various settings and materials, you can evaluate their effects on the final print and identify the best combination for your specific needs. Test prints allow you to minimize visual defects and improve the overall quality of your 3D prints.
Evaluate Impact on Print Quality
When conducting test prints, it is crucial to evaluate their impact on print quality. Look for any visible defects or irregularities that may result from different settings or materials. Assess the overall surface finish, dimensional accuracy, and structural integrity of the prints. By carefully examining the results, you can determine which settings and materials yield the best print quality.
Identify Best Settings
Through testing, you can identify the optimal settings for your 3D prints. This includes parameters such as layer height, wall lines, infill percentage, temperature, and retraction settings. By systematically varying these settings and evaluating their impact on print quality, you can pinpoint the values that produce the best results. Identifying the best settings ensures that your future prints consistently meet your desired level of quality.
Minimize Visual Defects
Visual defects can detract from the overall quality of your 3D prints. These defects may include issues like stringing, layer misalignment, warping, or rough surface finish. By conducting test prints, you can minimize these visual defects by fine-tuning the settings and selecting the most suitable materials. This ensures that your prints have a clean, professional look and meet your aesthetic requirements.
Consider Carbon Fiber Filament
For those looking to achieve a high-quality finish in their 3D prints, carbon fiber filament can be a great option. Carbon fiber filament contains tiny fibers of carbon that add strength and rigidity to the printed parts. This results in increased durability and a unique visual appeal. However, it is important to be aware of some potential drawbacks and take necessary precautions when working with carbon fiber filament.
Achieve High-Quality Finish
Carbon fiber filament produces prints with a high-quality finish due to its unique properties. The carbon fibers within the filament reinforce the printed parts, making them stronger and more resistant to impacts and wear. This added strength ensures that the final prints have a more professional look and last longer. The finished surfaces of carbon fiber prints also have a distinctive appearance, adding to their aesthetic appeal.

Watch Out for Potential Printer Damage
It is important to note that carbon fiber filament can potentially damage your 3D printer if not used correctly. The carbon fibers in the filament are abrasive and can wear down the nozzle and extruder gear over time. This can lead to clogging and decreased print quality. Therefore, it is essential to monitor your printer when using carbon fiber filament and regularly inspect and replace any worn or damaged parts.
Compatibility and Precautions
Before using carbon fiber filament, ensure that your 3D printer is compatible with this type of material. Some printers may require specific modifications or upgrades to handle the abrasiveness of carbon fiber filament. Additionally, take precautions such as using a hardened steel or ruby nozzle to withstand the abrasive nature of the filament. Regularly clean and maintain your printer to prevent clogs and ensure smooth operation.
Overall Tips to Improve Print Quality
In addition to the specific techniques mentioned above, there are some general tips that can help improve the print quality of your 3D prints. These tips encompass best practices and essential steps to optimize your printing process. By following these tips, you can consistently achieve super clean and visually appealing prints.
Follow Best Practices
To ensure optimal print quality, it is essential to follow best practices throughout the entire printing process. This includes proper bed leveling, filament loading, and filament storage. Adhering to best practices ensures that your printer is calibrated correctly and that the filament is free from contaminants or moisture, leading to cleaner and more precise prints.
Optimize Slicing Settings
Slicing software plays a crucial role in determining the print quality of your 3D prints. Take the time to understand and optimize the slicing settings according to your specific requirements. This includes parameters such as layer height, print speed, infill density, and support structures. Fine-tuning these settings can greatly improve the overall print quality and ensure that your prints meet your desired specifications.
Calibrate the Machine Regularly
Regular calibration of your 3D printer is essential for maintaining high print quality. This includes calibrating the bed level, nozzle height, and extrusion multiplier. Proper calibration ensures that the printer operates accurately and consistently, resulting in prints with precise dimensions and excellent surface finish. Make it a habit to regularly check and adjust these calibration parameters to achieve optimal print quality.
Mastering Bed Leveling
Bed leveling is a fundamental aspect of 3D printing that greatly affects print quality. Properly leveled bed ensures that the first layer adheres well to the build surface and prevents issues like warping or layer misalignment. Mastering bed leveling involves understanding the process and following a step-by-step guide to achieve the correct level. By prioritizing bed leveling, you can significantly improve the overall quality of your prints.
Importance of Proper Bed Leveling
The importance of proper bed leveling cannot be overstated. A level bed ensures that the first layer of your print is evenly deposited on the build surface, resulting in a strong foundation for the rest of the print. If the bed is not properly leveled, the first layer may be too thin or too thick, leading to adhesion issues and compromised print quality. By prioritizing bed leveling, you can eliminate one of the major sources of print defects.
Step-by-Step Bed Leveling Guide
To achieve proper bed leveling, follow a step-by-step guide that outlines the necessary adjustments and measurements. The process typically involves adjusting the bed leveling knobs or screws to achieve the desired levelness. This can be done manually using a piece of paper or with the help of automated bed leveling systems. By carefully following the guide and taking the time to calibrate the bed, you can ensure consistent and high-quality prints.
Troubleshooting Common Issues
Even with proper bed leveling, you may encounter common issues such as adhesion problems or warping. These issues can negatively impact print quality and result in failed prints. By understanding the common causes of these issues and implementing appropriate solutions, you can overcome them and achieve improved print quality. Troubleshooting guides and forums can provide valuable insights into addressing specific issues that may arise during the printing process.
Fine-Tuning Retraction Settings
Retraction is an important setting that directly affects print quality, particularly in reducing stringing and oozing. Fine-tuning retraction settings can significantly improve the overall aesthetics of your prints. By understanding how retraction works and determining the optimal retraction length and speed, you can effectively minimize stringing and achieve cleaner and more polished prints.
Understanding Retraction
Retraction refers to the process of retracting or pulling back the filament from the nozzle when the printer moves to a different location. This is done to prevent excess material from oozing out and causing stringing between different parts of the print. Understanding the fundamentals of retraction, such as the optimal retraction length and speed, allows you to eliminate stringing and achieve crisper, more defined prints.
Determining Optimal Retraction Length
The optimal retraction length depends on various factors, such as the type of filament, print speed, and nozzle size. It may require some experimentation to determine the ideal retraction length for a specific combination of settings and materials. By gradually adjusting the retraction length and observing the impact on print quality, you can find the sweet spot that minimizes stringing.
Adjusting Retraction Speed
Retraction speed is another parameter that can affect print quality. A faster retraction speed can help minimize stringing, but it may also lead to other issues like nozzle clogging or filament grinding. Conversely, a slower retraction speed may result in better print quality, but the print time may be extended. Finding the right balance between retraction speed and print quality is crucial for achieving super clean 3D prints.
Conclusion
Implementing these tips and techniques can greatly improve the print quality of your 3D prints. Whether it’s printing one part at a time, adjusting part positions, utilizing print sequence settings, or fine-tuning retraction, each step plays a crucial role in achieving clean and professional-looking prints. Additionally, conducting test prints, considering carbon fiber filament, and following overall best practices further enhance the quality of your prints. With continuous learning and practice, you can master the art of 3D printing and create exceptional prints. Experiment with different settings, materials, and techniques to find the best combination that meets your specific requirements. Remember, practice makes perfect, and by applying these tips, you can take your 3D prints to the next level.
Maintain Your 3D Printer with these Tools

AMOLEN Silk PLA 3D Printer Filament Bundle, Shiny Dual Color Filament 1.75mm Pack, Multi Color Change 3D Printing Filament for Most FDM 3D Printer, 4 Spools 200g Each
$29.99 (as of June 18, 2025 23:32 GMT +00:00 - More infoProduct prices and availability are accurate as of the date/time indicated and are subject to change. Any price and availability information displayed on [relevant Amazon Site(s), as applicable] at the time of purchase will apply to the purchase of this product.)
Capricorn Bowden PTFE Tubing 1M XS Series 1.75MM Filament with 2X PC4-M6 & 2X PC4-M10 Pneumatic Fittings & Tube Cutter for Creality Ender 3 V2/ Ender 3/ Ender 3 Pro/Ender 5/ CR-10/10S 3D Printer
$11.99 (as of June 18, 2025 23:32 GMT +00:00 - More infoProduct prices and availability are accurate as of the date/time indicated and are subject to change. Any price and availability information displayed on [relevant Amazon Site(s), as applicable] at the time of purchase will apply to the purchase of this product.)
Creality K1C 3D Printer, 2024 New Version 600mm/s High-Speed Auto Leveling Clog-Free Robust Direct Extruder K1 SE Upgraded 3D Printer with AI Camera 300°C Printing Support Carbon Fiber Filaments
$559.00 (as of June 18, 2025 23:32 GMT +00:00 - More infoProduct prices and availability are accurate as of the date/time indicated and are subject to change. Any price and availability information displayed on [relevant Amazon Site(s), as applicable] at the time of purchase will apply to the purchase of this product.)
FLASHFORGE Adventurer 5M 3D Printer, 600mm/s High-Speed, 1 Click Fully Auto Leveling, Upgraded Direct extruder Quick Detachable 280°C Nozzle, Dual-Sided PEI Coating Plate, Print Size 220x220x220mm
$259.00 (as of June 18, 2025 23:32 GMT +00:00 - More infoProduct prices and availability are accurate as of the date/time indicated and are subject to change. Any price and availability information displayed on [relevant Amazon Site(s), as applicable] at the time of purchase will apply to the purchase of this product.)