FLASHFORGE Adventurer 5M 3D Printer, 600mm/s High-Speed, 1 Click Fully Auto Leveling, Upgraded Direct extruder Quick Detachable 280°C Nozzle, Dual-Sided PEI Coating Plate, Print Size 220x220x220mm
$259.00 (as of June 18, 2025 23:32 GMT +00:00 - More infoProduct prices and availability are accurate as of the date/time indicated and are subject to change. Any price and availability information displayed on [relevant Amazon Site(s), as applicable] at the time of purchase will apply to the purchase of this product.)Creality K1 + BambuStudio = Perfect 3D Printer?” by Zachary 3D Prints examines the integration of the Creality K1 with BambuStudio, a software known for its user-friendliness and advanced slicing features. This guide is particularly beneficial for novices and those looking to deepen their 3D printing prowess, as it encompasses the entire process from initial setup to the optimization of print settings, ensuring a seamless and enhanced 3D printing experience.
The video offers a comprehensive tutorial, beginning with the download and registration of the BambuStudio software, followed by the addition of the Creality K1 printer to the software’s settings. It continues with an exploration of fundamental slicing settings and advanced model preparation techniques. Concluding with a demonstration of a final print, viewers are encouraged to engage further by subscribing and accessing additional resources through channel membership.
Introduction to Creality K1 and BambuStudio Integration
Overview of Creality K1
The Creality K1 is a flagship model within Creality’s lineup of 3D printers, notable for its balance of affordability, reliability, and performance. It features a robust aluminum frame, a heated build plate, and a precise extruder capable of utilizing various filament types including PLA, ABS, and PETG. The K1’s user-friendly interface and durable construction make it an appealing choice for both 3D printing novices and experienced users. Its 0.4 mm nozzle is standard but capable of fine details and rapid manufacturing. Overall, the Creality K1 is celebrated for its high print quality and ease of use.
Introduction to BambuStudio Slicer
BambuStudio is a sophisticated slicing software developed to streamline the 3D printing process. Derived from PrusaSlicer, BambuStudio combines advanced features with an intuitive user interface, making it suitable for both beginners and seasoned 3D printing enthusiasts. It supports a range of printers and provides robust customization options, from adjusting print quality and speed to infill patterns and support structures. The software is designed for ease of integration with multiple 3D printers, including the Creality K1, enhancing the user’s workflow and overall printing experience.
Benefits of Integrating Creality K1 with BambuStudio
The integration of the Creality K1 with BambuStudio brings several benefits. First, BambuStudio’s detailed slicing capabilities allow more precise control over print settings, resulting in higher quality prints. The software’s intuitive interface and advanced features make it easier to fine-tune settings, manage multiple print jobs, and experiment with different materials and infill settings. Moreover, BambuStudio supports exporting G-code files, which can be directly uploaded to the Creality K1 over a network, streamlining the printing process. This integration optimizes the performance of the Creality K1, providing users with a versatile, streamlined 3D printing experience.
Downloading and Installing BambuStudio
Where to Download BambuStudio
To begin integrating the Creality K1 with BambuStudio, you must first download the BambuStudio software. The software can typically be found on the BambuLab’s official website under the downloads section. Ensure you download the version compatible with your operating system, whether it be Windows, macOS, or Linux. It is also recommended to check for the latest version to benefit from recent updates and features.
Step-by-Step Installation Process
Once the download is complete, you can proceed with the installation process. Follow these steps:
- Open the Installer: Locate the downloaded file on your computer and double-click to open the installer.
- License Agreement: Read and accept the license agreement to proceed.
- Installation Path: Choose the directory where you want to install BambuStudio. The default path is usually acceptable for most users.
- Install: Click the ‘Install’ button and wait for the process to complete. This may take a few minutes.
- Launch: Once installed, you can launch BambuStudio directly from the installer or via your desktop or start menu shortcut.
Registering for a BambuStudio Account
After installing the software, you must register for a BambuStudio account to access its full range of features. Follow these steps:
- Open BambuStudio: Launch the software on your computer.
- Register: Click on the ‘Sign Up’ or ‘Register’ button.
- Fill in Details: Enter the required information, including your email address, username, and password.
- Verification: Verify your email address by clicking on the verification link sent to your inbox.
- Login: Use your newly created credentials to log into BambuStudio.

Find 3D Printing Accessories Here
Setting Up Creality K1 in BambuStudio
Accessing Printer Settings
Before you can start printing, you need to configure BambuStudio to recognize your Creality K1 printer. To do this:
- Launch BambuStudio: Start the software and log in if prompted.
- Navigate to Settings: Click on the settings icon, often depicted as a gear, located in the top-right corner of the application.
- Printer Settings: Select the ‘Printer’ tab from the settings menu to access the printer management interface.
Adding Creality K1 to BambuStudio
To add the Creality K1:
- Add Printer: Click the ‘Add Printer’ button.
- Select Manufacturer: Scroll down the list and select ‘Creality’ from the list of supported 3D printer manufacturers.
- Choose Model: Locate and select the ‘Creality K1’ from the list of models.
- Confirm: Click ‘Confirm’ to add the printer to your profile.
Selecting Nozzle Size (0.4 mm) and Confirming Settings
Once the Creality K1 is added to BambuStudio:
- Nozzle Setup: Next to the selected printer, you will see an option to specify the nozzle size. Ensure it is set to ‘0.4 mm’, which is the standard nozzle size for the Creality K1.
- Apply Settings: Confirm and apply the settings to ensure they are saved.
- Calibration Profile: Optionally, you can run a quick calibration to ensure optimal printing settings.
Navigating BambuStudio Interface
Understanding the Build Plate Navigation
Navigating the build plate in BambuStudio is a fundamental skill for effective 3D printing. The build plate is a virtual representation of your printer’s actual print bed. In BambuStudio, you can visualize and arrange your 3D models on this build plate before printing. The virtual environment allows you to see the spatial orientation and layout of your models to ensure they fit within the print area.
Using the Mouse for View Adjustments
You can use your mouse to navigate the build plate in various ways:
- Pan: Hold the right mouse button and drag to pan the view horizontally or vertically.
- Rotate: Hold the left mouse button and drag to rotate the build plate view, allowing you to inspect the model from different angles.
- Zoom: Scroll the mouse wheel to zoom in or out, providing a closer look at specific regions of the build plate or a broader overview of the entire setup.
Overview of Left-Side Settings for Creality K1
On the left side of the BambuStudio interface, you will find various settings specific to the Creality K1:
- Material Settings: Here, you can select the type of filament you are using such as PLA, ABS, or PETG.
- Layer Height: Choose the desired layer height. Common settings include 0.1 mm for high detail, 0.2 mm for a standard balance of speed and detail, and 0.3 mm for quicker prints.
- Infill Density and Pattern: Adjust the density and pattern of the infill to ensure adequate structural support without unnecessarily increasing print time and material usage.
- Support Generation: Decide whether to generate supports, which can be essential for printing complex models with overhangs.
- Print Speed: Adjust the print speed based on your model’s requirements and the type of filament being used.

Configuring Slicing Settings
Adjusting Print Quality Settings
Print quality settings in BambuStudio are crucial for achieving the desired outcome:
- Layer Height: Lower layer heights yield finer details. For most applications, a 0.2 mm layer height balances speed and quality.
- Wall Thickness: Increasing wall thickness can improve the strength and durability of your prints.
- Top/Bottom Layers: Adjust the number of layers for a more solid finish on the top and bottom surfaces of your prints.
Configuring Print Strength and Infill Patterns
Print strength is essential for the durability of the final product:
- Infill Density: Higher infill percentages yield stronger, heavier prints. Typically, values range from 10% to 100% depending on the strength requirements.
- Infill Patterns: Select suitable infill patterns such as grid, honeycomb, or gyroid. Each pattern offers different levels of strength, flexibility, and print speed.
Setting Print Speed and Using Supports and Rafts
Adjusting the speed and adding supports or rafts can impact print success:
- Print Speed: Higher speeds reduce print time but can affect quality. An initial layer speed around 50 mm/s and subsequent layers around 100-150 mm/s is recommended for standard prints.
- Supports: Necessary for models with overhangs or complex geometries. Supports can be customized to minimize filament use and ease of removal.
- Rafts: A raft can improve bed adhesion for prints with small contact areas or when printing on uneven surfaces.
Preparing 3D Models for Printing
Loading and Arranging 3D Models
To begin preparing your 3D model for printing:
- Load Model: Click the ‘Add’ button and select your 3D model file (usually in STL, OBJ, or 3MF format).
- Arrange Models: Use the pan, rotate, and zoom functions to position the model(s) on the build plate. It is essential to ensure the models fit within the bed area and are optimally spaced to prevent collisions during printing.
Making Adjustments: Scaling, Orientation
Adjust your 3D models for optimal printing:
- Scaling: Select the model and use the scale tool to resize it proportionally to fit within the build plate boundaries and meet size requirements.
- Orientation: Rotate the model to minimize supports and optimize strength. Ideally, flat surfaces should be aligned with the build plate to improve adhesion and print quality.
Advanced Features: Support Painting and Seam Location Adjustments
BambuStudio offers advanced features to refine your prints:
- Support Painting: Use the support painting tool to manually select areas where supports should or should not be generated. This feature provides fine control over support placement, ensuring minimal interference with the model’s desired finish.
- Seam Location Adjustments: Adjust settings to control the location of layer seams, which can affect the print’s aesthetic quality. By positioning seams strategically, you can minimize their visibility and impact on the surface quality.
Exporting and Uploading G-code Files
Slicing the Model and Exporting G-code File
Once your model is ready:
- Slice the Model: Click the ‘Slice’ button to process the model according to the configured settings. This step converts the 3D model into G-code instructions that the printer will follow.
- Preview: Review the sliced model in preview mode to check layer-by-layer construction and detect potential issues.
- Export G-code: Click ‘Export’ and save the G-code file to your computer. Ensure the file name is indicative of the model and settings used for easy identification.
Uploading Models to Creality K1 via IP Address
To upload the G-code file:
- Locate IP Address: Find the IP address of your Creality K1, usually available on the printer’s interface or through your network settings.
- Upload via Browser: Open a web browser and enter the printer’s IP address.
- Access Upload Interface: Navigate to the upload section of the Creality K1’s web interface.
- Upload G-code: Select the previously saved G-code file and upload it to the printer.
- Start Printing: Initiate the print job directly from the web interface after confirming the uploaded file.
The Printing Process
Starting the Print Job on Creality K1
With the G-code file uploaded:
- Printer Pre-checks: Ensure the printer bed is clean, and the filament is correctly loaded.
- Start Print Job: From the printer’s interface or the web interface, select the uploaded G-code file and start the print job. Monitor the initial layers to ensure proper adhesion and settings functionality.
Monitoring the Print Progress
While the print is in progress:
- Regular Checks: Periodically check the printer to ensure there are no issues such as layer shifting or filament jams.
- Web Interface Monitoring: Use the printer’s web interface to monitor the print progress remotely if supported.
- Adjust Settings: Some advanced setups may allow live adjustments to print speed or temperature, useful in fine-tuning the print quality.
Troubleshooting Common Issues During Printing
Common printing issues include:
- Adhesion Problems: Ensure the bed is adequately leveled and consider using adhesives like glue stick or painter’s tape.
- Layer Shifting: Check for mechanical issues or instability in the printer setup.
- Filament Jams: Clear any obstructions in the extruder and ensure filament flows smoothly.
Showcasing the Final Print
Example of a Completed Print with Polymaker PLA Light Purple
After completing the print:
- Review the Print: Inspect the finished product for quality, adhesion, and overall execution of details.
- Example Showcase: Highlight an example print such as a model printed with Polymaker PLA in light purple to showcase the printer’s capability and the quality achievable with the BambuStudio integration.
Tips for Further Tweaking Settings
For improved results:
- Fine-tune Layer Heights: Adjust layer heights for different sections of the model if using adaptive slicing.
- Experiment with Infill Patterns: Different patterns can achieve varying strength and material efficiency.
- Adjust Print Speed: Lower print speeds often enhance detail but may extend print times.
Optimizing Results Based on Print Outcome
Based on the finished print:
- Identify Issues: Look for any imperfections such as stringing, overhangs, or uneven layers.
- Adjust Settings: Modify temperature, speed, or support configurations to address these issues in future prints.
- Iterate: Continuous iteration and adjustment of settings based on print outcomes can lead to consistently higher quality results.
Conclusion
Recap of Creality K1 and BambuStudio Integration Benefits
Integrating the Creality K1 with BambuStudio presents numerous advantages, including comprehensive control over print settings, improved print quality, and enhanced workflow efficiency. BambuStudio’s advanced features enable fine-tuning and customization, which are essential for achieving high-quality prints consistently.
Encouragement to Experiment and Share Results
Experimenting with different settings, materials, and print techniques can significantly enhance your 3D printing skills and outcomes. Share your results and experiences with the community to contribute to collective knowledge and learn from others’ insights.
Final Call to Action for Viewer Engagement
If you found this guide helpful, consider liking, commenting, and subscribing to our channel for more 3D printing tips and tutorials. Hit the notification bell to stay updated on new content. Share your printed models and experiences with us on social media, and join our community to access exclusive perks and further your 3D printing journey.
Maintain Your 3D Printer with these Tools

ELEGOO Rapid PETG Filament 1.75mm Black 1KG, High Speed 30-600mm/s 3D Printer Filament Dimensional Accuracy +/- 0.02 mm, 1kg Cardboard Spool(2.2lbs) Fits for Most FDM 3D Printers
$14.99 (as of June 18, 2025 23:32 GMT +00:00 - More infoProduct prices and availability are accurate as of the date/time indicated and are subject to change. Any price and availability information displayed on [relevant Amazon Site(s), as applicable] at the time of purchase will apply to the purchase of this product.)
Geeetech Silk PLA Filament 1.75mm for 3D Printer , Metal-Like Shiny Consumable 1kg (2.2lbs) 1 Spool, Dimensional Accuracy +/- 0.03 mm, Silk Gold
$17.49 (as of June 18, 2025 23:32 GMT +00:00 - More infoProduct prices and availability are accurate as of the date/time indicated and are subject to change. Any price and availability information displayed on [relevant Amazon Site(s), as applicable] at the time of purchase will apply to the purchase of this product.)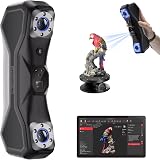
Revopoint MetroX 3D Scanner for 3D Printing, Handheld 3D Printer Scanner Blue Laser Scan, Metrology-Grade Precision 0.01mm for Metal Dark Object, Up to 60fps Speed, Support Windows macOS, Standard
$999.00 (as of June 18, 2025 23:32 GMT +00:00 - More infoProduct prices and availability are accurate as of the date/time indicated and are subject to change. Any price and availability information displayed on [relevant Amazon Site(s), as applicable] at the time of purchase will apply to the purchase of this product.)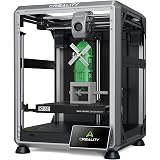
Creality 3D Printer, K1 SE Fully Assembled Auto Leveling FDM 3D Printers for Kids and Beginners, 600mm/s Max High-Speed Printing, Core XY All Metal Structure, Larger Print Size 250x220x220mm
$279.00 (as of June 18, 2025 23:32 GMT +00:00 - More infoProduct prices and availability are accurate as of the date/time indicated and are subject to change. Any price and availability information displayed on [relevant Amazon Site(s), as applicable] at the time of purchase will apply to the purchase of this product.)