
ELEGOO Mars 5 Ultra 9K MSLA Resin 3D Printer, Smart Mechanical Sensor, Fast Printing Up to 150mm/h, AI Camera, WiFi Cluster Printing, Automatic Leveling, Large Printing Size 6.04 * 3.06 * 6.49 inch
$284.89 (as of June 19, 2025 23:45 GMT +00:00 - More infoProduct prices and availability are accurate as of the date/time indicated and are subject to change. Any price and availability information displayed on [relevant Amazon Site(s), as applicable] at the time of purchase will apply to the purchase of this product.)Day 4 of learning Fusion 360 for 3D printing is all about designing a grocery bag holder. In this video tutorial by Brandon Santana, you will learn how to create a 3D printable grocery bag holder step by step. The tutorial starts with creating a new component for the design and creating a sketch on the bottom plane. Four circles are then created to form the handle of the bag holder, followed by dimensioning them to the appropriate sizes. The sketch is then turned into a 3D body, and fillets are added to round out the sharp edges. The tutorial progresses by creating the bottom portion of the design with four lines, revolve it to turn the sketch into a 3D body, and add fillets to round out the edges. The video concludes with a demonstration of the finished design and an invitation to join a 3D printing community for access to resources and STL files. You can also support the content creator by buying them a coffee.
Welcome back to day three of Learning Fusion 360 for 3D printing! In today’s tutorial, we will be diving into the process of creating a 3D printable grocery bag holder. As we progress through the tutorial series, the designs will become more challenging, but don’t worry, Brandon Santana has put in extra effort to ensure that the instructions are clear and accurate, so you can learn and have some valuable experience with the program. So, let’s jump into Fusion 360 and get started with part three of this tutorial, where we will create a new component called “Grocery bag holder” and start designing the holder by creating a sketch on the bottom plane.
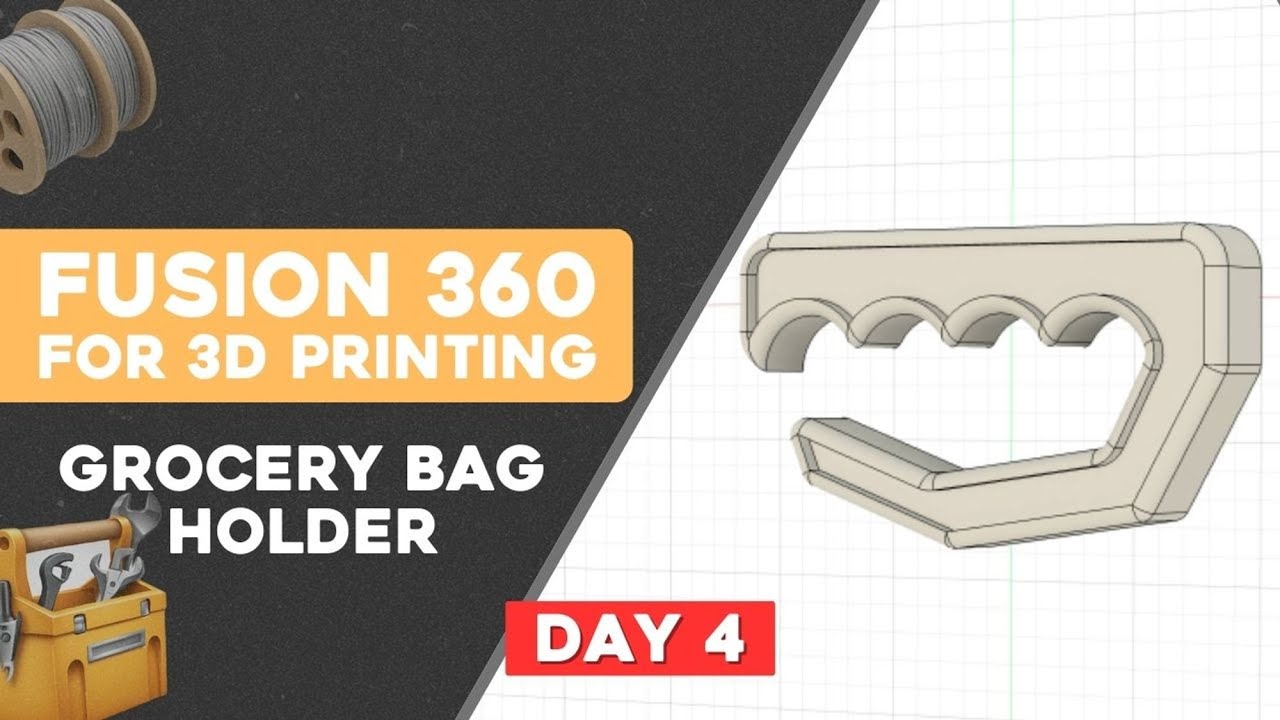
Day 4: Learn Fusion 360 for 3D Printing | Designing A Grocery Bag Holder

This image is property of i.ytimg.com.

Introduction to Fusion 360 for 3D Printing
Welcome back to another Fusion 360 tutorial! Today, we are on day four of learning Fusion 360 for 3D printing. In this tutorial, we will be diving into the process of creating a 3D printable grocery bag holder. Whether you want it for your home office or any other space, this tutorial will guide you through the steps of designing a functional and practical bag holder using Fusion 360. Throughout this tutorial, we will progress in difficulty, but I will do my best to provide clear instructions and help you get the most value out of learning this program. By the end, you’ll have a finished 3D design ready for printing!
About Brandon Santana
Before we dive into the tutorial, let me introduce myself. My name is Brandon Santana, and I am the creator of this Fusion 360 tutorial series. I have a passion for 3D printing and design, and I am excited to share my knowledge and experience with you. Through these tutorials, I aim to make learning Fusion 360 fun, accessible, and rewarding. So, if you have any questions or feedback along the way, feel free to reach out and engage with the community. Let’s learn together and create amazing 3D prints!

Join the 3D Printing Community
Are you looking to connect with a community of like-minded individuals who are passionate about 3D printing? Join our 3D printing community and become part of a supportive and engaging group. Share your creations, ask questions, and learn from others. We believe in the power of collaboration and knowledge-sharing, and we welcome you to be a part of our community. Together, we can explore new possibilities and push the boundaries of 3D printing.
Fusion 360 Hobbyist License
In order to follow along with this tutorial and fully immerse yourself in the world of Fusion 360, you will need access to a Fusion 360 hobbyist license. The hobbyist license allows for personal use and is free for enthusiasts, makers, and hobbyists. It provides access to all the features and functionalities of Fusion 360, empowering you to bring your design ideas to life. So, make sure you have a Fusion 360 hobbyist license set up before we proceed with the tutorial.

This image is property of images.unsplash.com.
Downloadable Hotkey Cheatsheet
To help you navigate Fusion 360 more efficiently and speed up your workflow, I have created a free downloadable hotkey cheatsheet. This cheatsheet lists all the essential hotkeys in Fusion 360, allowing you to quickly access various commands and tools. By using hotkeys, you can save time, streamline your design process, and become more proficient in Fusion 360. Make sure to download the cheatsheet and keep it handy for easy reference while working on your projects.
Support the Content Creator
If you find value in the content I am producing and the tutorials I am sharing, consider supporting me by buying me a coffee. Your support helps me continue creating high-quality tutorials, providing resources to the 3D printing community, and exploring new innovations in the world of 3D design. I appreciate any contributions made and I am grateful for your continued support. Together, we can foster a thriving community of passionate makers and designers.

This image is property of images.unsplash.com.
Tutorial: Creating a 3D Printable Grocery Bag Holder
Now let’s delve into the main tutorial for today: creating a 3D printable grocery bag holder. In this tutorial, we will be designing a functional and ergonomic holder that allows you to easily carry your grocery bags without straining your hands. The design will feature a sturdy handle and a stable bottom portion to prevent bags from tipping over. By the end of this tutorial, you will have a fully 3D printable design that you can bring to life using your 3D printer.
Step 1: Creating a New Component and Sketch
To begin the design process, we need to create a new component for our bag holder. This will help us organize and keep track of our design in the Fusion 360 browser. To do this, hover over to the “Create” menu and select “New Component”. Name the component “Grocery Bag Holder” and press OK. This step sets up a dedicated space for our design within Fusion 360.
Next, we will create a sketch on the bottom plane of our component. Select the bottom plane from the design workspace, and you will be presented with a top-down view of our design. This is where we will start sketching the profile of our bag holder.

This image is property of images.unsplash.com.
Step 2: Creating the Handle of the Bag Holder
The handle is a crucial part of the bag holder design, as it provides a comfortable grip for carrying the grocery bags. To create the handle, we will use four circles placed along a line within our sketch. This will allow us to achieve the desired shape and functionality.
Hover over to the sketch toolbar and select the “Center Diameter Circle” tool. Click along the line within our rectangle and drag out a circle with a diameter of 20mm. Repeat this process to create three more circles, ensuring they are evenly spaced along the line.
Step 3: Dimensioning the Circles
Now that we have created the circles for the handle, it’s time to dimension them to the appropriate sizes. By setting specific dimensions, we can ensure that our design is accurate and well-proportioned.
Select the first circle and press “D” on your keyboard to open the dimension tool. Click on the center of the circle and then click on the edge of the rectangle to set a dimension of 15mm. Repeat this process for the remaining circles, setting dimensions of 20mm.
Step 4: Turning the Sketch into a 3D Body
Once we have dimensioned the circles, it’s time to turn our 2D sketch into a 3D body. This will give our bag holder the necessary depth and volume.
Press “E” on your keyboard to access the extrude tool. Select the profile of the sketch and set an extrusion distance of 15mm. This will determine the height of our handle. Once you are satisfied with the settings, press OK to create the 3D body.
Step 5: Adding Fillets
To make our design more ergonomic and visually appealing, we will add fillets to round out the sharp edges. Fillets will provide a smoother and more comfortable grip when holding the bag holder.
Press “F” on your keyboard to access the fillet tool. Select the three inner edges of the handle and set a fillet radius of 1.5mm. This will give the handle a subtle curve. Next, select the three outer edges of the handle and set a fillet radius of 7.5mm. This will create a more pronounced rounding effect.
Step 6: Creating the Bottom Portion
Now that we have completed the handle, it’s time to move on to the bottom portion of the bag holder. This part will provide stability and prevent the bags from tipping over.
Create a new sketch on the top face of the bag holder. We will use lines to create the outline of the bottom portion. Press “L” on your keyboard to access the line tool. Starting from the bottom right corner, draw a line with a length of 30mm. Using the angle value, set the line at 60 degrees. Repeat this process to create three more lines, setting the lengths and angles as follows: 40mm at 128 degrees, 33mm at 152 degrees, and 18mm at 132 degrees.
Step 7: Revolving the Sketch into a 3D Body
With the bottom portion outlined, we can now turn our 2D sketch into a 3D body. This will give our bag holder the necessary depth and volume at the bottom.
Press “E” on your keyboard to access the extrude tool. Select the profile of the sketch and set the extrusion type to “Revolve”. This will create a solid 3D body by revolving the sketch around the center axis. Once you are satisfied with the settings, press OK to create the 3D body.
Step 8: Adding Fillets to the Edges
To ensure a seamless transition between the handle and the bottom portion, we will add fillets to the edges. This will create a smooth and visually pleasing design.
Press “F” on your keyboard to access the fillet tool. Select the inner and outer edges of the bottom portion and set a fillet radius of your choice. This will round out the edges, reducing sharp corners and enhancing the overall aesthetics.
Step 9: Creating a Gap in the Center
To further improve the functionality of our bag holder, we will create a gap in the center. This gap will allow for easy insertion and removal of grocery bags, making the holder more convenient to use.
Create a new sketch on the top face of the holder. Use the circle tool to create a circle with a diameter of your choice. Position the circle in the center of the top face. This will serve as our reference for creating the gap.
Step 10: Cutting the Offset into the Design
With the circle in place, we need to cut it into the design to create the desired gap. This can be achieved using the offset and extrude tools.
Press “O” on your keyboard to access the offset tool. Select the face of the holder and set the offset distance to create the desired gap size. Once you are satisfied with the offset, press OK to create a new sketch.
Next, press “E” on your keyboard to access the extrude tool. Select the outline of the gap and set the extrusion type to “Cut”. This will remove the material within the gap, leaving behind the desired opening.
Step 11: Finalizing the Design for 3D Printing
Congratulations! You have successfully created a 3D printable grocery bag holder using Fusion 360. At this point, take a moment to review your design and make any necessary adjustments. Ensure that all dimensions and details are accurate and ready for 3D printing.
Optional: Adding Fillets to the Top Edges
To further enhance the aesthetics and comfort of the bag holder, you can add fillets to the top edges. This will soften the corners and create a more polished look.
Optimizing Layer Height for Smoother Finish
Before we conclude this tutorial, let’s discuss an optional step to optimize the layer height for a smoother finish. When 3D printing, the layer height determines the resolution and quality of the printed object. By adjusting the layer height settings in your slicer software, you can achieve a finer finish and improve the overall appearance of your prints.
Conclusion and Invitation to Join the 3D Printing Community
That wraps up our tutorial on designing a 3D printable grocery bag holder using Fusion 360. We covered the entire process, from creating the handle to finalizing the design for 3D printing. I hope you found this tutorial informative and enjoyable.
Remember, learning Fusion 360 opens up a world of possibilities in 3D design and printing. If you want to continue learning and exploring the world of 3D printing, consider joining our 3D printing community. Connect with fellow enthusiasts, share your designs, and gain access to valuable resources and STL files.
Thank you for joining me on this Fusion 360 journey, and I look forward to seeing your 3D printed creations!
Join the 3D Printing Community by clicking here
If you want to learn how to launch and sell your 3D prints, visit this link
In this video, you will find a Fusion 360 Hobbyist License here
Download the Free Hotkey Cheatsheet by clicking here
If you enjoy the content I’m producing, you can buy me a Coffee here
Check out my personal work at this link
You can find me on social media platforms:


ELEGOO PLA+ Filament 1.75mm White 1KG, High Toughness PLA Plus 3D Printer Filament Dimensional Accuracy +/- 0.02mm, 1kg Spool(2.2lbs) for Most FDM 3D Printers
$14.99 (as of June 19, 2025 23:45 GMT +00:00 - More infoProduct prices and availability are accurate as of the date/time indicated and are subject to change. Any price and availability information displayed on [relevant Amazon Site(s), as applicable] at the time of purchase will apply to the purchase of this product.)
Creality ABS Filament 1.75mm, 3D Printer Filament, Excellent Resistance, Odorless Non-Toxic, Stability, Tough, 1kg(2.2lbs) Printing Filament for 3D Printer (Black)
$22.99 (as of June 19, 2025 23:45 GMT +00:00 - More infoProduct prices and availability are accurate as of the date/time indicated and are subject to change. Any price and availability information displayed on [relevant Amazon Site(s), as applicable] at the time of purchase will apply to the purchase of this product.)
FLASHFORGE Adventurer 5M 3D Printer, 600mm/s High-Speed, 1 Click Fully Auto Leveling, Upgraded Direct extruder Quick Detachable 280°C Nozzle, Dual-Sided PEI Coating Plate, Print Size 220x220x220mm
$259.00 (as of June 19, 2025 23:45 GMT +00:00 - More infoProduct prices and availability are accurate as of the date/time indicated and are subject to change. Any price and availability information displayed on [relevant Amazon Site(s), as applicable] at the time of purchase will apply to the purchase of this product.)
youyeetoo FHL-LD19 Lidar Sensor - 12Meter (39ft) 360° Ranging - Walnut Size, 30K lux Resistant - Provide ROS/ROS2/C/C++ SDK Raspberry Tutorial for Robots Drone SLAM, Lidar Scanner Kit with Adapter
$68.60 (as of June 19, 2025 23:45 GMT +00:00 - More infoProduct prices and availability are accurate as of the date/time indicated and are subject to change. Any price and availability information displayed on [relevant Amazon Site(s), as applicable] at the time of purchase will apply to the purchase of this product.)