ELEGOO Neptune 3 Pro FDM 3D Printer with Auto Bed Leveling, Dual-Gear Direct Extruder, Dual Lead Screw Drive, Removable Capacitive Screen, 8.85x8.85x11in Large Printing Size
$209.99 (as of May 29, 2025 10:56 GMT +00:00 - More infoProduct prices and availability are accurate as of the date/time indicated and are subject to change. Any price and availability information displayed on [relevant Amazon Site(s), as applicable] at the time of purchase will apply to the purchase of this product.)Are you ready to unlock the creative potential of 3D CAD software and design a toaster that’s both functional and visually stunning?

Anycubic Coupon – $5 off $50+ sitewide with code DIY5OFF
Understanding the Basics of 3D CAD Software
Before diving into the design process, it’s essential to understand the fundamentals of 3D CAD software. Computer-Aided Design (CAD) software is a powerful tool used to create, modify, and analyze digital models of physical objects. In the context of designing a toaster, 3D CAD software allows you to create a digital representation of the appliance, taking into account its structure, aesthetics, and user interface.
The Benefits of Using SelfCAD
SelfCAD is a versatile and user-friendly platform for 3D modeling, making it an ideal choice for designing a toaster. With SelfCAD, you can create complex shapes, incorporate intricate details, and experiment with different materials and textures. The software also offers a range of tools and features that simplify the design process, including a vast library of pre-made shapes and a intuitive interface.
Step 1: Creating the Basic Shape of the Toaster
To begin designing your toaster, start by creating the basic shape of the appliance. From the 3D Shapes category on the toolbar, choose the cube option and set the width to 85, depth to 175, and height to 100. This will create a rectangular shape that serves as the foundation of your toaster design.
| Shape | Width | Depth | Height |
|---|---|---|---|
| Cube | 85 | 175 | 100 |
Click to finalize the cube shape and then activate edge selection by clicking on the highlighted region. This will allow you to modify the shape and add details.

Anycubic Coupon – $5 off $50+ sitewide with code DIY5OFF
Step 2: Adding Fillets and Rounding the Edges
To add a touch of elegance to your toaster design, you can add fillets and round the edges. From the modify category on the toolbar, choose the fillet option and set the intensity to 20 and level to 5. This will create a smooth, curved edge that adds visual appeal to your design.
| Fillet | Intensity | Level |
|---|---|---|
| Fillet | 20 | 5 |
Click to finalize the fillet and then repeat the process for the remaining edges. This will create a cohesive and polished look for your toaster design.
Step 3: Creating the Toasting Slots
The toasting slots are a crucial component of your toaster design. To create these slots, choose the cube option from the 3D Shapes category and set the width to 20, height to 110, and depth to 110. Position the cube at the center of the toaster, ensuring that it’s aligned with the edges.
| Shape | Width | Height | Depth |
|---|---|---|---|
| Cube | 20 | 110 | 110 |
Click to finalize the cube shape and then copy and paste it to create multiple slots. You can adjust the position and size of each slot to achieve the desired layout.

Step 4: Adding Buttons and Controls
The buttons and controls are an essential part of your toaster design, allowing users to interact with the appliance. To create these elements, choose the cube option from the 3D Shapes category and set the width to 50, height to 10, and depth to 10. Position the cube at the top of the toaster, ensuring that it’s aligned with the edges.
| Shape | Width | Height | Depth |
|---|---|---|---|
| Cube | 50 | 10 | 10 |
Click to finalize the cube shape and then repeat the process to create multiple buttons and controls. You can adjust the position and size of each element to achieve the desired layout.
Step 5: Experimenting with Materials and Textures
With the basic design complete, you can experiment with different materials and textures to add depth and visual interest to your toaster design. SelfCAD offers a range of materials and textures that you can apply to your design, from sleek and modern to rustic and vintage.
Tips and Tricks
- Experiment with different materials and textures to create a unique and visually stunning design.
- Use the fillet tool to add smooth, curved edges to your design.
- Adjust the position and size of each element to achieve a cohesive and polished look.
Conclusion
Designing a toaster using 3D CAD software is a fun and creative process that allows you to bring your ideas to life. With SelfCAD, you can create complex shapes, incorporate intricate details, and experiment with different materials and textures. By following these steps and tips, you can create a toaster design that’s both functional and visually stunning.
Additional Resources
- SelfCAD Tutorials: https://www.selfcad.com/tutorials
- SelfCAD Academy: https://www.selfcad.com/academy/curriculum/
- 3D Modeling 101: https://www.youtube.com/playlist?list=PL74nFNT8yS9DcE1UlUUdiR1wFGv9DDfTB
Anycubic Coupon – $5 off $50+ sitewide with code DIY5OFF
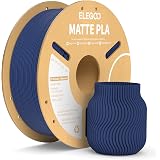
ELEGOO Matte PLA Filament Navy Blue 1KG, 1.75mm 3D Printer Filament Dimensional Accuracy +/- 0.02mm, 1kg Carboard Spool (2.2lbs) for Most FDM 3D Printers
$18.99 (as of May 29, 2025 10:56 GMT +00:00 - More infoProduct prices and availability are accurate as of the date/time indicated and are subject to change. Any price and availability information displayed on [relevant Amazon Site(s), as applicable] at the time of purchase will apply to the purchase of this product.)
SUNLU PLA 3D Printer Filament PLA Filament 1.75mm, Neatly Wound 3D Printing Filament 1.75mm, Dimensional Accuracy +/- 0.02 mm, Fit Most FDM 3D Printers, 1kg Spool (2.2lbs), Black
$13.99 (as of May 29, 2025 10:56 GMT +00:00 - More infoProduct prices and availability are accurate as of the date/time indicated and are subject to change. Any price and availability information displayed on [relevant Amazon Site(s), as applicable] at the time of purchase will apply to the purchase of this product.)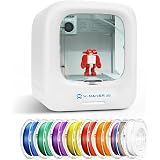
AOSEED 3D Printer for Kids, Beginner 3D Printer with 8 PLA Filament Set, Huge Toy Library & Modify, Wi-Fi & App Control, Create STEM Toys, High Precision, W/ 15+ Mini 3D Design Module, X-Maker Joy
$279.98 (as of May 29, 2025 10:56 GMT +00:00 - More infoProduct prices and availability are accurate as of the date/time indicated and are subject to change. Any price and availability information displayed on [relevant Amazon Site(s), as applicable] at the time of purchase will apply to the purchase of this product.)
Anycubic Kobra S1 Combo 3D Printer, 4 Stunning Multicolor with Anycubic ACE PRO, 600mm/s High Speed and 320℃ Hotend Free-Clog Extruder, Intelligent Drying While Printing, Built-in Camera 250*250*250mm
$599.99 (as of May 29, 2025 10:56 GMT +00:00 - More infoProduct prices and availability are accurate as of the date/time indicated and are subject to change. Any price and availability information displayed on [relevant Amazon Site(s), as applicable] at the time of purchase will apply to the purchase of this product.)