
Upgraded Tina2S 3D Printer, HEPHI3D 3D Printers WiFi Cloud Printing Auto Bed Leveling, Fully Assembled Mini 3D Printers for Beginners, Silent Print, Fully Open Source DIY 3D Printers for Home, School
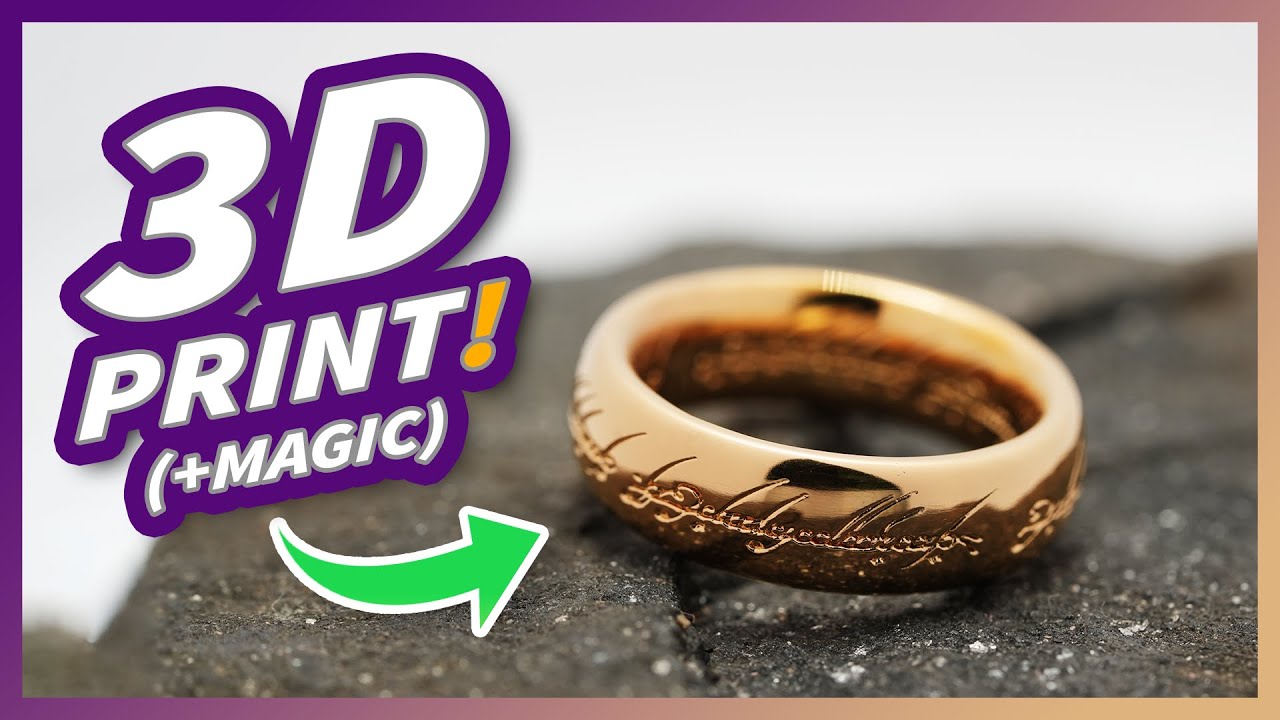
$195.49 (as of June 18, 2025 23:32 GMT +00:00 - More infoProduct prices and availability are accurate as of the date/time indicated and are subject to change. Any price and availability information displayed on [relevant Amazon Site(s), as applicable] at the time of purchase will apply to the purchase of this product.)In this video tutorial by HEN3DRIK, you will learn how to electroplate 3D prints and create beautiful rings. The tutorial covers all the necessary steps, from creating the 3D print and applying conductive paint using an airbrush, to the electroforming process with copper, nickel, and gold. The video provides a comprehensive guide, including the equipment needed and the specific techniques to achieve a professional result. Whether you’re a beginner or experienced in 3D printing, this tutorial offers valuable insights and tips for creating stunning metal-plated 3D prints. So grab your materials and get ready to delve into the fascinating world of DIY metalplating with 3D prints!
In this engaging tutorial, the host demonstrates the process of electroplating 3D prints to create stylish rings. He starts with a 3D print, emphasizing the importance of using a smooth resin printer for optimal results. The tutorial covers essential steps, such as carefully cleaning the print and applying conductive paint. The electroforming process involves different electrolytes, including copper, nickel, and gold, resulting in a glossy metal finish. Throughout the video, the host shares his expertise and tips, making the process of electroplating accessible to anyone interested in DIY metalplating with 3D prints. So gather your materials and get ready to explore the world of electroplating with this informative and engaging tutorial.
How to Prepare 3D Prints for Electroplating
Electroplating is a fascinating process that allows you to transform your 3D prints into stunning metal objects. By applying a layer of metal onto the surface of your prints, you can create beautiful jewelry pieces, decorative objects, miniatures, and figurines. In this article, we will guide you through the step-by-step process of preparing your 3D prints for electroplating, including cleaning and smoothing the print, applying conductive paint, setting up the electroplating bath, and electroplating with different metals such as copper, nickel, and gold. We will also explore alternative materials for diffusion barriers and discuss the equipment and supplies you will need. Let’s dive in!

Cleaning the Print
Before you can start the electroplating process, it is crucial to ensure that your 3D print is clean and free from any impurities. This step is essential because any dirt or debris on the surface of the print can interfere with the plating process and result in an uneven or flawed finish.
To clean your print, carefully remove it from the printing plate and any support structures. Take extra care not to break off any delicate parts while handling the print. Once removed, inspect the print for any residual material or imperfections.
To achieve a thorough cleaning, it is recommended to wash the print with water and mild soap. Gently scrub the surface using a soft brush or sponge to remove any dirt or residue. Rinse the print thoroughly under running water to ensure all traces of soap are removed. It is important to note that different 3D printing materials may require specific cleaning methods, so be sure to consult the manufacturer’s guidelines for the best cleaning practices.
After cleaning, allow the print to dry completely before proceeding to the next step. It is advisable to air dry the print to ensure no moisture remains on the surface, as this can affect the adhesion of subsequent layers during the electroplating process.
Smoothing the Print
Once your 3D print is clean and dry, the next step is to smooth its surface. Smoothing is important because it helps to create a polished and flawless base for the metal plating. There are several methods you can use to smooth the print, depending on the material and desired outcome.
One common method is sanding. Using progressively finer grits of sandpaper, gradually sand the surface of the print to remove any visible layers or imperfections. Start with a coarse grit sandpaper, such as 120 or 180, and gradually progress to finer grits, such as 220, 320, and 400. Sand in a circular motion or following the contours of the print to avoid creating visible scratches.
Another method for smoothing the print is chemical smoothing. This method involves using specific chemicals that can dissolve the surface of the print, resulting in a smoother finish. Different materials may require different chemicals, so be sure to research and follow the appropriate instructions for your specific print material.
In addition to sanding and chemical smoothing, there are also post-processing techniques such as acetone vapor smoothing or using a heat gun to melt and smooth the surface of the print. These methods are more suitable for certain types of prints, such as those made with ABS or other thermoplastic materials.
Regardless of the method you choose, it is important to take your time and work carefully to achieve the desired level of smoothness. Remember to wear appropriate safety gear, such as gloves and a mask, when working with chemicals or using power tools.


Applying Conductive Paint
Once your 3D print is clean and smooth, it is time to apply a layer of conductive paint. Conductive paint is essential for creating a conductive surface on your print, which is necessary for the electroplating process. It allows the metal ions in the electrolyte to adhere to the print and form a metal layer.
Conductive paint is available in various formulations, but it is important to choose one that is compatible with the specific metal you intend to use for electroplating. For example, if you plan to electroplate with copper, make sure to use a conductive paint that is suitable for copper electrolyte.
To apply the conductive paint, you can use an airbrush or a brush with fine bristles. Before starting, make sure to mix the paint thoroughly to ensure an even consistency. Then, apply a layer of conductive paint to the entire surface of the print using gentle and even strokes. Pay attention to any intricate details or hard-to-reach areas to ensure complete coverage.
It is important to note that conductive paint dries quickly, so it is recommended to work efficiently and avoid any delays between coating the print and proceeding to the next step. If necessary, you can apply multiple coats of conductive paint to ensure a uniform and sufficient thickness.
Setting Up the Electroplating Bath
Now that your 3D print is ready with the conductive paint applied, it is time to set up the electroplating bath. The electroplating bath is a container filled with electrolytes that facilitate the electroplating process by providing the necessary ions for metal deposition. In this section, we will discuss how to choose the right electrolytes, set up the container, and attach the anodes.
Choosing the Right Electrolytes
The choice of electrolytes depends on the specific metal you wish to electroplate onto your print. For example, if you want to electroplate with copper, you will need an acidic copper electrolyte. Nickel electrolyte is optional but can be used as a diffusion barrier between the copper and final gold layers. Finally, for gold electroplating, you will need a gold electrolyte.
Ensure that the electrolytes you choose are compatible with the conductive paint and the specific metal you plan to use. It is important to follow the manufacturer’s instructions regarding the preparation and usage of the electrolytes to achieve optimal results.
Setting Up the Container
The container used for the electroplating bath should be non-conductive and large enough to accommodate the size of your 3D print. Choose a container that is appropriate for the scale of your project and ensure that it is clean and free from any contaminants that could interfere with the plating process.
Place the container on a stable surface and ensure that it is level. This will help to ensure an even distribution of the electrolytes and the deposition of the plating metal. It is also a good idea to line the container with a non-conductive material, such as plastic or glass, to further prevent any electrical interference.
Attaching the Anodes
Anodes are essential components in the electroplating process as they provide a source of metal ions for deposition onto the print. For copper electroplating, you will need one or two copper anodes. The anodes should be large enough to provide sufficient metal ions for plating and positioned in a way that maximizes the deposition onto the print.
To attach the anodes, you will need banana plugs and alligator clips. Connect the positive terminal of the power supply to the anodes using the banana plugs, and secure them in place. Ensure that the anodes are fully immersed in the electrolyte and positioned in proximity to the print to optimize the plating process.

Electroforming with Copper
With the electroplating bath set up, it is time to proceed with the electroforming process. Electroforming involves applying a layer of copper onto the conductive paint layer, creating a thick base coat for subsequent plating.
Placing the Print in the Bath
Carefully place the 3D print into the electroplating bath, ensuring that it is fully immersed in the electrolyte. The print should not touch the anodes or the sides of the container to prevent electrical short circuits. It is advisable to use a small hook made from copper wire, which can be attached to the Rotor jig and hold the print securely in the bath.
Applying Voltage for Copper Electroforming
To initiate the electroforming process, apply voltage to the electroplating bath. The specific voltage and duration will depend on various factors, including the desired thickness of the plating and the specific electrolyte used. Typically, a voltage of around 0.7 volts is sufficient for electroforming copper, and the process can take approximately 4 hours.
It is important to monitor the electroforming process closely and adjust the voltage or duration as needed to achieve the desired results. Take care not to exceed the recommended voltage or duration as this can lead to overplating or other undesirable outcomes.
Duration of the Electroforming Process
The duration of the electroforming process can vary depending on factors such as the desired thickness of the copper layer and the specific conditions of the electroplating bath. It is essential to monitor the process regularly and make adjustments as needed.
Typically, the electroforming process for copper takes around 4 hours at a voltage of approximately 0.7 volts. However, it is important to note that these are general guidelines, and the exact duration may vary depending on the specific parameters of your setup and the desired outcome.
Electroplating with Nickel
Once the electroforming process is complete and you have achieved the desired thickness of the copper layer, you can proceed to electroplate with nickel. Nickel electroplating serves as a diffusion barrier between the copper base coat and the final gold layer, preventing the metals from mixing over time and forming rose gold.
Applying the Nickel Electrolyte
To electroplate with nickel, prepare the nickel electrolyte according to the manufacturer’s instructions. Place the 3D print, with the copper base coat, into the electroplating bath filled with the nickel electrolyte. Ensure that the print is fully immersed and properly positioned.
Setting the Voltage for Nickel Electroplating
For nickel electroplating, the voltage and duration may vary depending on the desired thickness of the nickel layer and the specific electrolyte used. It is recommended to start with a lower voltage, such as 2 volts, and adjust as needed based on your observations.
Monitor the electroplating process closely to ensure that the nickel layer forms evenly and adheres well to the copper base coat. Adjust the voltage and duration as necessary to achieve the desired results.
Purpose of Nickel as a Diffusion Barrier
The nickel layer serves as a diffusion barrier between the copper base coat and the final gold layer. Over time, if copper and gold come into direct contact, they can form rose gold, altering the intended appearance of the plated object. By electroplating with nickel as a diffusion barrier, you can ensure that the copper and gold layers remain separate and preserve the desired aesthetic.

Electroplating with Gold
The final step in the electroplating process is to electroplate with gold. Gold electroplating adds a luxurious and elegant finish to your 3D prints, transforming them into stunning jewelry pieces or decorative objects.
Applying the Gold Electrolyte
Prepare the gold electrolyte according to the manufacturer’s instructions. Place the 3D print, with the copper and nickel layers, into the electroplating bath filled with the gold electrolyte. Ensure that the print is fully immersed and properly positioned.
Using a Galvanic Brush for Gold Electroplating
To apply the gold plating, you can use a galvanic brush. The galvanic brush allows you to quickly and selectively plate specific areas of the print, creating a detailed and precise finish. Assemble the brush according to the manufacturer’s instructions and adjust the voltage to the recommended level.
Move the galvanic brush gently and evenly over the surface of the print, paying attention to the areas you wish to plate with gold. Each movement of the brush deposits a small amount of gold onto the print, allowing you to control the thickness and distribution of the plating.
Duration of the Gold Electroplating Process
The duration of the gold electroplating process can vary depending on the desired thickness of the gold layer and the specific conditions of the electroplating bath. It is important to monitor the process closely and adjust the duration and voltage as needed.
For a consistent and even gold plating, it is recommended to plate the print until the desired color and appearance are achieved. Keep in mind that gold is an expensive material, so it is advisable to plate only the areas that will be visible or in contact with the skin.
Finishing and Polishing
After the electroplating process is complete, it is essential to finish and polish the plated print to achieve a professional and flawless appearance. This final step helps to remove any imperfections, enhance the shine, and ensure a durable finish.
Washing the Print
To remove any residual electrolytes or contaminants, wash the plated print in distilled water. Gently rinse the print under running water or submerge it in a container of distilled water, making sure to agitate the water to aid in the removal of any debris. Thoroughly dry the print after washing to prevent water spots or damage to the plated surface.
Polishing the Copper Layer
To achieve a high gloss finish on the copper layer, use a polishing paste and a soft cloth. Apply a small amount of the polishing paste to the cloth and gently buff the surface of the copper layer using circular motions. Continue polishing until the copper layer shines brightly and any remaining imperfections are minimized.
Adding a Nickel Diffusion Barrier
If you have electroplated with nickel as a diffusion barrier, ensure that the nickel layer is smooth and free from any defects. If there are any imperfections or rough areas, you can use fine steel wool to gently polish the surface until it is smooth.
Final Gold Electroplating
After polishing the nickel layer, you can proceed with one final layer of gold electroplating. Using the galvanic brush or another suitable method, apply a thin layer of gold onto the plated print. Focus on areas that require additional gold plating or touch-ups to achieve an even and uniform appearance.
Take care not to overplate or apply too much gold, as this can result in an uneven or excessive finish. Once you are satisfied with the gold plating, rinse the print in distilled water and carefully dry it to complete the electroplating process.
Alternative Materials for Diffusion Barriers
While nickel is commonly used as a diffusion barrier in electroplating, there are alternative materials that can serve the same purpose. One such material is palladium, which works as an effective barrier and is less toxic than nickel.
Using palladium as a diffusion barrier can provide similar benefits in terms of preventing the mixing of metals and preserving the intended appearance of the plated object. It is important to follow the appropriate procedures and recommendations when using palladium or any other alternative materials as diffusion barriers.
Equipment and Supplies Needed
To successfully electroplate your 3D prints, you will need the following equipment and supplies:
- Conductive paint: Choose a conductive paint that is compatible with your desired plating metal.
- Electrolytes: Select the appropriate electrolytes for each stage of the electroplating process, such as copper, nickel, and gold electrolytes.
- Anodes: Obtain copper anodes for copper electroplating and consider using palladium or other suitable materials as diffusion barriers.
- Container: Use a non-conductive container that is large enough to accommodate your prints and electroplating bath.
- Galvanic Brush: A galvanic brush can be beneficial for selectively applying gold plating and achieving detailed finishes.
- Power supply: A reliable power supply is necessary to provide the voltage required for the electroplating process.
- Safety gear: Wear appropriate safety gear, such as gloves and a mask, when working with chemicals or using power tools.
Ensure that you have all the necessary equipment and supplies before starting the electroplating process to ensure a smooth and successful experience.
Creative Possibilities with Electroplated 3D Prints
Electroplating opens up a world of creative possibilities for your 3D prints. With the ability to transform plastic prints into metal objects, you can explore various applications and create unique and eye-catching designs.
Other Jewelry Designs
Electroplated 3D prints are perfect for creating custom jewelry pieces. From earrings and necklaces to bracelets and rings, the possibilities are endless. Experiment with different shapes, textures, and plating options to design one-of-a-kind jewelry that reflects your style and personality.
Decorative Objects
Electroplating can also be used to create stunning decorative objects for your home or office. Whether you’re interested in creating metal sculptures, vases, or decorative accents, electroplating allows you to add a touch of elegance and sophistication to your interior design.
Miniatures and Figurines
If you enjoy creating miniatures and figurines, electroplating can take your creations to the next level. By applying a layer of metal onto your prints, you can achieve a realistic and captivating finish that enhances the details and showcases your craftsmanship.
Experiment with different metals, finishes, and plating techniques to bring your miniatures and figurines to life in a whole new way.
In conclusion, electroplating offers a fascinating method to transform your 3D prints into stunning metal objects. By following the step-by-step process of cleaning and smoothing the print, applying conductive paint, setting up the electroplating bath, and electroplating with different metals, you can unleash your creativity and explore countless possibilities in jewelry design, decorative objects, miniatures, and figurines. With the right equipment and supplies, a little patience, and attention to detail, you can achieve remarkable results and create truly unique and remarkable electroplated 3D prints. Happy electroplating!
This tutorial is all about electroplating and electroforming rings using non-conductive plastic like the Lord of the Rings Ring of Power. I will guide you through the step-by-step process, explaining the basics of electroplating and how to apply conductive paint with an airbrush. This technique is perfect for DIY metal plating on 3D prints.
To get started, make sure you have the following:
- Tifoo Conductive Copper Paint (ensure compatibility with your copper electrolyte)
- A container for the galvanic bath
- Acidic copper electrolyte
- Optional nickel electrolyte
- One or two copper anodes
- Banana plug and alligator clips for connecting the components
If you prefer galvanic pen plating, you will also need:
- Gold Electrolyte
- Graphite Anode
Once you have everything ready, it’s time to get creative and have fun! Give it a try and see the beautiful results you can achieve. Don’t forget to check out my other videos on metal plating, such as How to Metal Plate Miniature 3D Prints and How to Metal Plate 3D Prints | FULL TUTORIAL. Enjoy!

Capricorn Bowden PTFE Tubing 1M XS Series 1.75MM Filament with 2X PC4-M6 & 2X PC4-M10 Pneumatic Fittings & Tube Cutter for Creality Ender 3 V2/ Ender 3/ Ender 3 Pro/Ender 5/ CR-10/10S 3D Printer
$11.99 (as of June 18, 2025 23:32 GMT +00:00 - More infoProduct prices and availability are accurate as of the date/time indicated and are subject to change. Any price and availability information displayed on [relevant Amazon Site(s), as applicable] at the time of purchase will apply to the purchase of this product.)
OVERTURE PLA Filament 1.75mm, Neatly Wound 3D Printer Filament 1kg Spool (2.2lbs), Dimensional Accuracy +/- 0.02 mm, Fit Most FDM 3D Printers (Black 1-Pack)
$14.99 (as of June 18, 2025 23:32 GMT +00:00 - More infoProduct prices and availability are accurate as of the date/time indicated and are subject to change. Any price and availability information displayed on [relevant Amazon Site(s), as applicable] at the time of purchase will apply to the purchase of this product.)
3D Scanning Spray for 3D Scanners, No Cleaning Needed, for Transparent, Reflective or Highly Textured Surfaces Objects, 400ml
$39.99 (as of June 18, 2025 23:32 GMT +00:00 - More infoProduct prices and availability are accurate as of the date/time indicated and are subject to change. Any price and availability information displayed on [relevant Amazon Site(s), as applicable] at the time of purchase will apply to the purchase of this product.)
Sovol SV08 Core-XY 3D Printer Voron 2.4 Open Source, 700mm/s High Speed 3D Printers with 300℃ Clog-Free Hotend & Camera, Auto Leveling with 4 Independent Z Motors, Large Print Size 13.8x13.8x13.6in
$699.99 (as of June 18, 2025 23:32 GMT +00:00 - More infoProduct prices and availability are accurate as of the date/time indicated and are subject to change. Any price and availability information displayed on [relevant Amazon Site(s), as applicable] at the time of purchase will apply to the purchase of this product.)