
ANYCUBIC Photon Mono M7 PRO 14K Resin 3D Printer, 170mm/h Fast Printing, 10.1'' Mono LCD with COB LighTurbo 3.0 Source, Dynamic Temperature Control Resin Vat, Build Volume 8.77''x4.96''x9.05''
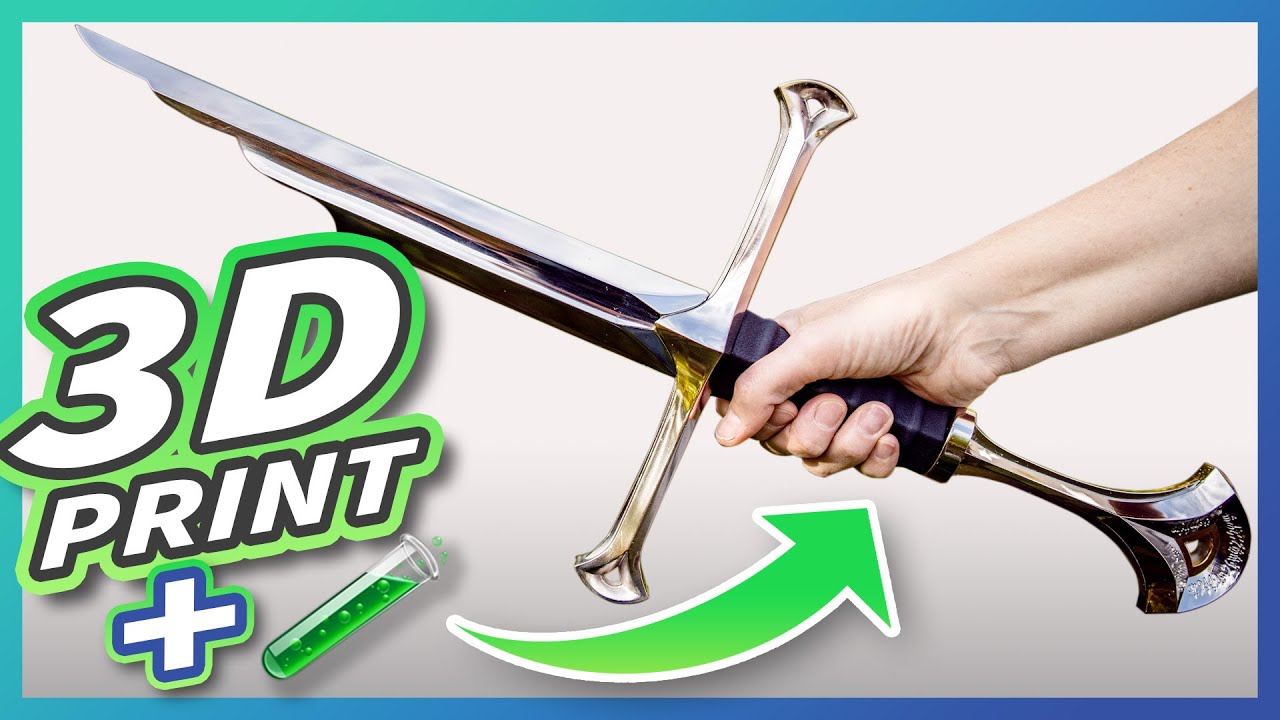
$689.99 (as of June 19, 2025 23:45 GMT +00:00 - More infoProduct prices and availability are accurate as of the date/time indicated and are subject to change. Any price and availability information displayed on [relevant Amazon Site(s), as applicable] at the time of purchase will apply to the purchase of this product.)In this video tutorial by HEN3DRIK, you will learn how to create stunning props by electroplating your 3D prints. The focus of this tutorial is the Narsil Sword from The Lord of the Rings. By combining 3D printing and metal plating techniques, you can achieve realistic and impressive objects for your prop collection or to show off at comic con. The tutorial covers various chapters, such as creating the 3D print, super smoothing the surface, the bath plating process, polishing the electroplated copper, and using different metals for electroplating. You’ll also learn about the physical properties of electroplated 3D prints. Get ready to dive into this exciting tutorial and unleash your creativity!


Electroplating 3D Prints
Overview of electroplating 3D prints
Electroplating 3D prints is a process that involves coating a plastic surface with a layer of metal, such as copper, nickel, palladium, or gold. This technique allows for the creation of objects with a metallic appearance and unique physical properties. By combining 3D printing technology with electroplating, one can create convincing props for their collections or for events like comic conventions.
Benefits of electroplating 3D prints
Electroplating 3D prints offers several benefits. First, it creates a visually stunning metallic finish that closely resembles real metal objects. This can greatly enhance the overall aesthetic value of 3D printed props. Additionally, electroplating provides strength and durability to the printed objects, making them more resistant to scratches and wear. Lastly, the electroplated metal layer can be easily cleaned and dried, making maintenance hassle-free.
Materials and equipment needed for electroplating
To electroplate 3D prints, certain materials and equipment are required. These include:
- Conductive copper paint: Used to ensure good conductivity for the electroplating process. Make sure it is compatible with your chosen electrolyte.
- Container: A larger tank is needed to accommodate the size of the 3D printed object.
- Acidic copper electrolyte: This is the main electrolyte used for copper plating.
- Optional electrolytes: Nickel, palladium, and gold electrolytes can be used for additional plating options.
- Copper anodes: One or two copper anodes should be used.
- Banana plug and alligator clips: These are used to connect the 3D printed object to the power supply.
- Degreaser: Used to clean the printed parts before electroplating.
- Distilled water: Used to prepare the electrolyte solutions.
- Galvanic brush and pen: Optional tools for applying nickel, palladium, and gold plating.
Swords Tutorial 1
Introduction to the tutorial
In this tutorial, we will guide you through the process of electroplating a 3D printed sword, specifically the Narsil Sword from The Lord of the Rings. This tutorial will cover the steps from 3D printing the sword to the final stage of plating the object with copper, nickel, palladium, and gold. By following these steps, you will be able to create a stunning prop with a metallic shine.
Video tutorial by HEN3DRIK on electroplating 3D prints
Before we dive into the details, it is recommended to watch the video tutorial by HEN3DRIK on electroplating 3D prints. This video provides a visual demonstration of the entire process and can help you better understand the steps involved. It will serve as a valuable resource alongside this written tutorial.

Setting up the Bath
Steps to set up the electroplating bath
The first step in electroplating 3D prints is to set up the electroplating bath. This involves preparing the container, filling it with the appropriate electrolyte, and ensuring the correct current and voltage are set.
-
Choose a container that is large enough to accommodate the size of your 3D printed object. It should be able to hold the electrolyte solution comfortably.
-
Prepare the acidic copper electrolyte by following the instructions provided by the manufacturer. This electrolyte is essential for copper plating.
-
Optional electrolytes such as nickel, palladium, and gold can be prepared if desired. Follow the manufacturer’s instructions for each electrolyte.
-
Place one or two copper anodes in the electrolyte solution. The surface area of the anodes should be slightly larger than the surface area of the object to be plated.
-
Connect the banana plug and alligator clips to the object you wish to electroplate. Ensure good electrical contact.
-
Adjust the current and voltage settings on the power supply according to the manufacturer’s instructions. This will vary depending on the size and composition of the object.
Choosing the right electrolyte for the copper plating
For copper plating, it is important to select the appropriate electrolyte. The acidic copper electrolyte is commonly used for this purpose. However, it is crucial to ensure that the conductive copper paint you used earlier is compatible with the chosen electrolyte. Refer to the manufacturer’s instructions and specifications to confirm compatibility.
Optional electrolytes for nickel, palladium, and gold plating
In addition to copper plating, you may choose to apply additional layers of nickel, palladium, or gold to your 3D printed object for a more diverse and luxurious appearance. Each of these electrolytes will require specific preparation and process adjustments. Consult the manufacturer’s instructions for each electrolyte to ensure proper handling and plating results.
Creating the 3D Print
Downloading the Narsil Sword design
To begin the process, you will need to download the design for the Narsil Sword. This design can be found on Thingy West, and a link to the design will be provided in the tutorial. Ensure that you have access to the appropriate file format for your 3D printer.
Printing the sword using a resin printer
Once you have obtained the design file for the Narsil Sword, it is time to print the sword using a resin printer. Resin printers are preferred for this project because they produce a smooth and easy-to-grind surface, which is crucial for the later electroforming process.
Follow the instructions provided with your resin printer to set up and initiate the printing process. It is important to ensure that the printing is accurate and that all details of the sword are captured in the print.
Importance of a smooth and easy-to-grind surface
A smooth and easy-to-grind surface is essential for achieving optimal results in the electroplating process. This surface condition allows for better adhesion of the metal layer during plating and creates a more polished and uniform appearance. Therefore, it is crucial to pay attention to the printing quality and post-processing techniques to achieve the desired surface texture.

Super Smoothing 3D Print
Deburring and sanding the printed parts
After the 3D printed parts have been obtained, the next step is to remove any burrs and uneven surfaces. Carefully inspect each part and use appropriate tools to deburr and sand the surfaces. This process should focus on achieving a flat and smooth surface, as it will greatly impact the final appearance of the electroplated object.
Achieving a flat and smooth surface
To achieve a flat and smooth surface, it is important to take your time during the deburring and sanding process. Use sandpaper with varying grits to systematically work on each part. Start with a coarser grit to remove any roughness or imperfections and gradually move to a finer grit for a polished finish. The goal is to create an even surface that is free from any visible defects.
Using sandpaper and steel wool for finishing
To achieve the best results in refining the surface, use a combination of sandpaper and steel wool. Sandpaper is effective for removing larger imperfections and preparing the surface for a smoother finish. Steel wool, on the other hand, provides a finer touch and can be used for buffing the surface to a high gloss. Remember to wear appropriate safety gear, such as goggles and gloves, during this process.
How Much Does it Weigh
Weighing the printed parts before electroplating
Before proceeding with the electroplating process, it is important to weigh the 3D printed parts. This will allow you to determine the weight increase after electroplating, which can be an interesting aspect to track. Use a reliable scale to measure the weight of each part individually and record the values for future reference.
Calculating the weight increase after copper plating
After completing the copper plating process, weigh the 3D printed parts again to calculate the weight increase. The difference in weight will provide insight into the amount of copper deposited on the surface. This information can be useful for understanding the effectiveness of the electroplating process and for comparing different plating techniques in future projects.

Bath Plating Process
Detailed process of electroplating the 3D prints with copper
The electroplating process of the 3D prints with copper involves several key steps. These steps are crucial for achieving the desired results and ensuring a strong and durable plating. Here is a detailed outline of the process:
-
Prepare the electroplating bath by setting up a container large enough to accommodate the 3D printed object. Fill the container with the acidic copper electrolyte.
-
Place one or two copper anodes in the electrolyte. Ensure that the surface area of the anodes is slightly larger than the surface area of the object to be plated.
-
Connect the 3D printed object to the power supply using banana plugs and alligator clips. Ensure good electrical contact.
-
Adjust the current and voltage settings on the power supply according to the manufacturer’s instructions. Start with a low current and gradually increase it to achieve optimal plating results. Monitor the process closely to avoid any issues or overheating.
-
Allow the object to electroplate for the recommended duration, typically several hours. The length of time will depend on the desired thickness of the copper layer and the specific requirements of the electrolyte.
-
Regularly check the progress of the electroplating process. Ensure that the plating is uniform and free from defects. Adjust the current or voltage if necessary to achieve the desired results.
-
Once the specified plating time has elapsed, remove the object from the electrolyte and carefully rinse it with distilled water to remove any excess electrolyte.
Adjusting the current and voltage for optimal plating results
To achieve optimal plating results, it is crucial to adjust the current and voltage settings on the power supply. The specific values will depend on the size and composition of the object being electroplated, as well as the chosen electrolyte. Consult the manufacturer’s instructions and recommendations for guidance on the appropriate settings. It is important to monitor the plating process closely to ensure that the current and voltage are adjusted as needed to achieve the desired results.
Preventing impurities and waste material from affecting the plating
During the electroplating process, it is important to prevent impurities and waste material from affecting the plating. This can be achieved through proper filtration and containment measures. For example, using anal pockets made from pond filters and hot glue guns can help prevent waste material from the copper anodes from getting into the electrolyte and depositing on the parts. Regularly monitor the electrolyte for any signs of impurities and perform maintenance tasks, such as cleaning and replacing the anodes, as necessary.
Polishing the Electroplated Copper
Techniques for polishing the electroplated copper
After electroplating, the copper layer on the 3D printed object may require polishing to achieve a high-quality finish. Here are some techniques for polishing the electroplated copper:
-
Use polish and a soft cloth or polishing pad to buff the surface of the copper. Apply the polish in circular motions and continue until the desired shine is achieved.
-
If necessary, use finishing tools such as buffing compounds and polishing wheels to further enhance the appearance of the copper. These tools can help remove minor imperfections and create a more refined and glossy finish.
Using polish and finishing for a high gloss surface
To achieve a high gloss surface on the electroplated copper, it is important to use appropriate polish and finishing techniques. Apply the polish using a soft cloth or polishing pad and work in small circular motions. Gradually build up the shine by applying more polish as needed. Once the desired gloss is achieved, use finishing tools to further refine the surface, removing any remaining imperfections and creating a smooth and reflective appearance.
Enhancing the shine and appearance of the copper plating
To enhance the shine and appearance of the copper plating, consider using additional techniques such as burnishing or lacquering. Burnishing involves using a smooth hard object, such as a burnishing tool or a spoon, to rub the copper surface and create a polished finish. Lacquering can provide a protective coating and enhance the longevity of the copper plating. Choose a clear lacquer specifically designed for metal surfaces and follow the manufacturer’s instructions for application.
Nickel Electroplating
Applying a thin layer of nickel plating to the electroplated copper
In addition to copper plating, you may choose to apply a thin layer of nickel plating to the electroplated copper. Nickel plating can provide a different aesthetic and add a touch of class to the finished prop. The process of nickel electroplating is similar to copper plating, but with a few adjustments. Follow the steps for the copper plating process, making sure to use nickel electrolyte and adjust the current and voltage settings accordingly.
Precautions for working with nickel sulfide
It is important to exercise caution when working with nickel sulfide, as it can be a contact allergen. To ensure your safety, always wear a gas mask and gloves when handling nickel sulfide. Additionally, work in a well-ventilated area to minimize exposure to any fumes or vapors. If you have any concerns about working with nickel sulfide, consider alternative plating options, such as palladium or gold.
Adjusting voltage to avoid bubble formation during plating
When electroplating with nickel, it is essential to adjust the voltage to avoid bubble formation on the surface of the object. Many YouTube videos demonstrate nickel baths bubbling intensely, but it is recommended to avoid excessive bubbling. Adjust the voltage just before bubbles form to maintain optimal plating conditions. Monitor the process closely and make necessary adjustments to achieve the desired results.
Conclusion + Impressions
Summary of the electroplating process
In conclusion, electroplating 3D prints is an exciting technique that allows for the creation of stunning props with a metallic shine. By combining 3D printing technology with metal plating, one can achieve a unique and visually appealing aesthetic. The electroplating process involves several key steps, including preparing the bath, printing and preparing the 3D object, weighing the object before and after plating, and adjusting the current and voltage for optimal plating results. Additional plating options, such as nickel, palladium, and gold, can be explored to create even more diverse and luxurious finishes.
Impressions and thoughts on the finished electroplated sword
After completing the electroplating process, take a moment to reflect on the finished electroplated sword. Consider the overall appearance, shine, and physical properties of the object. The electroplating process should have transformed the original 3D printed sword into a convincing and visually striking prop. Assess the quality of the plating, polish, and finishing techniques used, and make notes for future projects.
Future possibilities and projects with electroplated 3D prints
The electroplating of 3D prints opens up a world of possibilities for creating unique and captivating props. With the knowledge and experience gained from this tutorial, you can explore and experiment with different designs, materials, and plating techniques. Consider using electroplating to create other props, such as helmets, armor, or jewelry. The combination of 3D printing and metal plating offers endless opportunities for creativity and innovation.
Electroplating 3D prints allows you to bring your imagination to life and create objects that are sure to impress. With the right materials, equipment, and techniques, you can achieve stunning results that rival professionally made props. So go ahead, have fun, and try your hand at electroplating your 3D prints. The possibilities are truly endless!
In the tutorial “Electroplating 3D Prints | Swords Tutorial 1,” I will show you how to create stunning props by electroplating your 3D prints. We will be using the Narsil Sword from LOTR as an example. By combining 3D printing and metal plating techniques, you can make realistic objects for your prop collection or the next comic con.
Here are the materials you will need for this project:
-
Bright Copper Electrolyte: Check it out here
-
Copper Conductive Varnish: Find it here
-
Galvano Degreaser: Get it here
-
Palladium Electrolyte: Purchase it here
Please note that these links are affiliate links. Occasionally, I recommend products that I personally use and know well. If you decide to make a purchase using the affiliate link, I may receive a commission. Rest assured, buying from affiliate links won’t cost you anything extra.
To begin, let’s set up the bath for electroplating. You can find detailed instructions in the video “How to Metal Plate 3D Prints | FULL Tutorial.”
Here are the chapters in the video for your convenience.
Also, if you’re interested, you can find the Narsil design by 3D-mon on Thingiverse here.
For conductivity, I used Tifoo Conductive Copper Paint. Just make sure it is compatible with your copper electrolyte.
To create the galvanic bath, you will need the following items:
-
A container
-
Acidic copper electrolyte
-
Optional nickel electrolyte
-
Palladium electrolyte
-
Gold electrolyte
-
One or two copper anodes
-
Banana plug & alligator clips
Additionally, you may need:
-
Degreaser
-
Distilled water
-
Galvanic brush + pen
Now it’s time to have some fun and give it a try! Enjoy the process and let your creativity shine. If you’d like, you can check out my other videos on electroplating 3D prints for more inspiration.
- Electroplating 3D Prints | Thermal Detonator
- How to Metal Plate The Ring from LOTR
- Electroplating 3D Prints – Super Smooth
- DIY Electroplating 3D Prints … (the shiny way) 🧪

ELEGOO PLA+ Filament 1.75mm White 1KG, High Toughness PLA Plus 3D Printer Filament Dimensional Accuracy +/- 0.02mm, 1kg Spool(2.2lbs) for Most FDM 3D Printers
$14.99 (as of June 19, 2025 23:45 GMT +00:00 - More infoProduct prices and availability are accurate as of the date/time indicated and are subject to change. Any price and availability information displayed on [relevant Amazon Site(s), as applicable] at the time of purchase will apply to the purchase of this product.)
3DHoJor Matte PLA Filament 1.75mm Light Khaki, PLA 3D Printer Filament, 1kg Spool (2.2lbs) PLA Filament, Fit Most FDM 3D Printer
$14.99 (as of June 19, 2025 23:45 GMT +00:00 - More infoProduct prices and availability are accurate as of the date/time indicated and are subject to change. Any price and availability information displayed on [relevant Amazon Site(s), as applicable] at the time of purchase will apply to the purchase of this product.)
youyeetoo FHL-LD19 Lidar Sensor - 12Meter (39ft) 360° Ranging - Walnut Size, 30K lux Resistant - Provide ROS/ROS2/C/C++ SDK Raspberry Tutorial for Robots Drone SLAM, Lidar Scanner Kit with Adapter
$68.60 (as of June 19, 2025 23:45 GMT +00:00 - More infoProduct prices and availability are accurate as of the date/time indicated and are subject to change. Any price and availability information displayed on [relevant Amazon Site(s), as applicable] at the time of purchase will apply to the purchase of this product.)
Creality Ender 3 V3 SE 3D Printer, 250mm/s Faster FDM 3D Printers with CR Touch Auto Leveling, Sprite Direct Extruder Auto-Load Filament Dual Z-axis & Y-axis, Printing Size 8.66 * 8.66 * 9.84 inch
$186.15 (as of June 19, 2025 23:45 GMT +00:00 - More infoProduct prices and availability are accurate as of the date/time indicated and are subject to change. Any price and availability information displayed on [relevant Amazon Site(s), as applicable] at the time of purchase will apply to the purchase of this product.)