Sovol SV08 Core-XY 3D Printer Voron 2.4 Open Source, 700mm/s High Speed 3D Printers with 300℃ Clog-Free Hotend & Camera, Auto Leveling with 4 Independent Z Motors, Large Print Size 13.8x13.8x13.6in
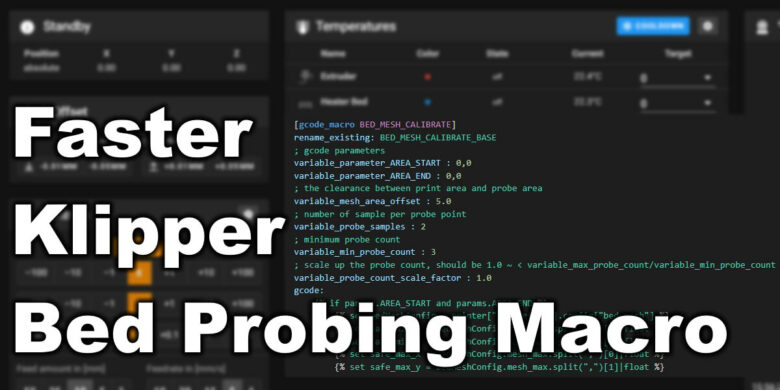
$699.99 (as of June 18, 2025 23:32 GMT +00:00 - More infoProduct prices and availability are accurate as of the date/time indicated and are subject to change. Any price and availability information displayed on [relevant Amazon Site(s), as applicable] at the time of purchase will apply to the purchase of this product.)Have you ever felt that bed probing on your 3D printer takes longer than necessary, making you impatient to start your print? If so, you’re not alone. Many 3D printing enthusiasts seek to optimize their setup for efficiency and speed. One fantastic way to achieve that is by utilizing a faster Klipper bed probing macro.
Anycubic 3D Materials Sale: Resin & PLA from $9.49/kg
What is a Faster Klipper Bed Probing Macro?
Essentially, this macro created by ChipCE significantly reduces bed probing time. Bed probing traditionally checks multiple points across the entire bed surface to ensure a level build plate. However, this can be quite time-consuming, especially if you’re eager to start printing. The Klipper bed probing macro optimizes this process by focusing only on the area where your object will be printed.
Why It Matters
Speed is crucial in 3D printing. The longer it takes for the bed probing, the longer you have to wait before your design gets transformed into a physical object. By expediting this process, the macro ensures you get to the printing stage more quickly, which can be particularly valuable for users who frequently make smaller prints or prototypes.
How Does the Macro Work?
The beauty of this macro lies in its simplicity and efficiency. The faster bed probing macro adjusts the probe area automatically based on the size of the object you intend to print. This means you won’t be wasting time probing areas of the bed that won’t even be used during the printing process.
Behind the Scenes
When you initiate a print, the macro calculates the exact dimensions of the area the 3D model will occupy and restricts the probing to that space. Not only does it make the process faster, but it also enhances precision in bed leveling where it’s necessary.
Anycubic 3D Materials Sale: Resin & PLA from $9.49/kg
Setting Up the Faster Klipper Bed Probing Macro
Editing the printer.cfg File
The first step to implementation involves editing the printer.cfg file of your Klipper setup. This file is integral to your 3D printer’s firmware, managing everything from motor control to sensor calibration.
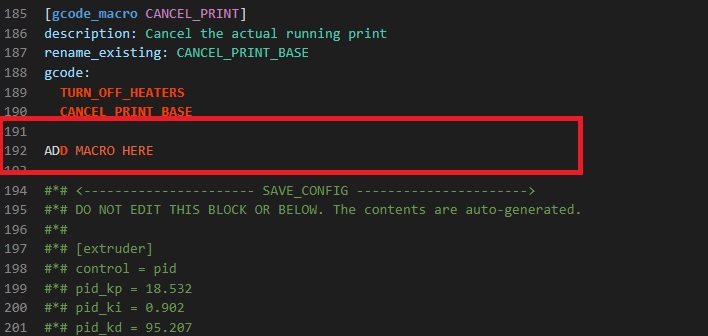
- Access the printer.cfg: Open your
printer.cfgfile in your preferred text editor. - Add the Macro Code: Insert the specific macros provided by ChipCE directly into the file. The content usually looks something like this:
[gcode_macro BED_MESH_CALIBRATE] description: Build an Adaptive Bed Mesh gcode: {% set bed_temp = params.get(“BED”, printer.configfile.config[‘heater_bed’][‘temperature’]) %} {% set hotend_temp = params.get(“HOTEND”, printer.configfile.config[‘extruder’][‘temperature’]) %} BED_MESH_CLEAR M190 S M109 S G28 BED_MESH_CALIBRATE REGION=X0:230 Y0:210 G1 X0 Y0 Z2 F3000
- Save and Restart: Save the changes and restart the Klipper service to apply the new settings.
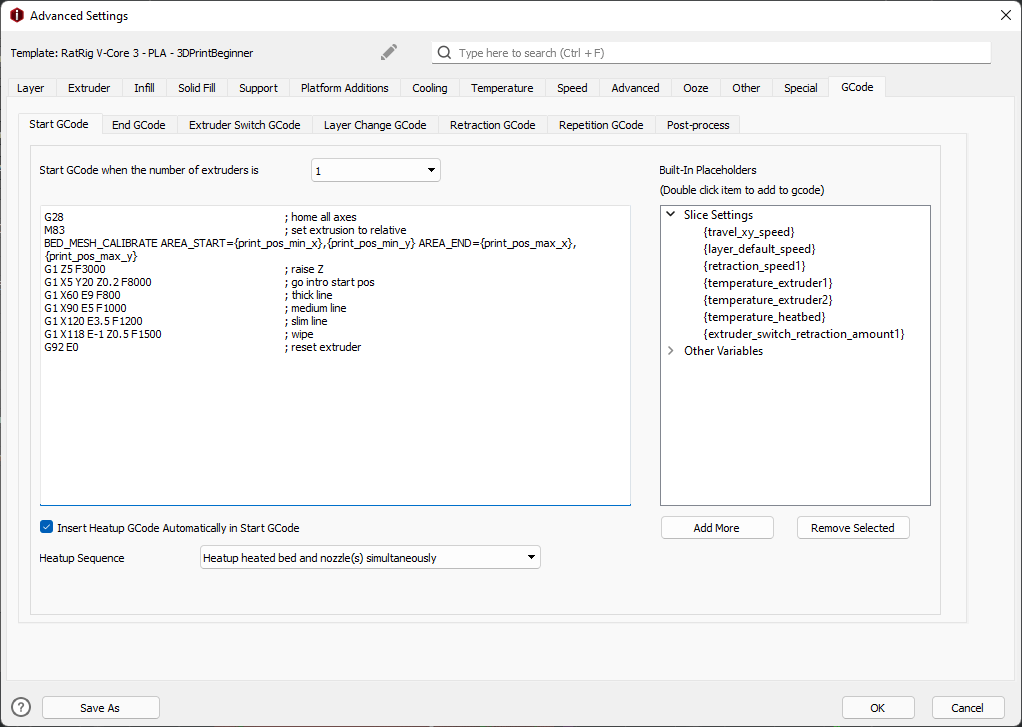
Updating the Start G-code in Your Slicing Software
The next step involves tweaking the start G-code in your slicing software. This is crucial as it aligns the slicing software with the updated bed probing settings.
IdeaMaker
In IdeaMaker, go to Printer Settings and find the option to edit the start G-code. Insert the following lines to ensure smooth integration:
BED_MESH_CALIBRATE G28
PrusaSlicer
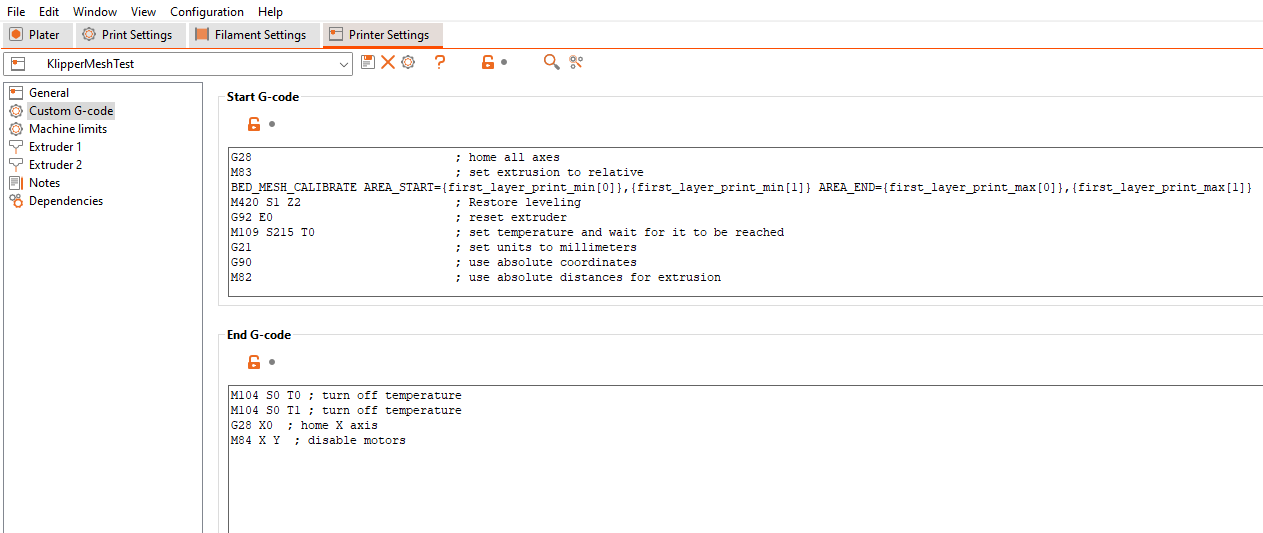
For PrusaSlicer, navigate to Printer Settings, then Custom G-code and update the Start G-code section similarly:
BED_MESH_CALIBRATE G28
Fine-Tuning Your Setup
Once the initial settings are applied, you might need to fine-tune the parameters based on your specific printer’s needs. Ensure that the probe measures are accurate and revise the [REGION=X0:230 Y0:210] line if your printer bed size differs from the default example.
Benefits of Using This Macro
Enhanced Efficiency
The primary benefit of this macro is the enhanced speed and efficiency it brings to the probing process. By focusing only on the required area, it saves time and reduces the wear and tear on your 3D printer.
Precision
Accuracy is another significant advantage. Since the macro performs probing strictly where it’s necessary, it offers a more precise leveling for the part of the bed that will host the actual print.
Easy Integration
Integrating this macro into your existing setup is straightforward and hassle-free. The instructions for editing the printer.cfg file and updating your slicing software are simple enough, even for those newer to 3D printing.
Troubleshooting and Community Support
Common Issues
Despite the many benefits, some users might run into issues such as incorrect probing or integration errors with certain slicing software. Adjusting the settings and double-checking the code entries often resolves these problems.
Community Assistance
For those who find themselves stuck, the 3DPrintBeginner Forum is a fantastic resource. Users can share their experiences, ask questions, and even find customized macros tailored to different printer models.
Patreon Support
If you want to support further development and get more exclusive tips and tricks, consider joining the community on Patreon. Your contribution not only helps sustain the creation of helpful content but also allows you to connect with fellow 3D printing aficionados.
User Feedback and Interaction
Your Experience Matters
Your feedback is invaluable. Many users have shared incredible insights and modifications that make the macro even more efficient. Engaging in the community, whether it’s by dropping a comment or suggesting improvements, enriches the collective knowledge base.
Compatibility Questions
A common query among users revolves around compatibility. The macro is quite adaptable, but it’s always wise to check in the community forum or with the macro developer to ensure it’s optimal for your specific printer model.
Sharing is Caring
The 3D printing community thrives on shared knowledge. If you come across any new macros or tweaks that boost printing efficiency, feel free to share them. This collaborative approach benefits everyone and continually pushes the envelope of what is possible in 3D printing.
Conclusion
In summary, the Faster Klipper Bed Probing Macro by ChipCE is a phenomenal tool for anyone looking to optimize their 3D printing setup. By reducing the probing time and honing in on the actual print area, it saves precious time and enhances the overall efficiency of your printer. Implementing this macro is straightforward, and the benefits are immediate and significant. With active community support and ongoing discussions, you have all the resources needed to troubleshoot and further improve your setup.
Your journey into faster, more efficient 3D printing doesn’t stop here. Engage with the community, experiment with your setup, and continually seek out new ways to improve. Happy printing!
Anycubic 3D Materials Sale: Resin & PLA from $9.49/kg
