Creality 3D Printer, K1 SE Fully Assembled Auto Leveling FDM 3D Printers for Kids and Beginners, 600mm/s Max High-Speed Printing, Core XY All Metal Structure, Larger Print Size 250x220x220mm
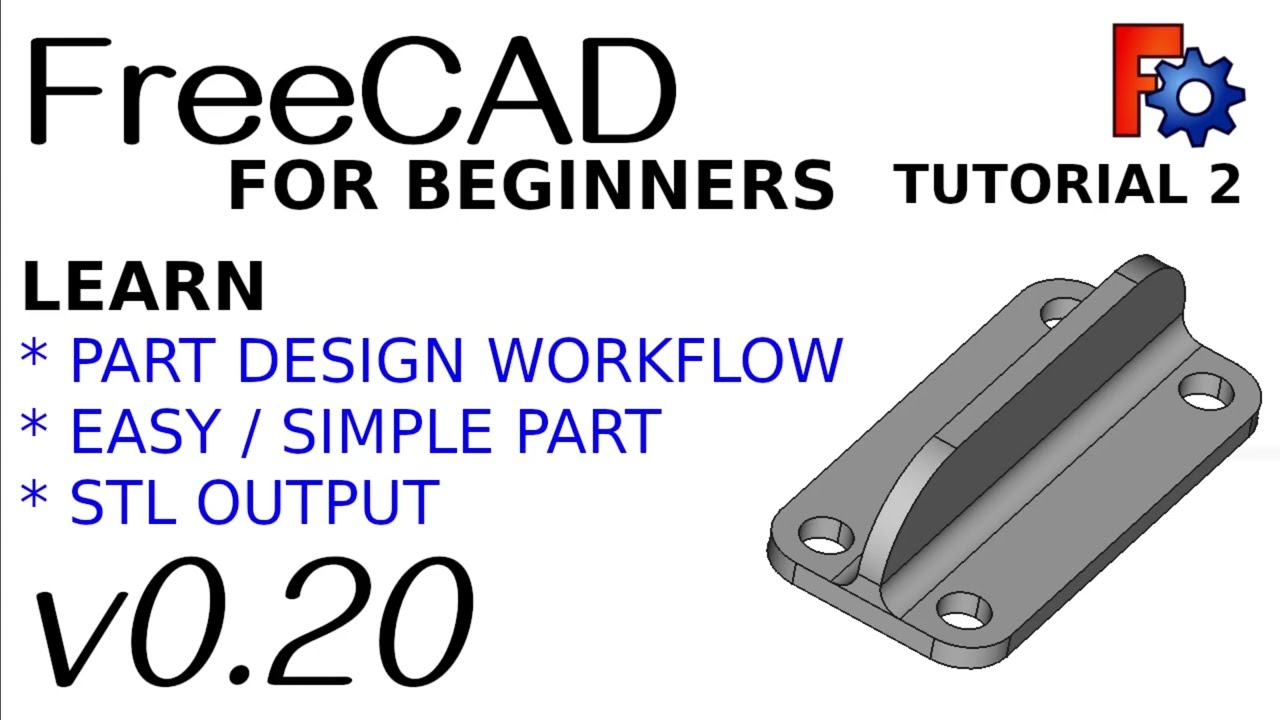
$279.00 (as of June 18, 2025 23:32 GMT +00:00 - More infoProduct prices and availability are accurate as of the date/time indicated and are subject to change. Any price and availability information displayed on [relevant Amazon Site(s), as applicable] at the time of purchase will apply to the purchase of this product.)Part 2 of the Beginner’s course for FreeCAD 0.20 is all about creating a simple model and exporting it to STL format using the Part Design workbench. The instructor takes you through the basics of using the sketcher to create fully constrained sketches, which are then used to pad and pocket the model, resulting in an object. The video also covers how to export the model for 3D printing or for use in other applications. This course aims to teach you the fundamentals of FreeCAD using different workflows, and you can stay updated with new video releases by following the playlist “FreeCAD 0.20 / 0.21 For Beginners Tut…”
Welcome back to part two of the total beginners course to FreeCAD 0.20. In this lesson, you will learn a basic part design workflow and the fundamentals of using the sketcher to create fully constrained sketches. These sketches will then be used to create an object through padding and pocketing techniques. Additionally, you will be shown how to export the finished model in STL format, which is suitable for 3D printing or for loading into other 3D applications like Blender. Make sure to follow the playlist “FreeCAD 0.20 / 0.21 For Beginners Tut…” to stay up to date with new video releases.

Setting up FreeCAD
Downloading and installing FreeCAD
To begin using FreeCAD, you first need to download and install the software. FreeCAD is available for free on the official FreeCAD website. Simply navigate to the website and click on the download button. Choose the appropriate version for your operating system (Windows, Mac, Linux) and follow the on-screen instructions to complete the installation process.
Configuring the software
Once FreeCAD is installed, it’s a good idea to spend some time configuring the software according to your preferences. Start by launching FreeCAD and opening the Preferences window. Here, you can customize various aspects of the software, such as the interface, navigation, and default settings.
Take some time to explore the different options available and adjust them to your liking. This will ensure that you have a comfortable and efficient working environment while using FreeCAD.
Navigating FreeCAD
Understanding the interface
The FreeCAD interface consists of various components that allow you to navigate the software and access its features. At the top of the window, you’ll find the menu bar, which contains menus for different commands and tools.
Below the menu bar, you’ll find a toolbar, which provides quick access to frequently used tools and commands. The toolbar consists of icons representing various functions, such as creating new sketches, adding dimensions, and exporting models.
The central part of the interface is the 3D view, where you can see and interact with your designs. You can rotate, zoom, and pan the view to examine your models from different angles.
On the left side of the interface, you’ll find the Tree view, which displays the hierarchy of objects and operations in your model. This view allows you to easily navigate through your design and make changes to individual components.
Using the toolbar
The toolbar in FreeCAD provides quick access to essential tools and commands. It consists of icons that represent different functions and operations.
To use a tool from the toolbar, simply click on its icon. For example, if you want to create a new sketch, click on the “Create New Sketch” icon. This will activate the Sketcher workbench and allow you to start sketching.
Make sure to familiarize yourself with the icons on the toolbar and their respective functions. This will help you work more efficiently and save time while using FreeCAD.
Utilizing the different workbenches
FreeCAD uses a modular system called workbenches to organize its tools and commands. Each workbench focuses on a specific aspect of the design process, such as sketching, part design, or assembly.
To switch between different workbenches, use the Workbench dropdown menu located on the toolbar. The dropdown menu contains a list of available workbenches, such as Sketcher, Part Design, and Draft.
Selecting a workbench will activate its specific tools and commands, allowing you to perform tasks related to that workbench. For example, if you want to create a 3D model, you’ll need to switch to the Part Design workbench.
Customizing the workspace
FreeCAD allows you to customize the workspace according to your preferences. You can rearrange the toolbar, add or remove icons, and create custom shortcuts for frequently used tools.
To customize the workspace, go to the Preferences window and navigate to the “Customize” section. Here, you’ll find options to modify the toolbar, customize the appearance of icons, and set up keyboard shortcuts.
Experiment with different configurations and find a setup that works best for you. Customizing the workspace will help you streamline your workflow and make FreeCAD more intuitive to use.


Modeling from scratch
Starting a new project
To start a new project in FreeCAD, you need to create a new document. This can be done by clicking on the “Create New Document” icon on the toolbar or using the File menu.
Once you have created a new document, make sure to save it to a location of your choice. This will ensure that your work is saved and can be accessed later.
Creating a new sketch
In FreeCAD, sketches are the foundation for creating 3D models. A sketch is a 2D representation of your design, created on a specific plane.
To create a new sketch, switch to the Sketcher workbench. This can be done by selecting the Sketcher workbench from the Workbench dropdown menu on the toolbar.
Next, select the plane on which you want to create the sketch. This can be done by choosing the appropriate plane from the selection tools available in the Sketcher workbench.
Once you have selected the plane, you can start sketching by using the tools and commands available in the Sketcher workbench.
Using the sketcher to create fully constrained sketches
The sketcher in FreeCAD allows you to create fully constrained sketches, ensuring that your designs are accurate and precise.
To create fully constrained sketches, you need to add constraints to your sketch. Constraints are rules that define the relationships between different elements in your sketch, such as lines, points, and angles.
FreeCAD provides a range of constraints that you can use to constrain your sketch. These include distance constraints, angle constraints, and symmetry constraints, among others.
To add a constraint, select the appropriate constraint tool from the Sketcher workbench and apply it to the desired elements in your sketch. The constraint will automatically adjust the position and dimensions of the constrained elements to fulfill the specified rule.
By applying constraints to your sketch, you can ensure that it remains fully defined and can be used to create 3D models accurately.
Part Design Workflow
Understanding the part design workbench
The Part Design workbench in FreeCAD is used to create complex 3D models by combining and manipulating 2D sketches.
In the Part Design workbench, you can perform operations such as extruding, padding, pocketing, and filleting to create solid objects from your sketches.
To work in the Part Design workbench, switch to it using the Workbench dropdown menu on the toolbar.
Using sketches to pad and pocket the model
In the Part Design workbench, you can use sketches to create features on your model, such as pads and pockets.
Pads are created by extruding a sketch in a specific direction, adding material to the model. Pockets, on the other hand, are created by removing material from the model, based on a sketch.
To create a pad or pocket, select the sketch you want to use and choose the appropriate tool from the Part Design workbench. Specify the dimensions and direction of the feature, and FreeCAD will generate the corresponding pad or pocket.
By combining different sketches and applying pads and pockets, you can create complex 3D models with detailed features.
Adding dimensions and constraints to the sketch
To create accurate and precise sketches, it’s important to add dimensions and constraints to your design.
Dimensions specify the size and position of elements in your sketch, while constraints define the relationships between different elements.
To add dimensions, select the dimension tool from the Sketcher workbench and apply it to the desired lines or points in your sketch. This will display the dimensions on the screen, allowing you to adjust them as needed.
Constraints can be added in a similar way as described earlier. Select the appropriate constraint tool from the Sketcher workbench and apply it to the elements you want to constrain. This will ensure that the elements maintain the specified relationships while you make changes to the sketch.
By adding dimensions and constraints, you can create accurate and fully defined sketches that can be used for 3D modeling.
Creating solid objects from the sketches
Once you have created the desired sketches and added dimensions and constraints, you can use the Part Design workbench to turn them into solid objects.
In the Part Design workbench, select the sketch you want to use and choose the appropriate tool to pad or pocket the sketch. This will generate a solid object based on the dimensions and constraints of the sketch.
You can continue adding more sketches and applying operations to create complex 3D models with intricate details.

Exporting the Model as STL
Preparing the model for export
Before exporting your model as an STL file, it’s important to ensure that it is properly prepared and ready for 3D printing or use in other 3D applications.
Review your model to make sure all the dimensions and details are accurate and complete. Check for any errors or issues that may affect the printing or usability of the model.
It’s also a good idea to perform a final check for any overlapping or intersecting elements. These can cause problems during the printing process and may result in a failed print.
Choosing the STL file format
STL (Standard Tessellation Language) is a widely used file format for 3D printing and exchanging 3D models between different software applications.
In FreeCAD, you can export your model as an STL file by choosing the appropriate file format during the export process.
When exporting as an STL, you have the option to specify the file format version. It’s recommended to choose the latest version compatible with your 3D printing software or application.
Selecting the export options
During the export process, you can also specify additional options for the STL file.
These options may include:
- Units: Choose the appropriate unit of measurement for your model. This ensures that the dimensions of the model are correctly interpreted during the 3D printing or import process.
- Resolution: Specify the level of detail and smoothness of the exported model. Higher resolution settings result in larger file sizes but may produce better quality prints.
- Triangulation: Choose the method used to convert the model’s geometry into triangles. Different methods may result in variations in the appearance of curved surfaces.
Carefully review and select the appropriate options based on your specific requirements and the capabilities of your 3D printing software or application.
Advantages of Exporting as STL
Compatibility with 3D printers
One of the main advantages of exporting your models as STL files is their compatibility with 3D printers.
STL is a widely supported file format in the 3D printing industry, allowing you to easily transfer your models to different printers and print them without compatibility issues.
By exporting your models as STL, you can ensure that they are ready for 3D printing and can be successfully converted into physical objects.
Interoperability with other 3D packages
In addition to 3D printing, exporting your models as STL files also allows for interoperability with other 3D modeling and design software applications.
STL files can be imported into various 3D packages, such as Blender, Unity, and SolidWorks. This enables you to leverage the capabilities of different software tools and incorporate your FreeCAD models into larger, more complex projects.
By exporting your models as STL, you can collaborate with others and seamlessly integrate your designs into different workflows and pipelines.

Other Workflows in FreeCAD
Exploring different workflows in FreeCAD
While the part design workflow is one of the fundamental workflows in FreeCAD, the software offers various other workflows for different design and modeling tasks.
These workflows include assembly design, drafting, sheet metal design, and architectural design, among others.
Each workflow focuses on specific aspects of the design process and provides a set of tools and commands tailored to those tasks.
By exploring different workflows in FreeCAD, you can broaden your understanding of the software and expand your capabilities as a 3D designer.
Understanding the part design, assembly, and drafting workbenches
The part design, assembly, and drafting workbenches are commonly used in FreeCAD for different purposes.
The part design workbench, as discussed earlier, is used to create and modify 3D models by combining sketches and applying operations such as padding and pocketing.
The assembly workbench, on the other hand, allows you to create and manage assemblies of multiple parts. This is useful for designing complex objects that consist of multiple components.
The drafting workbench is specifically designed for creating 2D drawings and technical documentation from your 3D models. It provides tools for creating views, dimensions, and annotations for manufacturing or documentation purposes.
By understanding these workbenches and how they relate to different design workflows, you can effectively use FreeCAD for a wide range of design tasks.
Following the Beginner’s Course Playlist
Finding the FreeCAD 0.20/0.21 For Beginners Tut… playlist
To continue learning FreeCAD and gain a deeper understanding of its features and workflows, you can follow the Beginner’s Course playlist.
The Beginner’s Course playlist is a collection of video tutorials that cover various topics and techniques in FreeCAD. These tutorials are specifically designed for beginners and provide step-by-step instructions and explanations.
To find the playlist, simply search for “FreeCAD 0.20/0.21 For Beginners Tut…” on your preferred video platform, such as YouTube. The playlist should contain all the relevant videos in the correct order.
Subscribe to stay updated with new video releases
To stay updated with new video releases and ensure that you don’t miss out on any valuable tutorials, consider subscribing to the instructor’s YouTube channel or following their social media accounts.
By subscribing, you’ll be notified whenever new videos are uploaded, allowing you to continue your learning journey and keep up with the latest FreeCAD updates and techniques.
Supporting the Instructor
Donating to the instructor’s Patreon page
If you find value in the instructor’s content and would like to support their work, consider donating to their Patreon page.
Patreon is a platform that allows content creators to receive financial support from their audience. By becoming a patron, you can contribute a monthly donation to help the instructor cover their expenses and create more high-quality tutorials.
Visiting the instructor’s Patreon page will provide you with more information on how to contribute and the benefits you can receive as a patron.
Contributing to the instructor’s Ko-fi page
Another way to support the instructor is by donating to their Ko-fi page.
Ko-fi is a platform that allows content creators to receive one-time donations from their audience. It provides a simple and convenient way to show your appreciation and contribute to the instructor’s efforts.
Visiting the instructor’s Ko-fi page will allow you to make a donation and support their channel and content.
Supporting the channel and content
If you’re unable to contribute financially, there are still other ways to support the instructor and their content.
Sharing the instructor’s videos with your friends and social media followers can help increase their reach and attract more viewers. Liking and commenting on their videos also contributes to their engagement and visibility on video platforms.
Additionally, providing feedback and suggestions to the instructor can help them improve their content and create more valuable tutorials in the future.
By supporting the channel and content, you’re contributing to the growth and success of the instructor’s work, allowing them to continue producing helpful tutorials and resources.
Conclusion
In conclusion, FreeCAD is a powerful 3D modeling and design software that offers a range of features and workflows for creating detailed and accurate models.
In this article, we discussed the process of setting up FreeCAD, navigating the software, and modeling from scratch using the sketcher and part design workflows.
We also explored the advantages of exporting models as STL files for 3D printing and interoperability with other 3D packages.
By following the Beginner’s Course playlist and supporting the instructor, you can further enhance your skills in FreeCAD and continue learning new techniques and workflows.
Remember to experiment, practice, and explore the different tools and workbenches in FreeCAD to expand your knowledge and become proficient in 3D modeling and design with this versatile software.
Welcome to part 2 of the new total beginners course to FreeCAD 0.20. In this lesson, we will teach you a basic part design workflow and go through the fundamentals of using the sketcher to create sketches that are fully constrained. We will then use these sketches to pad and pocket the model to create our object. We will also learn how to export this out in STL format for 3D Printing or loading into another application such as Blender.
Throughout this course, we will teach you the fundamentals of FreeCAD using different workflows. For example, in one lesson, you will learn how to sketch and build a model while following a workflow that takes you through the part design workbench all the way to exporting it out in STL format. In another lesson, you will learn how to model in the part workbench and discover the differences between it and the part workbench, while following a workflow that allows you to create 2D plans of your model for laser or paper cutting.
Our goal is to teach you FreeCAD in a practical way. Please follow the playlist here to keep up to date with the video releases.
Journey with us and support us on Patreon. You can also donate to us here, subscribe to our YouTube channel here, and browse our Redbubble Shop here.

Ender 3 V3 KE PEI Spring Steel 235x235mm, Texture PEI Sheet Magnetic Flexible Heated Bed, Ender 3 V3 SE Build Plate for Creality K1C/K1/Ender 3 V3/Ender 3/Ender 3 Pro/Ender 3 V2/Ender 3 V2 Neo
$12.59 (as of June 18, 2025 23:32 GMT +00:00 - More infoProduct prices and availability are accurate as of the date/time indicated and are subject to change. Any price and availability information displayed on [relevant Amazon Site(s), as applicable] at the time of purchase will apply to the purchase of this product.)
【2025 Special Bundle】SUNLU Official Filament Dryer Box S4,Four-Spool 3D Printer Dehydrator with Rapid Heating, Auto Humidity Control, and Advanced Triple Fan Upgrade, Fits PLA,PETG,ABS,TPU,PA,etc.
$139.99 (as of June 18, 2025 23:32 GMT +00:00 - More infoProduct prices and availability are accurate as of the date/time indicated and are subject to change. Any price and availability information displayed on [relevant Amazon Site(s), as applicable] at the time of purchase will apply to the purchase of this product.)
HXOGYUB 3D Scanning Spray for 3D Scanners, Professional for All 3D Scanner, Safety Material, High Reflectivity, Easy to Clean, for Reflective, Transparent or Highly Textured Surfaces, 500ML
$33.99 (as of June 18, 2025 23:32 GMT +00:00 - More infoProduct prices and availability are accurate as of the date/time indicated and are subject to change. Any price and availability information displayed on [relevant Amazon Site(s), as applicable] at the time of purchase will apply to the purchase of this product.)
ELEGOO Neptune 3 Pro FDM 3D Printer with Auto Bed Leveling, Dual-Gear Direct Extruder, Dual Lead Screw Drive, Removable Capacitive Screen, 8.85x8.85x11in Large Printing Size
$209.99 (as of June 18, 2025 23:32 GMT +00:00 - More infoProduct prices and availability are accurate as of the date/time indicated and are subject to change. Any price and availability information displayed on [relevant Amazon Site(s), as applicable] at the time of purchase will apply to the purchase of this product.)