ANYCUBIC Photon Mono M7 PRO 14K Resin 3D Printer, 170mm/h Fast Printing, 10.1'' Mono LCD with COB LighTurbo 3.0 Source, Dynamic Temperature Control Resin Vat, Build Volume 8.77''x4.96''x9.05''
$689.99 (as of June 18, 2025 23:32 GMT +00:00 - More infoProduct prices and availability are accurate as of the date/time indicated and are subject to change. Any price and availability information displayed on [relevant Amazon Site(s), as applicable] at the time of purchase will apply to the purchase of this product.)In this tutorial, you will learn how to design a simple hinged box in FreeCAD for 3D printing. The tutorial will cover creating one side of the box with a repeating hinge and then copying, flipping, and pinning to create the full box. You will also learn how to hollow out the box using FreeCAD’s part design pad and thickness tool, or alternatively, using the pocket tool. Additionally, the tutorial will cover modeling the hinge and creating a linear pattern. The hinges will be attached to connect the two sides of the box when they are copied and rotated. The video also mentions the option to donate to the creator’s contributions to the community on their Ko-fi site.
Welcome to the tutorial on how to create a 3D printed box using FreeCAD. In this beginner’s guide, we will walk through the process of modeling a simple hinged box for 3D printing. We will use basic tools in FreeCAD to create one side of the box with a repeating hinge, and then duplicate and rotate it to form the full box. Topics that will be covered include creating the bottom and top of the box, modeling the hinge, and using a linear pattern. Get ready to learn and don’t forget to subscribe to the channel if you enjoy the tutorial!

Creating the Box
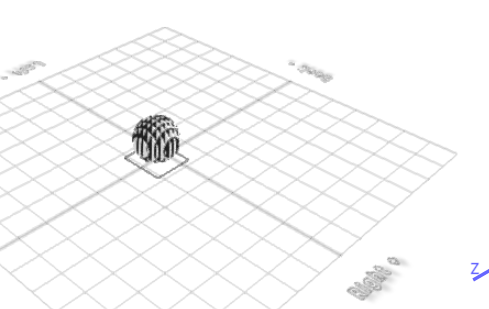
To begin creating the box, we will first design one side of the enclosure. In FreeCAD’s part design workbench, create a new body and a new sketch. Place the sketch along the XY plane and determine the dimensions of the box. For a small box, let’s go with a square shape measuring 200 by 200 millimeters in depth. After placing the square in the sketch, make the two sides equal and set the length of one side to 200 millimeters using the fix horizontal distance option. The sketch should now be centered in the middle of the screen.
Next, we will hollow out the box using FreeCAD’s part design pad and thickness tool. Select the top face of the sketch and use the thickness tool to make the walls thick. Set the desired thickness, for example, 10 millimeters. By default, the thickness extends outward, but we want it to go inward while keeping the shape intact. To achieve this, change the thickness to be inward. This will create a hollow space within the box.
Alternatively, if you want to leave a wall of the same thickness around the box, you can use the pocket tool. This tool allows you to create walls with a consistent thickness. Simply select the sketch, go to the pocket tool in the part design workbench, and specify the desired thickness. The pocket tool will create the walls of the box with the same thickness all around.
Modeling the Hinge
Now let’s move on to modeling the hinge for the box. We will create a hinge using FreeCAD’s modeling tools. Modeling a hinge in FreeCAD involves multiple steps, but our step-by-step guide will make it easy for you to follow along.
To begin, create a new sketch on the top face of the box. Use the geometry tools to draw the profile of the hinge. You can create a simple rectangular shape or add more intricate details to match your design preferences. Once the sketch is complete, extrude it to create a 3D object representing the hinge.
Ensure that the hinge is properly designed for functionality. Check if it aligns with the edge of the box and if it allows for smooth opening and closing of the box. Make any necessary adjustments to the hinge design to ensure it meets your requirements.


Repeating Hinges with Linear Pattern
To save time and effort, we can use FreeCAD’s linear pattern tool to repeat the hinge along the length of the box. This tool allows us to create multiple instances of an object in a linear pattern.
Select the hinge object and activate the linear pattern tool in FreeCAD’s part design workbench. Set the number of instances and the desired spacing between them. FreeCAD will automatically create the repeated hinges, evenly spaced along the box’s length. This step will ensure that all the hinges are consistent and aligned.
Attaching Hinges
Now that we have repeated the hinges along the box’s length, it’s time to attach them to the other side of the box. As you copy and rotate one side of the box to create the other side, the hinges will naturally connect together.
Connect the two sides of the box by selecting the corresponding hinge objects on each side and using the appropriate connecting tool in FreeCAD’s part design workbench. Make sure to position and rotate the hinges appropriately to ensure they align correctly and allow for smooth opening and closing of the box.

Creating the Top and Bottom of the Box
With the main structure of the box complete, we can now focus on designing the top and bottom. Create a new sketch on the top face of the box and use the sketch tools to draw the desired shape of the top and bottom. Extrude the sketches to create 3D objects representing the top and bottom of the box.
Ensure that the dimensions of the top and bottom match the dimensions of the box to ensure a snug fit. Use the appropriate alignment and constraint tools in FreeCAD to position and align the top and bottom accurately.
Conclusion
In this tutorial, we have covered the process of creating a simple hinged box in FreeCAD for 3D printing. We started by designing one side of the enclosure and repeating the hinge along the box’s length. We then hollowed out the box using FreeCAD’s part design pad and thickness tool. Additionally, we explored the alternative method of creating box walls using the pocket tool with the same thickness.
Next, we modeled the hinge step-by-step and ensured it was properly designed for functionality. We then used FreeCAD’s linear pattern tool to repeat the hinge along the box’s length. Attaching the hinges helped connect the two sides of the box, allowing for smooth opening and closing.
Finally, we created the top and bottom of the box, ensuring the dimensions and alignment were accurate. We encourage you to try 3D printing the box using our tutorial as a guide. If you found this tutorial helpful, consider making an optional donation to the creator’s Ko-fi site to support their contributions to the community.
Remember, FreeCAD offers a wide range of tools and capabilities for 3D modeling, so feel free to explore and experiment with different design ideas and features. Happy designing and happy printing!
In this tutorial, you will learn how to create a simple hinged box using FreeCAD for 3D printing. We will use basic tools in FreeCAD to model the box and create a repeating hinge. By copying, flipping/rotating, and pinning the hinge, you will be able to create the full box ready for slicing and printing. We will also explore how to hollow out the box using FreeCAD’s part design pad and thickness tool. Alternatively, if all the box walls have the same thickness dimensions, we can use the pocket tool inside the box.
Next, we will focus on the hinge. You will learn how to model the hinge and repeat it using a linear pattern. By attaching the hinge, when you copy and rotate one side of the box to create the other side, the hinges will connect together. Finally, we will move on to the pin, which holds the two sides of the box together.
Join me on this journey and feel free to support me by donating at this link. Don’t forget to subscribe to my channel, @mangojellysolutions, and browse my Redbubble Shop at MangojellyLabs.redbubble.com.
BIQU CryoGrip Pro Frostbite Panda Build Plate for Bambu-Lab P1S P1P X1C X1E A1 3D Printers, Cold Plate, Room Temperature Printing, Double-Sided Textured Sheet, 257x257mm, 1 Piece
$32.99 (as of June 18, 2025 23:32 GMT +00:00 - More infoProduct prices and availability are accurate as of the date/time indicated and are subject to change. Any price and availability information displayed on [relevant Amazon Site(s), as applicable] at the time of purchase will apply to the purchase of this product.)
Creality Wood Filament PLA, 3D Printer Filament 1.75 mm, Smooth Silk Texture, Toughness, 1kg(2.2lbs)/Spool Printing Filament, for All FDM Printers (Wood)
$23.98 (as of June 18, 2025 23:32 GMT +00:00 - More infoProduct prices and availability are accurate as of the date/time indicated and are subject to change. Any price and availability information displayed on [relevant Amazon Site(s), as applicable] at the time of purchase will apply to the purchase of this product.)
Anycubic Kobra S1 Combo 3D Printer, Multi-Color 3D Printer High Speed Max 600mm/s High Precision, Core XY Stable Structure Ultra-Quiet Printing Anycubic App One-Click Printing 250 * 250 * 250mm
$599.99 (as of June 18, 2025 23:32 GMT +00:00 - More infoProduct prices and availability are accurate as of the date/time indicated and are subject to change. Any price and availability information displayed on [relevant Amazon Site(s), as applicable] at the time of purchase will apply to the purchase of this product.)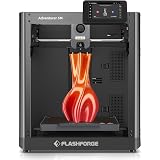
FLASHFORGE AD5M 3D Printer Fully Auto Calibration Print with 1-Click Max 600mm/s Speed, All-Metal CoreXY Structure Precise Printing, Easy-Maintenance Quick-Swap Nozzle, Print Size 220x220x220mm
$259.00 (as of June 18, 2025 23:32 GMT +00:00 - More infoProduct prices and availability are accurate as of the date/time indicated and are subject to change. Any price and availability information displayed on [relevant Amazon Site(s), as applicable] at the time of purchase will apply to the purchase of this product.)