FLASHFORGE 3D Printer AD5M, CoreXY 600mm/s High-Speed Printer with 1-Click Auto Leveling, High-Temp Direct Drive Extruder, 3s Quick-Swap Nozzle, 220×220×220mm Build Volume
$259.00 (as of June 19, 2025 23:45 GMT +00:00 - More infoProduct prices and availability are accurate as of the date/time indicated and are subject to change. Any price and availability information displayed on [relevant Amazon Site(s), as applicable] at the time of purchase will apply to the purchase of this product.)Are you tired of spending hours creating product photography mockups from scratch, only to end up with subpar results? With the rise of 3D CAD software, creating realistic and customizable product photography mockups has never been easier or more accessible.
The Power of 3D CAD Software in Product Photography Mockup Creation
In today’s visually-driven market, an effective product photography mockup can make a significant difference in attracting customers and communicating your brand’s value. 3D CAD software, such as SelfCAD, offers a wealth of tools and features that enable designers to create photorealistic scenes and mockups with ease. With 3D CAD software, you can create complex shapes, edit and modify designs, and render high-quality images that showcase your product in the best possible light.

Anycubic Coupon – $5 off $50+ sitewide with code DIY5OFF
Setting Up Your 3D CAD Software
To get started with designing a product photography mockup using 3D CAD software, you’ll need to set up your software and familiarize yourself with the interface. Here’s a step-by-step guide to help you get started:
| Step | Action | Description |
|---|---|---|
| 1 | Launch the editor | Open SelfCAD and launch the editor to begin designing your product photography mockup. |
| 2 | Choose a 3D shape | From the 3D Shapes category on the toolbar, choose a cube and set the width to 85, height to 120, and depth to 50. |
| 3 | Add a fillet | From the modify category on the toolbar, choose fillet and set the intensity to 7 and level to 3. |

Anycubic Coupon – $5 off $50+ sitewide with code DIY5OFF
Creating a Product Photography Mockup
Once you’ve set up your software and created a basic shape, you can begin designing your product photography mockup. Here’s a step-by-step guide to help you create a realistic and customizable mockup:
| Step | Action | Description |
|---|---|---|
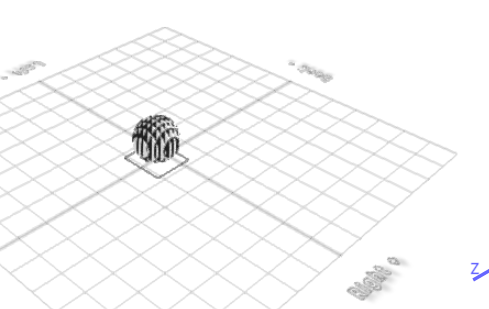
| 1 | Create a cylinder | From the 3D Shapes category on the toolbar, choose a cylinder and set the top radius to 10, bottom radius to 10, height to 20, and horizontal segments to 10. |
| 2 | Add a cube | From the 3D Shapes category on the toolbar, choose a cube and set the width to 78, height to 20, and depth to 37. |
| 3 | Add a fillet | From the modify category on the toolbar, choose fillet and set the intensity to 6 and level to 4. |

Rendering a Photorealistic Scene
Once you’ve created your product photography mockup, you can render a photorealistic scene using SelfCAD’s rendering tools. Here’s a step-by-step guide to help you render a high-quality image:
| Step | Action | Description |
|---|---|---|
| 1 | Select the mesh | Click on mesh 8 to select it, then click on stitch & scoop on the toolbar and choose difference. |
| 2 | Set the rendering options | Set the rendering options to your desired settings, such as resolution and lighting. |
| 3 | Render the scene | Click on the render button to render the scene and create a photorealistic image. |
Tips and Tricks for Creating a Realistic Product Photography Mockup
Here are some tips and tricks to help you create a realistic product photography mockup using 3D CAD software:
- Use reference images to get a better understanding of the product’s shape and design.
- Experiment with different materials and textures to create a realistic look.
- Pay attention to lighting and shading to create a photorealistic scene.
- Use the software’s built-in rendering tools to create a high-quality image.

Additional Resources
If you’re new to 3D CAD software or want to deepen your understanding of SelfCAD, here are some additional resources to help you get started:
- SelfCAD tutorials: Check out the interactive tutorials on the SelfCAD website to learn more about the software and its features.
- SelfCAD Academy: Access the SelfCAD Academy for a more structured learning experience and in-depth courses taught by industry experts.
- 3D Modeling 101 series: Watch the 3D Modeling 101 series on YouTube for tips and tricks on creating realistic 3D models.
By following these steps and tips, you can create a realistic and customizable product photography mockup using 3D CAD software. With practice and patience, you can master the intricacies of SelfCAD and create stunning product photography mockups that showcase your product in the best possible light.
Anycubic Coupon – $5 off $50+ sitewide with code DIY5OFF
ELEGOO Matte PLA Filament Navy Blue 1KG, 1.75mm 3D Printer Filament Dimensional Accuracy +/- 0.02mm, 1kg Carboard Spool (2.2lbs) for Most FDM 3D Printers
$19.99 (as of June 19, 2025 23:45 GMT +00:00 - More infoProduct prices and availability are accurate as of the date/time indicated and are subject to change. Any price and availability information displayed on [relevant Amazon Site(s), as applicable] at the time of purchase will apply to the purchase of this product.)
Capricorn Bowden PTFE Tubing 1M XS Series 1.75MM Filament with 2X PC4-M6 & 2X PC4-M10 Pneumatic Fittings & Tube Cutter for Creality Ender 3 V2/ Ender 3/ Ender 3 Pro/Ender 5/ CR-10/10S 3D Printer
$11.99 (as of June 19, 2025 23:45 GMT +00:00 - More infoProduct prices and availability are accurate as of the date/time indicated and are subject to change. Any price and availability information displayed on [relevant Amazon Site(s), as applicable] at the time of purchase will apply to the purchase of this product.)
TOSUKKI 6mm Positioning Targets with Black Contour for 3D Scaner,3D scanning Markers/Dots/Stickers,Reference Point Markers/Reflection Markers/for 3D Scaning and Optical Tracking(1200 Per Box)
$27.00 (as of June 19, 2025 23:45 GMT +00:00 - More infoProduct prices and availability are accurate as of the date/time indicated and are subject to change. Any price and availability information displayed on [relevant Amazon Site(s), as applicable] at the time of purchase will apply to the purchase of this product.)
Creality 3mm 3D Scanning Marker for 3D Scanner, 3D Tracking Dot Reference Point Markers for 3D scanning, Diffuse Reflection Markers for 3D Scanner, 5 sheet/98 dot per sheet/490 dot
$14.99 (as of June 19, 2025 23:45 GMT +00:00 - More infoProduct prices and availability are accurate as of the date/time indicated and are subject to change. Any price and availability information displayed on [relevant Amazon Site(s), as applicable] at the time of purchase will apply to the purchase of this product.)