
FLASHFORGE Adventurer 5M 3D Printer with Fully Auto Leveling System, Max 600mm/s High-Speed, 280℃ Quick-Detach Nozzle, CoreXY Structure for Superior Print Quality, Rookies & Experts Smart Choice
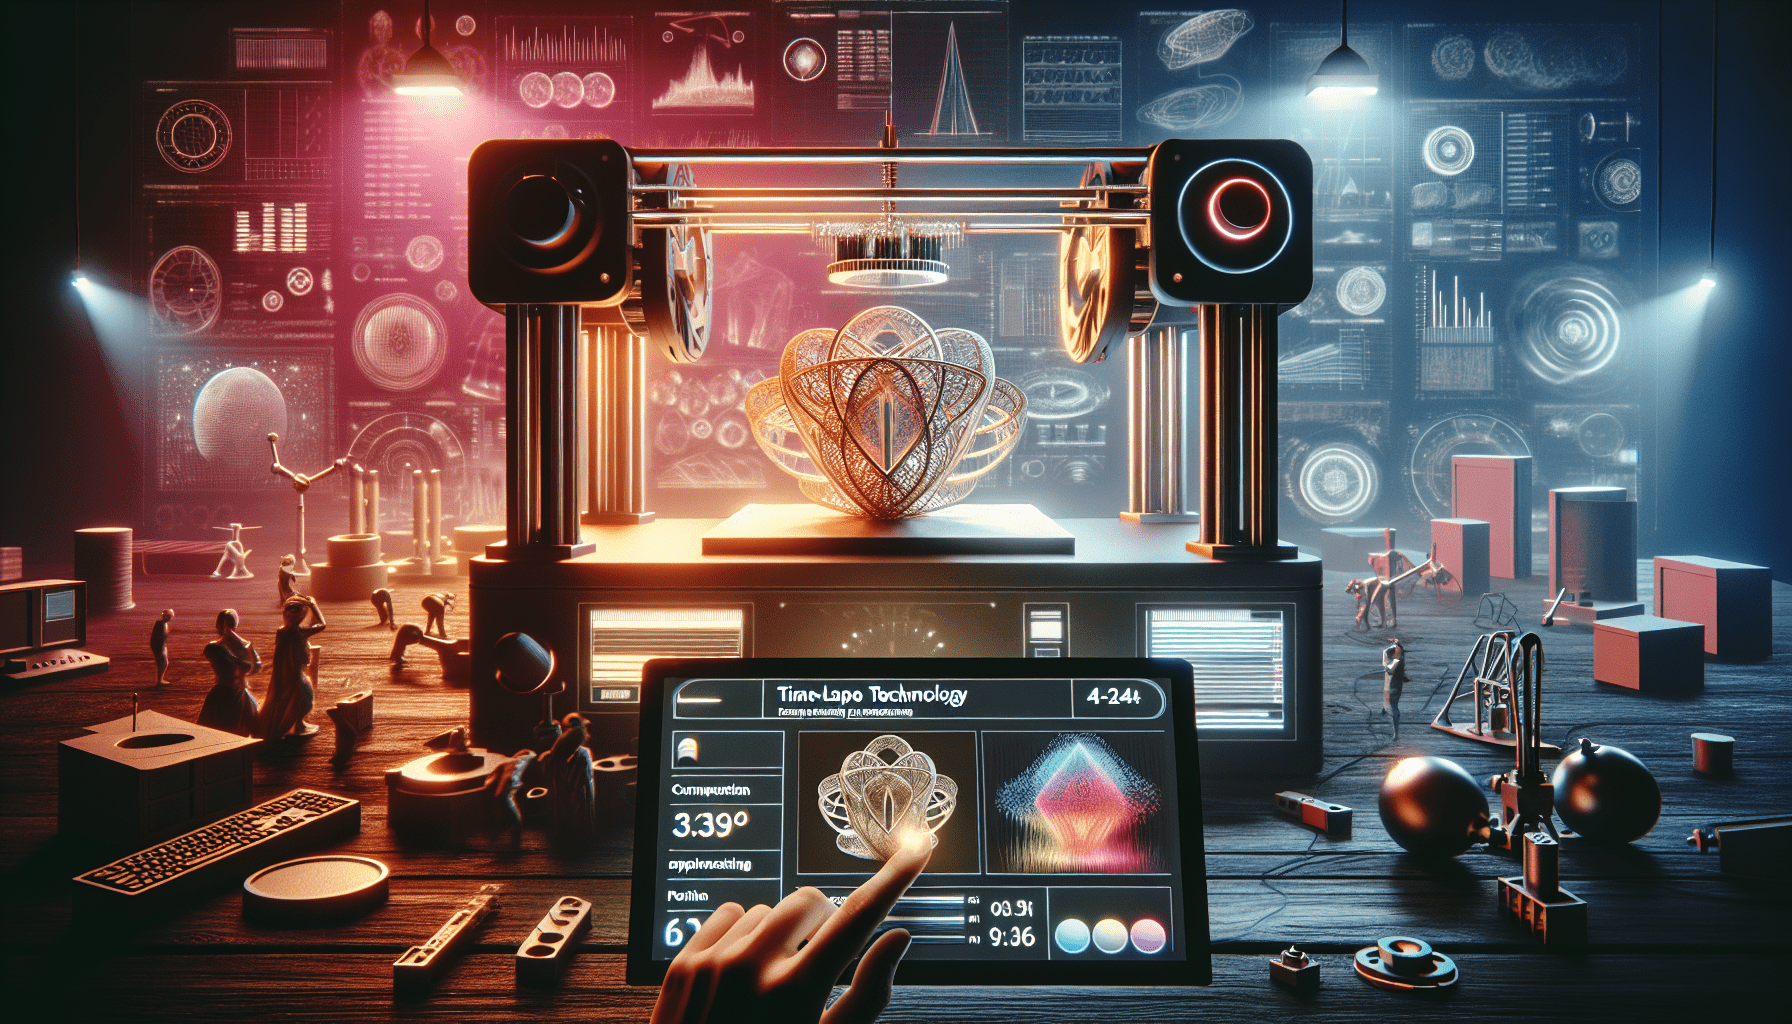
$259.00 (as of June 18, 2025 23:32 GMT +00:00 - More infoProduct prices and availability are accurate as of the date/time indicated and are subject to change. Any price and availability information displayed on [relevant Amazon Site(s), as applicable] at the time of purchase will apply to the purchase of this product.)In the video titled “How to create the BEST 3D Printing TimeLapses! OctoPrint, Octolapse Guide” by GreatScott!, you will learn how to use OctoPrint and Octolapse to create stunning timelapses of your 3D prints. The video provides step-by-step instructions on setting up OctoPrint and Octolapse, as well as discussing the theory behind timelapses and different options for taking pictures during the printing process. It also includes a demonstration using a Raspberry Pi camera and a DSLR camera, showcasing the differences in picture quality. The video concludes with an example of a timelapse using a gold pencil holder design from Thingiverse. If you’re interested in creating captivating 3D printing timelapses, this video is a must-watch.
In the video, GreatScott! explains how to use a Raspberry Pi and a DSLR camera to create engaging timelapses of your 3D prints. By utilizing software programs such as OctoPrint and Octolapse, you’ll be able to capture the printing process in a way that is visually appealing. The video provides detailed instructions on setting up these programs, as well as discussing the theory behind timelapses and different options for taking pictures. With a demonstration using both a Raspberry Pi camera and a DSLR camera, you’ll be able to see the differences in picture quality. Whether you’re a seasoned 3D printing enthusiast or just starting out, this video will guide you through the process of creating impressive 3D printing timelapses.


Setting up OctoPrint
Installing OctoPrint on a Raspberry Pi
To begin setting up OctoPrint, you will first need to install it on a Raspberry Pi. Start by obtaining a Raspberry Pi model, such as the Raspberry Pi 3, and a micro SD card. Download the latest OctoPi image from the OctoPrint website and use a tool like Etcher to burn the image onto the SD card. Edit the octopi-wpa-supplicant.txt file on the SD card using a text editor to connect the Raspberry Pi to your Wi-Fi network. Insert the SD card into the Raspberry Pi and connect it to your 3D printer via USB. Power on the Raspberry Pi and connect to it through your browser to complete the setup process.
Configuring OctoPrint settings
Once OctoPrint is installed on your Raspberry Pi, you can configure its settings through the user interface. Connect to OctoPrint using your browser and navigate to the settings menu. From here, you can customize options such as printer profiles, interface settings, and plugin configurations. Take some time to explore the different settings and tailor them to your specific needs.
Connecting OctoPrint to your 3D printer
To connect OctoPrint to your 3D printer, make sure that your printer is turned on and connected to the Raspberry Pi via USB. In the OctoPrint user interface, navigate to the connection settings and select your printer from the available options. You may need to specify additional settings such as the serial port and baud rate. Once the connection is established, you can start using OctoPrint to control and monitor your 3D printer.
Setting up Octolapse
Installing Octolapse plugin on OctoPrint
Octolapse is a plugin for OctoPrint that allows you to create stabilized timelapses of your 3D prints. To install Octolapse, open the OctoPrint user interface and navigate to the plugin manager in the settings menu. Search for Octolapse and click on the install button. After installing, restart OctoPrint to activate the Octolapse plugin.
Configuring Octolapse settings
Once Octolapse is installed, you can configure its settings to customize the timelapse creation process. Open the Octolapse settings menu in OctoPrint and explore the different options available. You can adjust settings such as camera position, camera control method, and timelapse stabilization. Take some time to experiment with the settings to achieve the desired results.
Calibrating the camera for timelapses
Before you start capturing timelapse footage, it is important to calibrate your camera. This process involves making sure the camera is properly focused and aligned with the printing area. Use the Octolapse settings to adjust the camera position and take test shots to ensure that the footage will be clear and centered on the 3D print. Calibrating the camera will help to create high-quality timelapses.

Understanding Timelapses
What is a timelapse?
A timelapse is a video recording technique where a series of still images are captured at regular intervals and then played back at a faster speed than real-time. This creates a visually engaging effect where time appears to be moving quickly. In the context of 3D printing, a timelapse can be used to document the entire printing process from start to finish in a condensed format.
Why use timelapses in 3D printing?
Timelapses are a valuable tool in the 3D printing community for several reasons. Firstly, they can be used for documentation and sharing of the printing process. Timelapses allow viewers to see the entire print from start to finish in a short amount of time, providing a clear overview of the printing process. Additionally, timelapses can be used for troubleshooting purposes, as they can capture any issues or errors that may occur during the print.
Choosing the interval between pictures
The interval between pictures in a timelapse determines the overall speed at which the video will be played back. A shorter interval, such as one picture every few seconds, will create a faster-paced timelapse. On the other hand, a longer interval, such as one picture every few minutes, will result in a slower-paced timelapse. The choice of interval depends on the desired effect and the length of the printing process.
Determining the printing speed
When creating a timelapse, it is important to consider the printing speed of your 3D printer. If the printer moves too quickly, the timelapse may appear chaotic and difficult to follow. On the other hand, if the printer moves too slowly, the timelapse may appear dull and uninteresting. Experiment with different printing speeds to find the right balance for your timelapse.
Camera Options
Using a Raspberry Pi camera module
One option for capturing timelapse footage is to use a Raspberry Pi camera module. This camera is directly compatible with the Raspberry Pi and can be easily connected and controlled through OctoPrint. The Raspberry Pi camera module offers a cost-effective solution for capturing timelapse footage, although it may have limitations in terms of image quality and resolution.
Using a DSLR camera
For higher-quality timelapse footage, a DSLR camera is a popular choice. DSLR cameras offer superior image quality, resolution, and flexibility compared to other camera options. To use a DSLR camera for timelapses, you will need to connect it to your 3D printer using an external trigger cable. This cable allows the printer to trigger the camera to capture a photo at specific intervals.
Comparison of picture quality
When deciding between a Raspberry Pi camera module and a DSLR camera, it is important to consider the picture quality. While the Raspberry Pi camera module may be sufficient for basic timelapse footage, a DSLR camera will provide higher-resolution images with better color accuracy and dynamic range. The choice of camera depends on your personal preferences and the level of quality you desire for your timelapse.

Taking Pictures
Automatically taking pictures with Octolapse
With Octolapse and your chosen camera, you can easily set up automatic picture capture during the printing process. Octolapse is designed to work seamlessly with OctoPrint, allowing you to specify the intervals at which pictures should be taken. Simply configure the settings in Octolapse and let it automatically capture the pictures throughout the print. This eliminates the need for manual intervention and ensures consistent results.
Manually taking pictures with a DSLR
If you are using a DSLR camera, you have the option of manually triggering the camera to take pictures at specific intervals. This method requires more hands-on involvement but allows for greater control over the image capture process. Using an external trigger cable, you can synchronize the camera with the printer and manually trigger the camera to capture a photo at the desired intervals.
Editing the Timelapse Footage
Importing footage into Adobe Premiere Pro
Once you have captured the timelapse footage, you will need to import it into editing software to create the final timelapse video. Adobe Premiere Pro is a popular choice for timelapse editing due to its extensive features and capabilities. Open Premiere Pro and create a new project. Import the captured footage into the project by selecting the files and dragging them into the timeline.
Adjusting the speed and duration of the timelapse
In Premiere Pro, you can adjust the speed and duration of the timelapse to create the desired effect. Select the timelapse footage in the timeline and right-click to access the Speed/Duration option. From here, you can increase or decrease the speed of the footage to create a faster or slower timelapse. Experiment with different speeds to find the right pacing for your video.
Adding transitions and effects
To enhance the visual appeal of your timelapse, you can add transitions and effects in Premiere Pro. Transitions can be used to smoothly transition between different clips or to add artistic elements to the video. Effects such as color grading or image stabilization can also be applied to improve the overall quality of the timelapse. Explore the various effects and transitions available in Premiere Pro to enhance your timelapse.
Exporting the final timelapse video
Once you have finished editing your timelapse in Premiere Pro, you will need to export it as a final video file. Select File > Export > Media in Premiere Pro and choose the desired export settings, such as file format, resolution, and bitrate. Click Export to start the rendering process. Once the export is complete, you will have a final timelapse video ready for sharing or further editing.

Example Timelapse
Choosing a 3D print design
To create an example timelapse, start by selecting a 3D print design that you find visually interesting. There are many websites, such as Thingiverse, where you can find a wide range of designs to choose from. Look for a design that has good potential for showcasing the printing process in a dynamic and visually appealing way.
Setting up the print
Once you have chosen a design, prepare your 3D printer and materials for the print. Make sure that your printer is calibrated and leveled, and that you have the necessary filament and settings for the print. Load the 3D model file into your slicing software and generate the G-code for the print. Transfer the G-code to your OctoPrint setup and start the print.
Capturing the timelapse footage
During the printing process, use Octolapse and your chosen camera to capture the timelapse footage. Configure Octolapse settings, including the interval between pictures, camera position, and stabilization options. Ensure that your camera is properly focused and aligned with the printing area. Let Octolapse automatically take the pictures throughout the print to create a smooth and visually engaging timelapse.
Editing the timelapse
After capturing the timelapse footage, import it into Adobe Premiere Pro for editing. Adjust the speed and duration of the timelapse to create the desired effect. Add transitions and effects to enhance the visual appeal of the video. Experiment with color grading, image stabilization, and other effects to improve the overall quality of the timelapse.
Finalizing the timelapse video
Once you are satisfied with the editing of your timelapse, export it as a final video file in Premiere Pro. Choose the appropriate export settings, such as file format and resolution. Start the export process and wait for the rendering to complete. Once the export is finished, you will have a final timelapse video ready for sharing with others.
Troubleshooting
Common issues and solutions
When setting up OctoPrint and Octolapse, you may encounter common issues such as connectivity problems, camera compatibility issues, or software conflicts. It is important to troubleshoot these issues to ensure that both OctoPrint and Octolapse are functioning properly. Refer to the OctoPrint and Octolapse documentation for troubleshooting guides and solutions to common problems.
Camera alignment problems
One common issue when capturing timelapse footage is camera alignment. If the camera is not properly aligned with the printing area, the timelapse footage may be off-center or distorted. To address this issue, use the Octolapse settings to adjust the camera position and make sure that it is focused on the desired area. Test the camera alignment before starting the print to ensure that the footage will be clear and centered.
Software compatibility issues
Another potential issue when setting up OctoPrint and Octolapse is software compatibility. Make sure that you are using the latest versions of both OctoPrint and Octolapse to avoid any compatibility issues. Additionally, check for any updates or patches for your camera software or drivers, as these can sometimes cause conflicts with Octolapse. If you encounter any software compatibility issues, consult the respective documentation and online forums for further guidance.
Tips and Tricks
Using timelapses for documentation
One useful application of timelapses in 3D printing is for documentation purposes. Timelapses provide a condensed overview of the entire printing process, making it easier to review and analyze the print. Use timelapses to document any issues or errors that occur during the print, as well as to showcase the different stages of the printing process. These timelapses can be valuable references for troubleshooting and future improvements.
Experimenting with different settings
When creating timelapses, don’t be afraid to experiment with different settings to achieve different effects. Adjust the interval between pictures, the printing speed, and the camera position to create unique and visually engaging timelapses. Explore different camera angles and perspectives to add variety to your footage. Each print and design may require slightly different settings to achieve the desired effect, so don’t be afraid to try out different combinations.
Using additional lighting for better picture quality
To enhance the picture quality of your timelapses, consider using additional lighting. Proper lighting can greatly improve the clarity and visibility of the printed object, resulting in higher-quality timelapse footage. Experiment with different lighting setups, such as using a ring light or LED panel, to achieve optimal lighting conditions. Pay attention to any shadows or reflections that may be present and adjust the lighting accordingly.
Conclusion
In conclusion, creating 3D printing timelapses using OctoPrint and Octolapse is a fun and rewarding process. By following the steps outlined in this guide, you can set up OctoPrint on a Raspberry Pi, configure Octolapse settings, and capture timelapse footage of your 3D prints. Understanding the theory behind timelapses, choosing the right camera option, and editing the footage in software like Adobe Premiere Pro are key components of the process. By experimenting with different settings and techniques, you can create visually appealing and captivating timelapse videos of your 3D prints. So, what are you waiting for? Start creating your own 3D printing timelapses and share your creations with the world!
Support me for more videos by visiting my profile on GreatScott’s channel. To watch the previous video on the AC Light Dimmer, whether you decide to DIY or buy it, click here. If you want to learn how to wirelessly control your 3D Printer using OctoPrint, check out this tutorial video. You can also connect with me on Facebook and Twitter.
To gather the components featured in this video, you can use the following affiliate links:
-
Aliexpress:
- Raspberry Pi: Click here
- Raspberry Pi Camera: Click here
- Micro Switch: Click here
- 2.5mm audio cable: Click here
-
Ebay:
- Raspberry Pi: Click here
- Raspberry Pi Camera: Click here
- Micro Switch: Click here
- 2.5mm audio cable: Click here
-
Amazon.de:
- Raspberry Pi: Click here
- Raspberry Pi Camera: Click here
- Micro Switch: Click here
- 2.5mm audio cable: Click here
In this video, I will guide you on how to use a Raspberry Pi and a DSLR camera to create outstanding timelapses of your 3D prints. You will learn about OctoPrint, Octolapse, and how to utilize these software to produce impressive timelapse videos. Let’s begin!
Below are the websites featured in the video:
- PrusaPrinters Blog
- Octolapse GitHub
- OctoPrint Official Website
- More Octolapse Documentation
- Timelapse on Thingiverse
- OctoPrint Community Discussion on Timelapses
- Octolapse Availability on OctoPrint
- 3D Printed Camera Mount on Thingiverse
The music used in this video:
- “2011 Lookalike” by Bartlebeats
- “Killing Time” by Kevin MacLeod (incompetech.com)
【2025 Special Bundle】SUNLU Official Filament Dryer Box S4,Four-Spool 3D Printer Dehydrator with Rapid Heating, Auto Humidity Control, and Advanced Triple Fan Upgrade, Fits PLA,PETG,ABS,TPU,PA,etc.
$139.99 (as of June 18, 2025 23:32 GMT +00:00 - More infoProduct prices and availability are accurate as of the date/time indicated and are subject to change. Any price and availability information displayed on [relevant Amazon Site(s), as applicable] at the time of purchase will apply to the purchase of this product.)
BIQU CryoGrip Pro Frostbite Panda Build Plate for Bambu-Lab P1S P1P X1C X1E A1 3D Printers, Cold Plate, Room Temperature Printing, Double-Sided Textured Sheet, 257x257mm, 1 Piece
$32.99 (as of June 18, 2025 23:32 GMT +00:00 - More infoProduct prices and availability are accurate as of the date/time indicated and are subject to change. Any price and availability information displayed on [relevant Amazon Site(s), as applicable] at the time of purchase will apply to the purchase of this product.)
Slamtec RPLIDAR A1M8 2D 360 Degree 12 Meters Scanning Radius LIDAR Sensor Scanner for Obstacle Avoidance and Navigation of Robots
$99.00 (as of June 18, 2025 23:32 GMT +00:00 - More infoProduct prices and availability are accurate as of the date/time indicated and are subject to change. Any price and availability information displayed on [relevant Amazon Site(s), as applicable] at the time of purchase will apply to the purchase of this product.)
TOSUKKI 6mm Positioning Targets with Black Contour for 3D Scaner,3D scanning Markers/Dots/Stickers,Reference Point Markers/Reflection Markers/for 3D Scaning and Optical Tracking(1200 Per Box)
$27.00 (as of June 18, 2025 23:32 GMT +00:00 - More infoProduct prices and availability are accurate as of the date/time indicated and are subject to change. Any price and availability information displayed on [relevant Amazon Site(s), as applicable] at the time of purchase will apply to the purchase of this product.)