
FLASHFORGE Adventurer 5M 3D Printer, 600mm/s High-Speed, 1 Click Fully Auto Leveling, Upgraded Direct extruder Quick Detachable 280°C Nozzle, Dual-Sided PEI Coating Plate, Print Size 220x220x220mm
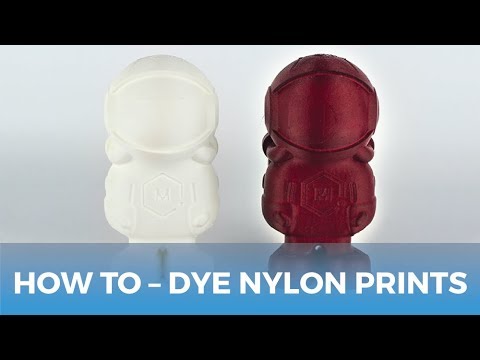
$259.00 (as of June 18, 2025 23:32 GMT +00:00 - More infoProduct prices and availability are accurate as of the date/time indicated and are subject to change. Any price and availability information displayed on [relevant Amazon Site(s), as applicable] at the time of purchase will apply to the purchase of this product.)Are you ready to add some color to your Nylon 3D printed parts? Alec from MatterHackers is here to show you how to dye your prints and create a vibrant, custom shade. In the past, Nylon was only available in limited colors, but with the Pro Series Nylon, you now have a larger variety to choose from. However, if that still isn’t enough, dyeing your parts is a simple and effective solution. Alec recommends using high poly or RIT Dye, which is specially formulated for polyester fabrics like Nylon. To achieve a beautiful burgundy shade, he mixed Rit dye more racing red and sapphire blue. He also shares helpful tips and techniques for dyeing your prints, such as the importance of preparing your prints and choosing the right temperature. So, grab your materials and get ready to turn your white prints into a burst of color!
How to Dye Nylon 3D Printed Parts

Introduction
Are you looking to add a splash of color to your Nylon 3D printed parts? While there is already a wide range of colorful Nylon options available, sometimes you might need a very specific shade for a special project. That’s where dyeing your Nylon parts comes in! In this tutorial, we will guide you through the process of dyeing Nylon 3D printed parts, giving you the freedom to create custom colors that suit your design perfectly.
Materials Needed
Before we dive into the dyeing process, let’s gather all the materials you will need:
- Nylon 3D printed parts
- Container for water
- High-temperature dye made for Nylon (such as RIT DyeMore or high-poly dyes)
- Second container for rinsing
- Channel locks or pliers
- Weight to keep the prints submerged in water
- Thermometer
- Stove or hot plate
- Paper towels
Now that we have everything we need, let’s move on to preparing the Nylon 3D prints.


Preparing the Nylon 3D Prints
Cleaning the Print
Before dyeing your Nylon prints, it is important to ensure that they are clean and free from any contaminants. Remove any glue, hairspray, or blue tape from the bottom of the prints, as these spots may not take the dye as well as the rest of the print. A clean surface will ensure a uniform and vibrant color after dyeing.
Mixing the Dye Solution
To achieve your desired color, it is necessary to mix the dye solution properly. Look for a high-temperature dye made for polyester fabrics, as Nylon is essentially a type of polyester. Popular brands such as RIT DyeMore offer a wide range of colors that work well with Nylon.
For a deep burgundy color, you can mix Racing Red and Sapphire Blue dyes from RIT DyeMore. Start with a small amount of Sapphire Blue, as just a few drops can make a significant difference. Experiment with different dye ratios to achieve the perfect shade for your project.
Once you have your dye solution ready, let’s move on to dyeing the test prints to determine the ideal submersion time and temperature.
Dyeing the Test Prints
Determining Submersion Time
To gauge the submersion time required to achieve your desired color, it is advisable to create test prints. Print a few sample objects, such as our MatterHackers logos, and dye them for different durations. Start with a short submersion time, say 30 seconds, and gradually increase it until you achieve the color you want.
Controlling Temperature
Maintaining the correct temperature is crucial for successful dyeing. Using a hot plate instead of a stove allows for better temperature control. Use a thermometer to monitor the water temperature and aim for around 140 degrees Fahrenheit (60 degrees Celsius). Going too high can damage the 3D print, while going too low may result in incomplete dye absorption.
Dyeing Process
Once you have determined the ideal submersion time and temperature through your test prints, you are ready to start dyeing your Nylon 3D prints. Attach a weight to your prints to keep them submerged in the water during the dyeing process.
Fill a container with water, ensuring that the water level is sufficient to cover the prints. Gradually add the dye solution to the container, following the recommended ratio provided by the dye manufacturer. Stir the solution well to ensure even distribution.
Next, fill a second container with cold water. This will be used to lock in the dye after the prints have been removed from the dye solution.
Carefully place your Nylon prints into the dye solution and ensure they are fully submerged. Use channel locks or pliers to handle the prints to avoid getting dye on your hands. Leave the prints in the dye solution for the predetermined submersion time.
After the desired time has passed, remove the prints from the dye solution and transfer them to the container of cold water. Submerging the prints in cold water will help lock in the dye and prevent bleeding.
Once the prints have been rinsed, gently dry them off with paper towels. Allow them to sit for a couple of minutes to ensure they are fully dry. Congratulations! You now have beautifully dyed Nylon 3D printed parts.

Understanding the Hygroscopic Nature of Nylon
Absorption of Water
It is important to note that Nylon is a hygroscopic material, meaning it readily absorbs water from the air. Before printing with Nylon, it must be dried to remove any absorbed moisture. However, dyeing your Nylon prints in water may raise concerns about additional water absorption.
Effects on Printing
While printing with Nylon that has been dyed in water may result in some initial water absorption, this is not a significant problem. Even after drying the filament thoroughly, Nylon prints can still contain residual moisture from the surrounding environment. The absorbed water does not affect the dyeing process or the color of the prints.
Mitigating Concerns
To mitigate any concerns about water absorption, it is crucial to ensure that your Nylon prints are thoroughly dried before printing. Following proper drying techniques and storing the printed parts in a dry environment will help prevent any negative effects of water absorption.
Conclusion
Final Thoughts
Dyeing Nylon 3D printed parts opens up a whole new world of creative possibilities. With just a few simple steps, you can transform your plain white prints into vibrant, customized creations. By experimenting with different colors and dye ratios, you can achieve unique shades to suit your specific project requirements.
Exploring Further Possibilities
Now that you have mastered the art of dyeing Nylon 3D printed parts, there is no limit to what you can create. Introduce a rainbow of colors to your designs, blend different hues together, or even try dyeing other types of materials. Let your imagination run wild and discover the endless possibilities of dyeing in the world of 3D printing.
In this 3D printing tutorial, we will show you how to dye your Nylon 3D printed parts. Although we have a variety of colorful Nylon options available, there might be times when you require a specific shade for a special project. That’s where dyeing comes in handy!
To learn more about dyeing Nylon, click here.
You can find PRO Series Nylon here.
If you want to stay updated with the latest and greatest 3D printing information, be sure to subscribe to our channel and turn on the notifications. We’ll deliver all the 3D printing awesomeness straight to your inbox!

OVERTURE PETG 3D Printer Filament 1.75mm, Neatly Wound Durable PETG 1kg Spool (2.2lbs), Strong Toughness Filament, Dimensional Accuracy +/- 0.02mm, Fit Most FDM Printers (Black (1-Pack))
$15.99 (as of June 18, 2025 23:32 GMT +00:00 - More infoProduct prices and availability are accurate as of the date/time indicated and are subject to change. Any price and availability information displayed on [relevant Amazon Site(s), as applicable] at the time of purchase will apply to the purchase of this product.)
ELEGOO PLA Plus Filament 1.75mm White 2KG, PLA+ Tougher and Stronger 3D Printer Filament Pro Dimensional Accuracy +/- 0.02mm, 2 Pcs 1kg Spool(2.2lbs) Fits for Most FDM 3D Printers
$28.98 (as of June 18, 2025 23:32 GMT +00:00 - More infoProduct prices and availability are accurate as of the date/time indicated and are subject to change. Any price and availability information displayed on [relevant Amazon Site(s), as applicable] at the time of purchase will apply to the purchase of this product.)
YOOPAI 6.0 mm 3D Scanning Markers for 3D Scanners, 3D Scanning Marker Dot Stickers, Diffuse Markers for 3D Scanners (10 Sheets of 500 dots)
$11.99 (as of June 18, 2025 23:32 GMT +00:00 - More infoProduct prices and availability are accurate as of the date/time indicated and are subject to change. Any price and availability information displayed on [relevant Amazon Site(s), as applicable] at the time of purchase will apply to the purchase of this product.)
Bambu Lab A1 Combo, A1 3D Printer and AMS lite, Support Multi-Color 3D Printing, High Speed & Precision, Full-Auto Calibration & Active Flow Rate Compensation, ≤48 dB Quiet FDM 3D Printers
$799.00 (as of June 18, 2025 23:32 GMT +00:00 - More infoProduct prices and availability are accurate as of the date/time indicated and are subject to change. Any price and availability information displayed on [relevant Amazon Site(s), as applicable] at the time of purchase will apply to the purchase of this product.)