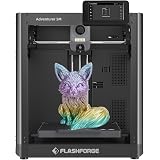
FLASHFORGE Adventurer 5M 3D Printer,600mm/s Max High-Speed FDM 3D Printers with Fully Auto Leveling, 280°C Direct Extruder with Quick Detachable Nozzle, Effective Cooling, Core XY Structure
$279.00 (as of May 29, 2025 10:56 GMT +00:00 - More infoProduct prices and availability are accurate as of the date/time indicated and are subject to change. Any price and availability information displayed on [relevant Amazon Site(s), as applicable] at the time of purchase will apply to the purchase of this product.)Welcome to the “MakerBot Print Software Tutorial” where you will learn all about the software used for 3D printing. In this tutorial, we will guide you through the different panels and options in MakerBot Print to help you import, manipulate and prepare your 3D models for printing. You will learn how to navigate the interface, import parts, adjust settings such as scale and orientation, and arrange multiple parts on the build plate. Additionally, we will cover important features like print settings, support material generation, infill density, and layer height adjustment. By the end of this tutorial, you will feel confident in using MakerBot Print to create high-quality 3D prints.
In this video tutorial by Christopher Townsend, you will be introduced to MakerBot Print and given a comprehensive overview of its interface and functionality. The tutorial begins by explaining the different panels and options of MakerBot Print, guiding you through the steps of importing files, zooming and rotating parts, and adjusting scale and orientation. It then delves into the arrange tab, which allows you to efficiently arrange multiple parts on the build plate, and the print settings tab, where you can customize print quality and other options. Additionally, the tutorial covers the use of support material, infill density, layer height, and provides insights into estimates and print preview for accurate time and material usage. The tutorial also highlights the options to export parts as MakerBot files, save as .print files, explore Thingiverse for 3D printable files, and access learning and support resources.


Getting Started
Introduction to MakerBot Print software
MakerBot Print is a software used for 3D printing. It provides a user-friendly interface to import, modify, and prepare 3D models for printing. With the help of MakerBot Print, users can easily transfer their designs to MakerBot 3D printers for physical realization.
Downloading and installing MakerBot Print
To get started with MakerBot Print, you will first need to download and install the software. Visit the MakerBot website and navigate to the Downloads section. From there, you can find the appropriate version of MakerBot Print for your operating system (Windows or macOS) and download it. Follow the on-screen instructions to complete the installation process.
Opening MakerBot Print
Once MakerBot Print is successfully installed on your computer, you can open the software. Locate the MakerBot Print icon on your desktop or in your applications folder and double-click to launch it. The software will open to a greyscale interface, as most functions are disabled until a part is inserted.
Interface Overview
Greyed out interface until part insertion
When you open MakerBot Print, you will notice that the majority of the interface is greyed out. This is because the software is waiting for you to insert a part before enabling the various features and functions. Once a part is inserted, the interface will become active, allowing you to interact with the available tools.
Main panels: Model View, Model Info, Print Settings
The MakerBot Print interface consists of several main panels. The first panel is the Model View, which displays the 3D model of the inserted part. Here, you can use the scroll wheel on your mouse to zoom in and out and click and hold the right mouse button to rotate the part.
The second panel is the Model Info, which provides information about the units used in the model. You can adjust the units in this panel to match the units in which your part was designed.
The third panel is the Print Settings, where you will customize the print options for the selected part. This includes adjusting print quality, configuring support material, and customizing infill density, layer height, number of shells, and infill pattern.

Importing and Using Parts
Importing parts into MakerBot Print
To import a part into MakerBot Print, go to the File menu and click on Insert File. Navigate to the location of the 3D model file on your computer, select it, and click Open. The part will be inserted into the software, and you can now interact with it using the available tools and features.
Using sample prints
If you’re new to MakerBot Print or just want to explore the software without importing your own designs, you can choose to use the sample prints provided. These sample prints, such as the chain-link or nut and bolt, are included with the software and can be accessed from the File menu. Simply select the sample print you want to use, and it will be inserted into MakerBot Print for you to examine and modify.
Inserting multiple parts
MakerBot Print allows you to insert and work with multiple parts at the same time. This is useful when you have a complex assembly or want to print multiple objects in a single print job. To insert multiple parts, simply repeat the process of importing a part for each additional file you want to include. Each part will be displayed separately in the Model View panel, and you can manipulate them individually or as a group.
Arranging parts on the build plate
When working with multiple parts, you may need to arrange them on the build plate to optimize the printing process. MakerBot Print provides an Arrange tab where you can automatically arrange the parts for efficient printing. This feature will distribute the parts evenly on the build plate, minimizing wasted space and reducing printing time. However, if you have specific requirements or want to avoid certain areas on the build plate, you can manually move and position each part as desired.
Modifying Parts
Scaling the part using Scale panel
If you need to resize a part, MakerBot Print allows you to scale it using the Scale panel. This panel provides options for uniformly scaling the part or scaling individual axes independently. By adjusting the scale percentage, you can make the part larger or smaller according to your needs. Keep in mind that it is generally recommended to design and export parts at the correct scale to avoid scaling issues during the printing process.
Rotating the part using Orientation panel
The Orientation panel in MakerBot Print allows you to rotate the part around the X, Y, and Z axes. By selecting the desired axis and clicking the appropriate rotation button, you can rotate the part in increments of 90 degrees. This feature is particularly useful for adjusting the orientation of the part to achieve optimal printing results and ensure proper adhesion to the build plate.
Mirroring the part
In addition to scaling and rotating, MakerBot Print also offers the option to mirror a part. Mirroring allows you to create a mirrored copy of the original part, which can be useful when printing symmetrical or asymmetrical objects. By mirroring the part, you can save time and material by printing both sides simultaneously.

Setting Print Options
Accessing the Print Settings tab
To set up the print options for a part, navigate to the Print Settings tab in MakerBot Print. Here, you will find a variety of parameters that can be adjusted to achieve the desired print quality and performance. It is important to note that different printers may have different options and settings available, so consult the documentation for your specific printer model for detailed guidance.
Adjusting print quality
MakerBot Print allows you to adjust the print quality to suit your needs. This can include settings such as the layer height, which determines the thickness of each printed layer, and the shell thickness, which affects the overall strength and durability of the printed part. By fine-tuning these parameters, you can achieve a balance between print quality and printing time.
Configuring support material
Support material is used to provide additional support to overhanging or complex geometries during the printing process. However, support material can be difficult to remove and may leave marks or imperfections on the final part. In MakerBot Print, you can configure the generation of support material based on your specific needs. It is generally recommended to avoid support material whenever possible, but in cases where it is necessary, careful consideration should be given to its placement and removal requirements.
Customizing infill density, layer height, number of shells, and infill pattern
In addition to print quality and support material, MakerBot Print provides options for customizing other aspects of the printing process. This includes the infill density, which determines the interior structure of the printed part, the number of shells or perimeters surrounding the part, and the infill pattern, which affects the strength and rigidity of the printed object. By experimenting with these settings, you can achieve the desired balance of strength, weight, and print time for your specific application.
Estimates and Print Preview
Estimating print time and material usage
Before starting a print job, it can be helpful to estimate the expected print time and material usage. MakerBot Print provides an estimation feature that calculates these values based on the selected print settings and the complexity of the part. This information can help you plan and optimize your printing schedule, as well as determine the amount of filament required for the job.
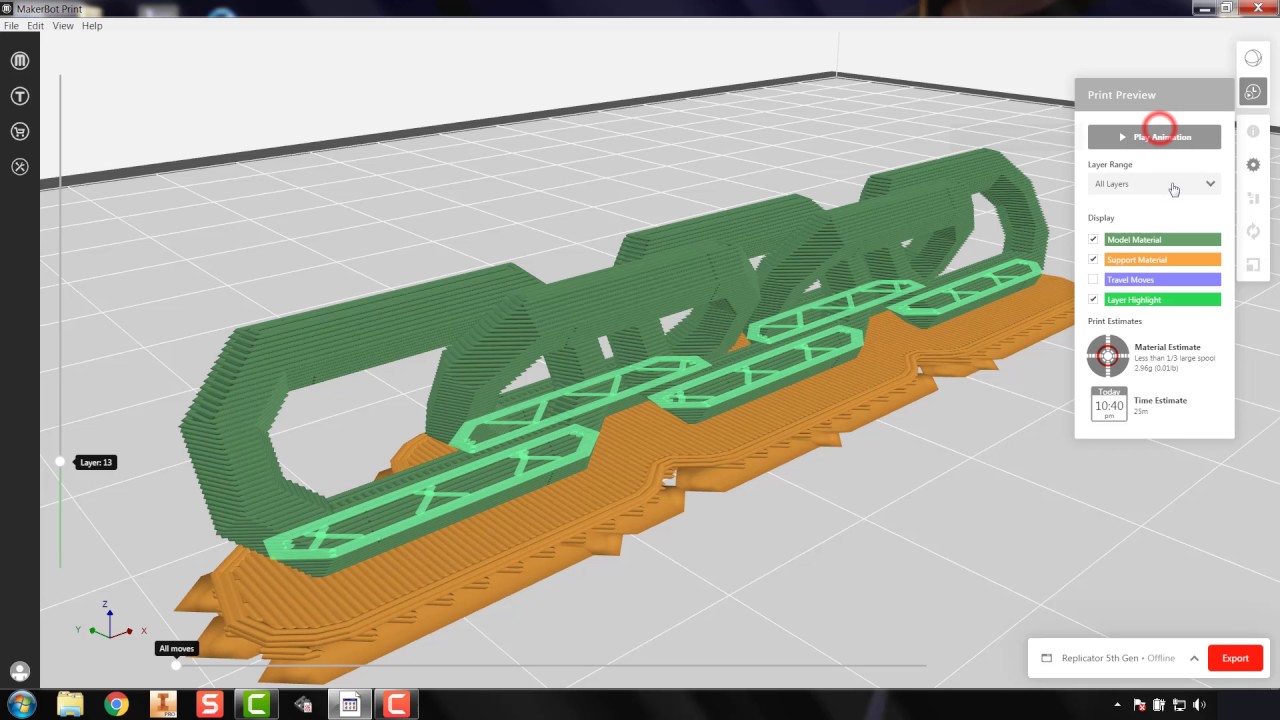
Previewing the print before starting
To visualize how the printed part will look once completed, MakerBot Print offers a print preview feature. This allows you to see a 3D representation of the layer-by-layer printing process, giving you an idea of the final outcome. By previewing the print, you can identify potential issues or make necessary adjustments before starting the actual printing process.

Exporting and Saving
Exporting parts as MakerBot files
Once you have finished modifying and setting up the print options for a part, you can export it as a MakerBot file. This file format is compatible with MakerBot 3D printers and contains all the necessary information for the printing process. To export a part as a MakerBot file, go to the File menu and click on Export. Choose a location on your computer to save the file, and give it a descriptive name for easy identification.
Saving files as .print files
In addition to exporting individual parts, MakerBot Print allows you to save your entire project as a .print file. This file format stores all the imported parts, modifications, and print settings, preserving the entire project for future use. Saving your work as a .print file enables you to easily reproduce and modify your designs without the need to start from scratch.
Exploring Thingiverse
Accessing the Thingiverse option
Thingiverse is a popular online platform for sharing and discovering 3D printable designs. MakerBot Print provides a convenient option to access Thingiverse directly from the software. By clicking on the Thingiverse button, you can browse through a vast library of ready-to-print models, search for specific designs, or gain inspiration for your own creations.
Exploring the library of 3D printable files
Once you access Thingiverse through MakerBot Print, you can freely explore the extensive collection of 3D printable files. The library contains a diverse range of designs, including functional objects, artistic creations, educational models, and much more. You can filter the search results based on various criteria, such as popularity, recency, or specific categories. Whether you’re looking for practical solutions or unique design ideas, Thingiverse offers a wealth of inspiration and resources.
Learning and Support
Accessing the Learning and Support option
When using MakerBot Print, it’s important to have access to learning resources and support materials. MakerBot Print provides a dedicated section where you can access valuable information and assistance. By clicking on the Learning and Support button, you will have access to tutorials, troubleshooting guides, and other educational resources to help you maximize your experience with the software.
Finding troubleshooting resources
In the Learning and Support section, you will find a variety of troubleshooting resources to help you overcome common issues. These resources can guide you through problems such as print failures, connectivity problems, or software glitches. If you encounter any difficulties during the printing process or while using MakerBot Print, referring to these troubleshooting guides can save you time and frustration.
Accessing tutorial videos for 3D printing
To further enhance your knowledge and skills in 3D printing, MakerBot Print offers tutorial videos that cover various topics. These videos provide step-by-step instructions and practical tips on using the software, optimizing print settings, and achieving successful prints. Whether you’re a beginner or an experienced user, the tutorial videos can offer valuable insights and techniques to improve your 3D printing workflow.
Conclusion
In this tutorial, we have explored the key features and functions of MakerBot Print software. We have learned how to import and use parts, modify them to fit our needs, and set up print options for optimal results. We have also explored the estimates and preview features, as well as the options for exporting and saving our projects. Additionally, we have discussed the ability to explore Thingiverse for a vast library of 3D printable files and the availability of learning and support resources. Now armed with this knowledge, we encourage you to continue exploring and experimenting with MakerBot Print, unlocking the full potential of 3D printing. Enjoy the journey of turning your ideas into tangible objects!
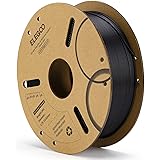
ELEGOO PLA Filament 1.75mm Black 1KG, 3D Printer Filament Dimensional Accuracy +/- 0.02mm, 1kg Cardboard Spool(2.2lbs) 3D Printing Filament Fits for Most FDM 3D Printers
$13.99 (as of May 29, 2025 10:56 GMT +00:00 - More infoProduct prices and availability are accurate as of the date/time indicated and are subject to change. Any price and availability information displayed on [relevant Amazon Site(s), as applicable] at the time of purchase will apply to the purchase of this product.)
OVERTURE PETG 3D Printer Filament 1.75mm, Neatly Wound Durable PETG 1kg Spool (2.2lbs), Strong Toughness Filament, Dimensional Accuracy +/- 0.02mm, Fit Most FDM Printers (Black (1-Pack))
$15.99 (as of May 29, 2025 10:56 GMT +00:00 - More infoProduct prices and availability are accurate as of the date/time indicated and are subject to change. Any price and availability information displayed on [relevant Amazon Site(s), as applicable] at the time of purchase will apply to the purchase of this product.)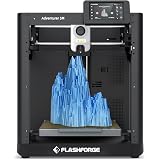
FLASHFORGE 3D Printer AD5M, CoreXY 600mm/s High-Speed Printer with 1-Click Auto Leveling, High-Temp Direct Drive Extruder, 3s Quick-Swap Nozzle, 220×220×200mm Build Volume
$279.00 (as of May 29, 2025 10:56 GMT +00:00 - More infoProduct prices and availability are accurate as of the date/time indicated and are subject to change. Any price and availability information displayed on [relevant Amazon Site(s), as applicable] at the time of purchase will apply to the purchase of this product.)
Creality K1 SE 3D Printer, with 600 mm/s Printing Speed CoreXY Auto Leveling and Z-Offset, 300℃ Dual-Gear Direct Extruder Full Metal Die Cast Solid Frame Printing Size 8.66x8.66x9.84 inch
$319.00 (as of May 29, 2025 10:56 GMT +00:00 - More infoProduct prices and availability are accurate as of the date/time indicated and are subject to change. Any price and availability information displayed on [relevant Amazon Site(s), as applicable] at the time of purchase will apply to the purchase of this product.)