Bambu Lab A1 Mini 3D Printer, Support Multi-Color 3D Printing, Set Up in 20 Mins, High Speed & Precision, Full-Auto Calibration & Active Flow Rate Compensation, ≤48 dB Quiet FDM 3D Printers
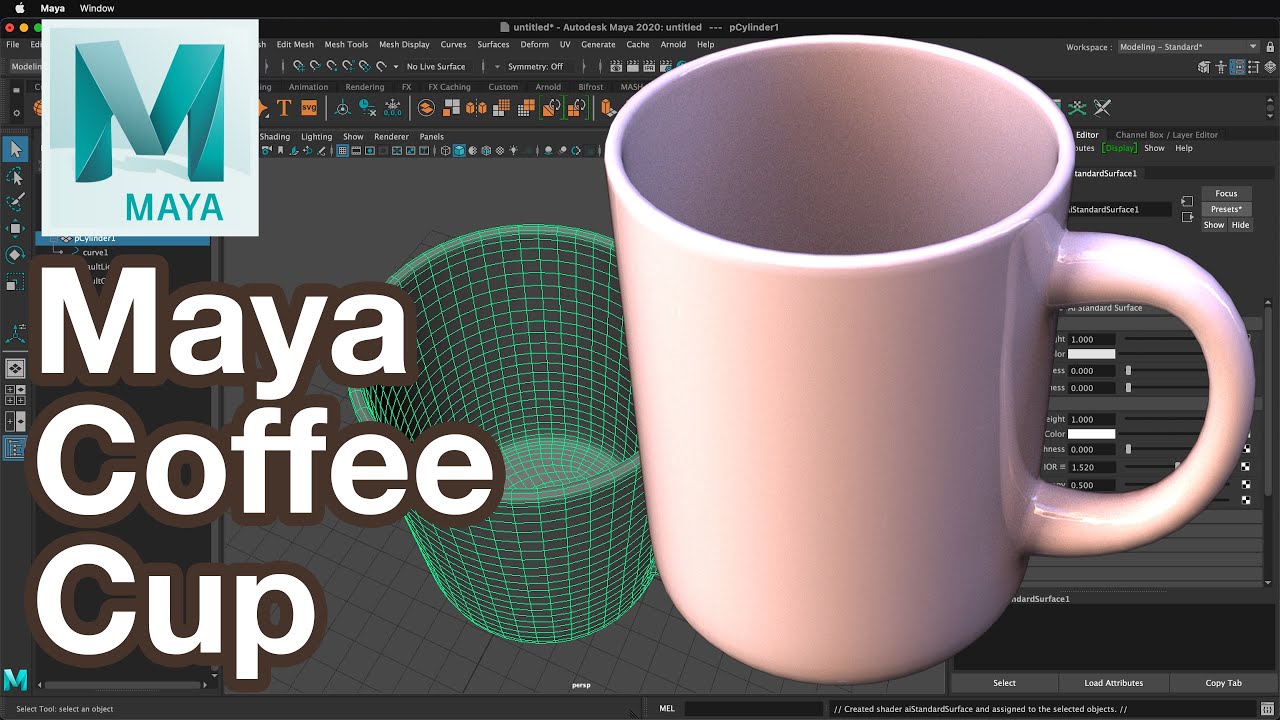
$399.00 (as of June 19, 2025 23:45 GMT +00:00 - More infoProduct prices and availability are accurate as of the date/time indicated and are subject to change. Any price and availability information displayed on [relevant Amazon Site(s), as applicable] at the time of purchase will apply to the purchase of this product.)In this detailed guide on “Maya Tutorial: Model a Coffee Cup,” you will explore the step-by-step process of creating a realistic coffee cup using Autodesk Maya. This tutorial is tailored for both beginners in 3D modeling and seasoned Maya users seeking to hone their skills. You will learn how to work with polygon cylinder primitives and modify their attributes to form the fundamental structure of the coffee cup. Additionally, techniques such as smoothing, extruding, and adding thickness will be covered to enhance the cup’s realism.
The second part of the tutorial focuses on crafting a realistic handle by employing the bridge command and adjusting curves. Essential tools like the Attribute Editor, Multi-Cut Tool, and Edge Loops will be utilized for precision shaping. Moreover, tips and tricks for working efficiently in Maya will be provided to improve your modeling workflow. By the end of this tutorial, you will be able to apply professional materials and prepare your completed coffee cup model for integration into various scenes.
Comprehensive Maya 3D Tutorial for Modeling a Realistic Coffee Cup
Gathering Tools and Resources
To begin your journey into 3D modeling using Autodesk Maya, it is crucial to gather all necessary tools and resources. This section will guide you through installing and setting up Maya, familiarizing yourself with its interface, importing basic shapes, understanding primitives, and learning to navigate the workspace.
Installing and Setting Up Maya
The first step in this tutorial involves installing Autodesk Maya, a powerful 3D modeling and animation software. Ensure your computer meets the system requirements for Maya to run efficiently. Visit the Autodesk website to download the latest version. Follow the installation instructions provided. Once installed, launch Maya and configure basic settings such as project folders and auto-save preferences to streamline your workflow.
Familiarizing Yourself with the Maya Interface
Once Maya is installed, take time to familiarize yourself with its interface. The primary components include the viewport, the outliner, the attribute editor, and the tool shelf. The viewport is your main workspace where the 3D models are created and manipulated. The outliner provides a hierarchical view of all objects in the scene. The attribute editor allows for detailed adjustments to your objects, and the tool shelf contains shortcuts to common tools and commands. Understanding these components is critical to navigating Maya effectively.
Importing Basic Shapes and Understanding Primitives
In Maya, basic shapes are referred to as primitives. These include cubes, spheres, cylinders, and more. To import a primitive, select it from the ‘Create’ menu on the top toolbar. For this tutorial, you will primarily work with a polygon cylinder primitive. Understanding primitives forms the foundation of modeling complex objects, as they can be manipulated, combined, and modified to create intricate models.
Navigation Tools and Basic Commands
Navigating the 3D space in Maya is facilitated by various tools and commands. Learn to use the pan, zoom, and orbit tools effectively to view different angles of your model. Mastering shortcut keys can significantly improve your workflow. For instance, holding down Alt and left-clicking allows you to orbit around the object, middle-clicking pans the view, and right-clicking zooms in and out. Familiarizing yourself with these navigation tools is essential for a smooth modeling experience.
Starting with the Base: Creating a Cylinder
Selecting the Polygon Cylinder Primitive
To begin modeling the coffee cup, select the polygon cylinder primitive from the modeling tool shelf. This shape will serve as the base structure of your cup. In the tool shelf, navigate to ‘Create’ and select ‘Polygon Primitives’ followed by ‘Cylinder’. This action will place a default cylinder into your workspace.
Setting Initial Dimensions: Radius and Height
Upon creating the cylinder, adjust its dimensions for accuracy. Open the ‘Attribute Editor’ by pressing Ctrl + A or by clicking on the attribute editor icon. Select ‘polyCylinder1’ and set the radius to 4 centimeters and the height to 10 centimeters. These dimensions provide a proportional base for your coffee cup.
Positioning the Cylinder on the Ground Plane
Correct positioning is critical. Translate the cylinder upward by 5 units to place it accurately on the ground plane. This ensures that the base of the cylinder is aligned correctly with the grid, facilitating further modifications.
Find 3D Printing Accessories Here
Adjusting Cylinder Attributes
Customizing Radius and Height
Fine-tune the dimensions of the cylinder in the ‘Attribute Editor’. By modifying the radius and height attributes, you can create a proportional structure for your coffee cup. Set a radius of 4 cm and height of 10 cm to ensure the cup has appropriate dimensions.
Configuring Subdivisions
Subdivisions are essential for defining the level of detail and smoothness. In the ‘Attribute Editor’, adjust the subdivisions along the axis to 12, the height subdivisions to 5, and set cap subdivisions to 0 to provide a good balance between detail and manageability. This configuration aids in forming quads and preventing overly complex geometry at this stage.
Using the Attribute Editor for Precise Adjustments
The ‘Attribute Editor’ allows for precise adjustments to your model’s properties. Beyond basic dimensions and subdivisions, use this editor to tweak other attributes such as the rotation and scale. Precise control through this tool ensures your model adheres to your envisioned design.
Preparing the Top and Bottom Faces
Switching to Face Mode
To prepare the cylinder for further modifications, switch to ‘Face Mode’. Right-click on the cylinder and select ‘Face’. This mode allows you to manipulate the individual faces of the cylinder.
Deleting the Top Face
The top face of the cylinder needs to be removed to create an open cup. Select the top face and delete it by pressing the Delete key. This action opens up the cylinder, setting the stage for additional modifications.
Adjusting the Bottom Face for Realistic Depth
Now, enhance the bottom face for a more realistic depth. Select the bottom face and use the ‘Scale Tool’ to uniformly scale it inward slightly. This adjustment creates a subtle curve at the bottom, giving the cup a realistic base.
Extruding and Scaling the Rim
Activating the Extrude Command
To form a rim on the cup, utilize the ‘Extrude’ command. With the top edge selected, press Ctrl + E (or Command + E on Mac). This command activates the extrude function, allowing you to pull out new shapes from the existing geometry.
Scaling Inwards for Cup Rim
Once the extrude command is active, use the scale tool to scale the extruded edge inwards. This action creates the cup’s rim. Adjust the scale uniformly to ensure a balanced and proportional rim.
Using Multi-Cut Tool for Quad Formation
The multi-cut tool is indispensable for forming quads, which are crucial for smooth modeling. With the rim edges selected, activate the multi-cut tool by holding Shift and right-clicking. Draw lines to create quad faces along the rim area, enhancing the structural integrity of the model.
Smoothing and Adding Thickness
Applying the Smooth Command
Smoothing the model enhances its appearance and makes it more realistic. With the entire cup selected, right-click and choose ‘Object Mode’. Then, apply the smooth command from the ‘Mesh’ menu. This operation rounds off sharp edges, creating a more refined appearance.
Setting Appropriate Thickness
The cup must have a realistic wall thickness. Again, activate the extrude command (Ctrl + E or Command + E) and set the thickness attribute to 0.3 units. This setting ensures the cup has substantial walls without appearing too bulky.
Adding Edge Loops for Definition
Edge loops are necessary for maintaining definition when smoothing the model. Use the multi-cut tool to insert edge loops near the top and bottom edges of the cup. These loops help preserve the shape by preventing excessive rounding during the final smooth.

Creating the Handle
Selecting Handle Faces in Grid Mode
The handle is created from a selection of faces on the cup’s side. Switch to grid mode and select a group of faces arranged in a rectangular pattern where the handle will be attached. Ensure the selection is symmetrical and aligns well with the overall cup design.
Circularizing and Adjusting Alignment
With the handle faces selected, use the ‘Circularize’ command to shape them into a circular pattern. Adjust the twist and alignment parameters to maintain a consistent curvature and blend seamlessly into the cup’s body.
Extruding and Scaling to Form the Handle
Extrude the selected faces outward to begin forming the handle. Use the scale tool to shape the handle’s cross-section. Repeat this process, extruding and scaling sequentially, until the handle connects back to the cup in an aesthetically pleasing manner.
Refining Handle Shape and Curvature
Utilizing Control Vertex for Shape Adjustment
Fine-tune the handle shape using control vertices. Select the handle and switch to ‘Vertex Mode’. Manipulate the control vertices to adjust the curvature and ensure a smooth transition from the handle to the cup.
Editing Poly Bridge Edge for Taper and Smooth Path
To create a taper and smooth path along the handle, use the poly bridge edge tool. This tool allows you to blend edges organically. Select the edges along the handle and apply the tool settings to achieve a refined taper, adding to the handle’s realism.
Ensuring Smooth Transition Between Handle and Cup
Ensure that the handle transitions smoothly into the cup’s body. Adjust the vertices at the connection points to avoid abrupt changes in geometry. This blending ensures that the handle appears as a natural extension of the cup.
Final Touches and Smoothness
Adding Additional Edge Loops for Overall Smoothness
Add additional edge loops to maintain the cup’s shape after final smoothening. Use the multi-cut tool to insert loops where necessary, especially around areas that tend to deform. This step ensures your model remains well-defined.
Performing a Final Smooth Command
Perform one last smooth command to give the cup a polished appearance. Ensure the subdivisions are high enough to achieve fine detail without overly increasing the polygon count. The final smooth makes the model ready for texturing and rendering.
Adjusting Pivot Point to Bottom
For ease of transformation and placement in scenes, adjust the pivot point to the bottom of the cup. Select the cup, press the ‘Insert’ key, and move the pivot point to the base. This adjustment facilitates proper alignment and placement in various scenes.
Conclusion
Recap of Key Learning Points
Through this tutorial, you’ve learned how to model a realistic coffee cup in Autodesk Maya. You started with selecting and modifying polygon cylinder primitives, adjusted attributes like radius, height, and subdivisions, and applied various modeling techniques such as smoothing, extruding, and adding thickness. You also created a handle using the bridge command and adjusted curves for a professional finish.
Next Steps for Further Learning
As next steps, consider enhancing your skills by exploring more complex modeling projects, such as creating intricate objects or characters. Dive into texturing and rendering to bring your models to life with realistic materials and lighting.
Encouragement to Continue Practicing and Exploring
Continuous practice is key to mastering 3D modeling. Keep experimenting with Maya’s tools and commands, take on various projects, and seek out tutorials to further your understanding. Remember, every model enhances your skill set, bringing you closer to becoming a proficient 3D artist.
Maintain Your 3D Printer with these Tools


