In the video titled “My Secret To No More 3D Printed Layer Lines” by Jake Grim, he discusses a unique slicing method known as “fuzz” that can eliminate visible layer lines in 3D printed parts. This video explores traditional post-processing methods like sanding, priming, and painting, highlighting their limitations and inefficiencies. Additionally, the video introduces the Fuzz Skin slicer feature offered by Bambu Studio, which adds a textured finish to 3D printed parts. The optimal fuzz thickness and distance point settings are explained, and a comprehensive experiment is conducted to determine the ideal fuzz parameters. Step-by-step instructions are provided on how to apply fuzz skin to 3D models for flawless prints. The video concludes by emphasizing the importance of perseverance and resilience in overcoming challenges and achieving innovation, encouraging viewers to unlock the full potential of their 3D printing projects using the fuzz technique.
In another video discussing the technique called “fuzzy skin” for 3D printing, the creator explores different methods of post-processing 3D printed parts, such as sanding and painting. The video shares the creator’s journey in experimenting with various techniques, including resin 3D printing and injection molding, before ultimately finding success with fuzzy skin. The video showcases the process of adding fuzzy skin using the Bamboo Lab A1 printer and explains how fuzzy skin can add texture and hide imperfections, eliminating the need for post-processing. The importance of perseverance and the message of embracing failure are highlighted, encouraging viewers to keep trying and learning from failures in their own 3D printing projects.

Introduction to the Fuzz Skin Slicer Feature
In this article, we will explore a unique slicing method called “fuzz” that can eliminate visible layer lines in 3D printed parts. Traditional post-processing methods like sanding, priming, and painting have their limitations, and we will discuss why the fuzz technique can be a game-changer in achieving professional-looking products with minimal post-processing. We will also introduce the Fuzz Skin slicer feature offered by Bambu Studio, designed to add a textured finish to 3D printed parts.
Exploring Traditional Post-Processing Methods and their Limitations
Before diving into the details of the fuzz technique, let’s take a moment to understand the traditional post-processing methods commonly used in 3D printing. Sanding, priming, and painting have been popular choices to achieve smooth surfaces and hide visible layer lines. However, these methods can be time-consuming, inefficient, and may not always deliver satisfactory results. Sanding requires multiple rounds with increasingly finer grits, while priming and painting involve several coats and waiting time between layers. Scaling these processes for larger quantities of parts can be challenging and costly.
Find 3D Printing Accessories Here
Understanding Fuzz Thickness and Distance Point Settings
To achieve the desired results with the fuzz technique, it’s important to optimize the fuzz thickness and distance point settings. Fuzz thickness refers to the depth of the added texture, while the distance point setting determines the frequency at which the tool head shakes while printing the wall path. Finding the ideal combination of these variables is crucial for achieving flawless prints with the desired aesthetic.
Conducting an Experiment to Determine Ideal Fuzz Parameters
To determine the ideal fuzz parameters, a comprehensive experiment was conducted. Different combinations of fuzz thickness and distance point settings were tested, and the results were evaluated based on the aesthetics and durability of the printed parts. By analyzing the outcome of the experiment, valuable insights were gained, which can guide users in selecting the optimal fuzz parameters for their specific needs.

Step-by-Step Instructions on Applying Fuzz Skin to 3D Models
In this section, we will provide step-by-step instructions on how to apply fuzz skin to 3D models using the Bambu Studio slicer feature. We will guide you through the process, from importing the 3D model into the software to setting the desired fuzz parameters and generating the sliced file. Detailed explanations and visual aids will ensure a smooth and successful implementation of the fuzz technique.
Showcasing Aesthetics and Durability Difference between Standard and Fuzz-Enhanced Parts
In this section, we will showcase the difference between standard 3D printed parts and those enhanced with the fuzz technique. By comparing the aesthetics and durability of these two types of parts, we will demonstrate how the fuzz technique can elevate the overall quality of 3D printed products. Visual examples and real-life applications will emphasize the impact of adding a textured finish to create professional-looking and durable parts.
Considerations Regarding Print Time and Design Tolerances
While the fuzz technique offers significant benefits in terms of aesthetics and post-processing reduction, it’s essential to consider potential drawbacks. One such consideration is increased print time. The shaking motion of the tool head during the printing process adds an additional step that can prolong the overall print time. Additionally, design tolerances may need to be adjusted to accommodate the added texture. We will discuss these considerations in detail and provide recommendations on how to manage them effectively.
Promoting Perseverance and Resilience in Overcoming Challenges
Innovation and progress often come with their fair share of challenges and setbacks. It’s important to embrace these challenges and approach them with perseverance and resilience. The fuzz technique is a result of continuous experimentation and a willingness to learn from failures. By sharing personal experiences and emphasizing the importance of perseverance, we aim to inspire viewers to push boundaries and explore innovative solutions in their 3D printing projects.
Conclusion: Unlocking the Full Potential of 3D Printing with Fuzz Technique
In conclusion, the fuzz technique offers a unique and efficient way to eliminate visible layer lines and enhance the quality of 3D printed parts. By understanding the optimal fuzz thickness and distance point settings, conducting experiments, and following step-by-step instructions, users can unlock the full potential of their 3D printing projects. While considerations regarding print time and design tolerances should be taken into account, the overall benefits the fuzz technique offers in terms of aesthetics and post-processing reduction make it a valuable tool in the world of 3D printing. By embracing perseverance and resilience, we can overcome challenges and achieve innovative solutions that elevate the quality of our 3D prints.
Maintain Your 3D Printer with these Tools
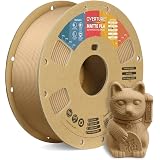
OVERTURE Matte PLA 3D Printer Filament 1.75mm, Matt Surface & Low Warping Filament 1kg Spool (2.2 lbs), Accuracy +/- 0.02 mm, Fit Most FDM Printers (Matte Light Brown)
$18.99 (as of June 17, 2025 23:14 GMT +00:00 - More info)
ELEGOO Matte PLA Filament Navy Blue 1KG, 1.75mm 3D Printer Filament Dimensional Accuracy +/- 0.02mm, 1kg Carboard Spool (2.2lbs) for Most FDM 3D Printers
$19.99 (as of June 17, 2025 23:14 GMT +00:00 - More info)