ELEGOO Neptune 3 Pro FDM 3D Printer with Auto Bed Leveling, Dual-Gear Direct Extruder, Dual Lead Screw Drive, Removable Capacitive Screen, 8.85x8.85x11in Large Printing Size
$209.99 (as of June 17, 2025 23:14 GMT +00:00 - More infoProduct prices and availability are accurate as of the date/time indicated and are subject to change. Any price and availability information displayed on [relevant Amazon Site(s), as applicable] at the time of purchase will apply to the purchase of this product.)Get ready to experience the fascinating world of restoration, where cutting-edge technology meets vintage charm. In this captivating project, we’ll take you on a journey to revive a 1960s pachinko machine using 3D printing technology. This mechanical game from Japan, a precursor to modern slot machines, required a custom upgrade part designed with Fusion 360 and a Revopoint RANGE 2 3D scanner to capture its intricate details.
From designing the part in pieces for testing to finally printing it in resin, we’ll delve into the design philosophy, key project takeaways, and additional pachinko machine problems to fix. You’ll discover the benefits of using 3D scanning and printing technology in restoration projects, and how it can breathe new life into antique machines like this pachinko game. So, sit back, relax, and enjoy the ride as we bring this vintage gem back to life!
$30 off $400+ Anycubic Products with code AC30OFF
Background
Restoring a 1960s pachinko machine may seem like a daunting task, but with the right tools and technology, it can be a fascinating and rewarding project. In this article, we’ll dive into the world of pachinko machines and explore how 3D printing technology can be used to restore these intricate gaming devices.
Overview of Pachinko Machines
Pachinko machines originated in Japan in the 1960s as a form of entertainment that skirted the country’s gambling laws. These mechanical devices used small metal balls to create a game of chance, with players aiming to land their balls in specific holes to win prizes. Pachinko parlors became popular gathering places, where people would play these machines and then exchange their winning balls for prizes at a separate location.
Importance of Restoration
As pachinko machines age, their mechanical components can become worn and damaged, making them difficult to repair. Restoration projects like this one not only help preserve these unique pieces of gaming history but also allow enthusiasts to continue enjoying them.
Benefits of 3D Printing in Restoration Projects
3D printing technology offers several advantages in restoration projects like this one. It allows for the creation of custom upgrade parts with high precision and accuracy, making it ideal for replicating intricate mechanical components. Additionally, 3D printing enables the rapid prototyping and testing of designs, streamlining the restoration process.
Project Overview
In this project, we’ll be designing and printing a custom upgrade part for a 1960s pachinko machine. We’ll use Fusion 360 software and a Revopoint RANGE 2 3D scanner to capture the machine’s intricate details and create a precise model.
Designing a Custom Upgrade Part
The custom upgrade part we’ll be designing is a large, complex piece that requires a 600 mm build volume printer to print in one piece. We’ll use Fusion 360 to create a 3D model of the part, taking into account the machine’s mechanical components and precision requirements.
Use of Fusion 360 and Revopoint RANGE 2 3D Scanner
Fusion 360 is a powerful software tool that allows us to design and simulate our custom upgrade part. The Revopoint RANGE 2 3D scanner enables us to capture the pachinko machine’s intricate details with high accuracy, which we can then import into Fusion 360 for design.
Printing and Assembly Process
Once our design is complete, we’ll print the part in pieces for testing and eventually send it to PCBWay for final printing in resin. We’ll also cover the post-processing and assembly techniques used to bring the part together.
Design Philosophy
When it comes to designing custom upgrade parts, precision measurement is crucial. In this section, we’ll explore the importance of precision measurement and how 3D sketching in Fusion 360 can help us achieve accurate designs.
Importance of Precision Measurement
Precision measurement is critical in restoration projects, where small inaccuracies can lead to mechanical issues or even render the part unusable. By using 3D scanning and printing technology, we can ensure that our custom upgrade part fits perfectly with the existing machine.
Using 3D Sketching in Fusion 360
Fusion 360’s 3D sketching capabilities allow us to create precise models of our custom upgrade part. We’ll explore how to use these tools to create a accurate design that meets the machine’s mechanical requirements.
Design Iterations and Testing
Designing a custom upgrade part often requires several iterations and testing. We’ll cover how we refined our design through testing and simulation, ensuring that the final part meets our requirements.

$30 off $400+ Anycubic Products with code AC30OFF
Scanning and Modeling
In this section, we’ll dive deeper into the scanning and modeling process, highlighting the benefits of using a Revopoint RANGE 2 3D scanner and Fusion 360 software.
Capturing Intricate Details with Revopoint RANGE 2 3D Scanner
The Revopoint RANGE 2 3D scanner is an essential tool in our restoration project. We’ll cover how we used the scanner to capture the pachinko machine’s intricate details and create a precise model.
Importing Scanned Model into Fusion 360
Once we’ve scanned the machine’s details, we’ll import the model into Fusion 360 for design. We’ll explore how to use the software’s tools to refine the model and create a custom upgrade part.
Model Refining and Editing
Refining and editing our scanned model is a critical step in the design process. We’ll cover how we used Fusion 360 to refine the model, ensuring that it meets our precision requirements.
3D Printing and Post-Processing
In this section, we’ll cover the 3D printing and post-processing techniques used to bring our custom upgrade part to life.
Printing in Pieces for Testing
Before sending our design to PCBWay for final printing, we’ll print the part in pieces for testing. This allows us to validate our design and make any necessary adjustments.
Final Printing in Resin by PCBWay
We’ll cover the final printing process, which involves sending our design to PCBWay for printing in resin. This high-quality material ensures that our custom upgrade part meets the machine’s mechanical requirements.
Post-Processing and Assembly Techniques
Once our part is printed, we’ll cover the post-processing and assembly techniques used to bring it together. This includes sanding, painting, and assembling the part into the pachinko machine.
Material Selection
Material selection is a critical aspect of 3D printing, particularly in restoration projects. We’ll explore the importance of material choice and why we selected resin for our custom upgrade part.
Importance of Material Choice
The material used for 3D printing can significantly impact the final product’s performance and durability. We’ll discuss why material selection is crucial in restoration projects like this one.
Resin vs. Other Materials for 3D Printing
Resin is a popular material for 3D printing, but it’s not the only option. We’ll compare resin to other materials, highlighting its benefits and drawbacks in the context of restoration projects.
Benefits of Resin for Restoration Projects
We’ll explore why resin is an ideal material for restoration projects like this one, including its high precision, durability, and resistance to wear and tear.
Challenges and Solutions
Restoration projects can be complex and challenging, particularly when working with intricate mechanical components. We’ll cover some of the common challenges we faced and how we overcame them.
Overcoming Design and Printing Challenges
Designing and printing a custom upgrade part requires careful planning and attention to detail. We’ll discuss some of the common challenges we faced and how we addressed them.
Troubleshooting Common Issues
Troubleshooting is an essential part of any 3D printing project. We’ll cover some common issues that arose during our project and how we resolved them.
Tips for Successful Restoration Projects
We’ll share some valuable tips and best practices for successful restoration projects, including the importance of precision measurement, design iteration, and material selection.
PCBWay: A One-Stop Shop for Custom 3D Printing
PCBWay is a leading provider of custom 3D printing and CNC machining services. We’ll explore how their services helped us bring our custom upgrade part to life.
Partnering with PCBWay for Large, Complex Prints
We’ll discuss why we partnered with PCBWay for the final printing of our custom upgrade part, including their expertise in large, complex prints.
Benefits of Using PCBWay for Restoration Projects
We’ll highlight the benefits of using PCBWay for restoration projects, including their high-quality materials, precision printing, and fast turnaround times.
Reviews and Recommendations
We’ll share our experience with PCBWay, including their customer service, communication, and overall quality of work.
Project Takeaways
In this section, we’ll reflect on the key lessons learned from our restoration project and share best practices for 3D printing in similar projects.
Key Lessons Learned
We’ll summarize the key takeaways from our project, including the importance of precision measurement, design iteration, and material selection.
Best Practices for 3D Printing in Restoration
We’ll share best practices for 3D printing in restoration projects, including tips for designing custom upgrade parts, working with complex mechanical components, and ensuring precision and accuracy.
Future Plans and Projects
We’ll discuss our future plans and projects, including how we hope to apply the skills and knowledge gained from this restoration project to other areas of interest.
Conclusion
In this article, we’ve explored the fascinating world of pachinko machines and how 3D printing technology can be used to restore these intricate gaming devices. We’ve covered the design, printing, and assembly of a custom upgrade part, highlighting the benefits of using 3D scanning, Fusion 360 software, and resin material.
Summary of the Project
We’ll summarize the key aspects of our restoration project, including the design, printing, and assembly of our custom upgrade part.
Impact of 3D Printing on Restoration Industry
We’ll discuss the impact of 3D printing on the restoration industry, including its potential to preserve cultural artifacts and revolutionize the way we restore complex mechanical devices.
Final Thoughts and Recommendations
We’ll share our final thoughts on the project, including recommendations for those interested in pursuing similar restoration projects and the importance of preserving gaming history.
$30 off $400+ Anycubic Products with code AC30OFF
Creality 3D Printer Glue Sticks for Hot Bed Warping Reducing 3D Printer Bed Adhesive PVP Solid 3D Print Glue Stick 3D Gloop for PLA/ABS/PETG/PC/PA/TPU(Pack of 4)
$13.59 (as of June 15, 2025 22:52 GMT +00:00 - More infoProduct prices and availability are accurate as of the date/time indicated and are subject to change. Any price and availability information displayed on [relevant Amazon Site(s), as applicable] at the time of purchase will apply to the purchase of this product.)
Creality 2 PCS Ender 3 Bed Ultra-Flexible Removable Magnetic Removable Build Surface Hotbed Cover Print Platform Kit for Ender 3 Neo/Ender 3 V2 Neo/Ender 3 S1/Ender 3 S1 Pro/Ender 3 V3 SE 235x235mm
$15.99 (as of June 15, 2025 22:52 GMT +00:00 - More infoProduct prices and availability are accurate as of the date/time indicated and are subject to change. Any price and availability information displayed on [relevant Amazon Site(s), as applicable] at the time of purchase will apply to the purchase of this product.)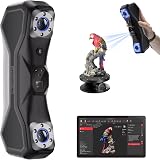
Revopoint MetroX 3D Scanner for 3D Printing, Handheld 3D Printer Scanner Blue Laser Scan, Metrology-Grade Precision 0.01mm for Metal Dark Object, Up to 60fps Speed, Support Windows macOS, Standard
$999.00 (as of June 17, 2025 23:14 GMT +00:00 - More infoProduct prices and availability are accurate as of the date/time indicated and are subject to change. Any price and availability information displayed on [relevant Amazon Site(s), as applicable] at the time of purchase will apply to the purchase of this product.)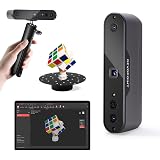
Revopoint Inspire 3D Scanner for 3D Printing Handheld, 3D Printer Scanner 0.2mm Precision, Full Color 3D Model Scanning for Car Customization, Digital Art, DIY Projects, Support Android/iOS/Mac/Win
$339.99 (as of June 17, 2025 23:14 GMT +00:00 - More infoProduct prices and availability are accurate as of the date/time indicated and are subject to change. Any price and availability information displayed on [relevant Amazon Site(s), as applicable] at the time of purchase will apply to the purchase of this product.)