ANYCUBIC 10K Resin 3D Printer, Photon Mono 4 LCD 3D Printer with 7-inch Mono Screen, Upgraded LighTurbo Matrix and Printing Platform, Printing Size of 6.04''x3.42''x6.49''
$159.99 (as of June 19, 2025 23:45 GMT +00:00 - More infoProduct prices and availability are accurate as of the date/time indicated and are subject to change. Any price and availability information displayed on [relevant Amazon Site(s), as applicable] at the time of purchase will apply to the purchase of this product.)In the video “Single Layer Multicolor 3D Prints // Fusion360 & AMS Tutorial” by Markury, you’ll learn how to convert a raster image into a vector image and bring it into Fusion360 for 3D printing. Markury shows you the step-by-step process, starting with finding a vector graphic or converting a PNG image using an online converter. Then, he demonstrates how to import the SVG image into Fusion360, extrude each color individually, and save the file in Fusion360. Finally, he guides you on using Bamboo Studio to separate the individual parts, color them, and slice the print to achieve a single layer multicolor 3D print.
Markury’s tutorial provides a comprehensive guide to creating single layer multicolor 3D prints using Fusion360 and AMS. Whether you’re a beginner or an experienced 3D printing enthusiast, this video will equip you with the skills and knowledge needed to bring your designs to life. So grab your favorite vector graphic or convert a PNG image and get ready to dive into the exciting world of single layer multicolor 3D printing.

Finding the Right Vector Graphic
When it comes to creating single layer multicolor 3D prints, the first step is finding the right vector graphic. While you can convert a raster image into a vector image, it’s recommended to look for vector graphics or coloring pages from reliable sources. These sources provide simple designs that you can color in however you want with your choice of filament. Another option is to search for Cricut sticker SVGs on platforms like Etsy. Although these files may require payment, they often offer high-quality designs.
Converting the Image to SVG
Once you’ve found the vector graphic or coloring page of your choice, the next step is converting it to an SVG format. You can achieve this by using an online converter website that accepts various file formats, including PNG, JPG, and even webp files. Simply upload the image to the converter website and convert it to an SVG. Remember to download the converted SVG file to your computer for further use.


Importing the SVG into Fusion 360
With the SVG file ready, you can now bring it into Fusion 360 for further editing and preparation before the 3D printing process. Start by creating a new sketch on the bottom plane in Fusion 360. From the “Insert” menu, choose to insert an SVG file from your computer, and select the previously downloaded SVG. The SVG may appear to be oversized initially, so you’ll need to scale it down using the curved line tool. Align the SVG to the desired size and position using the lines and guides provided.
Extruding Each Color Individually
Once the SVG is properly imported and aligned, the next step is to extrude each color individually. Start by selecting the red color in the sketch and extruding it to a thickness of 0.2 (equivalent to one layer). Create a new body for the white color, setting the same extrusion thickness. Repeat the process for the blue color, extruding the legs on the body to the same thickness. By extruding each color separately, you ensure that they’re distinct and not merged together.

Saving and Exporting the Model
After completing the extrusion process for each color, it’s time to save and export the model in Fusion 360. Click on the “Save” option to ensure your progress is saved in Fusion 360. To export the model as an STL file, go to the “Export” menu and select “STL File” from the dropdown. Wait patiently as the file exports, which may take a few moments depending on the complexity and size of the model.
Preparing the Model in Bamboo Studio
Once the model is exported as an STL file, you can proceed to use Bamboo Studio for further preparation. Import the STL file into Bamboo Studio, and initially, all the parts will be the same color and merged together. To separate the parts, right-click on the model and choose the option to split it into separate parts. Now, you can click on each individual part within the software to assign colors accordingly.

Coloring the Individual Parts
In Bamboo Studio, you can assign colors to each individual part of the model. Following the order set in Fusion 360, start by selecting the first part, which should be red. Apply the red color to this part. Proceed to the next part, applying the appropriate color (in this case, white). Finally, assign the blue color to the remaining parts. By accurately coloring each part, you ensure the final 3D print reflects the original design.
Slicing and Printing the Model
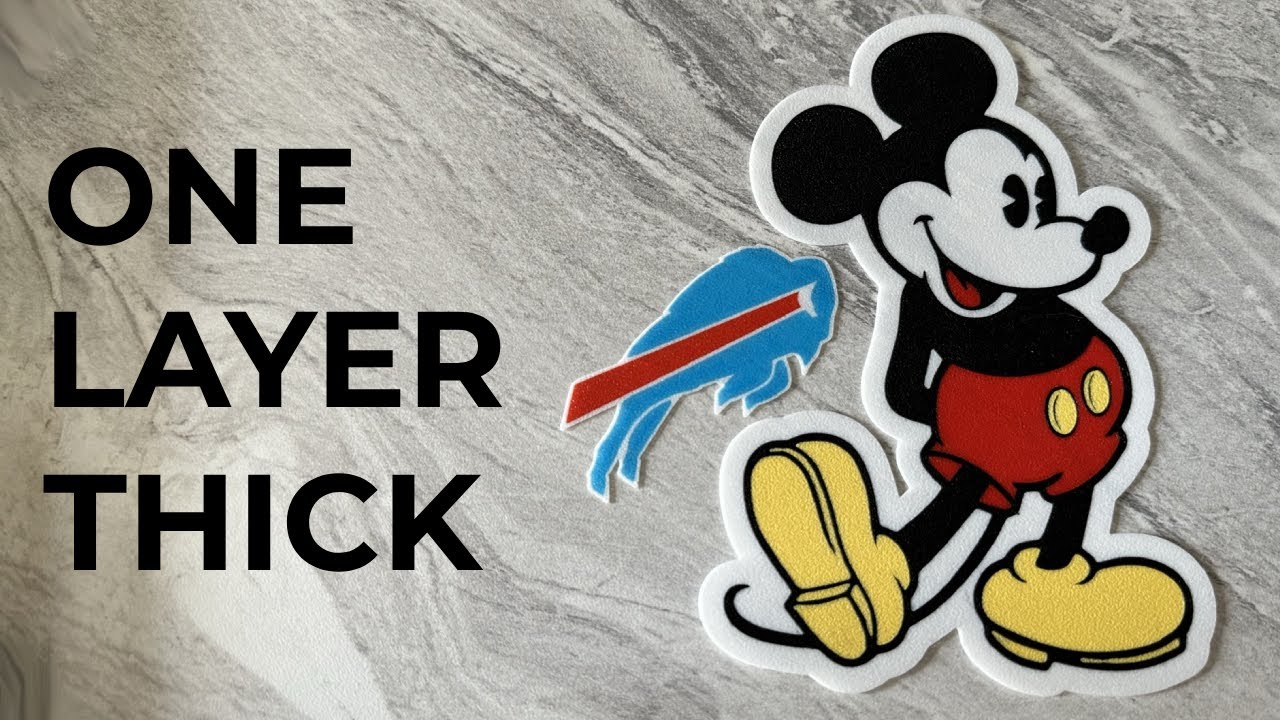
With all the parts properly colored, it’s time to slice the model in preparation for 3D printing. Position the model appropriately for printing, ensuring the textured side is facing upwards for optimal results. Use the slicing software in Bamboo Studio to create single-layer prints. Adjust the settings as per your preference, such as layer height and layer squish, to achieve smoother prints. Finally, send the print job to your 3D printer and wait for the magic to happen.
Optimizing Slicer Settings
While the default slicer settings provide decent results, you can further optimize them to enhance the quality and appearance of your 3D prints. Some recommended settings include using ironing on the topmost surface to add shine, switching to the Arachne wall generator for finer details, adjusting layer height and layer squish for smoother prints, changing top and bottom surface patterns to concentric for circular graphics, and adjusting the number of wall loops for improved structure.
Final Print and Conclusion
Once the print is complete, it’s time to review the finished 3D print. Take a moment to assess the quality, colors, and overall appearance of the print. If everything looks good, proceed to release the print from the bed carefully, ensuring the bed has cooled down completely to avoid any damage. Congratulations on successfully creating a single layer multicolor 3D print! If you followed the tutorial closely, you should have a beautiful and vibrant model in your hands.
In this video, you’ll learn how to convert a raster image into a vector image and import it into Fusion360 for 3D printing in Bambu Studio with the AMS. You can follow along with the steps I show you to quickly accomplish this. Before we get started, here’s a useful tool that you can use to convert your images to SVG format: Image to SVG converter. Although it mentions converting PNG files to SVG, it also accepts other file formats like .webp (when you right click/save an image from Chrome) or .jpg.
Creality Wood Filament PLA, 3D Printer Filament 1.75 mm, Smooth Silk Texture, Toughness, 1kg(2.2lbs)/Spool Printing Filament, for All FDM Printers (Wood)
$24.99 (as of June 19, 2025 23:45 GMT +00:00 - More infoProduct prices and availability are accurate as of the date/time indicated and are subject to change. Any price and availability information displayed on [relevant Amazon Site(s), as applicable] at the time of purchase will apply to the purchase of this product.)
Sovol Filament Dryer 2025, SH01 Filament Dehydrator 3D Printer Spool Holder with Upgraded Fan, Dry Box for Keeping Filament Dry, Compatible with 1.75mm, 2.85mm PLA PETG TPU ABS
$44.99 (as of June 19, 2025 23:45 GMT +00:00 - More infoProduct prices and availability are accurate as of the date/time indicated and are subject to change. Any price and availability information displayed on [relevant Amazon Site(s), as applicable] at the time of purchase will apply to the purchase of this product.)
ELEGOO Mars 5 Ultra 9K MSLA Resin 3D Printer, Smart Mechanical Sensor, Fast Printing Up to 150mm/h, AI Camera, WiFi Cluster Printing, Automatic Leveling, Large Printing Size 6.04 * 3.06 * 6.49 inch
$284.89 (as of June 19, 2025 23:45 GMT +00:00 - More infoProduct prices and availability are accurate as of the date/time indicated and are subject to change. Any price and availability information displayed on [relevant Amazon Site(s), as applicable] at the time of purchase will apply to the purchase of this product.)
ANYCUBIC Photon Mono 4, Resin 3D Printer with 7'' 10K Mono LCD Screen, Stable LighTurbo Light Source and 70mm/h Fast Printing, Print Volume 6.04'' x 3.42'' x 6.49''
$159.99 (as of June 19, 2025 23:45 GMT +00:00 - More infoProduct prices and availability are accurate as of the date/time indicated and are subject to change. Any price and availability information displayed on [relevant Amazon Site(s), as applicable] at the time of purchase will apply to the purchase of this product.)