FLASHFORGE Adventurer 5M 3D Printer,600mm/s Max High-Speed FDM 3D Printers with Fully Auto Leveling, 280°C Direct Extruder with Quick Detachable Nozzle, Effective Cooling, Core XY Structure
$259.00 (as of June 17, 2025 23:14 GMT +00:00 - More infoProduct prices and availability are accurate as of the date/time indicated and are subject to change. Any price and availability information displayed on [relevant Amazon Site(s), as applicable] at the time of purchase will apply to the purchase of this product.)“The Ultimate Creality Ender 3 Quick Start Guide” is a video by 3D Printing Canada that provides a comprehensive walkthrough of how to assemble, calibrate, and use the Creality Ender 3 3D printer. The video covers topics such as what comes in the Ender 3 box, step-by-step instructions on building the printer, leveling the bed, printing the test file, and slicing and printing the first model using Cura software. In addition to the instructional content, the video also provides contact information for 3D Printing Canada, such as their address, telephone number, and sales email. Free shipping is available for orders over $99 in the US and Canada, and the company can be followed on social media platforms like Facebook, Instagram, and Twitter.
Welcome to the 3dprintingcanada.com Ultimate Creality Ender 3 Quick Start Guide! This engaging video by 3D Printing Canada takes you through the entire process of assembling and calibrating the Creality Ender 3 3D printer, as well as using it for your first prints. From organizing the parts and laying out the kit to leveling the bed and using Cura software for slicing, this video covers all the essential steps. Be sure to check out the contact information for 3D Printing Canada, as well as their social media accounts for additional resources and updates. Free shipping is available for orders over $99 in the US and Canada, so you’ll have everything you need to get started with your 3D printing journey.

What Comes in the Creality Ender 3 Box
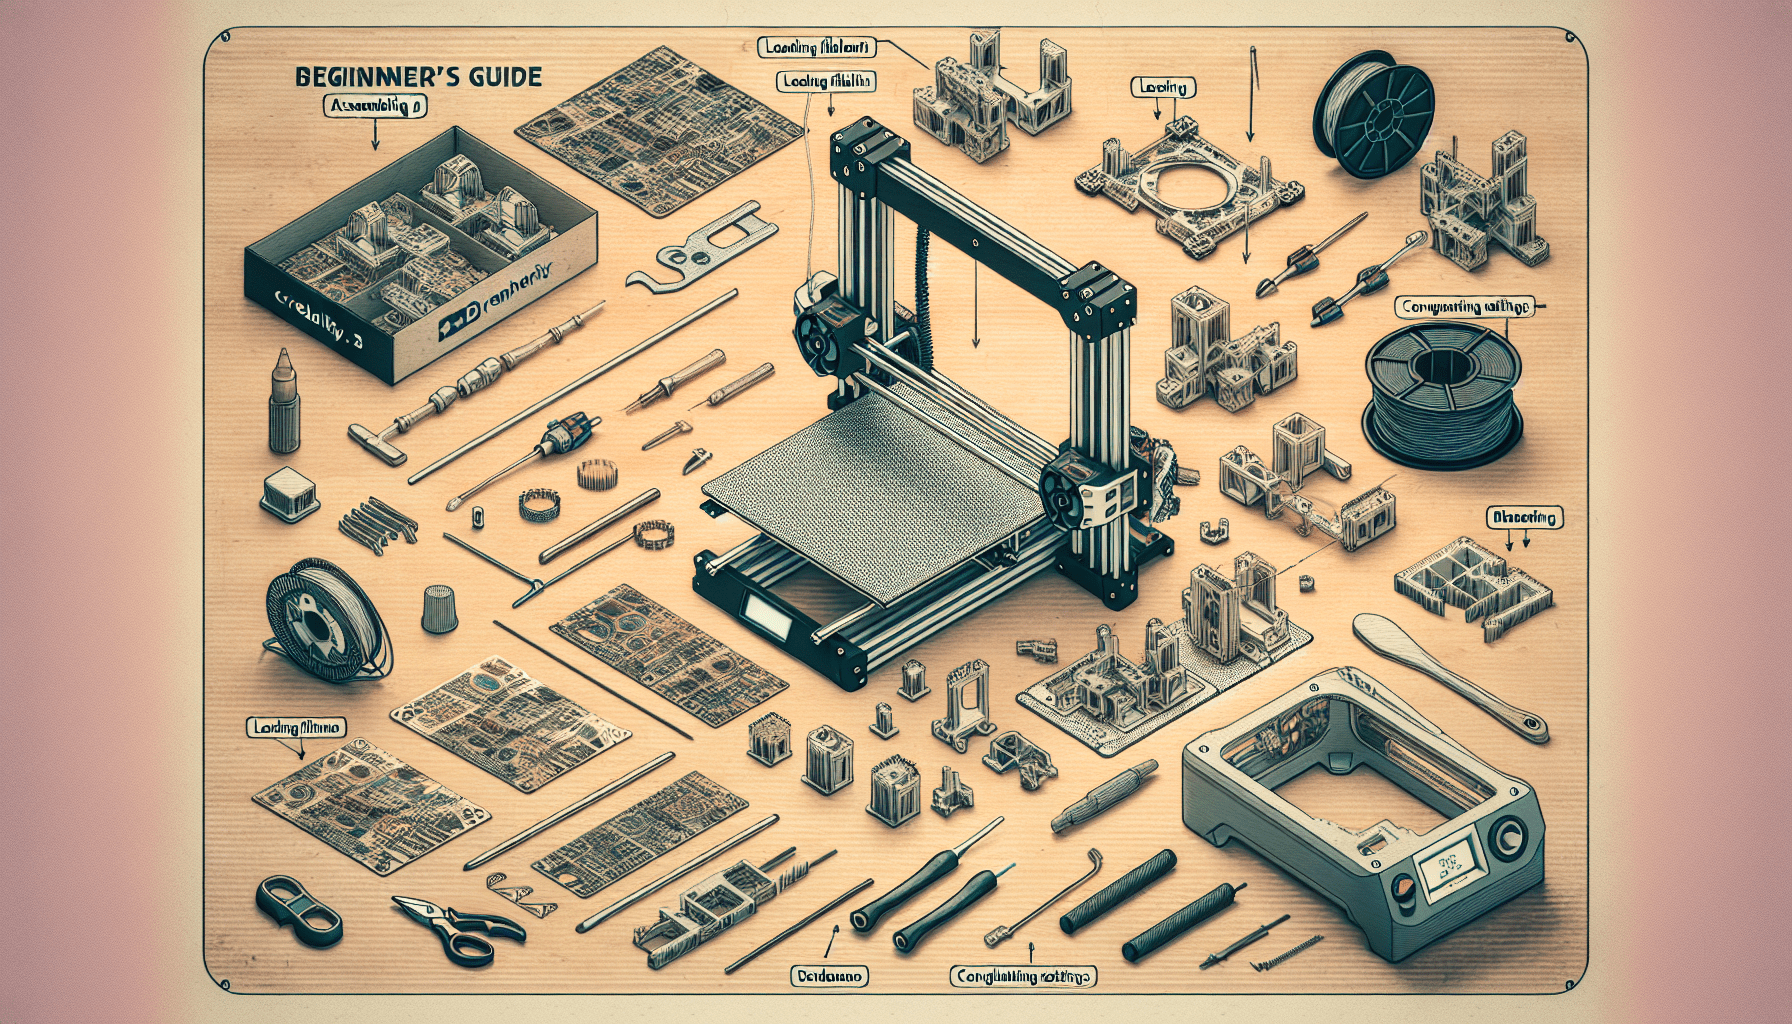
The Creality Ender 3 3D printer comes with a variety of parts and accessories to help you get started with your 3D printing journey. When you open the box, you will find:
- Instruction manual: This manual will guide you through the assembly and calibration process of the Ender 3 printer.
- Power supply: The power supply is necessary to provide the printer with the required electrical power.
- Z-axis motor: This motor plays a crucial role in moving the printer’s extruder up and down along the z-axis.
- Extruder and x-axis gantry assembly: The extruder is responsible for feeding the filament into the printer’s hotend, while the x-axis gantry assembly provides support for the extruder.
- 2020 extrusion pieces: These extrusion pieces are used to construct the frame of the Ender 3 printer.
- Spool holder: The spool holder holds the filament spool in place during printing.
- Main body: The main body of the printer houses the electronics and components necessary for its operation.
- Power cord: The power cord connects the printer to a power source.
- SD card and reader: The SD card is used to store and transfer 3D model files to the printer.
- Various screws and hardware: The kit includes a variety of screws and hardware that are essential for assembling the printer.
- Toolkit: The toolkit contains wrenches, allen keys, and a screwdriver to help you with the assembly process.
- Other accessories: The kit also includes spare pneumatic fittings and a nozzle, as well as a wire for unclogging nozzles and spare parts for the printer.
By laying out all the parts and familiarizing yourself with them, you can ensure a smooth assembly process and prevent any parts from getting misplaced or overlooked.
How to Build the Printer
Assembling the Ender 3 printer is a straightforward process that can be accomplished with the help of the instruction manual and basic tools. Here is a step-by-step guide to help you build your Ender 3 printer:
1. Organizing and laying out the parts of the Ender 3 kit
Before you begin the assembly process, it is important to organize and lay out all the parts of the Ender 3 kit on a clean work surface. This will help you become familiar with the components and ensure that you have everything you need for the assembly.
2. Mounting the extrusion pieces to the frame using screws
Start by cutting open the 2040 extrusions and identifying the correct ones for the assembly. One extrusion has two holes at the bottom, which will be mounted on the left-hand side of the printer. The other extrusion has two holes running up one side, which will be mounted on the right-hand side of the printer.
Insert M5 by 45 screws into the bottom holes of the extrusions and align the extrusions with the holes on the main frame. Use an appropriate allen key to tighten the screws until they are snug. Repeat this process for the left-hand side extrusion.
3. Mounting the power supply and z-axis limit switch
Mount the power supply to the right side of the printer frame using M4 by 20 screws. Align the power supply with the holes on the extrusion and tighten the screws until snug. Be careful not to over-tighten, as it could strip the screw holes or damage the printer.
Next, mount the z-axis limit switch to the left-hand side 2040 extrusion using the provided screws and t-nuts. Once the switch is secured, plug in the 3-pin z-axis limit switch wire.
4. Assembling and mounting the x-axis gantry
Take the extruder and x-axis assembly and orient it correctly by aligning the larger hole on the x-axis extrusion with the screw on the extruder motor assembly. Insert M4 by 16 screws into the front and back holes of the x-axis extrusion, and tighten them without completely tightening them down.
5. Mounting the extruder and x-axis gantry assembly
Attach the x-axis gantry assembly to the right-hand side extrusion by threading the screws into the extrusion holes and tightening them with an allen key. Ensure that the assembly is properly aligned and level.
6. Installing the x-axis belt and tensioner
Install the x-axis belt by placing it in the pulley grooves on the x-axis gantry assembly and extruder carriage. Use the provided zip ties to secure the belt and adjust the tension by tightening or loosening the belt tensioner.
7. Mounting the z-axis motor and lead screw
Take the z-axis motor assembly and insert the M4 by 16 screws into the holes, aligning them with the extrusion’s back. Tighten the screws, making sure there is a little play between the motor assembly and the extrusion. This will allow for proper alignment with the gantry.
8. Mounting the remaining 2020 extrusion piece and spool holder
Cut open the remaining 2020 extrusion piece and identify the one with two holes near the sides. This extrusion piece will go on top of the printer and serve as the mount for the spool holder. Secure the extrusion piece to the printer frame using the provided screws.
Once the extrusion is secure, attach the spool holder to the mount, ensuring that it is properly aligned and tightened.
Congratulations! You have successfully assembled your Creality Ender 3 3D printer.


How to Level the Bed
Bed leveling is a crucial step in the 3D printing process as it ensures that the first layer of the print adheres properly to the print bed. Here is a guide on how to level the bed on your Creality Ender 3:
1. Importance of bed leveling for successful prints
Proper bed leveling is essential for achieving high-quality prints. It ensures that the nozzle is at the correct distance from the print bed, allowing for proper filament adhesion and layer consistency. Without proper leveling, you may experience issues such as poor bed adhesion, uneven layers, or failed prints.
2. Adjusting the bed leveling knobs
The Ender 3 printer features manual bed leveling through four leveling knobs located underneath the print bed. To level the bed, follow these steps:
a. Home the printer: Use the printer's menu or controller to home the printer's axes, which will position the nozzle at the home position. b. Move the nozzle to each corner: Manually move the nozzle to each corner of the print bed using the printer's controls. c. Level the bed: Start with one of the leveling knobs and turn it clockwise or counterclockwise to adjust the height of that corner of the bed. Use a piece of paper or a leveling tool to gauge the distance between the nozzle and the bed. Repeat this process for the remaining three corners of the bed, ensuring that the nozzle is at the same distance from the bed in each corner. 3. Using a piece of paper or a leveling tool for precise leveling
To achieve precise bed leveling, you can use a piece of paper or a specialized leveling tool. Place the tool or paper under the nozzle and adjust the leveling knobs until you feel slight resistance when moving the paper. The nozzle should lightly grip the paper without tearing it. Repeat this process for all four corners of the bed, making adjustments as necessary.
Remember to periodically check and re-level the bed as needed, especially when switching build surfaces or after a significant amount of printing.
How to Print the Test File
Printing the test file that comes with the Ender 3 allows you to ensure that your printer is functioning correctly. To print the test file, follow these steps:
1. Loading the test file onto an SD card
Transfer the test file, typically provided on the included SD card or available for download from the manufacturer’s website, to an SD card. Ensure that the file has the correct format for printing, such as .gcode or .stl.
2. Inserting the SD card into the Ender 3
Locate the SD card slot on the front of the control box and insert the SD card into the slot. Ensure that the card is inserted fully to avoid any issues with file recognition.
3. Navigating the menu to locate and start the test file
Turn on the Ender 3 printer, and on the control box, navigate to the menu option to access the SD card. Locate the test file in the displayed list of files and select it. Follow the prompts on the screen to initiate the print.
The printer will start heating up the nozzle and print bed to the appropriate temperatures. Once the temperatures are reached, the printing process will begin. Observe the printer during the print to ensure that it is functioning correctly and watch for any issues or errors that may arise.

How to Slice and Print the First Model in Cura
Slicing is the process of converting a 3D model into instructions that the printer can understand. Ultimaker Cura is a popular slicing software that can be used with the Ender 3 printer. Here is a step-by-step guide on how to slice and print your first model using Cura:
1. Downloading and installing Ultimaker Cura software
Visit the official Ultimaker website and download the latest version of Ultimaker Cura that is compatible with your operating system. Once downloaded, run the installer and follow the on-screen instructions to install the software.
2. Importing the 3D model file into Cura
Open Ultimaker Cura after installation. Click on “Open File” or drag and drop your 3D model file (in formats such as .stl or .obj) into the Cura workspace.
3. Adjusting print settings in Cura
Cura provides a wide range of settings to customize your print. Adjust settings such as layer height, print speed, infill density, support structures, and more based on your project requirements. Take note of the recommended settings provided by the manufacturer or community for your specific printer.
4. Generating the G-code for the model
Once you have adjusted the settings to your liking, click on the “Slice” button in Cura. This action will convert the 3D model into G-code instructions that the printer can understand. The sliced file (typically .gcode) will be generated and displayed in Cura.
5. Saving the G-code to the SD card
Insert the SD card into your computer and save the sliced G-code file onto the SD card. Ensure that the file is saved in the root directory of the SD card and is properly named for easy identification.
6. Inserting the SD card into the Ender 3
Remove the SD card from your computer and insert it into the SD card slot located on the front of the Ender 3 control box. Ensure that the SD card is securely inserted.
7. Selecting and starting the print from the Ender 3 menu
Power on the Ender 3 printer and navigate to the SD card menu option using the control box. Locate the sliced G-code file in the displayed list of files and select it. Follow the prompts on the screen to initiate the print.
Your Ender 3 printer will start the print, following the instructions outlined in the G-code file. Monitor the print throughout the process to ensure that it is running smoothly and address any issues promptly.
Contact Information for 3D Printing Canada
For any inquiries or assistance with your Creality Ender 3 printer or other 3D printing needs, you can reach out to 3D Printing Canada using the following contact information:
- Company address: 36 Ditton Dr., Unit #3 Hamilton, Ontario L8W 0A9
- Telephone number: +1 (905) 963-9066
- Sales email: contact@3dprintingcanada.com
Feel free to contact them with any questions, concerns, or inquiries about their products and services. They will be happy to assist you.

Free Shipping Information
3D Printing Canada offers free shipping for orders over $99 within the United States and Canada. This is a great opportunity to save on shipping costs when purchasing your Creality Ender 3 printer or any other 3D printing supplies.
Make sure to take advantage of this offer by placing an order that meets the minimum free shipping requirement. This will allow you to enjoy your new Ender 3 printer without the added expense of shipping fees.
3D Printing Canada Social Media Accounts
Stay connected with 3D Printing Canada and join their online community by following them on their social media accounts. You can find them on:
- Facebook: 3dprintingcanada
- Instagram: 3d.printing.canada
- Twitter: 3dprintingcan
By following their social media accounts, you can stay informed about the latest updates, promotions, and announcements from 3D Printing Canada. Additionally, you can interact with other 3D printing enthusiasts and share your own experiences.
Additional Information
Aside from the quick start guide provided in this video, there are other helpful resources available to assist you in your 3D printing journey. These resources include:
- Online communities: Join online forums and communities dedicated to 3D printing to connect with experienced users, ask questions, and gain valuable insights.
- Online tutorials: Access various online tutorials and guides that cover different aspects of 3D printing. These tutorials can help you improve your skills and troubleshoot common issues.
- Manufacturer’s resources: Visit the manufacturer’s website for your printer, such as Creality’s official website, to access additional documentation, FAQs, and support forums.
By taking advantage of these resources, you can enhance your knowledge and skills in 3D printing, troubleshoot issues effectively, and stay updated with the latest trends and developments in the industry.
Conclusion
In this quick start guide, we covered various aspects of the Creality Ender 3 printer to help you get started on your 3D printing journey. We discussed what comes in the Ender 3 box, how to build the printer, how to level the bed, how to print the test file, and how to slice and print your first model using Cura.
We also provided you with the contact information for 3D Printing Canada, including their address, telephone number, and sales email. Additionally, we informed you about the free shipping offer available for orders over $99 in the US and Canada.
Don’t hesitate to reach out to 3D Printing Canada or utilize the provided resources to expand your knowledge and make the most out of your Creality Ender 3 printer. Start experimenting, learning, and creating amazing 3D prints with confidence!
USA Shop: link ::: CAD Shop: link ::: FREE Support Forum: link
Follow Us On Social Media:
Our Address:
36 Ditton Dr., Unit #3
Hamilton, Ontario
L8W 0A9
Telephone:
+1 (905) 963-9066
Sales Email:
The Ultimate Creality Ender 3 Quick Start Guide by 3D Printing Canada – link
The Ultimate Creality Ender 3 Quick Start Guide covers the following:
-
What comes in the Creality Ender 3 box
-
How to build a Creality Ender 3
-
How to level the bed on a Creality Ender 3
-
How to print the test file
-
How to slice and print your first model in Cura
Check out our forum for all things 3D Printing. link
Ask questions, stay informed and join the community.
Buy Filaments, 3D Printers, Parts, and Resin from link
Free Shipping US and Canada-wide On Order Over $99!
Follow Us On Social Media:
Our Address:
36 Ditton Dr., Unit #3
Hamilton, Ontario
L8W 0A9
Telephone:
+1 (905) 963-9066
Sales Email:

Asbrot Compatible with BBL PTFE Tube 2.5mm ID×4mm OD, Length 5M/ 16.4ft, for BBL AMS X1/ X1C/ P1P/ P1S/ A1/ A1 Mini, Prusa MMU3/ Direct Drive Extruder (Cream Color), with Tubing Cutter
$9.99 (as of June 15, 2025 22:52 GMT +00:00 - More infoProduct prices and availability are accurate as of the date/time indicated and are subject to change. Any price and availability information displayed on [relevant Amazon Site(s), as applicable] at the time of purchase will apply to the purchase of this product.)
Geeetech Silk PLA Filament 1.75mm for 3D Printer , Metal-Like Shiny Consumable 1kg (2.2lbs) 1 Spool, Dimensional Accuracy +/- 0.03 mm, Silk Gold
$17.49 (as of June 17, 2025 23:14 GMT +00:00 - More infoProduct prices and availability are accurate as of the date/time indicated and are subject to change. Any price and availability information displayed on [relevant Amazon Site(s), as applicable] at the time of purchase will apply to the purchase of this product.)
HXOGYUB 3D Scanning Spray for 3D Scanners, Professional for All 3D Scanner, Safety Material, High Reflectivity, Easy to Clean, for Reflective, Transparent or Highly Textured Surfaces, 500ML
$33.99 (as of June 17, 2025 23:14 GMT +00:00 - More infoProduct prices and availability are accurate as of the date/time indicated and are subject to change. Any price and availability information displayed on [relevant Amazon Site(s), as applicable] at the time of purchase will apply to the purchase of this product.)
Anycubic Kobra S1 Combo 3D Printer, 4 Stunning Multicolor with Anycubic ACE PRO, 600mm/s High Speed and 320℃ Hotend Free-Clog Extruder, Intelligent Drying While Printing, Built-in Camera 250*250*250mm
$599.99 (as of June 17, 2025 23:14 GMT +00:00 - More infoProduct prices and availability are accurate as of the date/time indicated and are subject to change. Any price and availability information displayed on [relevant Amazon Site(s), as applicable] at the time of purchase will apply to the purchase of this product.)