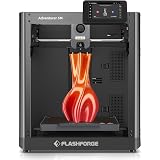
Anycubic Kobra S1 Combo 3D Printer, Multi-Color 3D Printer High Speed Max 600mm/s High Precision, Core XY Stable Structure Ultra-Quiet Printing Anycubic App One-Click Printing 250 * 250 * 250mm
$779.99 (as of May 7, 2025 20:40 GMT +00:00 - More infoProduct prices and availability are accurate as of the date/time indicated and are subject to change. Any price and availability information displayed on [relevant Amazon Site(s), as applicable] at the time of purchase will apply to the purchase of this product.)Hey there, thanks for tuning in to our video on TinkerCad. In this step-by-step tutorial, we’re going to show you how to turn a PNG or JPEG image into a 3D design. We’ll cover three main areas: converting the image into an SVG file, creating a snowflake ornament in Tinkercad using the SVG image, and exporting the design for 3D printing. So if you’re ready to get started, let’s dive right in!
For the first segment, we’ll guide you through the process of finding a snowflake image online, saving it as a PNG or JPEG file, and converting it into an SVG file using an online converter. In the second segment, we’ll show you how to import the SVG file into Tinkercad and design the rest of your snowflake. Finally, we’ll move on to the third segment where we’ll cover exporting the design and slicing it for 3D printing. Throughout the tutorial, we’ll provide tips and tricks to help you along the way. So grab your image and let’s turn it into a beautiful 3D design!

Converting Image to SVG
To begin creating your snowflake ornament in Tinkercad, the first step is to search for a snowflake image on the internet. Look for a snowflake design that you like and that fits the style you want for your ornament. Once you’ve found the perfect image, save it as a PNG or JPEG file on your computer. This will ensure that you have a copy of the image to work with in the next steps.
Now that you have the snowflake image saved, it’s time to convert it into an SVG file. SVG stands for Scalable Vector Graphics and is a file format commonly used in design programs. SVG files are ideal for creating 3D designs in Tinkercad. There are many online converters available that can help you convert your JPEG or PNG file into an SVG file. One popular option is the website image.online.convert.com. Simply upload your image, select the option to convert it to an SVG file, and the website will handle the conversion process for you. Once the conversion is complete, you can download your newly converted SVG file.
Importing SVG into Tinkercad
Now that you have your SVG file, you’re ready to import it into Tinkercad and start designing your snowflake ornament. Open Tinkercad and create a new project for your ornament. Once you’ve created a new project, locate the Import button in the toolbar. Click on the Import button and select the converted SVG file that you downloaded. Tinkercad will import the SVG file into your project.
After importing the SVG file, you may need to resize and adjust it to fit your desired design. Use the sizing and positioning tools in Tinkercad to make the necessary adjustments. You can also align the imported SVG file with other shapes or objects in your design to create a more intricate snowflake ornament.


Adding a Ring to the Design
To enhance your snowflake design, you can add a ring shape to it. You have two options for creating the ring in Tinkercad. You can either create the ring shape from scratch using Tinkercad’s shape generator tools, or you can choose an existing ring shape from Tinkercad’s shape library.
If you choose to create the ring from scratch, use the shape generator tools in Tinkercad to create a solid cylinder shape. Adjust the size of the cylinder to fit your design and use Tinkercad’s alignment tools to position and align the ring with the snowflake design.
If you prefer to choose an existing ring shape from Tinkercad’s shape library, simply drag and drop the ring shape onto your project. Resize and adjust the ring shape to fit the snowflake design. Again, use Tinkercad’s alignment tools to position and align the ring with the snowflake.
Exporting and Slicing for 3D Printing
Once you have finalized your snowflake design, it’s time to export it as an STL file and prepare it for 3D printing. In Tinkercad, go to the export menu and select the option to export your design as an STL file. Save the file on your computer.
Next, you’ll need to use a slicer software to prepare the STL file for 3D printing. One popular slicer software is Flashforge Products. Load the STL file into the slicer software and ensure that the snowflake is centered on the printing platform. This will help ensure that the snowflake is printed accurately.
Adjust the printing settings in the slicer software according to your preferences. You may need to enable or disable certain features such as supports or wraps, depending on the complexity of your snowflake design. Once you’ve adjusted the printing settings, save the sliced file to a drive or USB for printing.

Preparing for Printing
Before you start the 3D printing process, it’s important to prepare your 3D printer and the filament you’ll be using. Make sure your 3D printer is set up and functioning properly. Load the filament and ensure that it is properly inserted into the printer.
Slice and prepare the 3D model for printing using the settings provided in the slicer software. It’s important to note that the printing time and filament usage may vary depending on the size and complexity of your snowflake design. In general, a snowflake ornament of average size may take around 60 minutes to print and use approximately 10 grams of PLA filament.
Once you have prepared the 3D model for printing, start the printing process on your 3D printer. Monitor the print to ensure that it is progressing smoothly and make any necessary adjustments if needed.
Additional Snowflake Designs
If you’re looking for more snowflake designs to use or get inspiration from, you can explore Thingiverse under the name “Envisioned Robotics.” They have a collection of snowflake designs that you can browse through and potentially incorporate into your own project. Additionally, keep an eye out for other flexi models and upcoming tutorials from Envisioned Robotics that may be of interest to you.
With these steps and tips, you should now be able to convert an image into an SVG file, import it into Tinkercad, add a ring to the design, and prepare the design for 3D printing. Enjoy the process of creating your own unique snowflake ornament and let your creativity shine!
Welcome to our TinkerCad tutorial on how to turn a PNG/JPEG image into a 3D design! We appreciate you taking the time to watch this video. Throughout the video, we will guide you through three main steps:
-
Converting a JPEG/PNG snowflake image file into an SVG file suitable for import into Tinkercad. To do this, you can use a free image conversion tool such as the one provided here: FREE IMAGE Conversion
-
Once you have the SVG image of the snowflake, we will show you how to use it in Tinkercad to create an ornament. We will walk you through the process of importing the SVG file and using it as a reference to construct your 3D design.
-
Finally, we will demonstrate how to export the SVG image from Tinkercad to a slicer software, which will enable you to prepare the design for 3D printing. This step is crucial in ensuring that your ornament turns out just right.
To get started, make sure you have Tinkercad installed on your computer. If you haven’t already, you can access it through this link: TinkerCAD
Follow along with our step-by-step guide, and before you know it, you’ll have successfully transformed your 2D image into a 3D design!

ELEGOO Rapid PETG Filament 1.75mm Black 4KG, High Speed 30-600mm/s 3D Printer Filament Dimensional Accuracy +/- 0.02 mm, 1kg Cardboard Spool(2.2lbs) Fits for Most FDM 3D Printers
$47.96 (as of May 7, 2025 20:40 GMT +00:00 - More infoProduct prices and availability are accurate as of the date/time indicated and are subject to change. Any price and availability information displayed on [relevant Amazon Site(s), as applicable] at the time of purchase will apply to the purchase of this product.)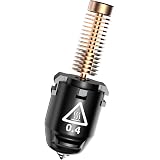
FLASHFORGE Adventurer 5M Nozzle, 0.4mm 280℃ High Flow 32mm³/s Nozzle for Stable High-Speed Printing, Adventurer 5M Pro Hotend, 3S Quick-Detachable Nozzle
$35.00 (as of May 7, 2025 20:40 GMT +00:00 - More infoProduct prices and availability are accurate as of the date/time indicated and are subject to change. Any price and availability information displayed on [relevant Amazon Site(s), as applicable] at the time of purchase will apply to the purchase of this product.)
Creality Ender 3 V3 SE 3D Printer, 250mm/s Faster FDM 3D Printers with CR Touch Auto Leveling, Sprite Direct Extruder Auto-Load Filament Dual Z-axis & Y-axis, Printing Size 8.66 * 8.66 * 9.84 inch
$229.00 (as of May 7, 2025 20:40 GMT +00:00 - More infoProduct prices and availability are accurate as of the date/time indicated and are subject to change. Any price and availability information displayed on [relevant Amazon Site(s), as applicable] at the time of purchase will apply to the purchase of this product.)
QIDI PLUS4 3D Printer, Max 600mm/s High-Speed Printing, 65℃ Chamber Heat, Fully Auto Leveling, 370°C Direct Extruder with Integrated Nozzle, Support PPS-CF Filaments, Large Print Size 12"x12"x11"
$799.00 (as of May 7, 2025 20:40 GMT +00:00 - More infoProduct prices and availability are accurate as of the date/time indicated and are subject to change. Any price and availability information displayed on [relevant Amazon Site(s), as applicable] at the time of purchase will apply to the purchase of this product.)