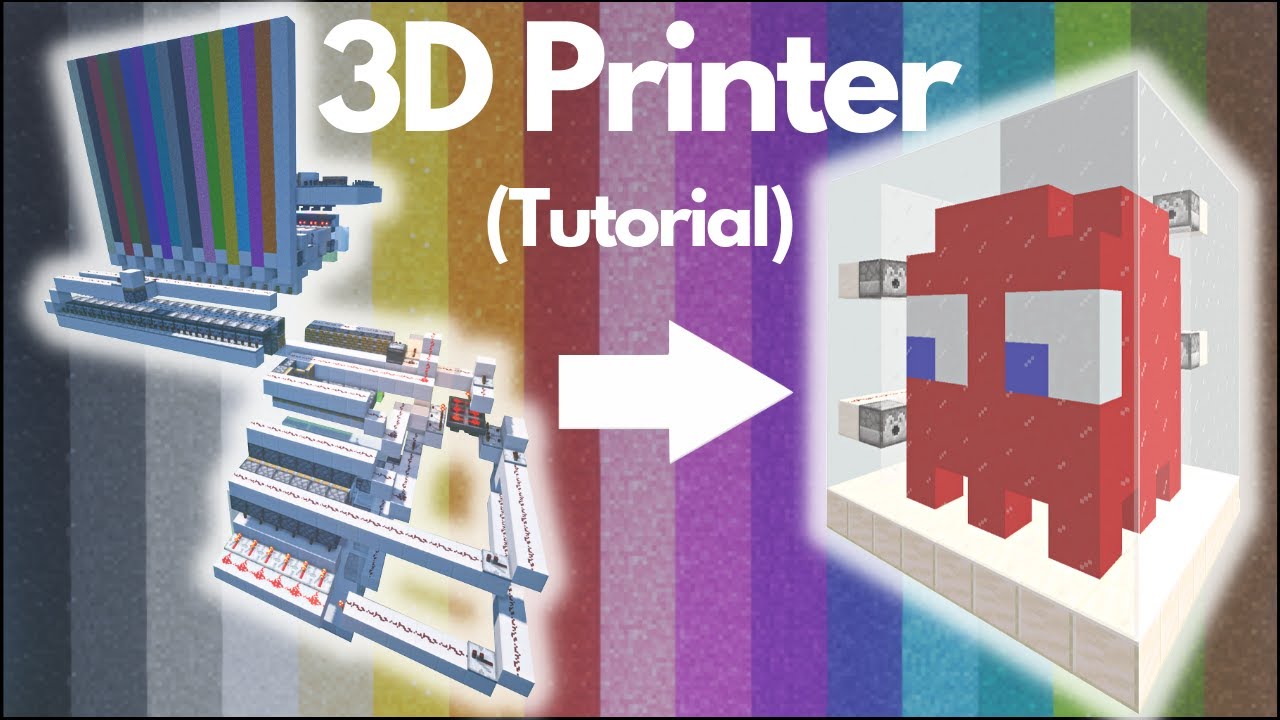
Anycubic 3D Printer Kobra S1 Combo, Multi-Color 3D Printer Max 600mm/s High Speed Printing High Precision, Works Right Out of Box Sealed Storage Intelligent Mult-Filament Drying 9.8"x9.8"x9.8"
$599.99 (as of June 18, 2025 23:32 GMT +00:00 - More infoProduct prices and availability are accurate as of the date/time indicated and are subject to change. Any price and availability information displayed on [relevant Amazon Site(s), as applicable] at the time of purchase will apply to the purchase of this product.)The article titled “Top 10 3D Printing Tips THAT WILL CHANGE YOUR LIFE! (April Fools 2023)” by Nero3D the Canuck Creator is a highly anticipated guide for 3D printing enthusiasts. The article provides a comprehensive overview of essential tips and tricks for successful 3D printing. Covering topics such as proper tool usage, lost history surrounding the Allen key, the use of magnets, and the basics of printer maintenance and assembly, this article aims to educate readers on both basic and advanced techniques for maximizing the potential of their 3D printers. Additionally, the article introduces voice control as a novel method for controlling 3D printers and suggests building a 3D printer with a magnetic flex plate for a unique maglev effect and vacuum pump situation. The article concludes with a teaser for the upcoming video on powder coating with tungsten carbide filament, leaving readers eager for more valuable insights and knowledge in the field of 3D printing. Overall, this article promises to be a valuable resource for 3D printing enthusiasts looking to enhance their printing experience and expand their knowledge in the field.
The author, Nero3D the Canuck Creator, presents the information in an engaging and informative manner, providing anecdotal historical facts alongside practical tips for improving 3D printing processes. Throughout the article, Nero3D encourages readers to join the Discord community, support the channel, and explore merchandise options. By using a mixture of humor and technical expertise, this article aims to captivate readers and provide them with invaluable knowledge and techniques that can transform their 3D printing experiences.
Proper Tool Use
Choosing the right tools for 3D printing
When it comes to 3D printing, using the right tools is crucial for achieving accurate and high-quality prints. The first step in choosing the right tools is to consider the specific requirements of your 3D printer. Different printers may require different types of tools for maintenance and assembly.
Some common tools that are commonly used in 3D printing include:
-
Allen keys: These are essential for tightening screws and bolts during printer assembly or maintenance. It’s important to tighten them until you hear a slight crack and then back off a quarter turn to avoid over-tightening.
-
Bubble level: This tool is used to ensure that the printer bed is properly leveled. Leveling the bed is important for achieving even and consistent prints.
-
Magnetic flex plate: Many modern 3D printers use magnetic flex plates for easy removal of printed objects. These plates make it easier to remove prints without damaging them.
-
Filament spool mount: Properly mounting the filament spool is crucial for preventing nozzle leaks. Mounting it in a clockwise direction helps to minimize torsional forces on the nozzle and ensures a secure connection.
Using tools safely and effectively
While using tools is an important part of the 3D printing process, it’s equally important to use them safely and effectively. Here are some tips for using tools in a safe and efficient manner:
-
Read the user manuals: Always read the user manuals and instructions provided by the tool manufacturers. This will help you understand the proper usage and safety precautions for each tool.
-
Wear protective gear: When working with tools, it’s important to protect yourself from potential hazards. Wear safety goggles, gloves, and other protective gear as required.
-
Use tools for their intended purpose: Each tool is designed for a specific purpose. Avoid using tools for tasks they were not designed for, as this can lead to damage or injury.
-
Store tools properly: After using the tools, store them in a safe and organized manner. This will prevent accidents and ensure that the tools remain in good condition.
-
Regularly inspect and maintain tools: Inspect your tools regularly for any signs of wear or damage. Replace damaged tools immediately and maintain them according to the manufacturer’s recommendations.
By choosing the right tools and using them safely and effectively, you can ensure that your 3D printing process is efficient and successful.
Lost History
Exploring the origins of 3D printing
The history of 3D printing dates back to the 1980s when the concept of additive manufacturing first emerged. However, the origins of 3D printing can be traced back even further. It is believed that the foundations of 3D printing were laid in the 1950s, when scientists began experimenting with techniques that would later contribute to the development of modern 3D printing.
In 1971, a French engineer named Alain Le Méhauté filed the first patent for a process called “stereolithography,” which involved creating three-dimensional objects by solidifying layers of photopolymers using UV light. This process laid the groundwork for what would become one of the most popular types of 3D printing: resin-based stereolithography.
Throughout the 1980s and 1990s, various advancements in 3D printing technologies took place, including the development of selective laser sintering (SLS) and fused deposition modeling (FDM). These technologies enabled the printing of functional prototypes and complex parts, opening up new possibilities for manufacturing and design.
Discovering forgotten techniques and innovations
While the history of 3D printing is well-documented, there are still many forgotten techniques and innovations that have fallen into obscurity. Exploring these lost histories can provide valuable insights into the evolution of 3D printing and inspire new developments in the field.
For example, the development of powder-based 3D printing techniques in the 1990s laid the foundation for a range of applications, including rapid prototyping and metal printing. However, many of these early powder-based processes have been overshadowed by newer technologies.
By researching and rediscovering these forgotten techniques, we can gain a deeper understanding of the possibilities and limitations of 3D printing. This knowledge can inform future advancements and help expand the capabilities of this rapidly evolving technology.
")
Find 3D Printing Accessories Here
Magnets in 3D Printing
Understanding the role of magnets in 3D printing
Magnets play a crucial role in 3D printing, contributing to enhanced functionality and ease of use. One of the most common applications of magnets in 3D printing is the use of magnetic build plates or flexible magnetic sheets.
Magnetic build plates offer several advantages over traditional build surfaces. They provide a secure and stable platform for printing, ensuring that the printed object adheres firmly to the surface. This minimizes the risk of warping or detachment during the printing process.
Additionally, magnetic build plates make it easier to remove prints once they are completed. Instead of struggling to pry the print off the build plate, users can simply detach the magnetic plate and flex it to release the print. This not only saves time but also helps prevent damage to delicate or intricate prints.
Utilizing magnetic systems for enhanced functionality
In addition to magnetic build plates, magnets can be used in various other aspects of 3D printing to enhance functionality and convenience. Some examples include:
-
Magnetic filament holders: Instead of using traditional spool holders, which require manual feeding of the filament, magnetic filament holders can automatically guide and feed the filament into the extruder. This makes filament changes quicker and more efficient.
-
Magnetic tool holders: Keeping tools and accessories organized is essential for effective 3D printing. Magnetic tool holders can be attached to the printer frame or workspace to securely hold tools such as Allen keys, tweezers, or scrapers within easy reach.
-
Magnetic bed leveling systems: Leveling the printer bed is a critical step in achieving accurate and consistent prints. Magnetic bed leveling systems use magnets and adjustable screws to make the leveling process quicker and more precise.
By incorporating magnets into various aspects of 3D printing, users can enjoy enhanced functionality, improved convenience, and streamlined workflows.
Join the 3D Printing Community
Benefits of joining 3D printing communities
Joining 3D printing communities offers numerous benefits for enthusiasts and professionals alike. These communities provide platforms for sharing knowledge, seeking advice, and participating in collaborative projects. By becoming part of a 3D printing community, you can:
-
Learn from experienced users: 3D printing communities are populated by a diverse group of individuals with varying levels of expertise. By engaging with these communities, you can learn from experienced users who can provide valuable insights and tips.
-
Stay updated on the latest trends and technologies: 3D printing is a rapidly evolving field, with new technologies and techniques constantly emerging. Being part of a community allows you to stay up to date with the latest developments and trends.
-
Seek advice and troubleshooting assistance: If you encounter issues or have questions about your 3D printer, the community can provide invaluable assistance. From troubleshooting common problems to offering suggestions for improving print quality, the collective knowledge of the community can be a valuable resource.
Getting involved in online forums and groups
One of the easiest ways to join the 3D printing community is by participating in online forums and groups. These platforms provide spaces for discussions, sharing projects, and seeking advice. Some popular online forums and groups include:
-
Reddit: The r/3Dprinting subreddit is a vibrant community where users share their prints, ask questions, and offer guidance.
-
Facebook Groups: There are numerous Facebook groups dedicated to 3D printing, covering a wide range of topics and interests. Joining these groups can connect you with like-minded individuals and provide opportunities for collaboration.
-
Discord: Discord servers dedicated to 3D printing offer real-time discussions and collaboration opportunities. These servers often host events, contests, and workshops that further enrich the community experience.
Supporting and collaborating with fellow enthusiasts
Being part of a 3D printing community is not just about taking knowledge and advice—it’s also about giving back and supporting fellow enthusiasts. Collaboration is a key aspect of the community, and there are various ways to get involved:
-
Sharing your knowledge and experiences: If you have expertise in a particular area or have successfully overcome a challenge, sharing that knowledge with the community can be immensely valuable to others.
-
Participating in collaborative projects: Many 3D printing communities organize collaborative projects, where members work together to design and create objects. Participating in these projects can be a great way to learn new skills, expand your network, and contribute to the community.
-
Offering assistance and feedback: If you see someone struggling with a problem or seeking advice, offering a helping hand or providing constructive feedback can make a world of difference. Your support can inspire others and foster a sense of camaraderie within the community.
By actively participating in the 3D printing community, you can not only enhance your own skills and knowledge but also contribute to the growth and development of the field as a whole.
")
Printer Maintenance and Assembly
Essential steps for maintaining a 3D printer
Proper maintenance is essential for keeping your 3D printer in optimal condition and ensuring consistently high-quality prints. While specific maintenance requirements may vary depending on the printer model, there are several essential steps that apply universally:
-
Regular cleaning: Dust and debris can accumulate on various parts of the printer, including the print bed, extruder nozzle, and cooling fans. Regularly clean these components to ensure smooth operation and prevent obstructions.
-
Lubrication: Moving parts, such as the linear rails and lead screws, may require regular lubrication to reduce friction and prevent wear. Consult the manufacturer’s guidelines to determine the appropriate lubricant and interval for lubrication.
-
Belt tensioning: Over time, the belts that drive the printer’s motion may loosen or stretch. Check the tension of the belts regularly and adjust them as needed to maintain accurate and precise movements.
-
Nozzle cleaning or replacement: The extruder nozzle can become clogged with debris or old filament. Regularly clean the nozzle using the appropriate cleaning methods or replace it if necessary to ensure proper extrusion.
-
Firmware updates: Manufacturers may release firmware updates to improve printer performance or add new features. Stay up to date with these updates and apply them as recommended by the manufacturer.
Tips for proper printer assembly
Proper assembly is crucial for ensuring that your 3D printer functions optimally and produces high-quality prints. While the assembly process may vary depending on the printer model, here are some general tips to keep in mind:
-
Read the instructions: Carefully read and follow the manufacturer’s assembly instructions to ensure that you assemble the printer correctly. Each printer model may have specific requirements and nuances that you need to be aware of.
-
Organize your parts: Before starting the assembly process, organize all the parts and components you will need. This will help you stay organized and prevent any missing or misplaced parts.
-
Take your time: Assembly can be a time-consuming process, especially for those new to 3D printing. Take your time, follow each step carefully, and double-check your work to avoid mistakes or missing steps.
-
Seek assistance if needed: If you encounter difficulties or have questions during the assembly process, don’t hesitate to seek assistance. Consult the manufacturer’s support resources or reach out to the 3D printing community for guidance.
By following proper maintenance practices and taking care during assembly, you can ensure the longevity and optimal performance of your 3D printer.
The Fascinating Story of the Allen Key
Uncovering the history and significance of the Allen key
The Allen key, also known as the hex key or hex wrench, is a ubiquitous tool in the realm of 3D printing and beyond. Its simple yet effective design makes it a versatile tool for assembling and maintaining various objects and devices. But where does the Allen key come from, and what is its connection to Ikea and 3D printing?
The history of the Allen key can be traced back to Jørgen Jørgensen, a Danish engineer who invented it in the early 20th century. The tool was originally patented in 1913 and was used primarily in the automotive industry. Its unique hexagonal shape provided a more secure grip and torque compared to traditional screwdrivers.
Fast forward to the mid-20th century, and the Allen key found its way into the world of furniture assembly through the ingenuity of Ingvar Kamprad, the founder of Ikea. Kamprad recognized the need for a simpler and more efficient way to assemble furniture, and the Allen key proved to be the perfect solution.
By designing furniture with pre-drilled holes and using Allen key screws, Ikea revolutionized the furniture industry. The Allen key became an iconic symbol of Ikea’s flat-pack furniture and its commitment to simplicity and affordability.
The Allen key’s influence extended far beyond Ikea, becoming a staple tool in various industries, including 3D printing. Many 3D printers utilize Allen keys for assembling frames, tightening screws, and making adjustments. The tool’s versatility and ease of use make it a must-have for any 3D printing enthusiast’s toolbox.
Exploring its connection to Ikea and 3D printing
The adoption of the Allen key by Ikea and its subsequent impact on the world of furniture assembly significantly contributed to its prevalence in the 3D printing community. The popularity of Ikea furniture and its reliance on the Allen key as a primary assembly tool led to its widespread availability and affordability.
3D printers, often known for their open-source nature and DIY ethos, embraced the Allen key as a standard tool for building and maintaining printers. Many printer kits and components include Allen keys in various sizes, ensuring compatibility with different types of screws and bolts used in 3D printers.
The Allen key’s connection to Ikea and 3D printing highlights the interconnectedness of different industries and the cross-pollination of ideas and technologies. As 3D printing continues to evolve and impact various sectors, it is fascinating to see how a simple tool like the Allen key has left its mark on the industry.
Preventing Nozzle Leaks
Identifying common causes of nozzle leaks
Nozzle leaks can be a frustrating and common issue in 3D printing. These leaks can lead to poor print quality, clogged nozzles, and wasted filament. Identifying the common causes of nozzle leaks is essential for preventing them and maintaining a smooth printing process.
One of the primary causes of nozzle leaks is improper mounting of the filament spool. When a spool is mounted in the counterclockwise direction, the torsional forces of the unwinding filament, combined with the extruder’s torque, can cause the nozzle to unscrew itself over time. This leads to leaks and inconsistent extrusion.
To prevent nozzle leaks caused by filament spool mounting, always make sure to mount the spool in a clockwise direction. This ensures that the torsional forces and extruder torque work in the same direction, preventing the nozzle from unscrewing.
Another cause of nozzle leaks is improper installation or tightening of the nozzle itself. If the nozzle is not tightened sufficiently, filament can leak out during printing. On the other hand, over-tightening the nozzle can result in damaged threads or a deformed nozzle profile, leading to leaks.
Regularly inspecting the nozzle and ensuring it is properly tightened is crucial for preventing leaks. Consult the manufacturer’s guidelines for recommended tightening torque and follow them closely.
Ensuring proper mounting of filament spool
Proper mounting of the filament spool is essential for preventing nozzle leaks and maintaining a smooth printing process. By following these steps, you can ensure that the filament spool is mounted correctly:
-
Check the direction: Before mounting the spool, make sure to identify the correct mounting direction. In most cases, the filament should unwind in a clockwise direction.
-
Align the spool holder: Align the spool holder with the printer’s filament path. This ensures that the filament feeds smoothly into the extruder without any obstructions or twists.
-
Secure the spool: Once aligned, secure the spool onto the mount or holder. Ensure that it is firmly attached and does not wobble or move during printing.
-
Check the tension: While printing, monitor the tension of the filament as it unwinds from the spool. If the tension is too high, it can lead to filament jams or nozzle clogs. Adjust the tension as necessary to maintain a smooth and consistent flow.
By paying attention to the mounting direction, alignment, and tension of the filament spool, you can prevent nozzle leaks and ensure a reliable and hassle-free printing experience.
Leveling the Printer Bed
Benefits of a leveled printer bed
Achieving a level printer bed is crucial for ensuring consistent print quality and adherence. A leveled bed plays a fundamental role in successful 3D printing by providing a stable foundation for the first layer of the print.
Some benefits of a leveled printer bed include:
-
Consistent layer height: A leveled bed ensures a consistent layer height throughout the print. This is important for maintaining the desired print dimensions and overall print quality.
-
Proper adhesion: A leveled bed allows the first layer of the print to adhere evenly to the print surface. This prevents warping, lifting, and other issues that can arise from an uneven bed.
-
Improved print accuracy: With a leveled bed, the printer’s movements remain consistent across the build surface. This leads to improved print accuracy and better overall print quality.
Using a bubble level for accurate bed leveling
While there are various methods for leveling a printer bed, using a bubble level can provide a simple yet effective solution. Here’s how to level your printer bed using a bubble level:
-
Prepare your printer: Before starting the leveling process, ensure that your printer is powered on and warmed up to the desired printing temperature. This allows for accurate leveling since the printer components will expand to their operating dimensions.
-
Place the bubble level: Place a bubble level on top of your printer bed, ensuring that it sits flat and does not wobble. Position it in a way that allows you to easily read the bubble.
-
Adjust the bed leveling screws: Most printers have screws located beneath the print bed that can be used to adjust its height. Use a wrench or the appropriate tool to turn these screws and level the bed. Refer to your printer’s manual or manufacturer guidelines for specific instructions on adjusting the bed.
-
Leveling process: Begin by adjusting one corner of the bed, using the bubble level as a guide. Slowly turn the corresponding screw until the bubble is centered within the level. Repeat this process for the other three corners of the bed, ensuring that each corner is leveled to the same degree.
-
Fine-tuning: After leveling the four corners, make adjustments to fine-tune the bed level. Gradually test the levelness by moving the bubble level to different positions on the bed and monitoring the bubble’s position. Continue adjusting the screws as necessary until the bed is level across its entire surface.
By regularly leveling your printer bed using a bubble level, you can ensure consistent print quality and avoid issues related to an uneven bed.
Voice Control for Your 3D Printer
Exploring the advantages of voice-controlled printing
Voice control has emerged as a new and exciting way to control 3D printers. By integrating voice control systems, such as Clipper with GPT Integration, users can operate their printers using simple voice commands. This technology offers various advantages and opens up new possibilities for 3D printing.
Some benefits of voice-controlled printing include:
-
Hands-free operation: With voice control, users can operate their printers without the need for physical input or touchscreens. This enables a hands-free workflow, allowing users to multitask or focus on other tasks while the printer is in operation.
-
Increased accessibility: Voice control makes 3D printing more accessible to individuals with physical limitations or disabilities. By eliminating the need for manual input, individuals with limited mobility can still enjoy the creative and technical aspects of 3D printing.
-
Streamlined workflow: Voice commands can simplify the printing process by eliminating the need to navigate through complex menus or interfaces. Users can simply vocalize their commands, making the process more intuitive and efficient.
-
Future potential: Voice control technology is still evolving, and its integration with 3D printing opens up exciting possibilities for the future. As the technology becomes more advanced, users may be able to control various aspects of the printing process, such as selecting print settings, adjusting temperatures, or even designing prints using voice commands.
Setting up voice control systems for 3D printers
To set up voice control systems for 3D printers, users need compatible hardware and software. Here’s a general overview of the setup process:
-
Hardware requirements: Voice control systems typically require a microphone input. This can be achieved through a built-in microphone on a webcam or by connecting an external microphone to the printer’s control board.
-
Software requirements: One of the popular voice control systems for 3D printers is Clipper with GPT Integration. This software integrates natural language processing capabilities into 3D printers, enabling voice control. Ensure that your printer’s firmware is compatible with the voice control software.
-
Configuration: Configure your printer’s firmware and the voice control software according to the manufacturer’s instructions and guidelines. This may involve installing additional plugins or making changes to the printer’s configuration files.
-
Testing and calibration: Once the voice control system is set up, perform calibration and testing to ensure its accuracy and responsiveness. Make adjustments as necessary to optimize the system’s performance.
It’s important to note that voice control systems are still evolving, and their integration with 3D printing is relatively new. Users should stay updated with the latest advancements in voice control technology to make the most of its capabilities and features.
Teaser for Next Video: Powder Coating with Tungsten Carbide Filament
Introduction to powder coating in 3D printing
Powder coating is a popular and versatile finishing technique used in various industries to provide durable and attractive coatings to objects. In the context of 3D printing, powder coating offers a unique opportunity to enhance the aesthetics and performance of printed parts.
In the upcoming video, we will explore the world of powder coating in 3D printing. We will dive into the techniques and materials involved in achieving professional-level powder coatings on 3D printed objects.
Exploring the capabilities of tungsten carbide filament
Tungsten carbide filament is a cutting-edge material that offers exceptional hardness, wear resistance, and thermal conductivity. In the next video, we will showcase the capabilities of tungsten carbide filament when used in conjunction with powder coating techniques.
By combining the durability and unique properties of tungsten carbide filament with powder coatings, users can create 3D printed objects with superior strength, wear resistance, and aesthetic appeal.
Stay tuned for our next video, where we will demonstrate the process of powder coating with tungsten carbide filament and delve into the countless possibilities it offers for 3D printing applications.
In conclusion, this comprehensive guide has explored various aspects of 3D printing, from proper tool use and maintenance to the history of the Allen key and the exciting world of magnets in 3D printing. By understanding these topics and staying engaged with the 3D printing community, enthusiasts and professionals can unlock the full potential of this transformative technology.
Maintain Your 3D Printer with these Tools

OVERTURE PETG 3D Printer Filament 1.75mm, Neatly Wound Durable PETG 1kg Spool (2.2lbs), Strong Toughness Filament, Dimensional Accuracy +/- 0.02mm, Fit Most FDM Printers (Black (1-Pack))
$15.99 (as of June 18, 2025 23:32 GMT +00:00 - More infoProduct prices and availability are accurate as of the date/time indicated and are subject to change. Any price and availability information displayed on [relevant Amazon Site(s), as applicable] at the time of purchase will apply to the purchase of this product.)
SUNLU PLA Plus Filament 1.75mm Black 1KG, Neatly Wound 3D Printer Filament 1.75mm, PLA+ 1000g, Dimensional Accuracy +/- 0.02 mm, Fit Most FDM 3D Printers, 1kg Spool (2.2lbs), Black
$14.99 (as of June 18, 2025 23:32 GMT +00:00 - More infoProduct prices and availability are accurate as of the date/time indicated and are subject to change. Any price and availability information displayed on [relevant Amazon Site(s), as applicable] at the time of purchase will apply to the purchase of this product.)
3D Scanning Marker & Turntable Kit – 6.0mm Inner Diameter Adhesive Dots with Auto Rotating Turntable, 600 Reference Markers for Handheld 3D Scanners, Reverse Engineering & Metrology
(as of June 18, 2025 23:32 GMT +00:00 - More infoProduct prices and availability are accurate as of the date/time indicated and are subject to change. Any price and availability information displayed on [relevant Amazon Site(s), as applicable] at the time of purchase will apply to the purchase of this product.)
Creality 3D Scanner Raptor Pro for Automotive & Engineering Projects with Metrology-Grade 0.02mm Accuracy,22+7 Blue Laser,Anti-Shake Tracking,Up to 60FPS Scanning Speed Support 5-2000mm Objects
$1,899.00 (as of June 18, 2025 23:32 GMT +00:00 - More infoProduct prices and availability are accurate as of the date/time indicated and are subject to change. Any price and availability information displayed on [relevant Amazon Site(s), as applicable] at the time of purchase will apply to the purchase of this product.)