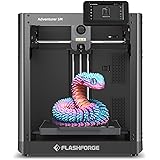
FLASHFORGE Adventurer 5M 3D Printer with Fully Auto Leveling, Max 600mm/s High Speed Printing, 280°C Direct Extruder with 3S Detachable Nozzle, Core XY All Metal Structure, Print Size 220x220x220mm
$259.00 (as of June 18, 2025 23:32 GMT +00:00 - More infoProduct prices and availability are accurate as of the date/time indicated and are subject to change. Any price and availability information displayed on [relevant Amazon Site(s), as applicable] at the time of purchase will apply to the purchase of this product.)In embarking on the study of 3D modeling using Blender, one encounters a comprehensive guide specifically tailored for absolute beginners. This tutorial is meticulously structured to walk you through the process of creating a low poly girl character, offering an accessible entry point into the world of 3D design. By focusing on the essential functionalities of Blender, it demystifies the complex software suite and enables users to gain practical experience from the initial setup to the final rendering.
The article outlines the journey, beginning with downloading and installing Blender, progressing through understanding its user interface and basic navigation, and advancing to object manipulation and modeling specific body parts. To aid in learning, it provides detailed steps for actions such as adding and modifying objects and applying materials and lighting. Moreover, chapter bookmarks enhance the tutorial’s usability, allowing viewers to easily revisit crucial segments. This systematic approach ensures that by the conclusion, learners can confidently produce a simple, yet polished, 3D model.
Downloading and Installing Blender
embarking on your 3D modeling journey begins with getting the right software. Blender is a powerful, free 3D software application that you can download and install easily. Below are the step-by-step instructions to get Blender up and running on your computer.
Visit blender.org
First, open your preferred internet browser and navigate to the official Blender website, which is “blender.org.” This site is the most reliable source for downloading the software, ensuring that you get the latest, official version.
Choose the Appropriate Version for Your Operating System
On the Blender homepage, locate the ‘Download’ button. Clicking on this will take you to a page where you can choose the appropriate version for your operating system. Blender offers downloads for Windows, macOS, and Linux. Make sure to select the correct version based on what system you’re using.
Download and Install Blender
After choosing the appropriate version, click the download button to start downloading the installation file. Once the download is complete, open the file. For Windows users, this will be a .exe file, while macOS users will have a .dmg file, and Linux users will have a .tar.xz file. Follow the on-screen instructions to install Blender. It is a straightforward process that does not require any additional plugins or software.
Open Blender After Installation
After successfully installing Blender, locate the application icon on your desktop or application folder, and open it. The first time you launch Blender, you’ll see a welcoming splash screen. From here, click on the “General” layout to get started with your 3D modeling journey.
Understanding Blender’s Interface
Getting acclimated to Blender’s interface is critical for efficient workflow. The interface is divided into various components, each serving a specific purpose.
Overview of the 3D Viewport
The 3D Viewport is the central area of Blender’s interface where all the modeling action happens. It is the interactive window where you can view, add, and manipulate objects in your 3D scene. The viewport can be navigated using various tools and shortcuts that allow you to orbit, pan, and zoom into different sections of your scene.
Explaining the Scene Outliner
On the right side of the interface is the Scene Outliner, an organizational tool that lists all the objects present in your scene. It helps in managing the hierarchy and relationships between objects, making it easier to select and organize them. You can also rename objects and arrange them into collections for better management.
Navigating the Properties Panel
Below the Scene Outliner, you will find the Properties Panel. This panel provides a wide range of options and settings associated with the selected object or scene elements. For example, you can adjust the material properties, physics settings, and object transformations. Understanding this panel will help you manipulate the finer details of your 3D models.
Using the Timeline for Basic Operations
At the bottom of the interface lies the Timeline, mainly used for animation but also useful for tracking changes in your scene. The Timeline allows you to move through frames of your animation or to set keyframes for various properties. For now, knowing its location and basic use will be sufficient.

Find 3D Printing Accessories Here
Basic Navigation in Blender
Blender’s navigation system allows you to easily inspect and manipulate your 3D models. Here are the fundamental navigational controls you need to know.
Orbiting, Panning, and Zooming Using the Middle Mouse Button
To navigate the 3D viewport, the middle mouse button (MMB) is essential. Holding down the MMB while moving your mouse will orbit around the scene. To pan the viewport, hold down Shift + MMB and move your mouse. Scrolling the MMB zooms in and out, allowing for closer inspection or wider views of your scene.
Switching Views Using the Number Pad
Blender allows you to quickly switch between different views using the number pad on your keyboard. For example, pressing 1 changes the view to the front view, pressing 3 switches to the right view, and pressing 7 goes to the top view. Combining Ctrl with these keys will switch you to the opposite view, e.g., Ctrl + 1 for the back view.
Understanding Orthographic vs. Perspective View
Blender supports two primary view modes: orthographic and perspective. Perspective view mimics how humans see the world, with objects appearing smaller as they get farther away. This is activated by pressing Numpad 5. Orthographic view, on the other hand, presents objects without this foreshortening, useful for technical modeling and aligning objects. You can toggle between these modes with Numpad 5.
Setting Up Reference Images
Reference images are vital for accurate and effective modeling, especially for beginners. They serve as blueprints guiding your 3D creation process.
Importance of Reference Images for Modeling
Reference images provide visual guidance, ensuring that proportions and details are accurate. They are particularly useful in character modeling, helping to maintain consistency across different viewpoints.
Importing Reference Images into Blender
To import reference images, go to the Add menu by pressing Shift + A and select Image > Reference. Navigate to your image file and open it. The image will appear in your scene aligned to your current view.
Adjusting the Opacity and Alignment of Reference Images
Once imported, you can adjust the opacity through the Properties Panel, making it semi-transparent, which can be helpful when tracing over the image. Align the image by entering ‘Edit Mode’ with the image selected, and use the G, R, and S keys to move, rotate, and scale the image into position.
Setting Up Reference Images in Different Orthographic Views
It is common to use multiple reference images from different views such as front, side, and top. Align these images in their respective orthographic views to create a comprehensive blueprint for your model. For instance, use the front view for a front reference image and align a side view image when in the right view.

Adding Basic Shapes and Objects
Adding and manipulating basic shapes is the foundation of 3D modeling in Blender.
Using the Shift + A Command to Add New Objects
Pressing Shift + A opens the Add menu, from which you can add various types of objects including meshes, lights, cameras, and more. For basic modeling, you will frequently add mesh objects.
Adding Primitive Shapes like Cubes and Spheres
In the Add menu, navigate to Mesh and select from a variety of primitive shapes like cubes, spheres, and cylinders. These primitives serve as the starting point for more complex models.
Understanding the 3D Cursor and Its Function
The 3D cursor is a point in the 3D Viewport that determines where new objects are added. It can be moved by left-clicking or by using the Shift + S command to snap it to different locations.
Resetting the 3D Cursor to the World Origin with Shift + S
Often, you will want to reset the 3D cursor to the world origin (0,0,0) to maintain consistency. Press Shift + S and choose ‘Cursor to World Origin’ to achieve this.
Object Manipulation
Manipulating objects efficiently is crucial for shaping your models.
Moving Objects Using the G Key
Select an object and press G to move it freely. To constrain the movement to a specific axis, press G followed by X, Y, or Z.
Rotating Objects with the R Key
Press R to enter rotation mode, allowing you to rotate the selected object. Similar to the move command, you can constrain rotation to specific axes by pressing R followed by X, Y, or Z.
Scaling Objects Using the S Key
Press S to scale an object uniformly. Again, pressing S followed by one of the axis keys will constrain the scaling to that specific axis.
Axis-Specific Transformations (G + X/Y/Z for Directional Movement)
Combining the G, R, and S keys with axis constraints (X, Y, Z) allows for precise transformations. For instance, pressing G followed by Y will move the object along the Y-axis only.

Modeling the Low Poly Girl Character
Starting with the Body: Creating and Shaping the Torso
Begin by adding a cube (Shift + A > Mesh > Cube). Enter ‘Edit Mode’ by pressing Tab, and use scaling (S) and extrusion (E) to shape the cube into a torso. Use loop cuts (Ctrl + R) to add additional geometry, allowing for more detailed shaping.
Modeling Legs and Feet: Using Extrusion and Scaling
Extrude the bottom faces of the torso to form the legs. Adjust the vertices using scaling and moving tools to create the leg shape. For the feet, extrude the bottom faces of the legs and shape them accordingly.
Creating Arms and Hands: Detailed Steps for Limb Modeling
Select the side faces of the torso and extrude them to form the arms. Use loop cuts and extrusion to shape the arms and hands. Remember to use scaling and moving tools to adjust the proportions.
Modeling the Head: Basic Shape and Facial Features
Add a new sphere for the head, position it above the torso, and enter ‘Edit Mode.’ Shape the sphere into a head by moving and scaling vertices. Create basic facial features such as the eyes and mouth using simple extrusions and cutting techniques.
Adding Ears and Hair: Final Touches for the Character
For the ears, extrude and shape faces from the sides of the head. For the hair, add a new object like a cube or sphere, position it appropriately, and shape it using scaling, moving, and extrusion to resemble stylized hair.
Using Modifiers for Efficiency
Modifiers are powerful tools in Blender that help streamline your modeling process.
Applying the Mirror Modifier for Symmetry
Add a Mirror Modifier to your model to ensure symmetry across the desired axis. This is crucial for ensuring both sides of your model remain identical.
Using the Subdivision Surface Modifier for Smoothness
Add a Subdivision Surface Modifier to smooth out your model. This modifier increases the polygon count, making the object look more rounded and organic.
Understanding the Clip Function in the Mirror Modifier
Enable the Clip function in the Mirror Modifier to ensure that vertices on the mirrored axis do not move through each other, maintaining a clean and symmetrical model.

Adding Materials and Basic Lighting
Applying Basic Colors and Materials through the Properties Panel
Select your object and navigate to the Properties Panel and the Materials tab. Click ‘New’ to create a new material and use color pickers and sliders to apply basic colors and properties.
Adding Area Lights to the Scene
To illuminate your scene, press Shift + A and add Area Lights. Position these lights to ensure your model is well-lit.
Adjusting Light Properties such as Power and Size
Select the lights and adjust their properties in the Properties Panel. Increase or decrease the power and size to achieve the desired lighting effect.
Conclusion
Creating a low poly girl character in Blender provides a solid foundation for understanding the basics of 3D modeling. Regular practice is key to mastery, and exploring advanced features like animation and rigging can further enhance your skills. Continue to follow tutorials and engage with the Blender community to keep learning and improving. Thank you for embarking on this creative journey, and best of luck in your 3D modeling adventures!
Maintain Your 3D Printer with these Tools
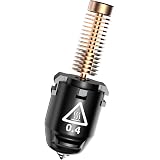
FLASHFORGE Adventurer 5M Nozzle, 0.4mm 280℃ High Flow 32mm³/s Nozzle for Stable High-Speed Printing, Adventurer 5M Pro Hotend, 3S Quick-Detachable Nozzle
$35.00 (as of June 18, 2025 23:32 GMT +00:00 - More infoProduct prices and availability are accurate as of the date/time indicated and are subject to change. Any price and availability information displayed on [relevant Amazon Site(s), as applicable] at the time of purchase will apply to the purchase of this product.)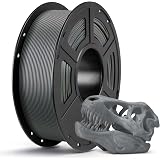
ANYCUBIC PLA 3D Printer Filament, 3D Printing PLA Filament 1.75mm Dimensional Accuracy +/- 0.02mm, 1KG Spool (2.2 lbs), Texture Grey
$11.89 (as of June 18, 2025 23:32 GMT +00:00 - More infoProduct prices and availability are accurate as of the date/time indicated and are subject to change. Any price and availability information displayed on [relevant Amazon Site(s), as applicable] at the time of purchase will apply to the purchase of this product.)
TOSUKKI 6mm Positioning Targets with Black Contour for 3D Scaner,3D scanning Markers/Dots/Stickers,Reference Point Markers/Reflection Markers/for 3D Scaning and Optical Tracking(1200 Per Box)
$27.00 (as of June 18, 2025 23:32 GMT +00:00 - More infoProduct prices and availability are accurate as of the date/time indicated and are subject to change. Any price and availability information displayed on [relevant Amazon Site(s), as applicable] at the time of purchase will apply to the purchase of this product.)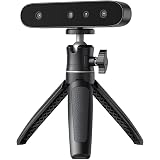
Creality CR-Ferret SE 3D Scanner Desktop Fast 0.1 Mm High Accuracy Flexible Scanning Range Anti-Shake 24-Bit Full-Color Scanning for Black Metal Non-Reflective Objects Mac Windows
$269.00 (as of June 18, 2025 23:32 GMT +00:00 - More infoProduct prices and availability are accurate as of the date/time indicated and are subject to change. Any price and availability information displayed on [relevant Amazon Site(s), as applicable] at the time of purchase will apply to the purchase of this product.)