
Creality K1C 3D Printer, 2024 New Version 3D Printers with 600mm/s Fast Printing Speed, Support Carbon Fiber Filament 300℃ High-Temp Print, Auto Leveling and Clog-Free Direct Extruder
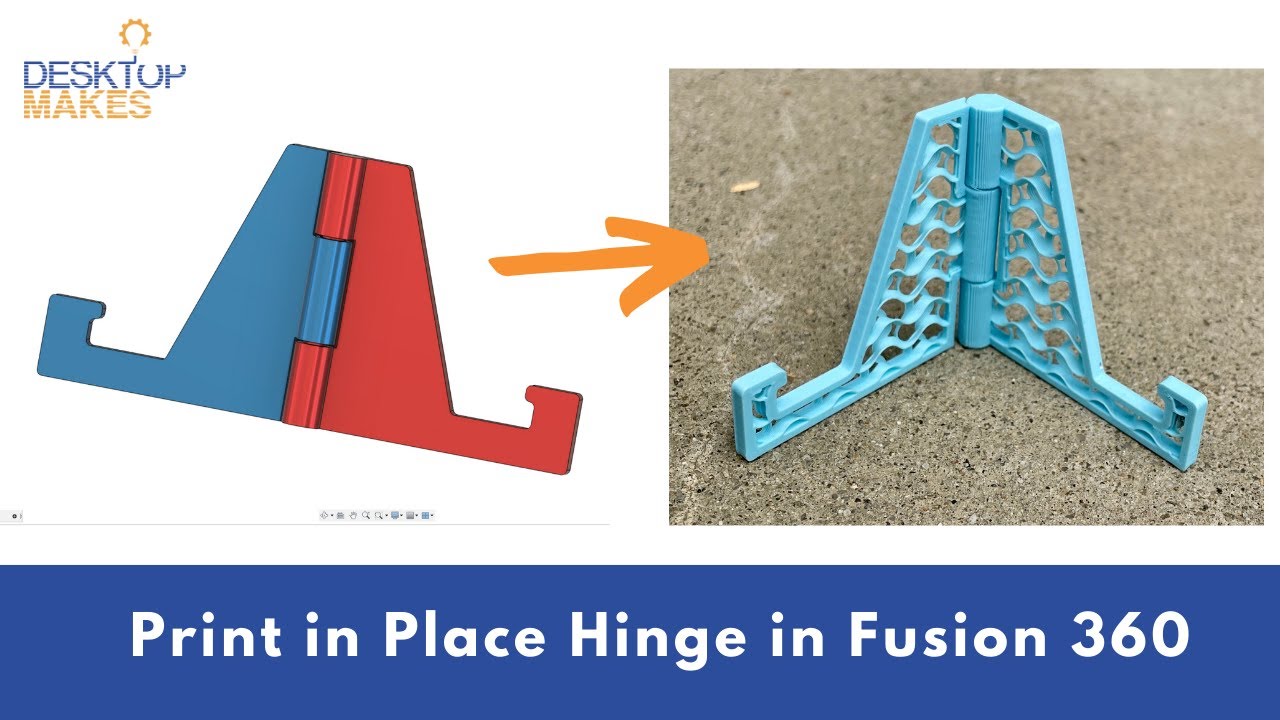
$509.15 (as of June 4, 2025 21:32 GMT +00:00 - More infoProduct prices and availability are accurate as of the date/time indicated and are subject to change. Any price and availability information displayed on [relevant Amazon Site(s), as applicable] at the time of purchase will apply to the purchase of this product.)In this tutorial, Thin Air 3D on YouTube guides you through the process of 3D modeling a print-in-place hinge in Fusion 360. The step-by-step instructions are beginner-friendly, making it accessible for anyone regardless of their experience level. The tutorial covers various aspects of the design process, including sketching, creating the box and lid, finding the pivot point, creating the hinge, connecting the hinge to the box, creating the hinge shaft, adding clearances, and exporting the STL file for 3D printing. The tutorial also provides tips for 3D printing and exporting the design, offering a comprehensive guide for creating your own 3D printable hinge in Fusion 360.
In this engaging video tutorial by Thin Air 3D, you can learn how to 3D model a print-in-place hinge in Fusion 360. Jacob, the host, aims to make the tutorial beginner-friendly so that anyone can follow along and create their own designs. The tutorial covers a range of topics, including using sketches and extrude tools to create shapes, designing a hinge using the Halfway Rule, and designing a box with a print-in-place hinge. It also includes instructions on exporting the design as an STL file for 3D printing, as well as tips and shortcuts for drawing in Fusion 360. By the end of the tutorial, you’ll have the knowledge and tools necessary to create your own 3D printable hinge design.
Tutorial: How to 3D Model a Hinge (Print-In-Place, No Supports) in Fusion 360, 3D Printing
 How To 3D Model A Hinge (Print-In-Place, No Supports) in Fusion 360, 3D Printing in detail.")
Overview of Fusion 360 and Design Process
Fusion 360 is a powerful 3D modeling software that allows users to create complex designs for various industries. In this tutorial, we will explore the process of designing and modeling a print-in-place hinge using Fusion 360. A print-in-place hinge is a hinge that can be 3D printed as a single component, without requiring any support structures. This makes it a convenient and practical solution for many applications.
Throughout this tutorial, we will cover each step of the design process in a beginner-friendly manner, ensuring that anyone, regardless of experience level, can follow along. By the end of the tutorial, you will have the necessary skills to create your own 3D printable box with a hinge and the ability to apply this knowledge to design various other objects.
Step 1: Drawing a Box in Fusion 360
To begin, we need to set up the workspace and preferences in Fusion 360. It is important to customize the settings according to our requirements to ensure a seamless design process. Once the workspace is set up, we can start drawing the box using sketches.
Sketches are the foundation of any design in Fusion 360. We will use quick tips and shortcuts to efficiently draw rectangles for the box. It is crucial to set dimensions and parameters accurately to achieve the desired size and shape of the box.
 How To 3D Model A Hinge (Print-In-Place, No Supports) in Fusion 360, 3D Printing")
 How To 3D Model A Hinge (Print-In-Place, No Supports) in Fusion 360, 3D Printing in detail.")
Step 2: Creating a Hinge Component
In this step, we will introduce the concept of components in Fusion 360. Components are individual objects within a design that can be grouped together. We will add a hinge component and create the hinge shape using sketching and extruding techniques.
The hinge component will act as a separate object that can be manipulated independently. This allows for easy modification and assembly of the hinge to the box.
Step 3: Making Cuts for the Hinge in the Box
To connect the hinge to the box, we need to make cuts in the box that align with the hinge component. This involves combining target and tool bodies, selecting the appropriate features, and joining them together.
By making precise cuts for the hinge, we ensure a seamless integration between the box and the hinge. This step is crucial for creating a functional print-in-place hinge.
Step 4: Dividing the Hinge into Three Equal Parts
To enhance the functionality and flexibility of the hinge, we will divide it into three equal parts using the Halfway Rule. This rule allows us to create a well-balanced hinge and ensures smooth movement with sufficient clearance.
Additionally, we will mirror the hinge feature on the other side to maintain symmetry and balance in the design. This step adds structural integrity and improves the overall functionality of the hinge.
Step 5: Adding Clearances for Printing
Creating proper clearances is crucial for successful 3D printing. In this step, we will create a sketch and adjust the geometry to accommodate for clearances. Clearances prevent parts from fusing together during the printing process and ensure smooth movement of the hinge.
We will check and adjust the clearances to guarantee optimal functionality. Furthermore, we will add fillets to round off sharp edges, making the design more printer-friendly.
 How To 3D Model A Hinge (Print-In-Place, No Supports) in Fusion 360, 3D Printing")
Step 6: Connecting the Hinge to the Box
To complete the assembly, we will connect the outer hinge pieces to the box. This step involves precise alignment and positioning of the parts to ensure proper functionality of the hinge.
By connecting the hinge securely to the box, we create a stable structure that can withstand movement and usage. Proper alignment is crucial for the successful operation of the hinge.
Step 7: Optimizing the Design for 3D Printing
Design optimization is essential to ensure a smooth 3D printing process. In this step, we will discuss the importance of optimizing designs for 3D printing and provide tips for achieving the best results.
We will cover factors such as wall thickness, support structures, infill density, and orientation to maximize printability and minimize potential issues during the printing process. These tips will help you achieve high-quality prints with minimal post-processing.
 How To 3D Model A Hinge (Print-In-Place, No Supports) in Fusion 360, 3D Printing")
Step 8: Exporting the Design as an STL File
Once the design is finalized and optimized, we can export it as an STL (Standard Tessellation Language) file, a commonly used format for 3D printing. Exporting the design in this format ensures compatibility with most 3D printers.
We will guide you through the process of exporting the design, including selecting the appropriate settings and saving the file for 3D printing. This step prepares the design for printing, allowing you to bring your creation to life.
Conclusion
In conclusion, this tutorial has provided a comprehensive overview of the design process for creating a print-in-place hinge in Fusion 360. We have covered each step in detail, from drawing a box to exporting the design as an STL file.
By following this tutorial, you have learned how to use sketches, create components, make cuts, divide a hinge into parts, add clearances, connect hinges, optimize designs, and export files for 3D printing. These skills can be applied to various other design projects, allowing you to unleash your creativity and bring your ideas to life.
Remember to practice and experiment with different designs to further enhance your skills. With Fusion 360’s powerful features and your newfound knowledge, you are well-equipped to create unique and functional 3D printed objects. Enjoy the journey of exploring the world of 3D modeling and printing!
In this tutorial, you will learn how to 3D model a hinge that can be printed in place without the need for supports. We will be using Autodesk Fusion 360 to create a small box with a functioning hinge. This tutorial is designed to be beginner-friendly, so regardless of your experience level, you should be able to follow along. By the end, you will have the skills to design your own print-in-place box with a hinge and create your own unique designs.
Throughout the tutorial, we will cover the following topics:
- Using sketches and extrude to create shapes
- Utilizing the shell command to make boxes
- Applying the Halfway Rule to design a hinge
- Designing a box with a print-in-place hinge that doesn’t require supports
- Exporting your STL files for 3D printing!
If you have any questions or feedback, please don’t hesitate to reach out. I would love to hear from you! Additionally, feel free to let me know if there are any specific objects or designs you would like to see me model in Fusion 360 or Blender. I’ll do my best to make it happen!
Check out my STL designs on my Cults3D profile: Cults3D Profile
For more information, visit my website: Thin Aircraft Works
You can also find my creations on Etsy: ThinAirCraftWorks Etsy Store
Follow me on Instagram: @thinair3d
Creality ABS Filament 1.75mm, 3D Printer Filament, Excellent Resistance, Odorless Non-Toxic, Stability, Tough, 1kg(2.2lbs) Printing Filament for 3D Printer (Black)
$22.99 (as of June 4, 2025 21:32 GMT +00:00 - More infoProduct prices and availability are accurate as of the date/time indicated and are subject to change. Any price and availability information displayed on [relevant Amazon Site(s), as applicable] at the time of purchase will apply to the purchase of this product.)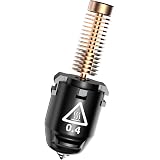
FLASHFORGE Adventurer 5M Nozzle, 0.4mm 280℃ High Flow 32mm³/s Nozzle for Stable High-Speed Printing, Adventurer 5M Pro Hotend, 3S Quick-Detachable Nozzle
$35.00 (as of June 4, 2025 21:32 GMT +00:00 - More infoProduct prices and availability are accurate as of the date/time indicated and are subject to change. Any price and availability information displayed on [relevant Amazon Site(s), as applicable] at the time of purchase will apply to the purchase of this product.)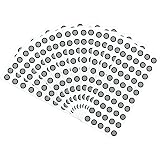
YOOPAI 6.0 mm 3D Scanning Markers for 3D Scanners, 3D Scanning Marker Dot Stickers, Diffuse Markers for 3D Scanners (10 Sheets of 500 dots)
$11.99 (as of June 4, 2025 21:32 GMT +00:00 - More infoProduct prices and availability are accurate as of the date/time indicated and are subject to change. Any price and availability information displayed on [relevant Amazon Site(s), as applicable] at the time of purchase will apply to the purchase of this product.)
Bambu Lab A1 Mini 3D Printer, Support Multi-Color 3D Printing, Set Up in 20 Mins, High Speed & Precision, Full-Auto Calibration & Active Flow Rate Compensation, ≤48 dB Quiet FDM 3D Printers
$399.00 (as of June 4, 2025 21:32 GMT +00:00 - More infoProduct prices and availability are accurate as of the date/time indicated and are subject to change. Any price and availability information displayed on [relevant Amazon Site(s), as applicable] at the time of purchase will apply to the purchase of this product.)