ANYCUBIC Photon Mono M7 PRO 14K Resin 3D Printer, 170mm/h Fast Printing, 10.1'' Mono LCD with COB LighTurbo 3.0 Source, Dynamic Temperature Control Resin Vat, Build Volume 8.77''x4.96''x9.05''
$689.99 (as of June 19, 2025 23:45 GMT +00:00 - More infoProduct prices and availability are accurate as of the date/time indicated and are subject to change. Any price and availability information displayed on [relevant Amazon Site(s), as applicable] at the time of purchase will apply to the purchase of this product.)Picture this: you have a gaming controller that you absolutely love, but there’s just one problem – it doesn’t quite fit comfortably in your hand. Well, fear not, because this article is about to introduce you to an innovative solution. In this captivating exploration, we will delve into the world of 3D scanning and Fusion 360 to create 3D printed accessories for existing objects. Whether it’s modifying parts for charity game controllers or designing a joystick for individuals with disabilities, this article will walk you through the fascinating process, step by step. So grab your favorite mug of creative inspiration and get ready to embark on a journey of limitless possibilities.
1. Introduction

What is 3D scanning?
3D scanning is a revolutionary technology that allows us to capture the physical shape and dimensions of real-world objects and convert them into digital models. It works by using various methods, such as laser scanning, structured light scanning, or photogrammetry, to capture multiple data points on the object’s surface. These data points are then combined to create a detailed and accurate 3D representation of the object.
What is Fusion 360?
Fusion 360 is a powerful 3D design and modeling software developed by Autodesk. It provides a comprehensive set of tools and features that allow designers to create, modify, and analyze 3D models for various applications. Fusion 360 is widely used in industries such as architecture, engineering, product design, and now, 3D printing.
Overview of the article
In this article, we will explore the process of using 3D scanning and Fusion 360 to design and create 3D printed accessories for existing objects. Specifically, we will focus on the design and modification of parts for game controllers, with a special emphasis on creating a 3D printed joystick for individuals with disabilities using a Logitech flight stick. We will guide you through each step of the process, from capturing the shape of the joystick grip using 3D scanning techniques, to editing and refining the design in Fusion 360, and finally, to 3D printing the accessory. So let’s dive in and explore the exciting world of 3D printing and customization!
2. Designing and Modifying Parts for 3D Printing
Understanding the process
Before we delve into the specifics of designing and modifying parts for 3D printing, it’s important to understand the overall process. The first step is to identify the object that needs customization or modification, such as a game controller. Once you have chosen the object, you need to analyze its design and identify the specific parts that can be modified or enhanced through 3D printing. This could include adding ergonomic grips, modifying buttons or triggers, or creating entirely new accessories.
Choosing the right objects to modify
When selecting objects for modification, it’s important to consider their size, complexity, and feasibility of modification. Game controllers are great candidates for customization, as they often have modular designs with removable parts. This makes it easier to create 3D printed accessories that can be attached or replace the original parts.
Considerations for game controllers
When designing for game controllers, there are several important considerations to keep in mind. Firstly, ergonomics play a crucial role in ensuring user comfort and accessibility. By customizing the grips and contours of a controller, we can enhance the user’s gaming experience, especially for individuals with disabilities who may have specific ergonomic requirements. Secondly, the design should be compatible with the existing functionality of the controller. It’s important to ensure that the modifications do not hinder or interfere with the controller’s buttons, triggers, or joysticks. Finally, durability and material selection are crucial factors to consider. Game controllers are subject to frequent and intense use, so the 3D printed accessories should be able to withstand the wear and tear of gaming sessions.
3. Creating a 3D Printed Joystick for Individuals with Disabilities
Importance of accessibility
Accessibility is an essential aspect of any design, and it becomes even more critical when creating accessories for individuals with disabilities. By leveraging the power of 3D printing, we can customize and adapt objects to meet the specific needs and requirements of different individuals. This inclusivity allows individuals with disabilities to enjoy the same level of gaming experience as their able-bodied counterparts.
Introduction to Logitech flight stick
The Logitech flight stick is a popular choice among gaming enthusiasts, especially those who enjoy flight simulators or aviation-themed games. It provides an immersive and realistic gaming experience with its joystick controls, but it may not be suitable for individuals with disabilities who require modified grips or ergonomic enhancements. By combining the capabilities of 3D scanning and Fusion 360, we can create a customized joystick grip that allows individuals with disabilities to comfortably use the Logitech flight stick.


Identifying design requirements for individuals with disabilities
When designing a 3D printed joystick grip for individuals with disabilities, it’s important to understand their specific needs and requirements. This could include considerations such as hand size, dexterity, grip strength, and any physical limitations they may have. By conducting user research and gathering feedback from individuals with disabilities, we can gather valuable insights that will inform our design decisions and ensure that the final accessory meets their unique needs.
4. Capturing the Shape of the Joystick Grip
Introduction to 3D scanning
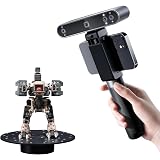
To begin the customization process, we need to capture the shape and dimensions of the Logitech flight stick’s joystick grip. For this purpose, we will utilize the technique of 3D scanning, which allows us to create a digital model of the physical object. There are various methods of 3D scanning, such as laser scanning or structured light scanning. For this project, we will use photogrammetry, which involves capturing multiple photographs of the object from different angles and using specialized software to reconstruct the 3D model.
Utilizing photogrammetry for accurate capture
Photogrammetry is a cost-effective and accessible method for 3D scanning, making it suitable for hobbyists, designers, and small-scale projects. To use photogrammetry, we will need a digital camera or a smartphone with a high-resolution camera. By taking multiple photographs of the Logitech flight stick’s joystick grip from different angles, we can gather the necessary data points to create an accurate 3D model.
Choosing the right equipment
When using photogrammetry for 3D scanning, it’s important to choose the right equipment to ensure accurate and high-quality results. A camera with a high-resolution sensor and manual shooting capabilities, such as aperture and focus controls, is ideal. Additionally, having a stable tripod or mount for the camera is crucial to avoid any blurriness or misalignment in the captured photographs. Lighting conditions should also be considered, as uniform and diffuse lighting helps in capturing clear and detailed textures on the object’s surface.
5. Converting the Scan into a Usable Format
Overview of Blender software
After capturing the 3D scans of the joystick grip using photogrammetry, we need to convert the collected data into a usable format that can be modified and edited in Fusion 360. For this purpose, we will utilize Blender, a free and open-source 3D modeling software. Blender offers a wide range of powerful tools and features that enable us to process and manipulate the captured 3D scans.
Importing and processing the scan
In Blender, we can import the 3D scan by loading the captured photographs or the generated point cloud. Blender’s photogrammetry tools allow us to align and stitch the photos together, generating a dense mesh that represents the surface of the joystick grip. We can then clean up the mesh, remove any artifacts or noise, and optimize its topology for further editing.
Preparing the scan for Fusion 360
Once we have processed and cleaned up the 3D scan in Blender, we need to prepare it for further editing and design in Fusion 360. This involves exporting the scan as a compatible file format, such as OBJ or STL, that can be imported into Fusion 360. Additionally, we may need to scale the scan to match the dimensions of the Logitech flight stick’s joystick grip and ensure that it is in the correct orientation for editing.
6. Importing and Editing the Scan in Fusion 360
Understanding Fusion 360
Now that our 3D scan of the joystick grip is ready, we can import it into Fusion 360 for further editing and design. Fusion 360 is a versatile and user-friendly software that offers a wide range of tools and features for 3D modeling and design. It allows us to modify the imported scan, add or remove features, and optimize the design for 3D printing.

Importing the scan into Fusion 360
To import the 3D scan into Fusion 360, we can use the “Insert” command and select the file containing the scan. Fusion 360 will then import the scan as a new component in the workspace. We can then position, orient, and scale the scan to align it with the Logitech flight stick’s joystick grip.
Performing modifications and design edits
With the scan imported into Fusion 360, we can now start modifying and editing the design according to our requirements. Fusion 360 offers a range of powerful editing tools, such as push-pull, revolve, extrude, and fillet, that allow us to add new features, modify existing ones, or remove unwanted elements. By leveraging these tools, we can create a customized and ergonomic joystick grip that meets the needs of individuals with disabilities.
7. Testing and Refining the Design
Importance of testing for functionality
After making the necessary modifications and edits to the joystick grip design in Fusion 360, it’s crucial to test the functionality and usability of the accessory. This involves assembling the 3D printed prototype with the Logitech flight stick, evaluating its fit and comfort, and ensuring that it does not interfere with the controller’s functionality. User testing is essential during this stage, as it allows us to gather feedback and make iterative improvements to the design.
Iterative design process
The design process is rarely perfect on the first attempt, and that’s where the iterative design process comes into play. By gathering feedback from users, identifying areas for improvement, and making iterative changes to the design, we can refine and optimize the joystick grip for better functionality and user experience. This iterative approach allows us to continually improve and enhance the design until we achieve the desired outcome.
Gathering feedback from users
To gather feedback from users, it’s important to involve individuals with disabilities who will be using the 3D printed joystick grip. By conducting interviews, surveys, or usability testing sessions, we can understand their experiences, preferences, and any issues they may have encountered while using the prototype. This feedback is invaluable in driving the design improvements and ensuring that the final accessory meets the needs and expectations of the users.
8. Finalizing the Design and Preparation for 3D Printing
Optimizing the design for 3D printing
Before proceeding with 3D printing, it’s important to optimize the design of the joystick grip to ensure a successful and high-quality print. Optimization involves checking for any potential printability issues, such as overhangs, unsupported sections, or small details that may not be captured accurately during the printing process. By making the necessary adjustments and modifications, we can ensure that the design is optimized for 3D printing.
Scaling and orientation considerations
When finalizing the design for 3D printing, it’s crucial to consider the scale and orientation of the object. The joystick grip should be scaled to match the dimensions of the Logitech flight stick’s joystick and ensure a snug fit. Additionally, the orientation of the design should be adjusted to optimize printability and minimize the need for support structures, which can affect the surface finish and add complexity to the printing process.
Adding necessary supports and structures
Depending on the design and complexity of the joystick grip, it may require additional support structures to ensure successful printing. Support structures are temporary structures that help to stabilize and hold up overhanging or unsupported sections of the design during the printing process. These structures can be easily removed once the printing is complete, leaving behind a clean and accurate final product.
9. 3D Printing the Accessory
Choosing the right 3D printer
With the design of the joystick grip finalized, it’s time to 3D print the accessory. When selecting a 3D printer, it’s important to consider factors such as print volume, resolution, material compatibility, and reliability. In the case of the joystick grip, it’s recommended to use a printer with high precision and resolution capabilities to ensure accurate and detailed printing of the customized design.
Material selection for durability and comfort
Selecting the right material for 3D printing the joystick grip is crucial to ensure durability, comfort, and functionality. Depending on the specific requirements, materials such as PLA, ABS, or PETG can be suitable options. PLA is a popular choice for its affordability and ease of printing, while ABS offers greater durability and impact resistance. PETG combines the best of both worlds, offering good strength and flexibility.
Setting up and executing the print
Before printing the joystick grip, it’s important to ensure proper preparation and setup of the 3D printer. This involves leveling the build plate, loading the selected material, and verifying the printer settings, such as temperature and print speed. Once everything is set up, the design file can be loaded into the printer software, and the print can be initiated. It’s important to regularly monitor the print progress and ensure that there are no issues or failures during the printing process.
10. Conclusion and Downloadable File
Summary of the process
In this comprehensive article, we have explored the exciting realm of 3D scanning, Fusion 360, and 3D printing to create customized accessories for existing objects. We have learned about the process of designing and modifying parts for 3D printing, with a specific focus on game controllers, such as the Logitech flight stick. By utilizing 3D scanning techniques, we were able to capture the shape of the joystick grip and convert it into a usable digital format. We then imported the scan into Fusion 360, edited and refined the design, and prepared it for 3D printing.
Providing the downloadable file for the 3D printed accessory
As promised, we are providing a downloadable file of the final 3D printed accessory for the Logitech flight stick’s joystick grip. This file can be used by individuals who wish to create their own customized joystick grip for individuals with disabilities. The file is compatible with popular 3D modeling and printing software, allowing users to further modify, customize, or scale the design according to their specific requirements.
Download the 3D Printed Joystick Grip Accessory File
Final thoughts and future possibilities
The possibilities of 3D scanning, design modification, and 3D printing are endless, especially when it comes to customization and accessibility. By leveraging these technologies, we can empower individuals with disabilities, allowing them to enjoy the same level of functionality and comfort as everyone else. As technology continues to advance, we can expect even more exciting developments in the field of 3D printing and customization, opening doors to new opportunities and possibilities for inclusivity. So let your creativity soar and start designing your own customized 3D printed accessories today!
ELEGOO PLA Plus Filament 1.75mm White 2KG, PLA+ Tougher and Stronger 3D Printer Filament Pro Dimensional Accuracy +/- 0.02mm, 2 Pcs 1kg Spool(2.2lbs) Fits for Most FDM 3D Printers
$28.98 (as of June 19, 2025 23:45 GMT +00:00 - More infoProduct prices and availability are accurate as of the date/time indicated and are subject to change. Any price and availability information displayed on [relevant Amazon Site(s), as applicable] at the time of purchase will apply to the purchase of this product.)
Asbrot Compatible with BBL PTFE Tube 2.5mm ID×4mm OD, Length 5M/ 16.4ft, for BBL AMS X1/ X1C/ P1P/ P1S/ A1/ A1 Mini, Prusa MMU3/ Direct Drive Extruder (Cream Color), with Tubing Cutter
$9.99 (as of June 19, 2025 23:45 GMT +00:00 - More infoProduct prices and availability are accurate as of the date/time indicated and are subject to change. Any price and availability information displayed on [relevant Amazon Site(s), as applicable] at the time of purchase will apply to the purchase of this product.)
Creality 3D Scanner Raptor Pro for Automotive & Engineering Projects with Metrology-Grade 0.02mm Accuracy,22+7 Blue Laser,Anti-Shake Tracking,Up to 60FPS Scanning Speed Support 5-2000mm Objects
$1,899.00 (as of June 19, 2025 23:45 GMT +00:00 - More infoProduct prices and availability are accurate as of the date/time indicated and are subject to change. Any price and availability information displayed on [relevant Amazon Site(s), as applicable] at the time of purchase will apply to the purchase of this product.)
Official Creality Ender 3 3D Printer Fully Open Source with Resume Printing Function DIY Printers Build Volulme 8.66x8.66x9.84 inch
$179.00 (as of June 19, 2025 23:45 GMT +00:00 - More infoProduct prices and availability are accurate as of the date/time indicated and are subject to change. Any price and availability information displayed on [relevant Amazon Site(s), as applicable] at the time of purchase will apply to the purchase of this product.)