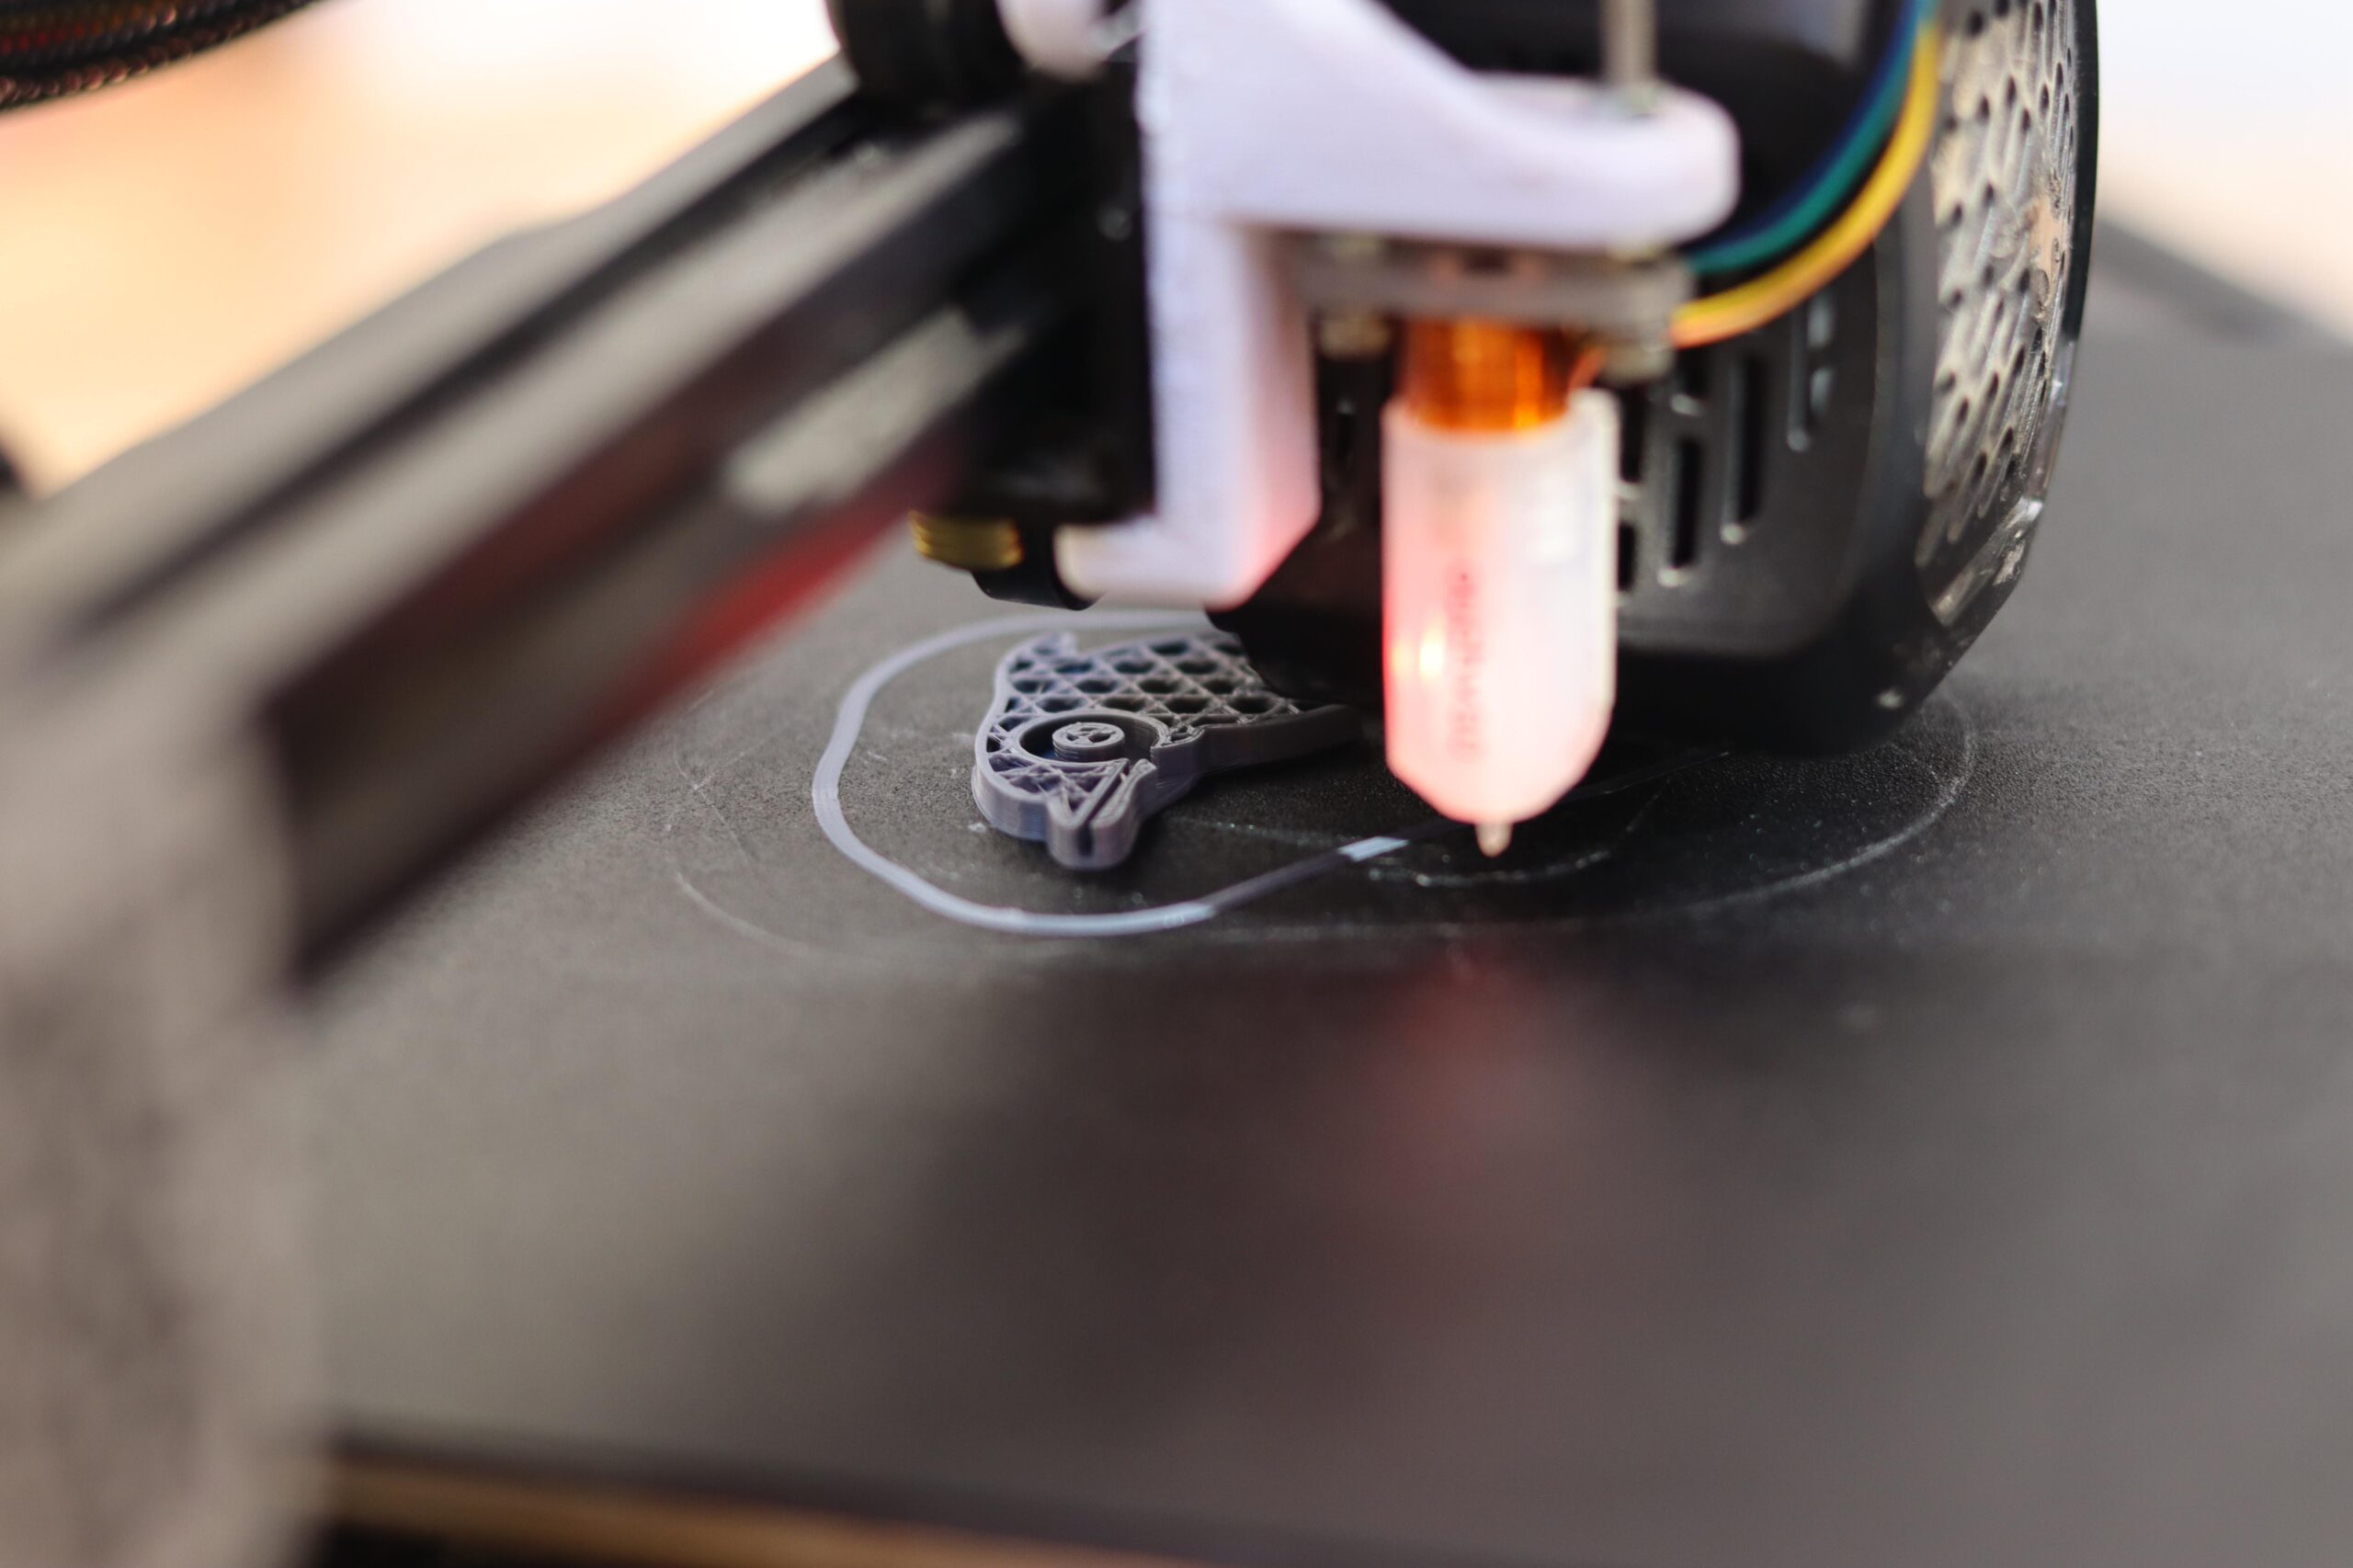
ELEGOO Saturn 4 Ultra 16K Resin 3D Printer with Flip-up Lid, Smart Tank Heating at 30℃, 150mm/h High Speed Printing, Large Printing Size of 8.33x4.66x8.66 Inches
$519.99 (as of June 18, 2025 23:32 GMT +00:00 - More infoProduct prices and availability are accurate as of the date/time indicated and are subject to change. Any price and availability information displayed on [relevant Amazon Site(s), as applicable] at the time of purchase will apply to the purchase of this product.)In the realm of 3D printing, achieving a flawlessly smooth and precise bed mesh calibration is crucial for high-quality output. The video “Voron V0 Bed Mesh Leveling with Klicky Probe | Quick” by Quality3Ds focuses on illustrating how you can use the Klicky Probe to attain optimal bed leveling for the Voron V0. This process is streamlined yet meticulous, underscoring its efficiency in enhancing print accuracy.
You will be guided through a step-by-step tutorial on how to effectively utilize the Klicky Probe to perform bed mesh calibration. The emphasis is placed on the ease with which the Klicky Probe achieves perfect leveling, promising improved consistency in your prints. By following these methods, you can ensure that your Voron V0 operates at its highest potential, thereby minimizing errors and enhancing overall print quality.

Understanding the Voron V0 and Klicky Probe
Overview of Voron V0
The Voron V0 is a compact and highly efficient 3D printer renowned for its ability to produce high-quality prints despite its small footprint. Designed with precision and reliability in mind, the Voron V0 utilizes a coreXY mechanism that ensures smooth and accurate movements, making it a popular choice among enthusiasts who require consistent output without compromising on space or complexity. The printer’s modular design permits extensive customization and upgrades, further enhancing its usability.
Introduction to the Klicky Probe
The Klicky Probe is an advanced, detachable Z-probe designed explicitly for automatic bed leveling. Its primary function is to enable the printer to detect and compensate for any irregularities on the print bed’s surface, thus ensuring a completely level printing platform. The Klicky Probe stands out for its mechanical simplicity, reliability, and the precision it offers, making it an invaluable accessory for high-precision printing operations.
Advantages of Using a Klicky Probe
Using a Klicky Probe with your Voron V0 provides several significant benefits. Firstly, it enhances print accuracy by facilitating a perfectly leveled bed, which is crucial for preventing print failures and ensuring smooth first layers. Secondly, the Klicky Probe’s detachment feature means it can avoid the issues related to permanent probes, such as potential interference with other printer components. Finally, the probe’s compatibility with various firmware options offers flexibility and adaptability to suit specific printing needs.
How the Klicky Probe Integrates with Voron V0
Integration of the Klicky Probe with the Voron V0 involves physical mounting, wiring, and firmware configuration. Once installed, the probe communicates with the printer’s firmware to perform bed leveling checks before each print job. The data collected by the probe is utilized to adjust the nozzle’s height dynamically across the bed, offsetting any deviations or inclines detected during the probing process.
Preparation Before Bed Mesh Leveling
Gather Necessary Tools and Materials
Before proceeding with bed mesh leveling, ensure you have all necessary tools and materials, including the Klicky Probe, mounting hardware, appropriate screws, necessary wiring, and your Voron V0 printer. Additionally, keep a selection of wrenches, screwdrivers, and pliers at hand for assembly and adjustments. You may also require a multimeter to check electrical connections.
Safety Precautions
Adhere to standard safety precautions during installation. Disconnect the printer from all power sources before conducting any hardware modifications to prevent electric shocks or short circuits. Wear safety glasses to protect your eyes from potential debris or sharp components. Make sure your working area is well-lit, organized, and free from any obstructive materials.
Firmware and Software Requirements
Ensure that your printer’s firmware supports the Klicky Probe. Typical firmware options include Marlin, Klipper, and RepRapFirmware. Verify your firmware version beforehand and check the documentation for any specific requirements related to the Klicky Probe. Additionally, familiarize yourself with the printer’s control software, which will be used to input and manage the leveling data.
Updating Firmware for Klicky Probe Compatibility
To ensure compatibility with the Klicky Probe, update your printer’s firmware to the latest version. Begin by downloading the correct firmware files from the official repository. Follow the firmware’s update guidelines meticulously to upload the new firmware correctly. Post-update, ensure that the firmware recognizes the Klicky Probe and that the probing functions are accessible through the printer’s interface.
Find 3D Printing Accessories Here
Installing the Klicky Probe
Unboxing and Inspecting the Klicky Probe
Carefully unbox your Klicky Probe and inspect all components for any signs of damage. Verify that all parts, including the probe itself, mounting brackets, screws, and wiring, are present. Cross-check with the manufacturer’s list of contents to ensure no pieces are missing.
Mounting the Klicky Probe on the Voron V0
Attach the Klicky Probe to the designated location on the Voron V0 using the provided mounting hardware. Position the probe securely but ensure it can be detached easily as needed. Follow the mounting instructions closely to avoid positioning errors that could affect the probe’s efficacy.
Wiring Instructions
Proceed to connect the Klicky Probe’s wiring to the appropriate ports on the Voron V0’s control board. Use the wiring diagram provided by the probe’s manufacturer to ensure correct connections. Pay special attention to polarity and signal pin assignments to avoid any malfunctions. After wiring, utilize a multimeter to ensure all connections are secure and functioning correctly.
Configuring Firmware Settings for Klicky Probe
Access your printer’s firmware configuration files and adjust the settings to incorporate the Klicky Probe. Define the probe type and the relevant mesh leveling parameters. Additionally, configure the probe offsets, setting them in accordance with the manufacturer’s recommended values to ensure accurate operation during leveling.
Initial Calibration of the Klicky Probe
Setting the Probe Offset
The probe offset refers to the distance between the nozzle and the probing tip of the Klicky Probe. Accurately calibrating this offset is critical for the probe’s performance. Utilize the printer’s interface or control software to move the nozzle to a reference point, then manually measure the gap between the nozzle and the bed, accounting for the probe’s intervention.
Running Initial Probe Tests
After setting the probe offset, conduct initial probing tests to validate the configuration. Initiate a test probing sequence over a few points on the bed to observe the probe’s behavior. Ensure that the probe engages and retracts correctly, and that the readings concur with expected values.
Verifying Successful Installation
Verify successful installation by running a preliminary print. Examine the first layer to ensure consistent adhesion across the bed. If discrepancies are noted, recheck the probe mounting, wiring, and firmware settings, and adjust as necessary.
Troubleshooting Common Issues
Should you encounter issues such as irregular probe readings or mechanical malfunctions, systematically troubleshoot by reviewing each aspect of the installation. Check for loose connections, incorrect firmware configurations, and probe misalignment. Utilize community forums and manufacturer support if issues persist.

Bed Mesh Leveling Process
Understanding Bed Mesh Leveling
Bed mesh leveling involves creating a detailed map of the bed’s topography, which the printer uses to compensate for any irregularities. This process ensures that the nozzle maintains a consistent distance from the bed, enhancing print quality and adhesion.
Starting the Bed Mesh Leveling Sequence
Initiate the bed mesh leveling sequence using your printer’s control software. The sequence involves the probe interacting with multiple points across the bed, recording height variations. Ensure that the bed is clean and free from obstructions before starting the sequence.
Recording Initial Probe Points
During the leveling sequence, the Klicky Probe will record measurements at each designated point on the bed grid. These points are then used to generate a mesh data map, which visualizes the bed’s surface variations.
Analyzing the Bed Mesh Data
Once the probing is complete, analyze the bed mesh data through your printer’s control software. The data will show height deviations which you can interpret to understand the bed’s profile. Ensure that you accurately save the data for subsequent adjustments.
Adjusting Bed Level Based on Mesh Data
Interpreting Mesh Data Results
Interpreting the mesh data involves understanding the height variations across the print bed. Peaks and troughs in the data indicate areas where manual or software adjustments are requisite to achieve a uniformly level surface.
Manual Adjustments on the Bed
Identify problematic areas from the mesh data and manually adjust the bed’s leveling screws accordingly. Aim to eliminate significant height variations by tweaking the bed until the mesh data reflects a more level surface.
Implementing Software Corrections
Using the bed mesh data, input software-based adjustments to compensate for any remaining minor height discrepancies. Configure the firmware to utilize the mesh data for real-time adjustments during printing.
Re-running Mesh Leveling for Verification
After making both manual and software corrections, re-run the mesh leveling sequence to verify the efficacy of your adjustments. Compare the new mesh data to the initial records to ensure improvements in bed leveling.
Finalizing Bed Mesh Leveling
Locking Bed Adjustments
Once satisfactory leveling is achieved, securely lock all bed adjustment screws to maintain the bed’s position. Regularly check for any signs of shifting or loosening which could affect leveling accuracy.
Saving Mesh Data to Firmware
Save the final mesh data configuration to your printer’s firmware to ensure the settings are utilized in future print jobs. This step secures your adjustments, preserving the bed’s leveling state over multiple print cycles.
Performing a Test Print
Conduct a detailed test print to evaluate the results of the leveling process. Examine the first layer critically, looking for uniform adhesion and optimal print quality across the entire bed surface.
Fine-tuning Based on Test Print Analysis
Based on the analysis of your test print, make any additional fine-tuning adjustments to the bed level or mesh data to perfect the setup. Continue testing and tweaking until you achieve the desired print quality.
Routine Maintenance and Recalibration
Regular Bed Cleaning
Maintain your Voron V0’s bed by regularly cleaning it to remove debris and filament residues. A clean bed ensures accurate probing and consistent print adhesion.
Periodically Checking Probe Calibration
Even after initial setup, periodically check the Klicky Probe’s calibration to ensure it remains accurate. Recalibrate as necessary to offset any drift in probe accuracy over time.
Updating Firmware for Optimal Performance
Regularly update your printer’s firmware to incorporate the latest features and improvements. Firmware updates can enhance probe performance and overall printing reliability.
Steps for Recalibrating the Bed Mesh
Should you notice any decline in print quality or bed leveling accuracy, follow the necessary steps for recalibrating the bed mesh. Start from initial calibration and proceed through mesh leveling and adjustment processes to restore optimal performance.
Tips and Tricks for Optimal Performance
Best Practices for Voron V0
To maximize the performance of your Voron V0, adopt best practices such as maintaining firmware updates, performing regular checks and cleanings, and ensuring that all components are securely positioned and functioning.
Enhancing Probe Accuracy
To enhance the accuracy of your Klicky Probe, ensure proper installation, maintain clean probing points, and routinely check for any wear and tear. High accuracy in probing is critical for flawless bed leveling.
Reducing Vibration and Noise
Reduce vibration and noise in your printing environment by placing your Voron V0 on a stable surface and securing all loose components. Vibration dampers and enclosures can also contribute to reducing operational noise.
Maximizing Print Quality with Proper Calibration
Proper calibration of your print bed and probe is paramount in achieving superior print quality. Invest the time to meticulously configure and adjust settings, ensuring that every layer adheres perfectly from start to finish.
Conclusion
Recap of Key Steps
This comprehensive guide covered essential steps such as preliminary preparation, installing the Klicky Probe, initial calibration, bed mesh leveling, adjustments based on mesh data, finalization, and routine maintenance. Each step is crucial for achieving a perfectly leveled print bed and high-quality prints.
Importance of Proper Bed Mesh Leveling
Proper bed mesh leveling is foundational to successful 3D printing. It ensures that the first layer adheres well, preventing common printing issues and contributing to the overall consistency and quality of printed objects.
Encouragement to Follow Best Practices
Adhering to best practices in installation, calibration, and maintenance not only enhances your printer’s performance but also extends its lifespan. Following these guidelines diligently will lead to more efficient and successful printing operations.
Invitation to Engage with the Community for Further Help
If you encounter any challenges or seek to further enhance your printer’s performance, engaging with the 3D printing community can provide valuable insights and assistance. Many users share their experiences, troubleshooting tips, and innovations, which can significantly benefit your 3D printing endeavors.
Maintain Your 3D Printer with these Tools
Polymaker 3D Printing Filament Storage Box - PolyDryer Box for Continuous Filament Sealing and Protection, 3D Printer Filament Holder Compatible with PA Nylon, PLA, PVB, PETG, ABS, TPU 1.75mm 2.85mm
$29.99 (as of June 18, 2025 23:32 GMT +00:00 - More infoProduct prices and availability are accurate as of the date/time indicated and are subject to change. Any price and availability information displayed on [relevant Amazon Site(s), as applicable] at the time of purchase will apply to the purchase of this product.)
ANYCUBIC PLA Filament 1.75mm Bundle, 3D Printing PLA Filament 1.75mm Dimensional Accuracy +/- 0.02mm, 1KG Spool (2.2 lbs), 2KG Black+Black
$23.99 (as of June 18, 2025 23:32 GMT +00:00 - More infoProduct prices and availability are accurate as of the date/time indicated and are subject to change. Any price and availability information displayed on [relevant Amazon Site(s), as applicable] at the time of purchase will apply to the purchase of this product.)
3D Scanning Marker & Turntable Kit – 6.0mm Inner Diameter Adhesive Dots with Auto Rotating Turntable, 600 Reference Markers for Handheld 3D Scanners, Reverse Engineering & Metrology
(as of June 18, 2025 23:32 GMT +00:00 - More infoProduct prices and availability are accurate as of the date/time indicated and are subject to change. Any price and availability information displayed on [relevant Amazon Site(s), as applicable] at the time of purchase will apply to the purchase of this product.)
Anycubic Kobra S1 Combo 3D Printer, 4 Stunning Multicolor with Anycubic ACE PRO, 600mm/s High Speed and 320℃ Hotend Free-Clog Extruder, Intelligent Drying While Printing, Built-in Camera 250*250*250mm
$569.99 (as of June 18, 2025 23:32 GMT +00:00 - More infoProduct prices and availability are accurate as of the date/time indicated and are subject to change. Any price and availability information displayed on [relevant Amazon Site(s), as applicable] at the time of purchase will apply to the purchase of this product.)