ANYCUBIC Photon Mono M7 PRO 14K Resin 3D Printer, 170mm/h Fast Printing, 10.1'' Mono LCD with COB LighTurbo 3.0 Source, Dynamic Temperature Control Resin Vat, Build Volume 8.77''x4.96''x9.05''
$689.99 (as of June 18, 2025 23:32 GMT +00:00 - More infoProduct prices and availability are accurate as of the date/time indicated and are subject to change. Any price and availability information displayed on [relevant Amazon Site(s), as applicable] at the time of purchase will apply to the purchase of this product.)Have you ever wondered how to unlock the full potential of your Anycubic Vyper 3D printer? With the installation of Klipper, a versatile and high-performance firmware, you can enhance your printer’s performance, achieve faster prints, and enjoy better control over your printing process. Let’s take a step-by-step journey through configuring and setting up Klipper on your Anycubic Vyper, making it a high-performance machine.
Anycubic 3D Materials Sale: Resin & PLA from $9.49/kg
Introduction to Installing Klipper on Anycubic Vyper
This comprehensive guide will assist you in installing Klipper firmware on your Anycubic Vyper 3D printer using Mainsail OS. Documented by 3DPrintBeginner, the process aims to boost printer performance significantly. Klipper is a powerful firmware that transforms how your 3D printer operates, combining the computing power of a Raspberry Pi with the printer’s mainboard for improved speed and control.
What is Klipper?
Klipper is an open-source firmware that leverages the processing power of a Raspberry Pi to manage a 3D printer’s mainboard. By offloading tasks from the printer’s CPU to the more capable Raspberry Pi, Klipper ensures smoother and faster printing while providing advanced features such as Pressure Advance and Input Shaper for higher print quality.
Anycubic 3D Materials Sale: Resin & PLA from $9.49/kg
Benefits of Installing Klipper on Anycubic Vyper
By installing Klipper, you can enjoy several enhancements to your Anycubic Vyper:
- Faster Printing Speeds: Klipper’s optimized code enables higher printing speeds without sacrificing quality.
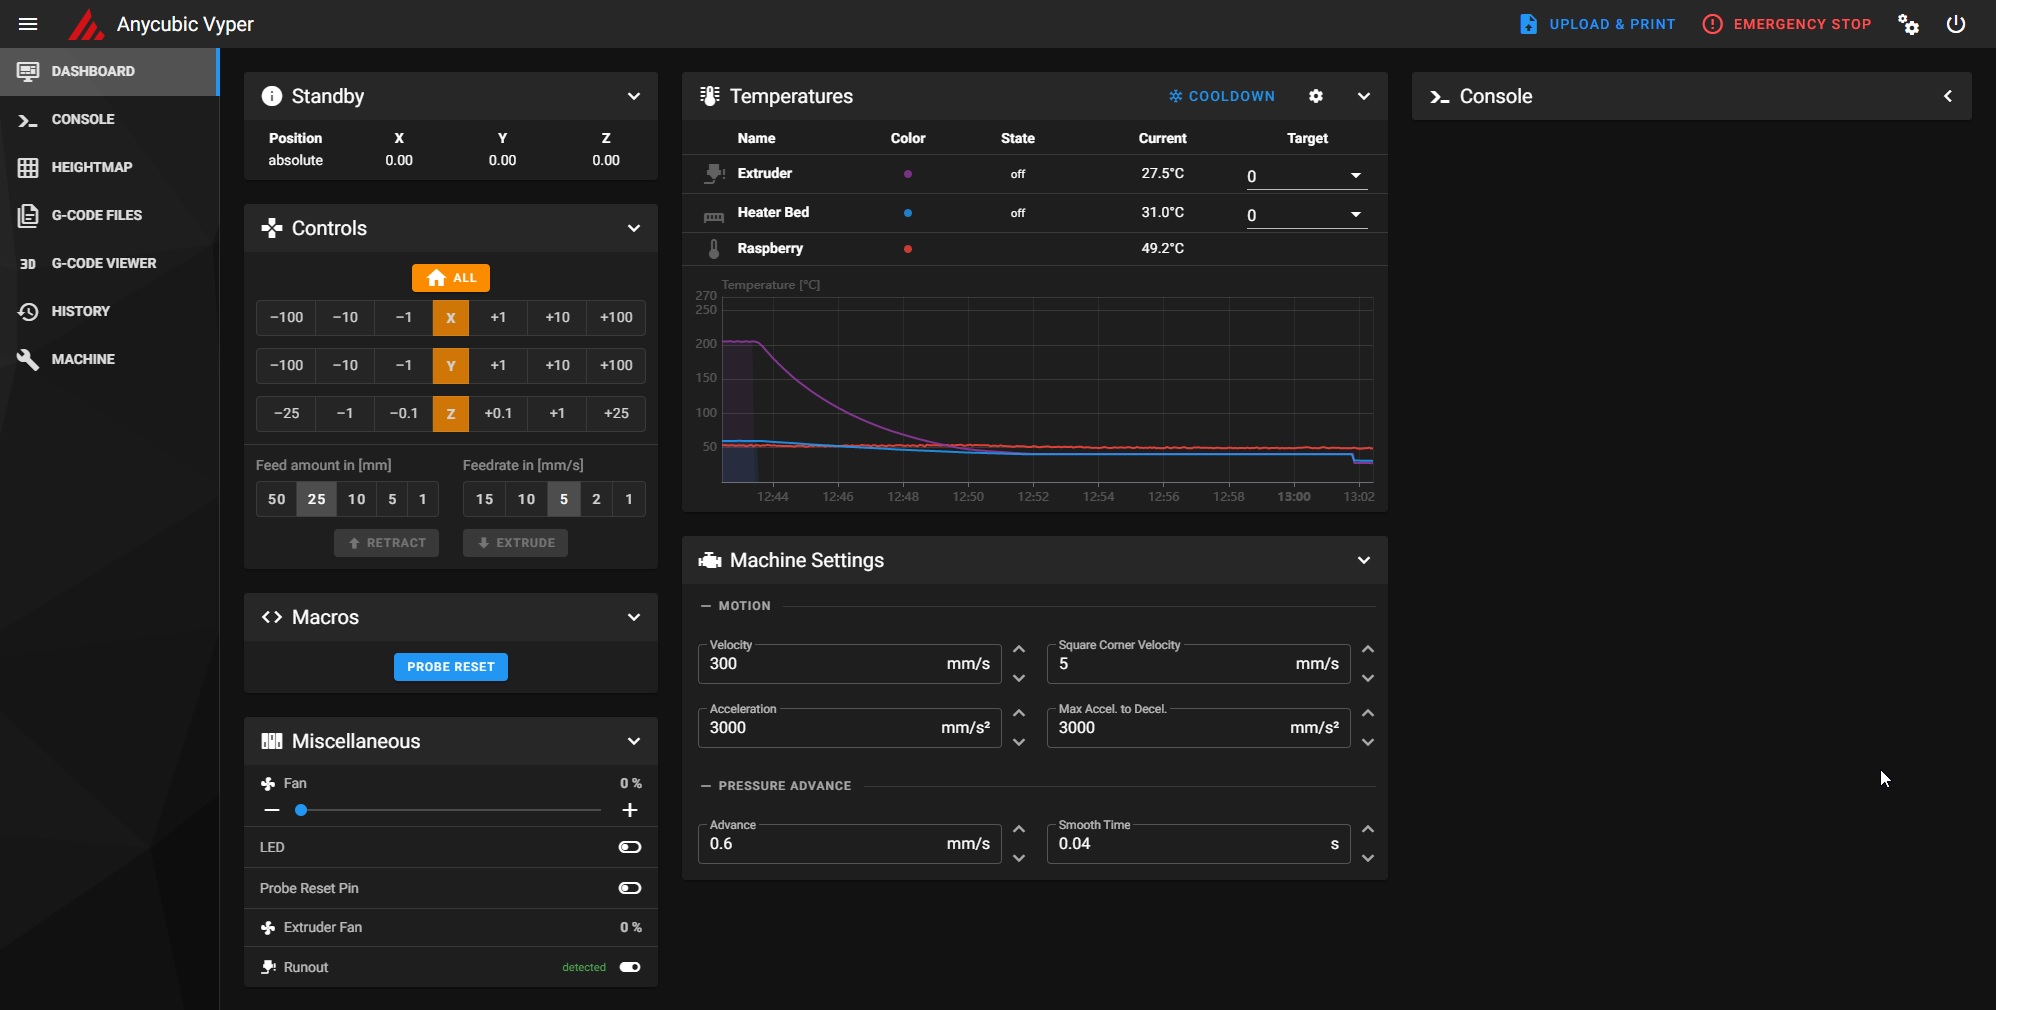
- Remote Control Capability via Wi-Fi: Control and monitor your printer remotely through Mainsail’s Web Interface.
- Improved Print Quality with Features like Pressure Advance and Input Shaper: These features help reduce common printing issues like ringing and maintain consistent extrusion.
Prerequisites
Before you begin the installation process, ensure you have the following components:
- Raspberry Pi (any version, preferably Raspberry Pi 4)
- MainsailOS or FluiddPi (for the Web Interface)
- Anycubic Vyper 3D printer
- Quality Power Supply for the Raspberry Pi
With these prerequisites, you are ready to advance to the installation process.

Important Considerations
Installing Klipper on your Anycubic Vyper requires some technical know-how and familiarity with 3D printers and hardware. Keep these points in mind:
- Experience Required: This process is not suited for absolute beginners; some experience with 3D printer hardware and software is necessary.
- Risk Involved: Proceed with caution, as there is a possibility of damaging your printer if steps are not followed correctly.
- Stock Touchscreen: Be aware that the stock touchscreen will become non-functional. You’ll need to use the Web Interface (WebUI) or an external touchscreen to control the printer.
Steps for Installation
Let’s break the installation process into manageable steps to ensure clarity and ease of understanding.
Install Web Interface
First, you need to install either MainsailOS or FluiddPi on your Raspberry Pi:
- Download the Image: Download the MainsailOS or Fluidd image from their respective websites.
- Flash the Image: Use a tool like Balena Etcher to flash the downloaded image onto a microSD card.
- Setup Wi-Fi Configuration: Before inserting the SD card into the Raspberry Pi, open the
wpa_supplicant.conffile on the card and configure your Wi-Fi credentials. - Insert and Boot: Insert the microSD card into your Raspberry Pi and power it on. Let it boot and connect to your Wi-Fi network.
Firmware Preparation
Next, prepare the Klipper firmware for your printer:
-
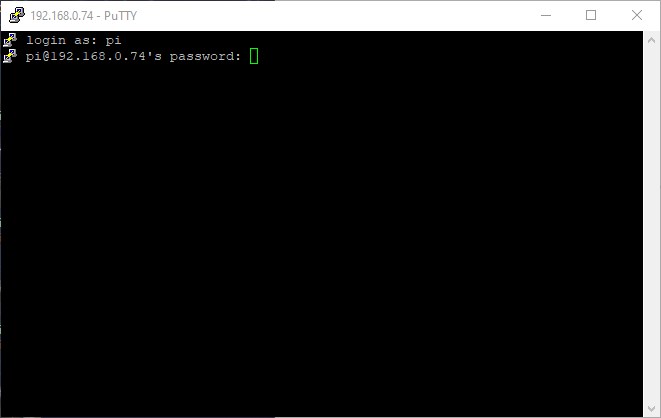
Accessing Raspberry Pi via SSH: Use an SSH client like Putty to connect to your Raspberry Pi.
-
Navigate to Klipper Folder: In the command line, enter:
cd ~/klipper/
-
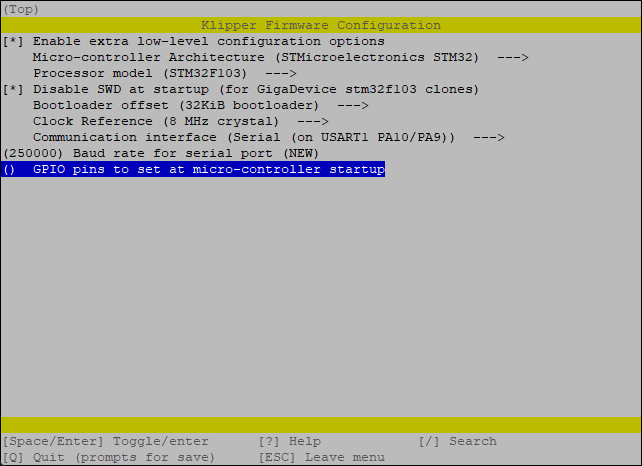
Run Configuration Command: This opens a menu interface to configure the firmware:
make menuconfig
-
Select Settings: Choose the appropriate settings for your Anycubic Vyper. Save and exit the menu.
-
Build the Firmware: Compile the firmware with:
make
-
Copy Firmware to SD Card: Once the build is complete, transfer the
klipper.binfirmware file to your SD card.
Flashing the Firmware
Now, flash the compiled firmware onto your Anycubic Vyper’s mainboard:
- Rename the Firmware File: Rename the firmware file to
firmware.bin. - Insert SD Card: Insert the SD card into your printer’s card slot.
- Power On the Printer: Turn on the printer to initiate the firmware update.
Configuration
Once you have successfully flashed the firmware, configure it to match your machine’s specs:
- Download Configuration File: Obtain the Anycubic Vyper Klipper config file from the official Klipper GitHub repository or trusted sources.
- Upload Configuration File: Go to Mainsail’s web dashboard and upload the configuration file.
- Adjust and Save Settings: Modify any settings specific to your setup and save the configuration.
Connecting Klipper
Finally, connect Klipper to your Anycubic Vyper:
- Restart Firmware: Use the “Firmware Restart” option on Mainsail’s dashboard.
- Connect Printer: Ensure that the printer successfully connects to Klipper. You should see your printer’s status active and ready for commands.
Reverting to Stock Firmware
If you ever need to switch back to the stock firmware, the process is straightforward:
- Download Stock Firmware: Obtain the official stock firmware from Anycubic’s website or support.
- Transfer Firmware to SD Card: Copy the stock firmware file to your SD card and rename it to
firmware.bin. - Insert and Flash: Insert the SD card into the printer and power it on to flash the stock firmware.
Conclusion
Congratulations on installing Klipper on your Anycubic Vyper! With this new firmware, your printer’s performance should see noticeable improvements. Should you encounter any issues or need further assistance, don’t hesitate to seek help through comments or the 3DPrintBeginner Forum. The Klipper community is vast and supportive, ready to help you troubleshoot and optimize your setup.
Additional Resources and Support
For further reading and support, consult these valuable resources:
- Klipper Configuration: Detailed configurations are available on Klipper’s official GitHub repository.
- Community Support: Join forums and communities where you can ask questions and share experiences.
- 3DPrintBeginner’s Patreon: Consider supporting 3DPrintBeginner on Patreon for exclusive content and direct support.
Implementing Klipper might seem daunting, but the benefits of enhanced performance and control make it well worth the effort. Enjoy your newly optimized 3D printing experience!
Anycubic 3D Materials Sale: Resin & PLA from $9.49/kg


