Fully Assembled Mini 3D Printer for Kids and Beginners - Complete Starter Kit with Auto Leveling 3D Printing Machine, 10M PLA Filament, and SD Card - WiFi 3D Home Printer for MAC, Windows, and Linux
$249.99 (as of February 27, 2025 15:21 GMT +00:00 - More infoProduct prices and availability are accurate as of the date/time indicated and are subject to change. Any price and availability information displayed on [relevant Amazon Site(s), as applicable] at the time of purchase will apply to the purchase of this product.)Have you ever wondered how you could optimize your 3D printing process to save both time and money? The world of 3D printing is constantly evolving, and new techniques and tools are being developed to streamline the process and enhance the quality of the final product. One such innovation worth exploring is the use of angled supports in the IdeaMaker slicer software, a technique that can significantly reduce print time and material costs.
IdeaMaker Angled Supports: Save Time and Money
Anycubic 3D Materials Sale: Resin & PLA from $9.49/kg
Overview of Angled Supports
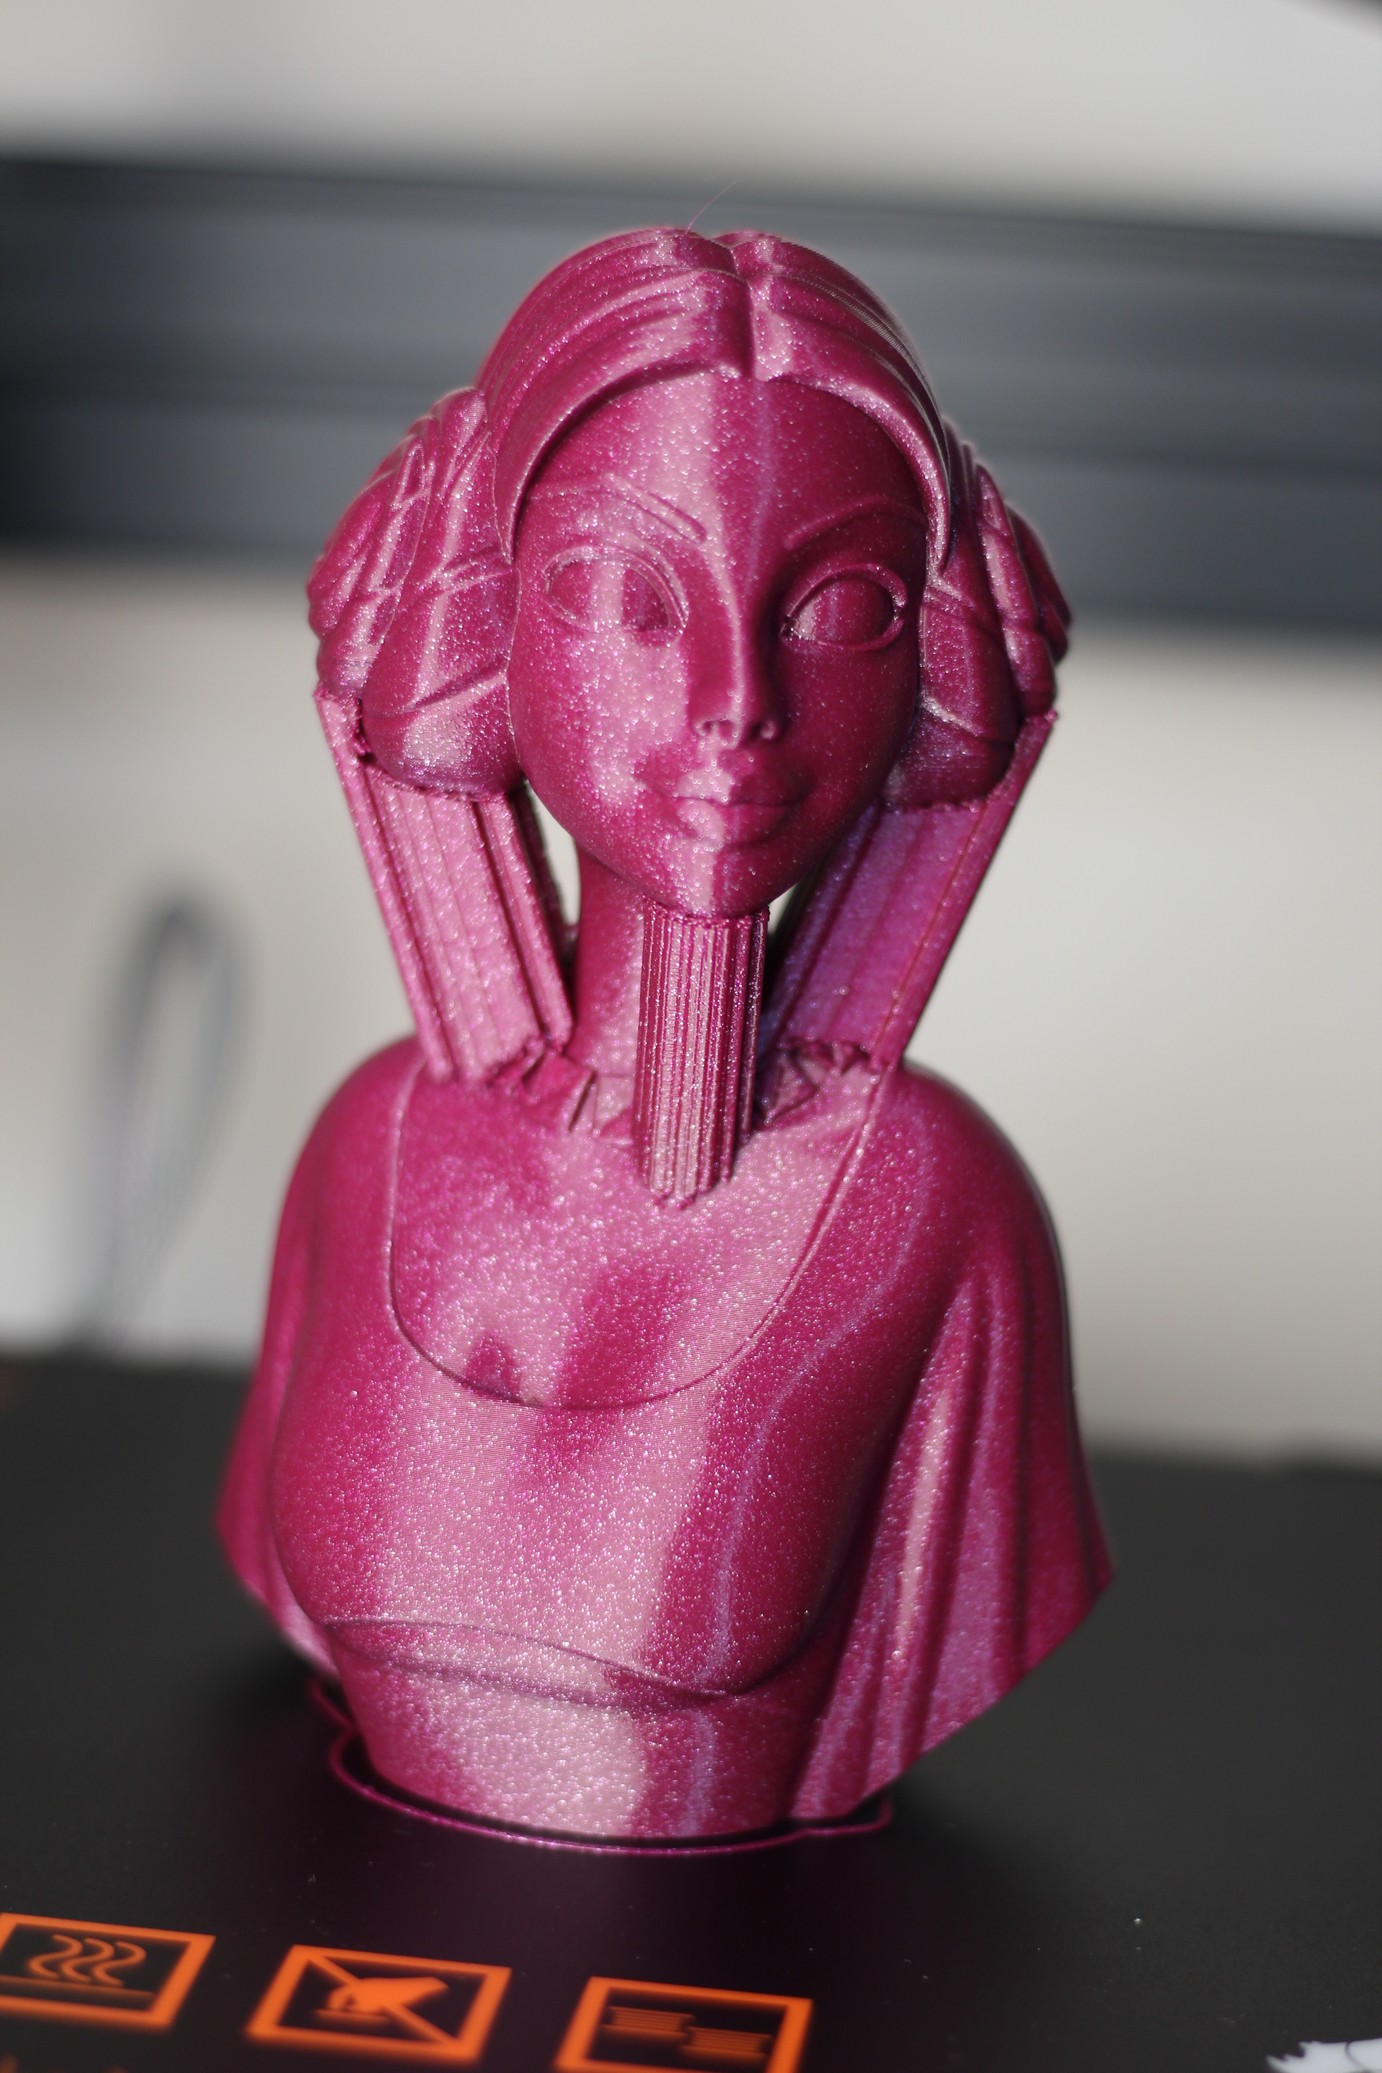
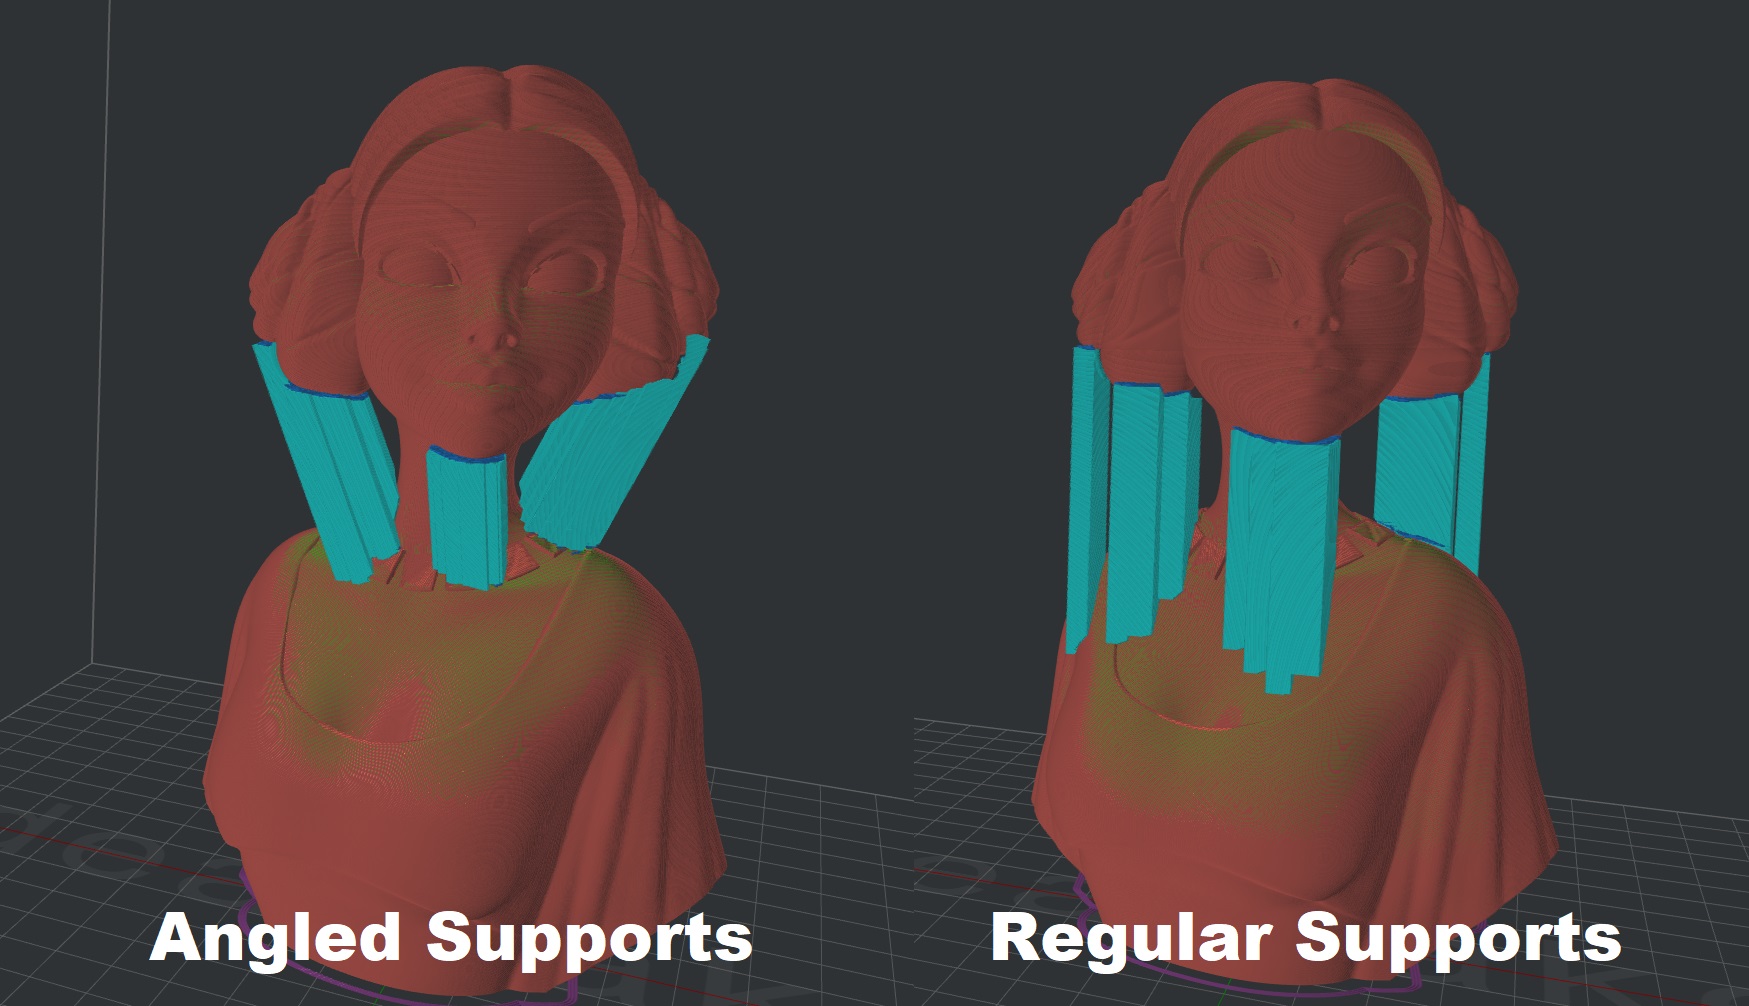
Angled supports are a game-changer in the realm of 3D printing. Traditional supports often lead to increased print times and higher material usage, not to mention the additional effort required to remove them and clean up the model. Angled supports, on the other hand, can be strategically placed to minimize these drawbacks.
Benefits of Angled Supports
Reduces Print Time
One of the most immediate benefits of using angled supports is a reduction in print time. Because these supports are designed to work more efficiently with the geometry of your model, the printer spends less time laying down unnecessary material. This can be particularly advantageous when you’re working on larger or more complex prints.
Minimizes Filament Usage
By optimizing the placement and configuration of supports, you can significantly cut down on the amount of filament used. Traditional supports often require a substantial amount of filament, much of which is ultimately discarded. Angled supports are more material-efficient, leading to cost savings that add up over multiple prints.
Fewer Contact Scar Points
Anyone who has ever removed supports from a 3D-printed model knows the frustration of dealing with contact scars—those unsightly marks left behind where the support structure meets the model. Because angled supports are more strategically placed, they result in fewer and less noticeable scar points, improving the overall finish of your project.
Anycubic 3D Materials Sale: Resin & PLA from $9.49/kg
Requirements for Setting Up Angled Supports
Before you can successfully implement angled supports, there are a few settings in the IdeaMaker slicer software that you’ll need to adjust.
Set Horizontal Expansion to 0
In the support settings, ensure that the Horizontal Expansion value is set to 0. This configuration helps in aligning the supports more accurately and minimizes contact points on the model.
| Setting | Value |
|---|---|
| Horizontal Expansion | 0 |
Ensure Optimal Support Settings
It’s crucial to make sure that your support settings are already optimized before you attempt to add angled supports. Double-check parameters such as support structure density, pattern, and overhang angles to ensure that your base settings will work well with the angled supports.
Steps to Implement Angled Supports
Implementing angled supports in IdeaMaker involves a series of straightforward steps that you can follow to achieve optimal results.
-
Import the 3D Model
Start by importing your 3D model into the IdeaMaker software. It’s important to inspect the model thoroughly, ensuring there are no errors or issues that could affect the print.
-
Identify Areas Needing Support
Once the model is loaded, identify the areas that will require support. These are typically overhangs or sections that extend horizontally over a certain distance and would otherwise sag or collapse during printing.
-
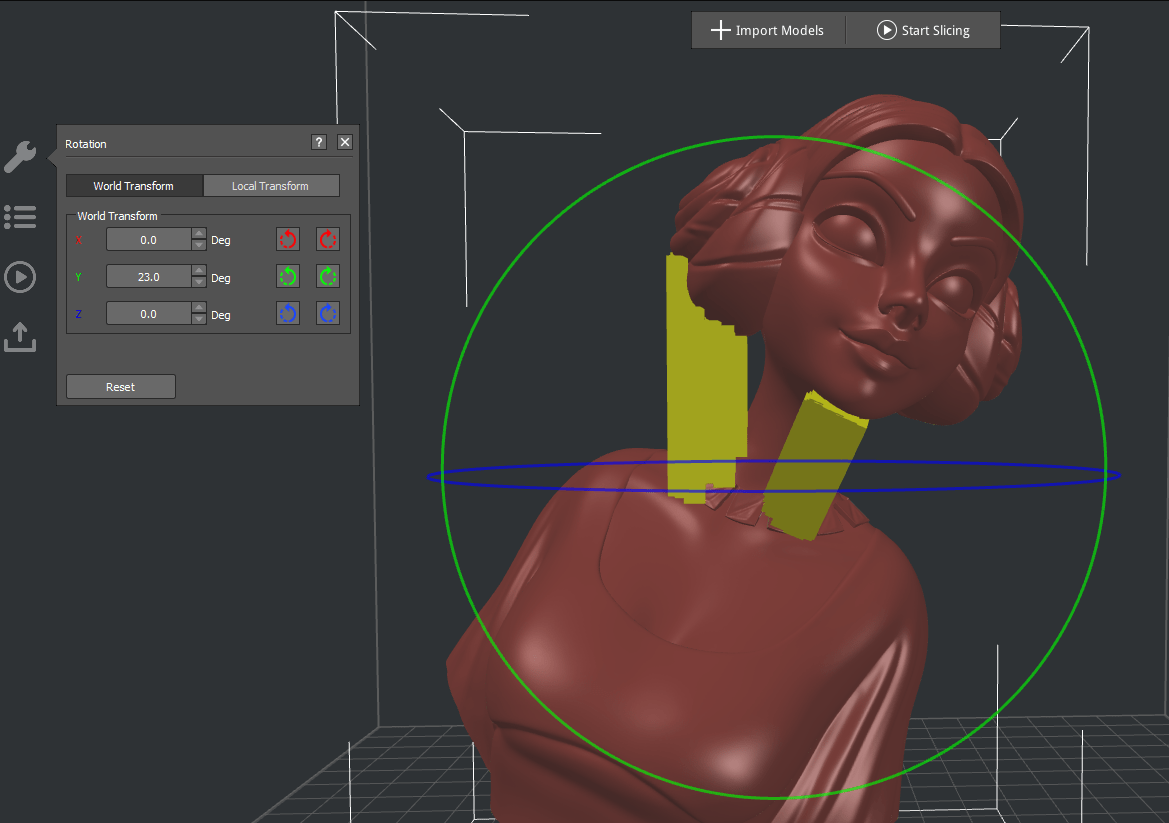
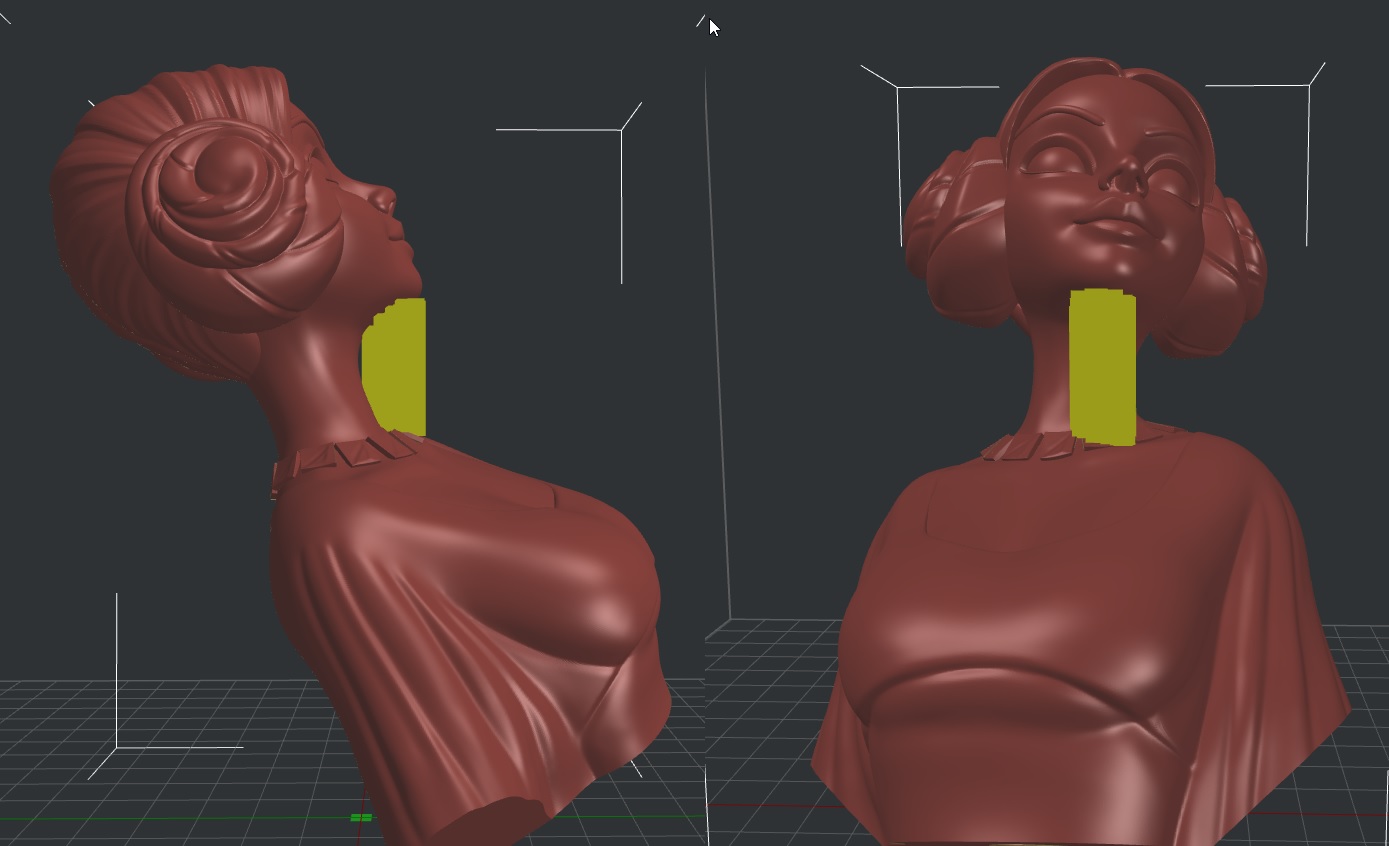
Rotate and Angle the Model to Align Supports
To properly implement angled supports, you’ll need to rotate and angle the model. The goal here is to align the supports in a way that they can be placed at an angle, rather than in a direct vertical orientation.
-
Add Supports to Identified Areas
After positioning the model, proceed to add supports to the identified areas. Make sure these are placed strategically to provide the necessary structural integrity without overusing material.
-
Return Model to Original Position and Slice
Once you’ve added the supports, return the model to its original orientation. Then, slice the model to prepare it for printing. This step will generate the G-code needed for your 3D printer to execute the print.
Practical Tips for Using Angled Supports
Even with the right settings and a good understanding of the process, there are still a few tips and tricks that can help you get the best results from angled supports.
Check Supports Using Preview Before Printing
Before you hit that ‘Print’ button, take some time to preview the supports you’ve added. IdeaMaker’s preview function allows you to see how the supports will be printed, letting you make any last-minute adjustments to ensure the best placement and angles.
Make Necessary Adjustments
Don’t hesitate to tweak the angles and positions of your supports if the preview shows any potential issues. Sometimes, minor adjustments can make a big difference in the quality and efficiency of your final print.
Conclusion
Incorporating angled supports into your 3D printing workflow can save you time and money, while also minimizing material waste and reducing contact scars on your models. By following the outlined steps and taking advantage of the tips provided, you can optimize your prints and achieve better results with less effort.
For those looking to further refine their 3D printing skills, consider exploring other IdeaMaker guides and resources available in the community. Joining forums like the 3DPrintBeginner Forum can also provide valuable insights and support from other users who have mastered these techniques.
Anycubic 3D Materials Sale: Resin & PLA from $9.49/kg
